Streaming Alpha Video
Studio is being deprecated, please head over to the documentation page for Mattercraft, our most advanced 3D tool for the web, where you can find the most recent information and tutorials.
The ZapWorks Studio streaming video implementation also supports alpha video.
Studio requires alpha video as a single mp4 containing a side-by-side alpha mask.
Check out our Alpha Video Preparation article for a guide on how to produce a supported alpha video.
This guide follows on from the embedding alpha video project and utilizes the video player symbol.
Step by Step
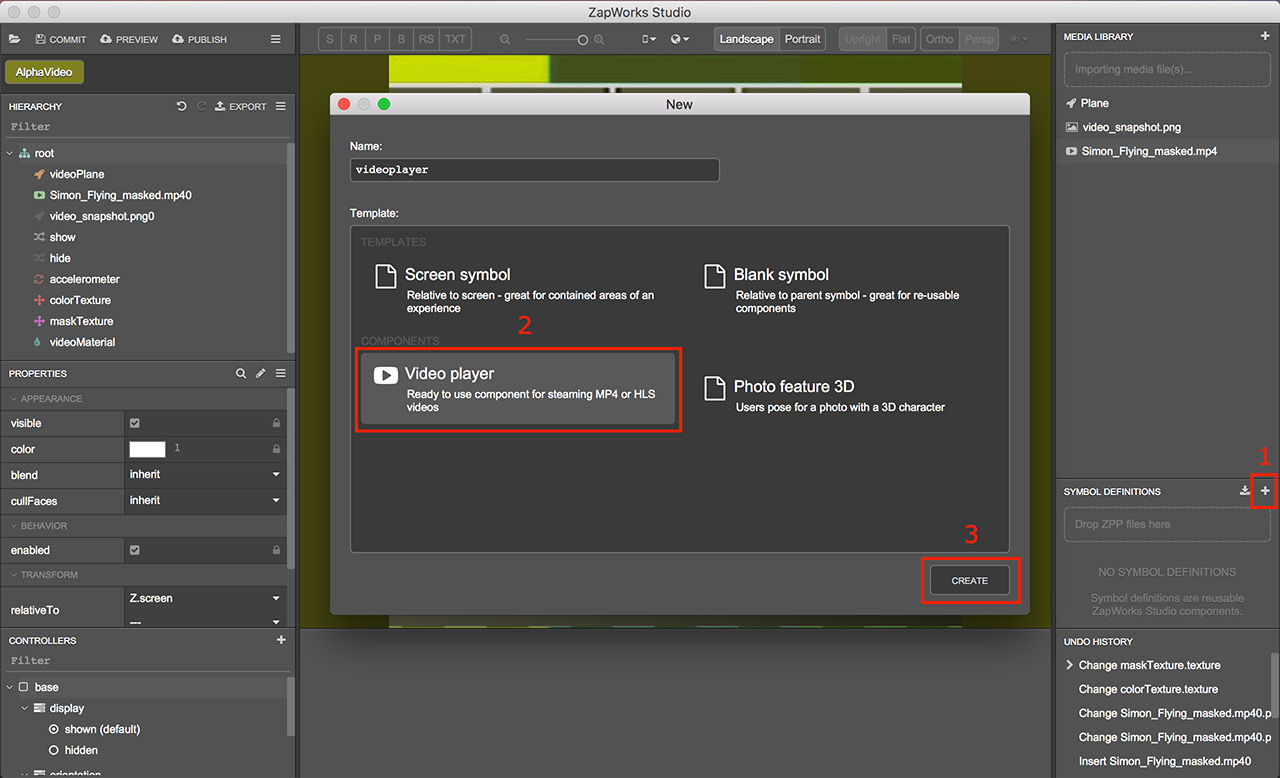
Section titled “Step by Step”- Opening the project created above, create a video player symbol by clicking on the plus icon in the Symbol Definitions panel, selecting
Video Playerand then clickingCreate.
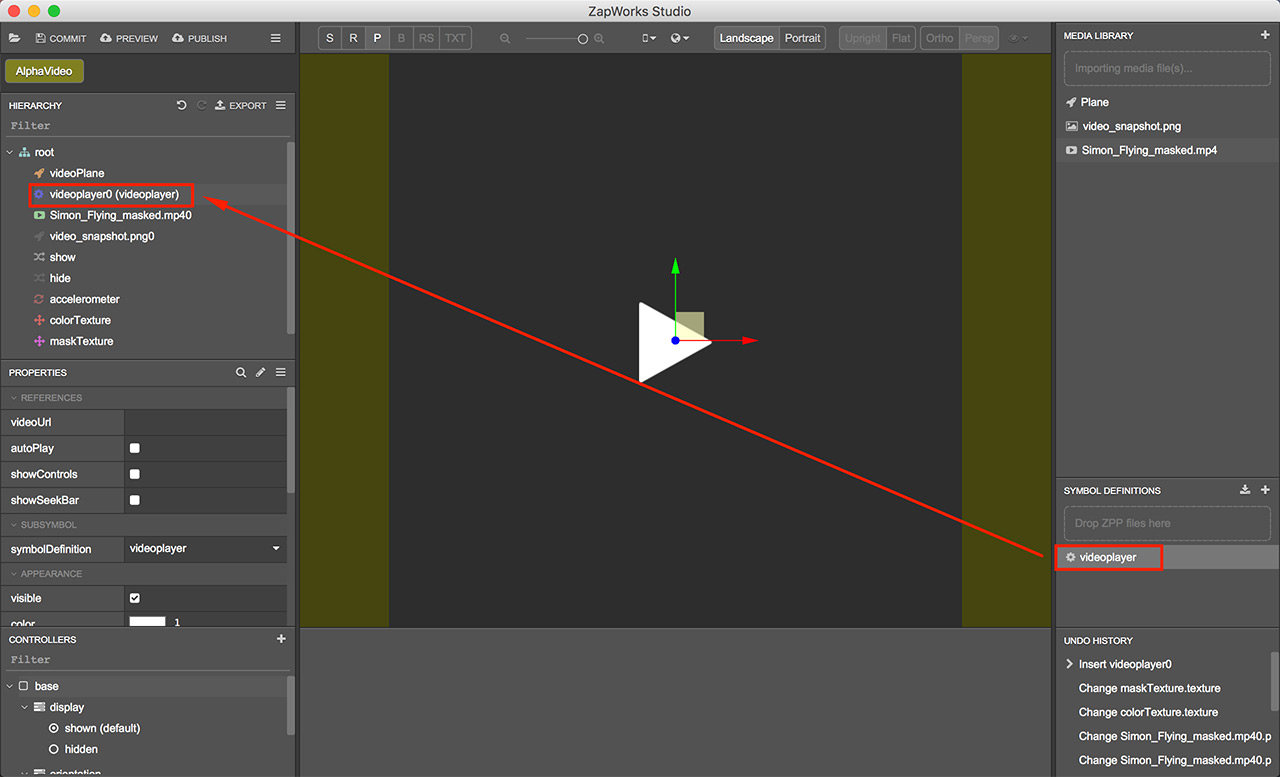
- Drag the video player symbol from the Symbol Definitions panel into the Hierarchy beneath the
videoPlane.
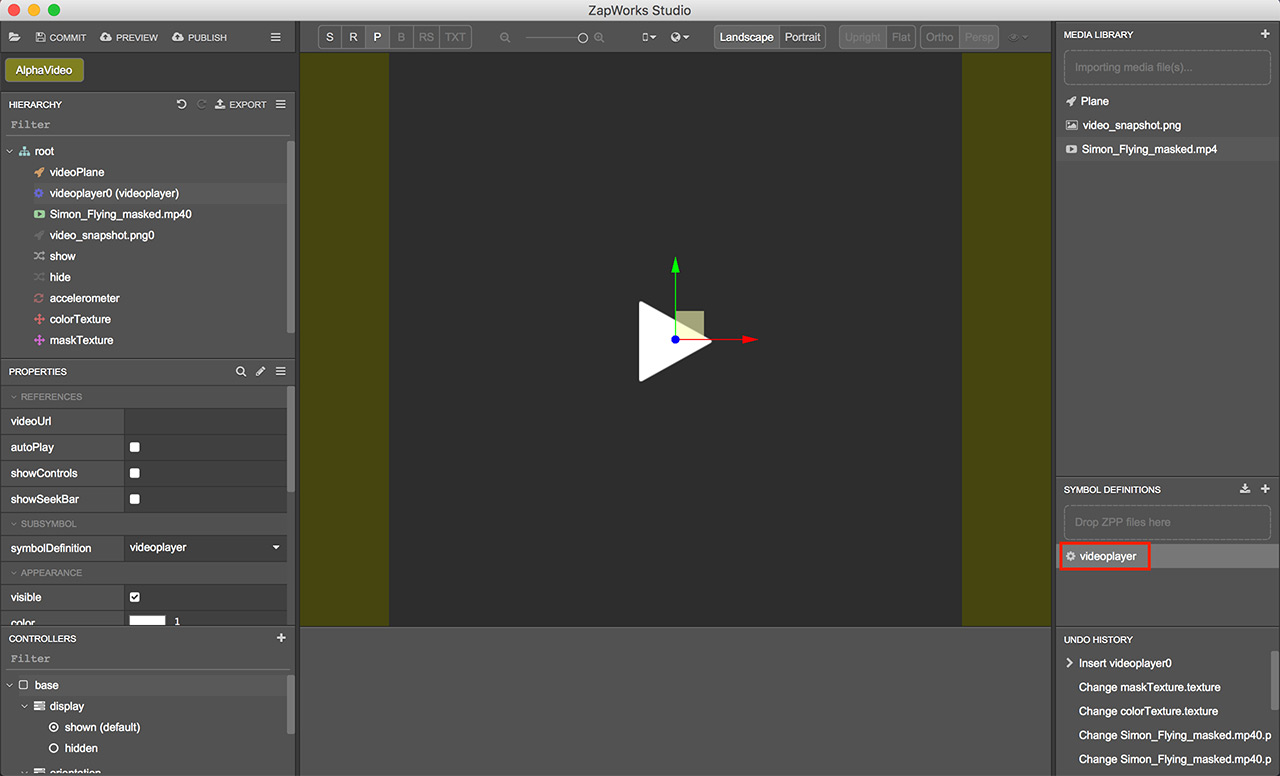
- Double click on the videoplayer symbol definition to enter it.
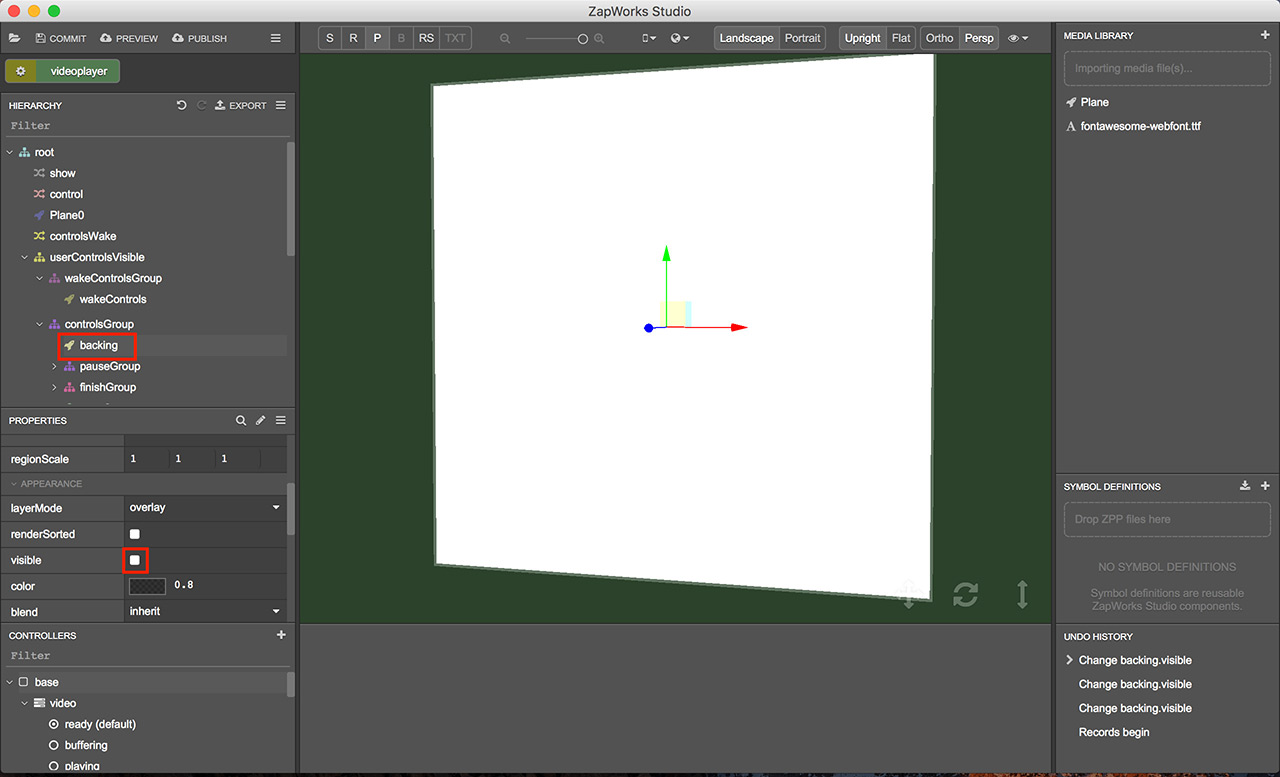
- Within the Hierarchy locate the
backingplane within thecontrolsGroupgroup and untick the visible property in the properties panel with it selected.
- Do the same as the step above but this time for the
bufferingBackingplane within thebufferingGroupgroup node.

And finally for the Plane0 plane.
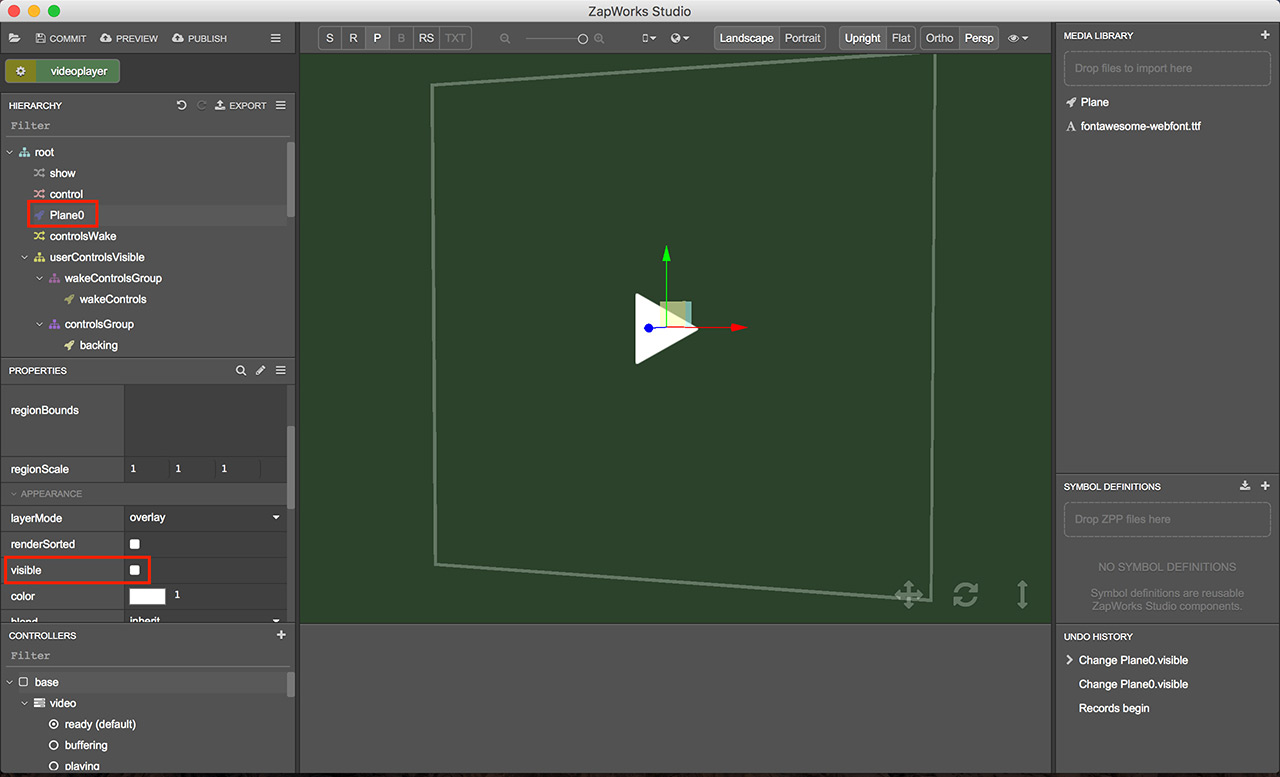
The reason we are making these planes invisible is because we want to use the
videoPlanewe have in our parent symbol to display the video and not have the one’s set up in the videoplayer symbol.
- Return to the parent symbol by double clicking the cog in the top left, just above the Hierarchy.

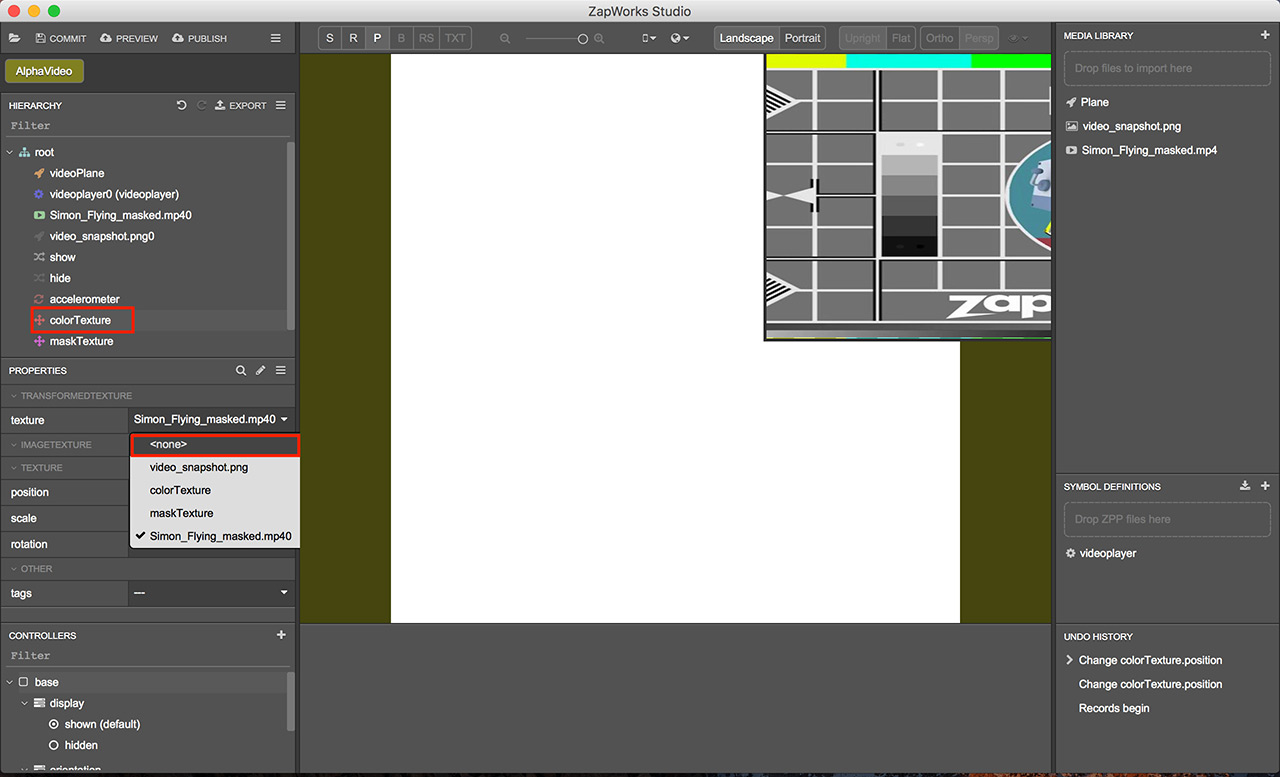
- Back in the parent symbol select the
colorTexturenode and set it’s texture to none. Do the same for themaskTextureas well. We will set the texture in a script node in the following steps.
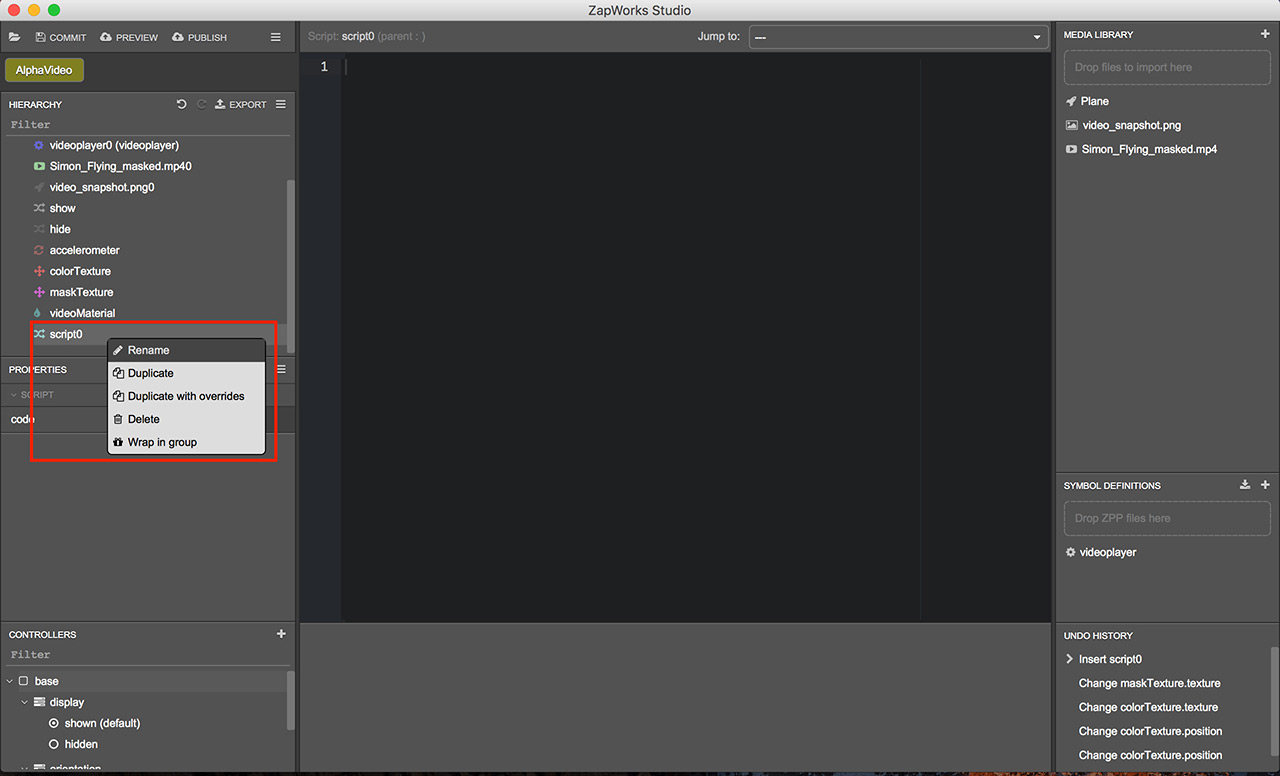
- Right click on the root node in the Hierarchy and select ‘New > Script > blank’ to create a new blank script.
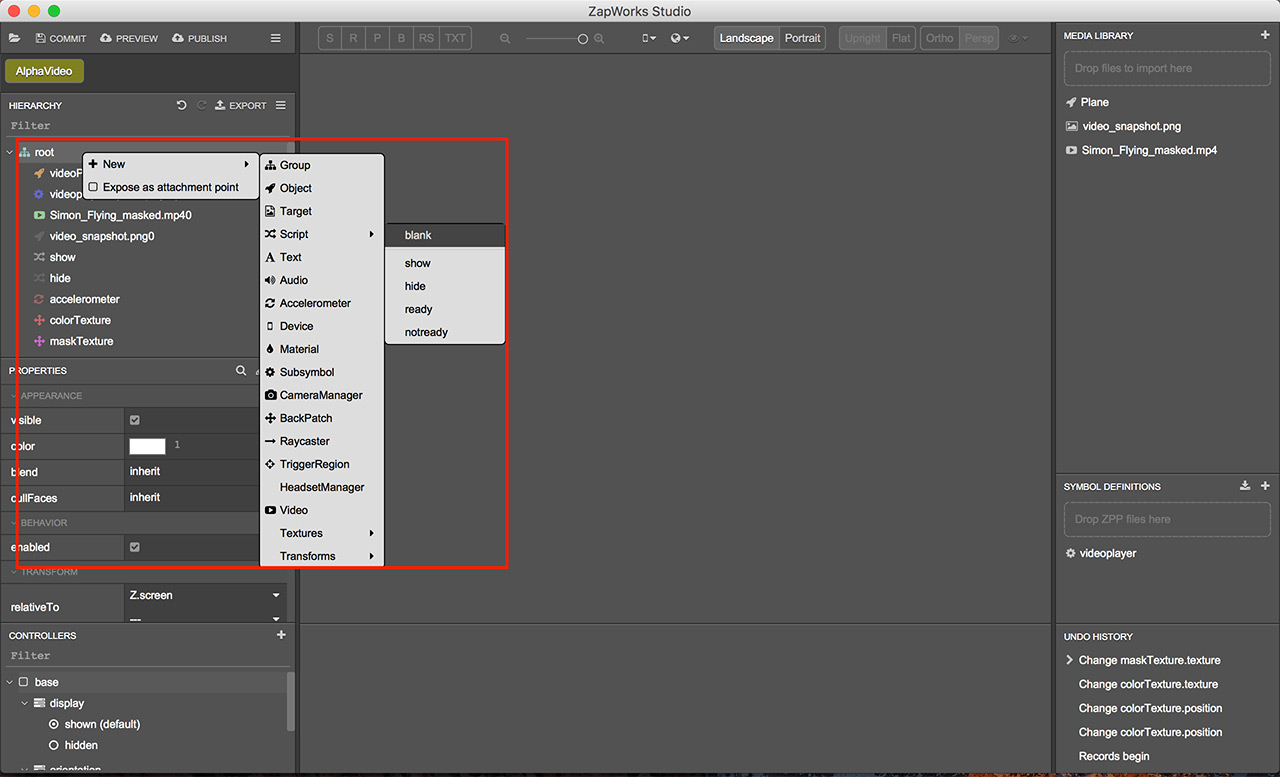
Feel free to rename this script to something more suitable by right clicking the newly created script and selecting ‘Rename’. This script will be used to set the texture of the transformed textures so we will call it ‘textureAssignment’.
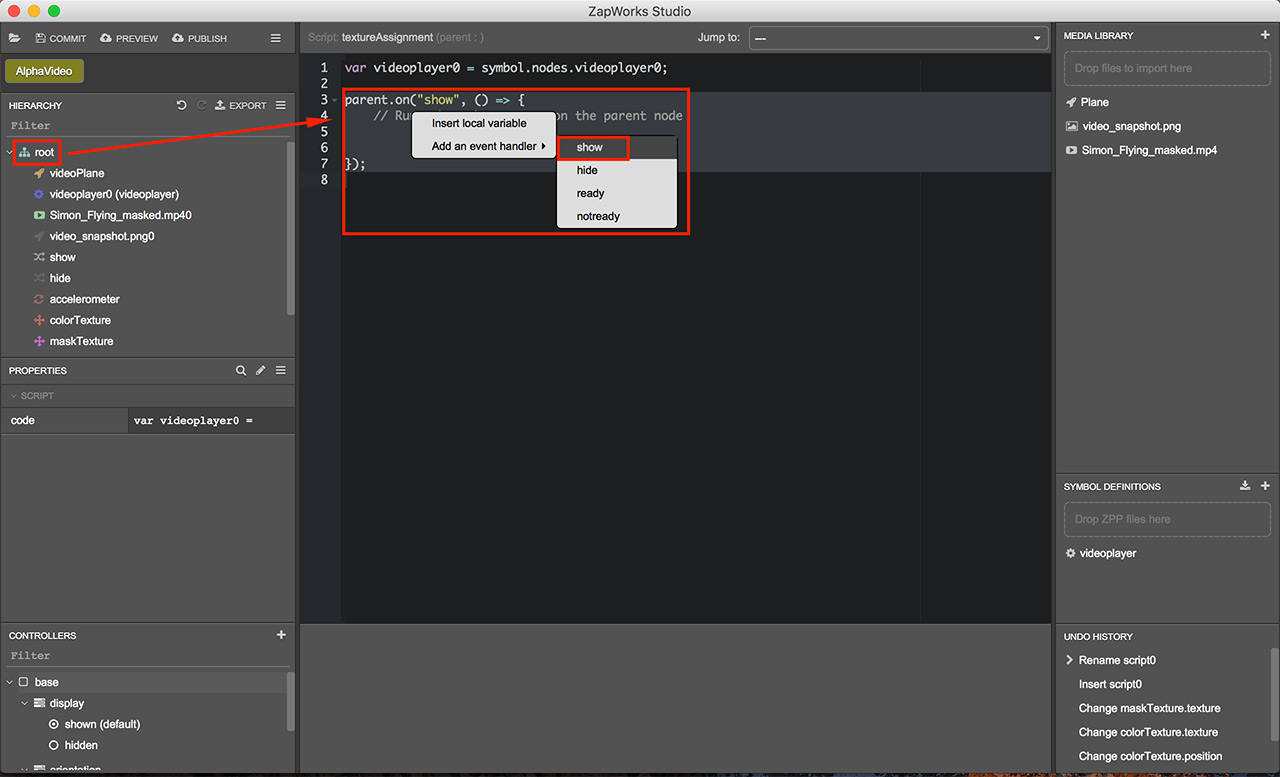
- With the script editor open click and drag the videoplayer node from the Hierarchy to the editor and select ‘Insert Local Variable’. This will let us access the properties of the videoplayer, which we will need in following steps.

- Click and drag the root node into the script editor and select ‘Add an event handler > show’ to create an event handler function that executes when the show event is fired. This is where we will place our texture assignment code.
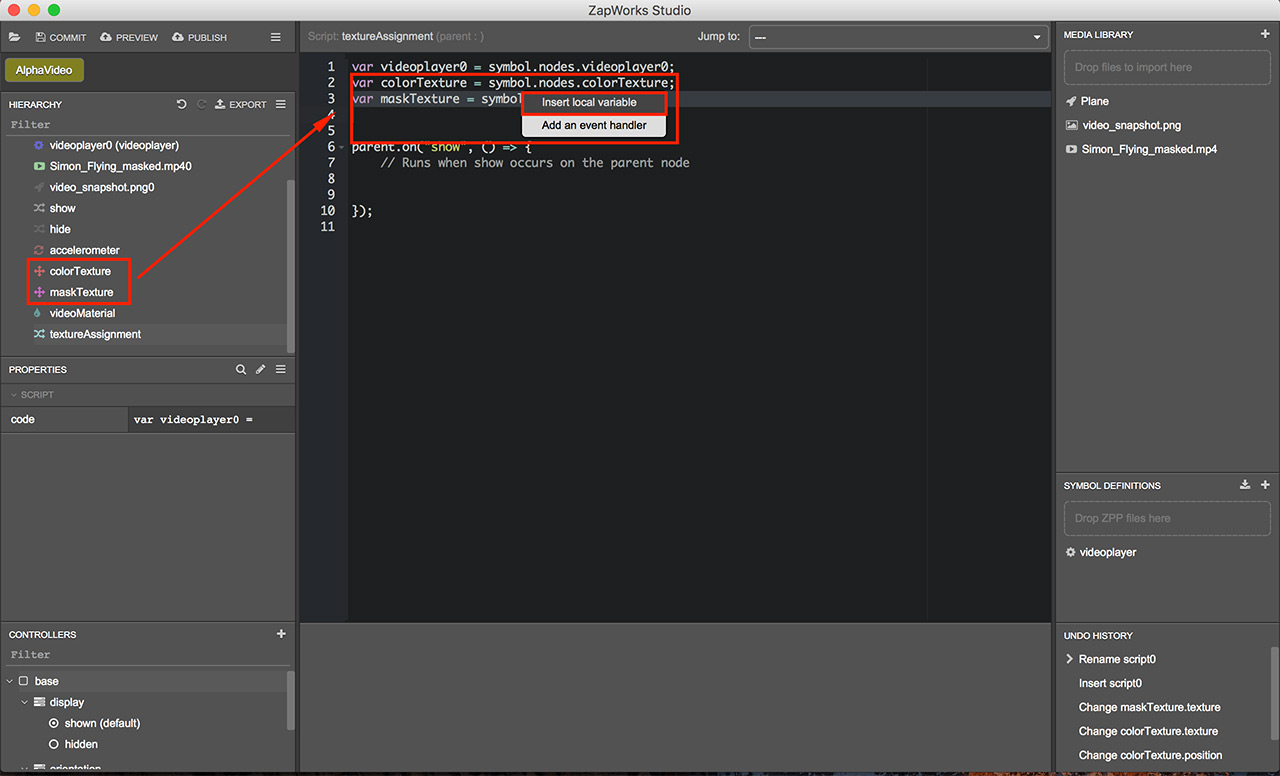
- Drag in both the color and mask texture nodes into the editor and insert them as local variables like we did with the videoplayer node.
- We can assign the textures to the transformed textures by typing out their variable names (the text before the = sign and after the var keyword), using the texture function (used for setting their texture) and then using some code to access the videoTexture from the video player symbol.
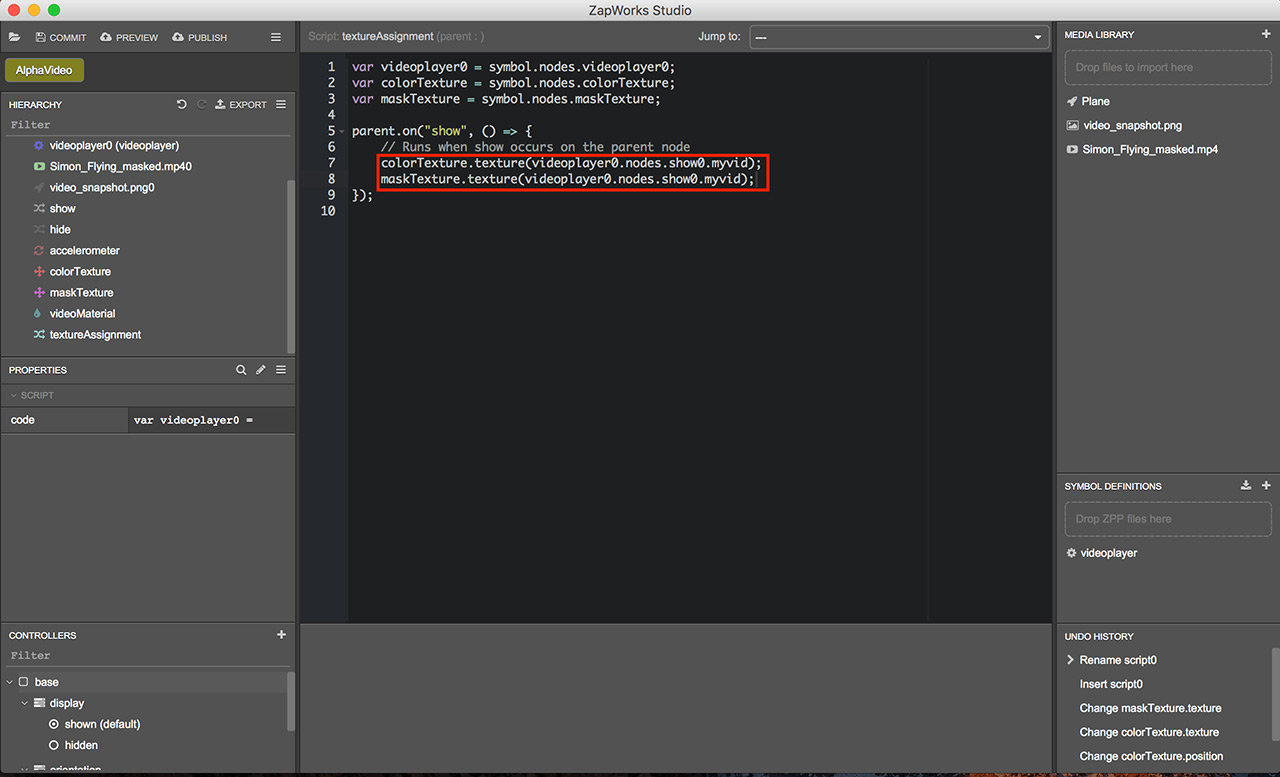
The code used to access the texture might be different depending on the name of your nodes but the default should be videoplayer0.nodes.show0.myvid.
With this code we are accessing the nodes within the video player symbol, getting the show node specifically, and asking for the myvid object, which is the texture in the video player symbol. It’s not vital you understand everything that’s going on in this step, just enough to make sure you are accessing the right component.
The complete code as shown above is as follows:
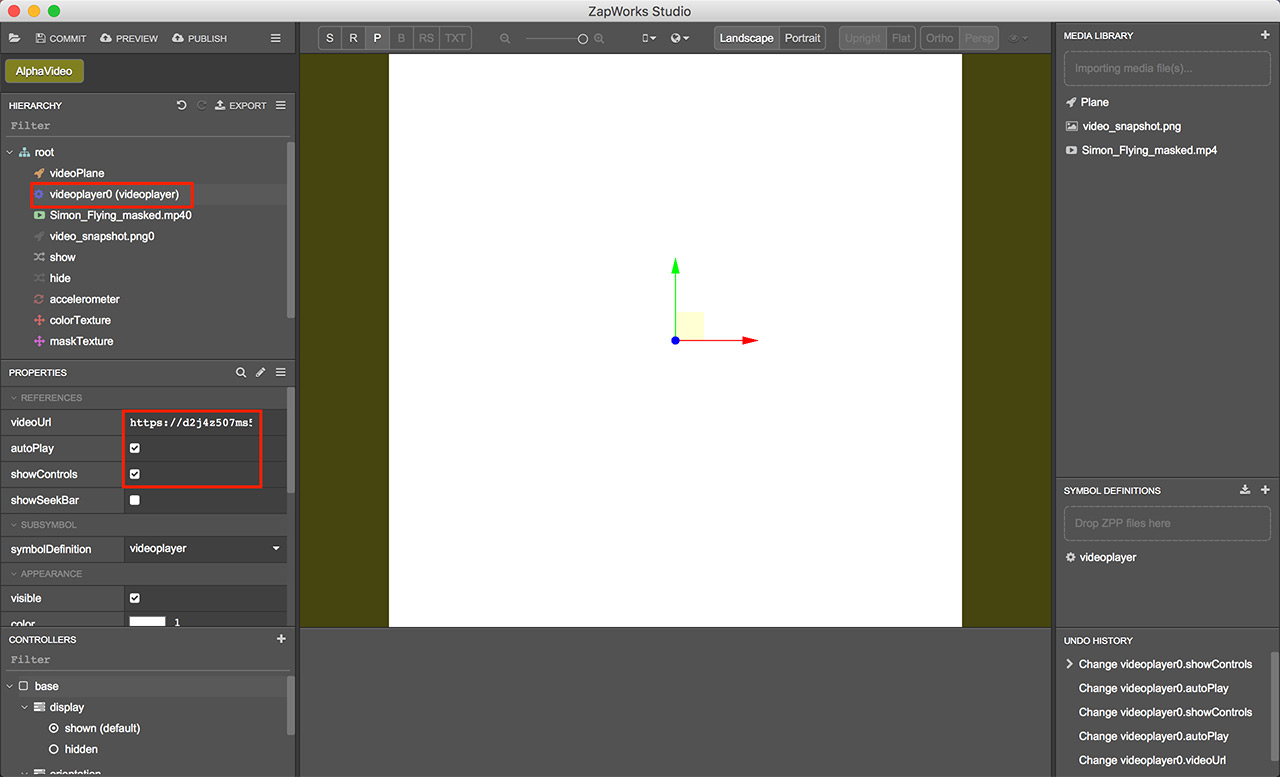
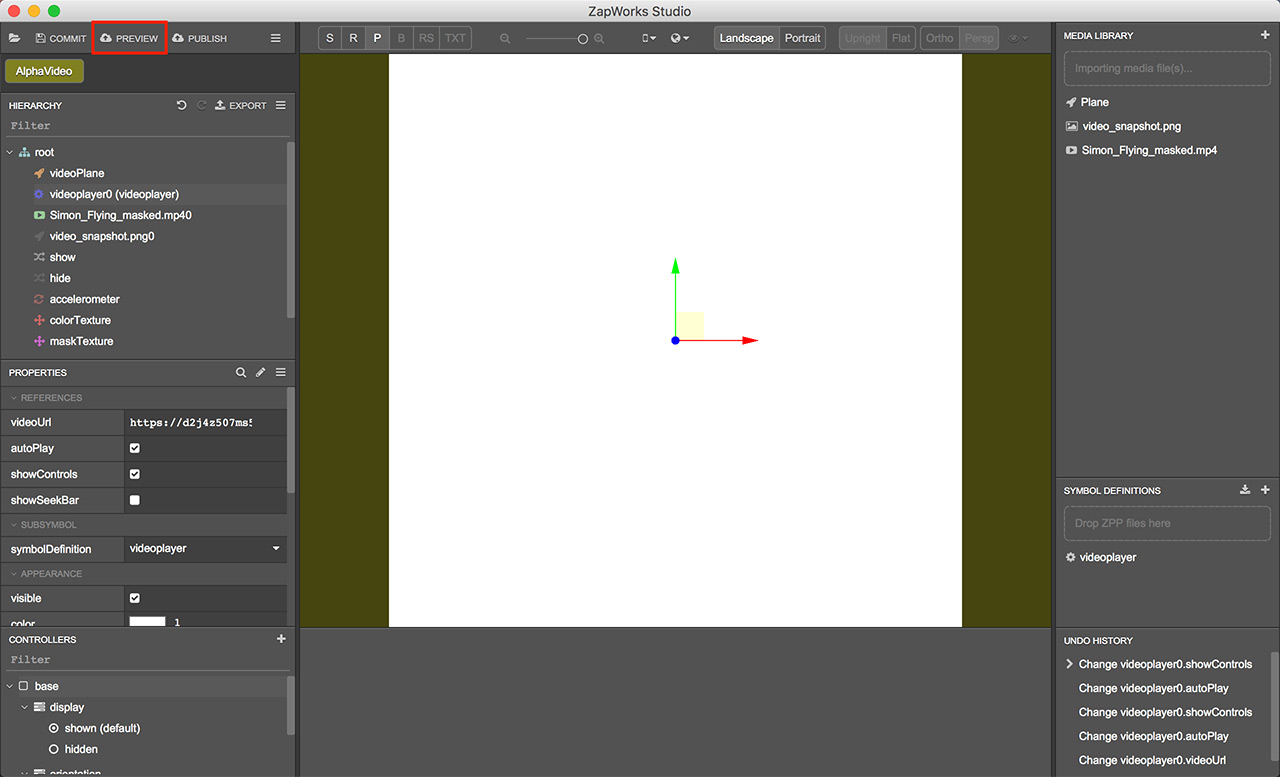
parent.on("show", () => { // Runs when show occurs on the parent node colorTexture.texture(videoplayer0.nodes.show0.myvid); maskTexture.texture(videoplayer0.nodes.show0.myvid);});- Before previewing the experience, select the videoplayer node and give it a URL to the video you wish to stream. As an example you can use:
https://d2j4z507ms5wl7.cloudfront.net/docs/simon-flying-masked.mp4
We can paste this URL into the videoURL property in the Properties panel. We can also set the video to auto play and whether to display controls such as pause and play when tapping on the video. We do this by ticking the autoPlay and showControls checkboxes respectively.
As with all streamed video, the URL needs to link directly to a publicly hosted mp4 or m3u8 (for HLS streaming) video file as opposed to one uploaded to a video hosting site such as Vimeo or YouTube.
The server hosting the video file needs to support range requests in order for the video to play properly across all devices. We recommend using a CDN, such as AWS CloudFront or CloudFlare, for faster, more scalable video serving.
- Preview the experience and give it a scan.
While we used the video player symbol to help speed things up, you can use the underlying Z.Video functionality for a more slimline solution.