Penalty Shootout Game
Studio is being deprecated, please head over to the documentation page for Mattercraft, our most advanced 3D tool for the web, where you can find the most recent information and tutorials.
Difficulty Level: Intermediate
Coding Knowledge Required: Beginner (at least some experience)
Time to Complete: 60 minutes
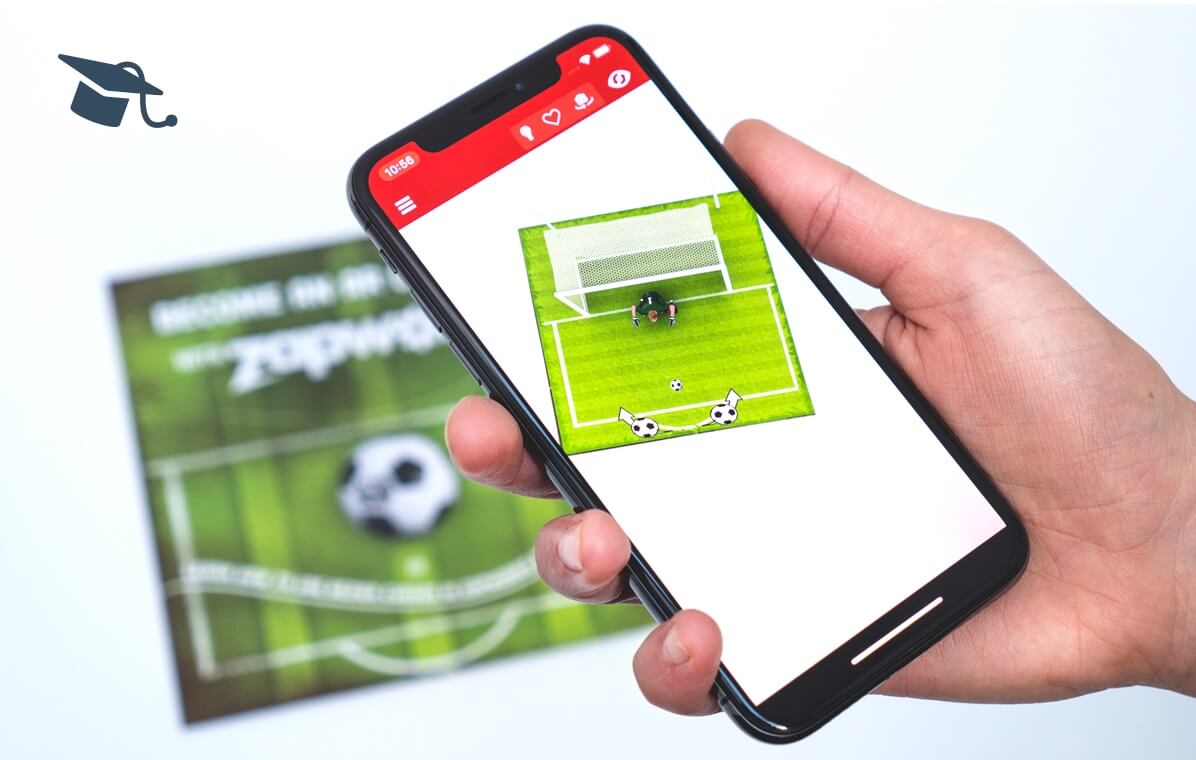
In this step-by-step tutorial, we’ll be creating a penalty shootout game using bezier curves, 3D models, timelines, and scripting. We’ve included the target image in the asset pack which you can find in step 3 so you can try it out before you start.
As this tutorial combines multiple different features of ZapWorks Studio, it should demonstrate the vast potential of the tool and give you the confidence to start building out even more complex experiences of your own.
If you get stuck, please refer to our extensive Documentation. You can also check out the Forum, a handy way to ask questions of other ZapWorks users. For background information the core concepts covered in this tutorial you can check out the video tutorials.
Step by Step
Section titled “Step by Step”1. Create a new Studio Zapcode
Enter your my.zap.works account and click the ‘Make a New Zapcode’ button in the top left. Give your code a name, and choose between either a circle or lozenge style and select ‘Studio’ as your tool. Widgets and Designer codes will not work for this tutorial.
2. Create a new project in ZapWorks Studio
Open ZapWorks Studio (download here) and create a ‘New Project’.
Choose to start with a ‘Blank’ template and give your project a name, e.g. “Masked Scene” and click ‘Create’.
3. Download the asset pack
Click here to download a zip file containing all the assets we’ll need for this experience.
After downloading the assets, unzip the folder.
4. Import 2D images and 3D model into Media Library
Import all assets from the ‘2D images’ and ‘3D models’ folders from the downloaded assets into the Media Library. With the 3D models, you’ll have to import the POD files one by one and then drag in the associated textures when the import dialog asks for them.
You do not need to do anything with the animations at this point.
5. Train tracking image
Tracking Images are pictures that content appears attached to as they move around in the camera view.
Click the plus (+) sign in top right of the Media Library. From the dropdown, select ‘Train Image File’. This will open up your Explorer / Finder and allow you to select your tracking image, named “target-image.jpg”, in the folder you unzipped in step 3.
The image will then be trained. During this process, which may take up to a minute, the image is analysed from multiple angles and a target file is produced. This file is added to your Media Library, with the file extension ZPT.
You’ll be prompted to select your target’s properties. As the image will be placed on a flat horizontal surface, select the ‘Flat’ option.
6. Add the target to the scene
Drag your target file from the Media Library into the root node within the Hierarchy.
Once in the Hierarchy a preview of the target will appear in the 3D view. The icons at the bottom right of the screen can be used to move the target in the view, just as if it were being physically moved in a camera view.
Targets in the Hierarchy act like groups. Content placed inside a target will appear attached to it in the 3D view and when viewed in the app.
Different views can be selected by clicking on the burger menu in the top right of the 3D View. Using the middle widget in the bottom right of the scene, rotate the scene towards you so that the pitch is once again in view.
7. Add the pitch to the Scene
Drag the pitch image “pitch.png” from the Media Library into the Hierarchy as a child of the tracking image.
8. Create a group for the goal
Right-click on the target node and select ‘New > Group’ and call it “Goal”. Make sure this group is positioned below the pitch in the Hierarchy.
Drag the goalpost 3D model from the Symbol Definitions panel into the Goal group. Within the Properties Panel set the transforms of the goalpost to:
| position | 0.01 | 0.42 | 0.39 |
| scale | 0.7 | 0.6 | 0.7 |
| rotation | 90 | 0 | 0 |
Make sure that you are changing the transforms of the goalpost 3D model and not the Goal group.
Drag the goalkeeper 3D model from the Symbol Definitions panel in to the “Goal” group, make sure that it is placed above the goalpost 3D model. Set the transforms to:
| position | 0.02 | 0.1 | 0.3 |
| scale | 0.3 | 0.3 | 0.3 |
| rotation | 90 | 0 | 0 |
Due to changes in the 3D import process, the scales applied to the models in the video below are now outdated, please use the values provided above.
9. Adding and animating the football
9.1) Creating a group for the football
Within the target image node, create a new group and call it “Football” . Make sure it is placed above the “Goal” group in the Hierarchy.
Drag the football 3D model from the Symbol Definitions panel into the Football group. Set the transforms of the football 3D model to:
| position | 0 | 0 | 0.46 |
| scale | 0.05 | 0.05 | 0.05 |
| rotation | 0 | 0 | 0 |
Due to changes in the 3D import process, the scale applied to the model in the image below is now outdated, please use the values provided above.
This is not the final position of the football.
9.2) Adding a Bezier transform for the football left kick
Right click on the Football group. Select New > Transforms > Bezier. Name the Bezier “leftKickBezier”.
Select the leftKickBezier node in the Hierarchy and in the Properties Panel navigate to Bezier > Points and select “Add”. Fill in these point values below:
| 0 | -0.6 | 0.05 |
| -0.31 | -0.5 | 0.07 |
| -0.53 | -0.24 | 0.14 |
| -0.54 | 0.56 | 0.06 |
More information on Bezier Curves.
Select the football 3D model in the Hierarchy. In the Properties Panel head to the Transforms section and set RelativeTo to “leftKickBezier”.
The football should now be positioned on the penalty spot.
9.3) Creating a controller for the penalty kick
In the Controllers Panel in the bottom left add a new controller by clicking the plus button (+) and call it “penaltyKick”.
We are now going to start working with timelines. If you have not yet read the Timelines article, we recommend you do this now and come back to the tutorial.
9.4) Creating a timeline for the football left kick
Right click on the new “penaltyKick” controller and create a new timeline called “leftKick”.
Select the “leftKick” timeline in the Controllers panel. Click on the leftKickBezier node in the Hierarchy. In the Properties > Distance add the distance value to the controller by clicking the plus button (+) next to it.
9.5) Setting up the left kick timeline In the Timeline panel, change the length of the “leftKick” timeline to 1500. Make sure to hit enter.
It’s advisable to zoom out of the timeline using the zoom slider in the top right of the timeline view so you can see the entire timeline.
Set the time to 1500. This will move the timeline handle. With the leftKickBezier node selected, set the distance value in the Properties panel to 1. This will create a transition block between 0-1.
We are now going to link the two end keyframes. Click and drag to highlight the far end two keyframe diamonds (this should turn them both orange) then right click and select Make Link (L) > With left value.
This will link the two end keyframes. Press play to test how it works.
Right-click on the transition block and select Interpolation > Decelerating.
If you play again, you will see that the ball slows down as it heads towards the goal.
We are now going to repeat this process for the right kick.
9.6) Adding a Bezier transform for the football right kick
Select the base controller in the Controller panel. Right click on the “Football” group in the Hierarchy and select New > Transforms > Bezier. Name the Bezier “rightKickBezier”.
Select the rightKickBezier node and in the Properties panel select “Add” next to points, filling in the values below:
| 0 | -0.6 | 0.05 |
| 0.31 | -0.5 | 0.07 |
| 0.53 | -0.24 | 0.14 |
| 0.54 | 0.56 | 0.06 |
9.7) Creating a timeline for the football right kick
In the Controllers panel, right click on the “penaltyKick” controller, create a new timeline called “rightKick”.
Select the “rightKick” timeline in the Controllers panel. Now click on the “rightKickBezier” node in the Hierarchy, in the Properties panel add the distance value by clicking the plus icon (+).
9.8) Setting up the right kick timeline
Change the length of the “rightKick” timeline to 1500.
In the Timeline panel, set the time to 1500. This will move the timeline handle. With the “rightKickBezier” node selected in the Hierarchy, set Properties > Distance to 1. This will create a transition block between 0-1.
Click and drag to highlight the end two keyframes (this should turn them both orange) then right click and select Make Link (L) > With left value.
Right click on the transition block of the rightKickBezier distance property and select Interpolation > Decelerating.
This won’t play just yet, as we still need to set the relativeTo.
9.9) Setting up the relativeTo and relativeToProp properties
Click into the base controller in the Controllers panel. Click on the “Football” 3D model node in the Hierarchy. Within the Properties panel navigate to Properties > Transform > relativeTo and set the second value to “rightKickBezier”. Then set relativeToProp value to [1,0].
Select the “rightKick” timeline in the Controllers panel and the “Football” 3D model node in the Hierarchy. Within the Properties panel, add the relativeToProp property to the timeline by clicking the (+) icon.
In the Timeline panel, set the time to 1501. This will move the timeline handle. In the Properties panel, change the relativeToProp value to [0,1] and hit enter. Set the time to -1. In the Properties panel, change the relativeToProp value to [0,1] and hit enter.
This moves the football relative to the right bezier curve allowing it to move along the curve. We do not need to change anything in the “leftKick” timeline as this uses the default relativeToProp value. You can now play left kick and right kick animations by clicking into the different controllers and pressing play in the Timeline panel.
10. Animate the goalkeeper
We are now going to animate the goalkeeper 3D model. Find and open the file “GK_animation.txt” in the asset folder that you downloaded earlier. It should be located BezierFootballAssets > 3D Models > Goalkeeper > GK_animation.txt. We are looking for the following animation frame references.
IDLE = 300-335R/LOW = 1-60L/LOW = 149-207Animation frame references define the different animations which have been baked into a 3D model.
10.1) Adding animation to the goalkeeper
Right click on the “Goalkeeper” subsymbol in the Symbol Definitions panel. Do not enter the subsymbol. Select “Properties” and navigate to the Animation tab. Expand the dialogue box from the bottom corner so you can see the option (+) or (-) new animations.
Click (+) to create 3 new rows and add in the start and end frames for the IDLE, R/LOW and L/LOW animations and click finish.
10.2) Testing the goalkeeper animations
You can now test that the animations have been uploaded. Double click on the goalkeeper subsymbol to enter it. Go into the Controllers panel and your animations should appear. Press play on each individually to preview.
To make sure these animations play at the correct speed in the parent symbol, we will use their length as it appears in the subsymbol. We will use 2500 for the left and right dive and 1500 for the idle.
Return to the parent subsymbol by clicking the breadcrumb bar at the top of the screen, above the 3D view. We are now going to add those goalkeeper animations to our existing timelines: leftKick and rightKick.
We are going to make the goalkeeper dive the wrong way each time.
10.3) Adding the goalkeeper animation to the left kick timeline
Select the “leftKick” timeline in the Controllers panel. Set the time to -1 and change the length of the timeline to 2500. This will make it match the length of the goalkeeper dive animation.
With the “goalkeeper” node selected in the Hierarchy, in Properties > References > Animations panel add the animations property to the timeline by clicking the plus icon (+). In the animations dropdown select “R/LOW”. Next change the value to 0 and hit enter.
In the Timeline panel set the time to 2500. In Properties > Animations set R/LOW to 2499 and hit enter. Back in the Timeline panel, click and drag over the final two diamonds. Right click and select Make Link (L) > with left value.
Creating a link between the final 2 keyframes prevents the timeline jumping back to the default value at the end of the time period.
10.4) Adding the goalkeeper animation to the right kick timeline
Select the “rightKick” timeline in the Controllers panel. In the Timeline panel, set the time to -1. Change the length of the timeline to 2500.
With the goalkeeper node selected in the Hierarchy set the animations dropdown to L/LOW and change the value to 0.
Set the time to 2500. In Properties > Animations set L/LOW to 2457 and hit enter. Click and drag over the final two diamonds. Right click and select Make Link (L) > with left value.
10.5) Creating a timeline for the goalkeeper idle animation
We will now add a new timeline for the goalkeeper being idle. In the Hierarchy, select the Goalkeeper node. In the Controllers panel right click on the Penalty Kick controller and add a new timeline called “idle”.
Set the length of the timeline to 1500. Set the time to -1. Select the idle animation from the dropdown in the Properties panel and set it to 0.
Set the time to 1500. Set idle animation to 1499. Highlight the two end keyframes, right click and select Make Left Link (L) > with left value.
In the latest version of Studio, you can click on the right arrow button underneath the reference number to automatically move to the final frame.
Click the loop button (the one to the right of the length value) to ensure goalkeeper idle animation loops.
11. Creating buttons to play the experience
We are now going to create buttons which will allow our player to trigger the animations.
11.1) Creating a group for the buttons
In the Controllers panel, make sure the base controller is selected. Add a new Group to the target image. Name it “Buttons”. Make sure the Buttons group is below the Goal group in the Hierarchy.
Drag the left-icon and right-icon buttons from the Media Library into the Buttons group.
11.2) Setting up each button’s transform
Select the left button in the Hierarchy and set its transforms to:
| position | -0.3 | -0.85 | 0.15 |
| scale | 0.2 | 0.2 | 1 |
| rotation | 45 | 0 | 0 |
Select the right button in the Hierarchy and set its transforms to:
| position | 0.3 | -0.85 | 0.15 |
| scale | 0.2 | 0.2 | 1 |
| rotation | 45 | 0 | 0 |
11.3) Setting up the goalkeeper idle animation to play by default
Select the “show” script in the Hierarchy. Click and drag the “idle” timeline from the Controllers panel into the show script. Make sure that you have placed the timeline within the parent show function. When letting go, select “play” from the dropdown menu.
We do this so the idle animation plays from the beginning.
11.4) Adding a pointerdown script for the left icon
Create a pointerdown script on the left icon by right clicking on the node and selecting New > Script > pointerdown.
With the left icon pointerdown script selected, drag the left kick timeline from the controllers panel and into the left icon pointerdown script inside the function and set it to play.
Drag the “leftkick” timeline into the left icon pointerdown script again but this time place it outside of the function and select add event handler > Complete.
Drag the “leftkick” timeline into the left icon pointerdown script for a 3rd time, this time within the complete function. Set it to reset.
Drag in the “idle” timeline within the complete function below the reset line and select “play”.
This process plays the timeline when you click the button. Then it resets to start from the beginning, returning the model to the idle animation.
11.5) Adding a pointerdown script for the right icon
We are now going to repeat this process for the right button. With the right icon pointerdown script selected, drag the “rightKick” timeline from the Controllers panel and into the right icon pointerdown script. Place it inside the function and set it to play.
Drag the “rightKick” timeline into the right icon pointerdown script again but this time place it outside of the function and select add event handler > Complete.
Drag the “rightKick” timeline into the right icon pointerdown script for a 3rd time, this time within the complete function and set it to reset.
Drag in the “idle” timeline within the complete function below the reset line and select “play”.
11.6) Hiding the buttons when the game is being played
Select the “leftKick” timeline in the Controller panel. Set the time handle to -1. Select the buttons group in the Hierarchy. In the Appearance and Behavior sections of the property panel add Visible and Enabled using the plus icon (+) and then uncheck both tick boxes next to them.
This means the user cannot see (
visible) or interact (enabled) with the buttons.
Do the same as the step before but this time for the “rightKick” timeline, setting the time handle to -1 and unchecking the visible and enabled checkboxes.
Preview and publish
Section titled “Preview and publish”That’s it! Your experience should now be playable. Print out the target image below, hit preview in the top left of the screen and hold your phone over the target image to see how it looks.
Remember you will need to change the zapcode on your target image. We have included the psd of the target image in the download folder.

Suggested Next Steps
Section titled “Suggested Next Steps”- Include the goalkeeper’s other animations.
- Add a photo feature to take a picture with the goalkeeper.
- Add a direction bar to allow the user to pick where they shoot.
Further Reading
Section titled “Further Reading”To learn more about the concepts covered in this tutorial, please see the following pages:
- Playing 3D Animations - More information on playing a 3D model’s animations.
- Bezier Curves - More information on bezier curves.