Preparing Alpha Video
Studio is being deprecated, please head over to the documentation page for Mattercraft, our most advanced 3D tool for the web, where you can find the most recent information and tutorials.
ZapWorks Studio supports alpha video i.e. video that features areas of transparency, using side-by-side alpha masked video.
This article covers alpha video preparation using Premiere Pro, though the process will be similar in other software.
Step by Step
Section titled “Step by Step”The following steps arrange the color channels of the video on the left hand side of the frame, and the alpha channel on the right hand side.
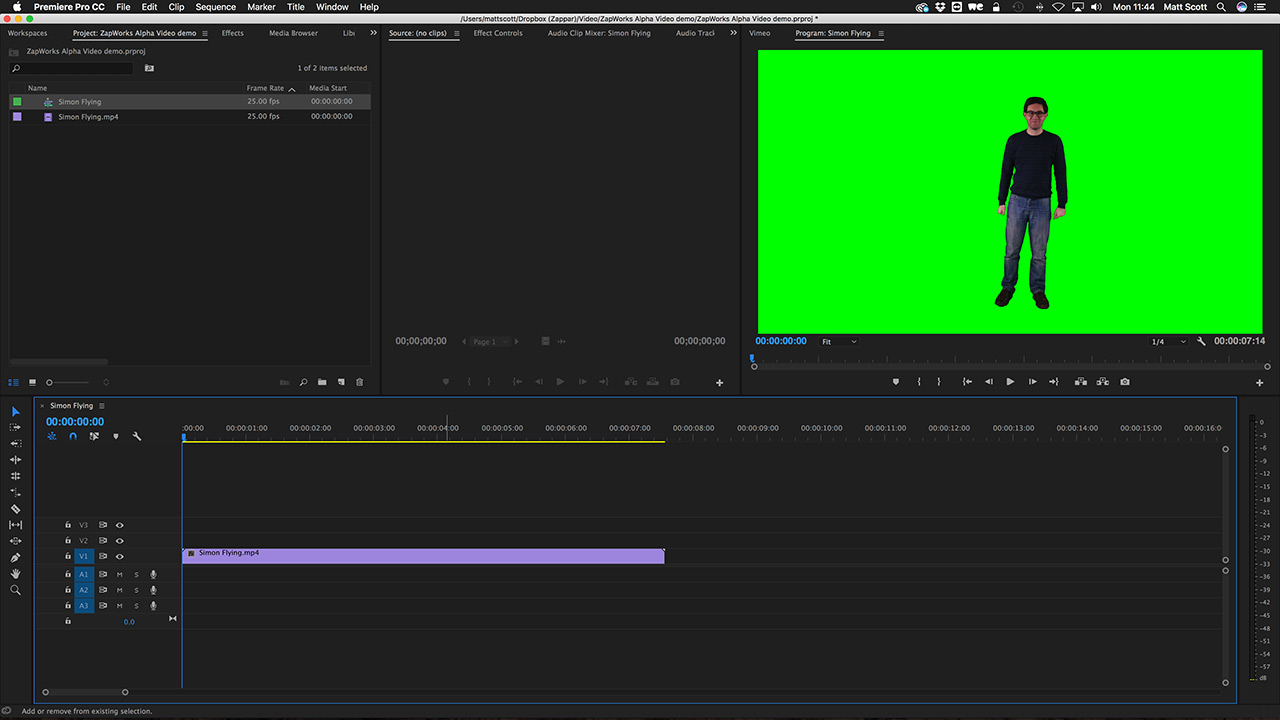
We start with our video; here we have some footage of Zappar’s co-founder, Dr. Simon Taylor pretending to fly around like a familiar superhero who has jets on his hands and feet.
We imported this footage, which has a green screen background, into Premiere Pro and created a new sequence from it.
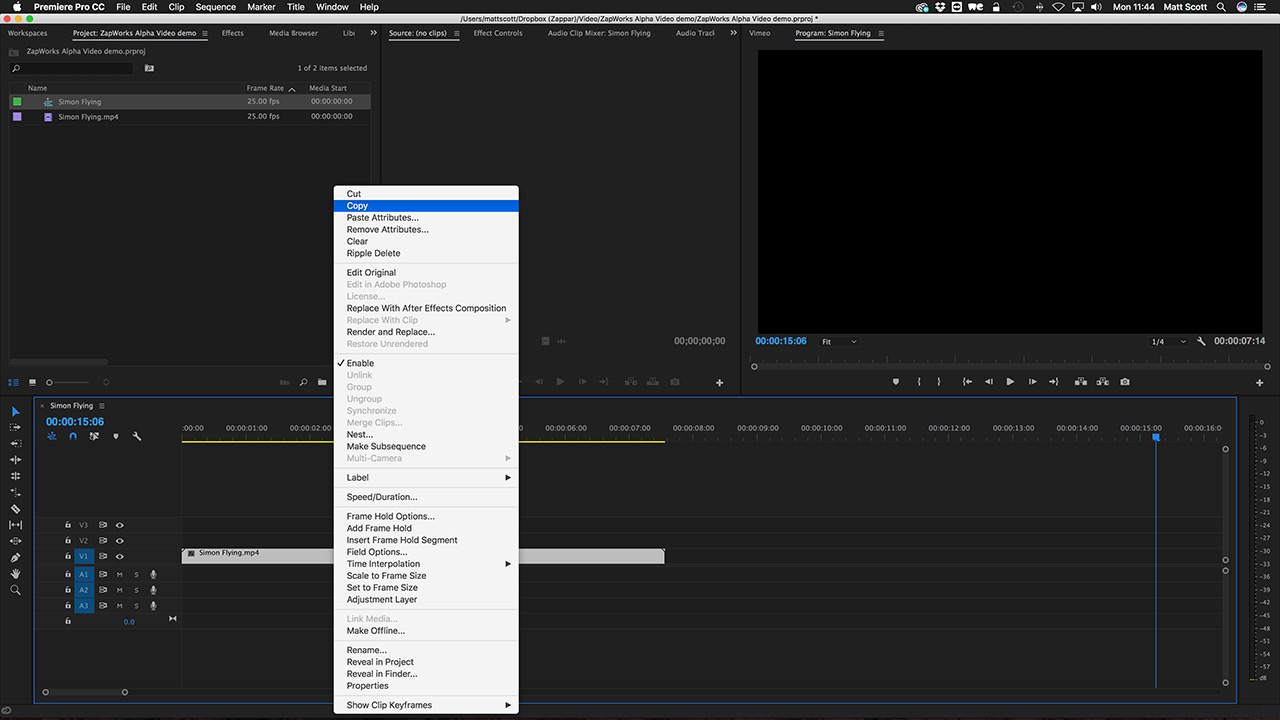
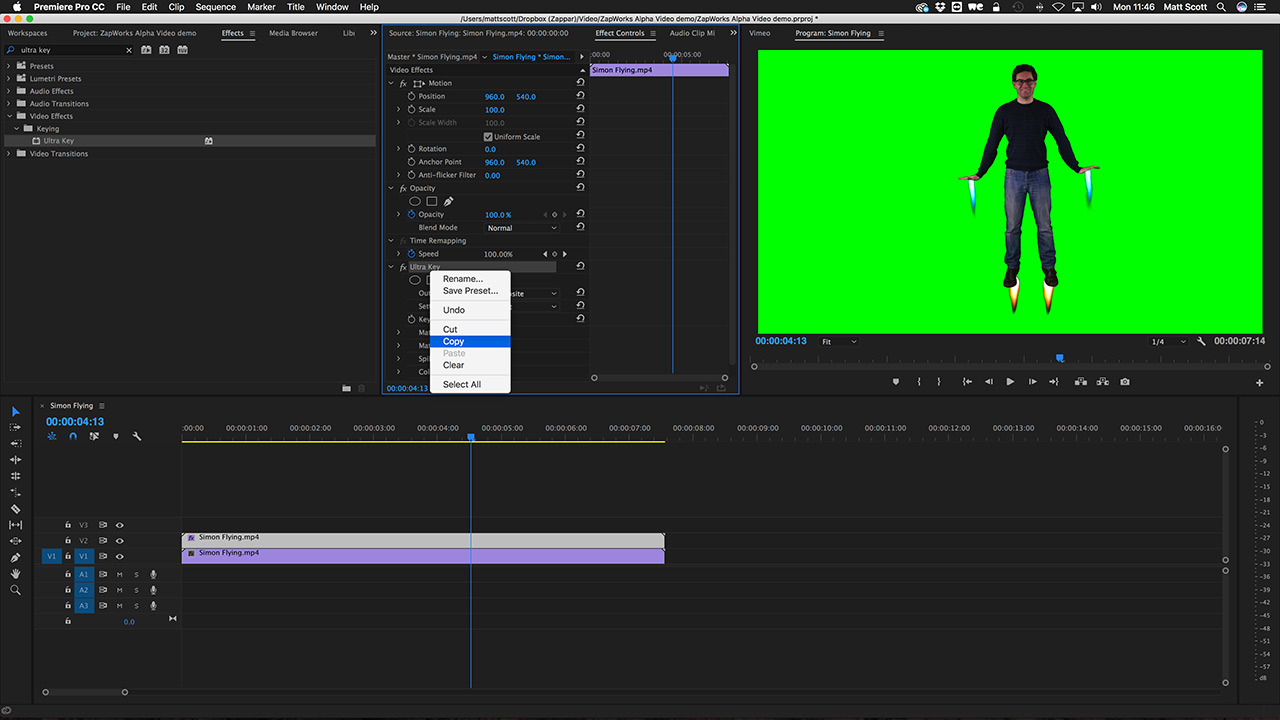
- Copy and paste this clip, and place the copy directly above the original in the timeline.

- Select the top clip and search for ‘Ultra Key’ in the Effects panel.
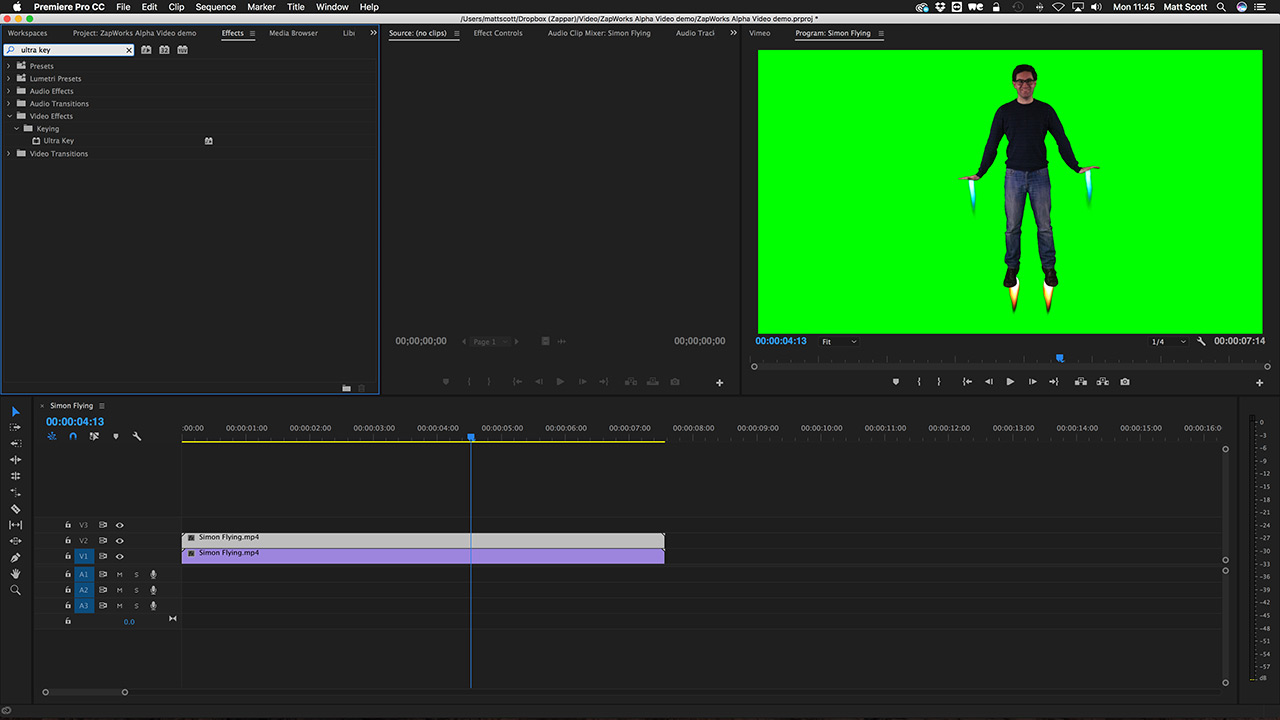
- Drag ‘Ultra Key’ onto the top clip and double-click to open the Effect Controls panel.

- Use the Eyedropper tool to select the Key Color - click on the green in the Program Monitor.
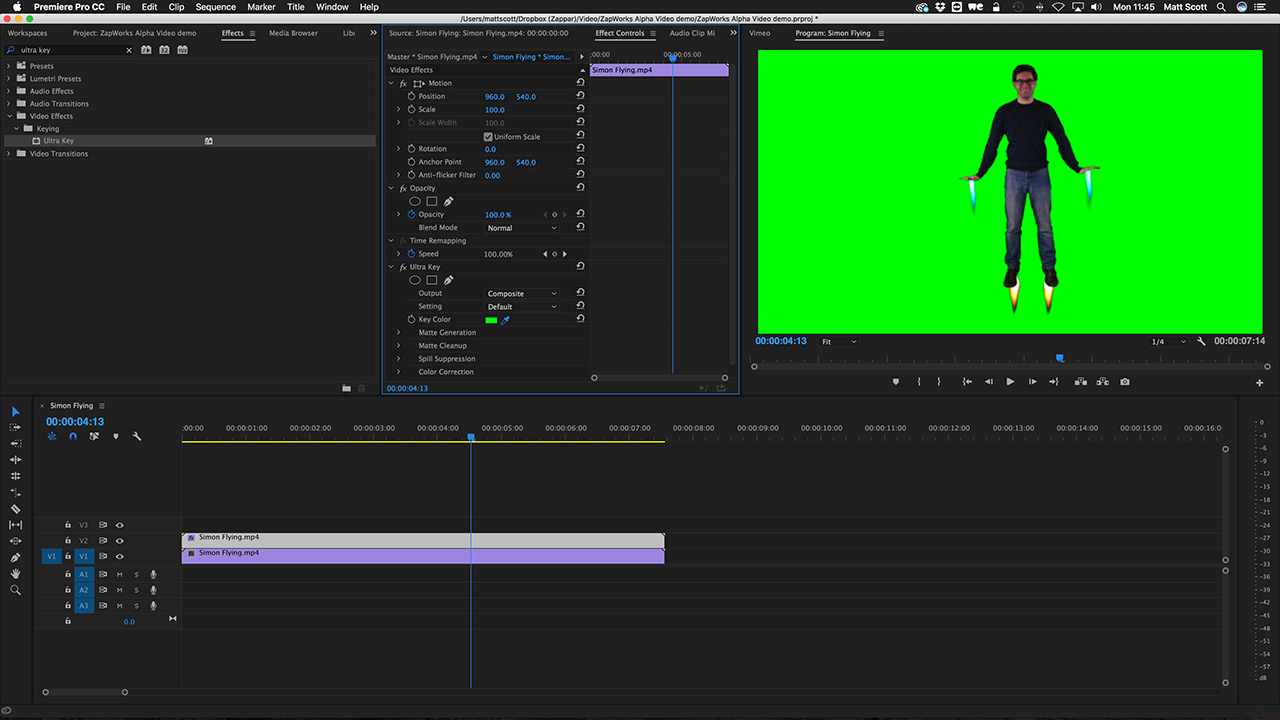
- Copy and paste the whole ‘Ultra Key’ effect onto the below clip.
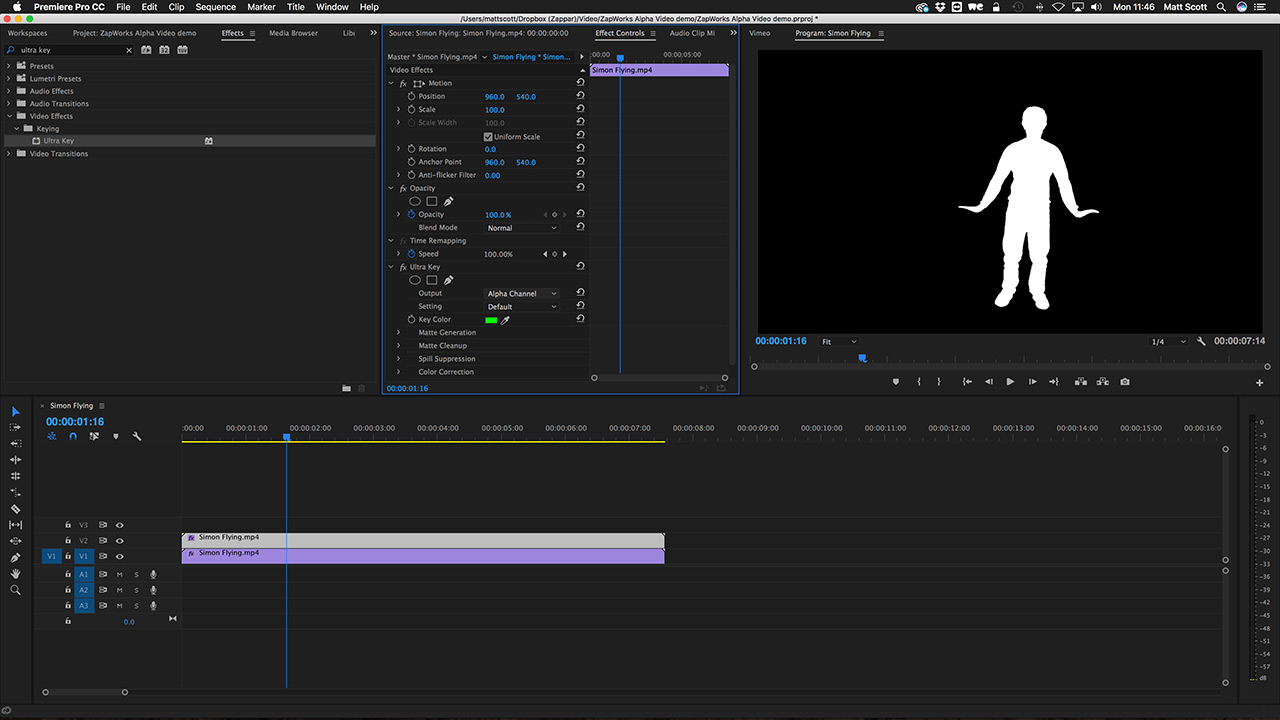
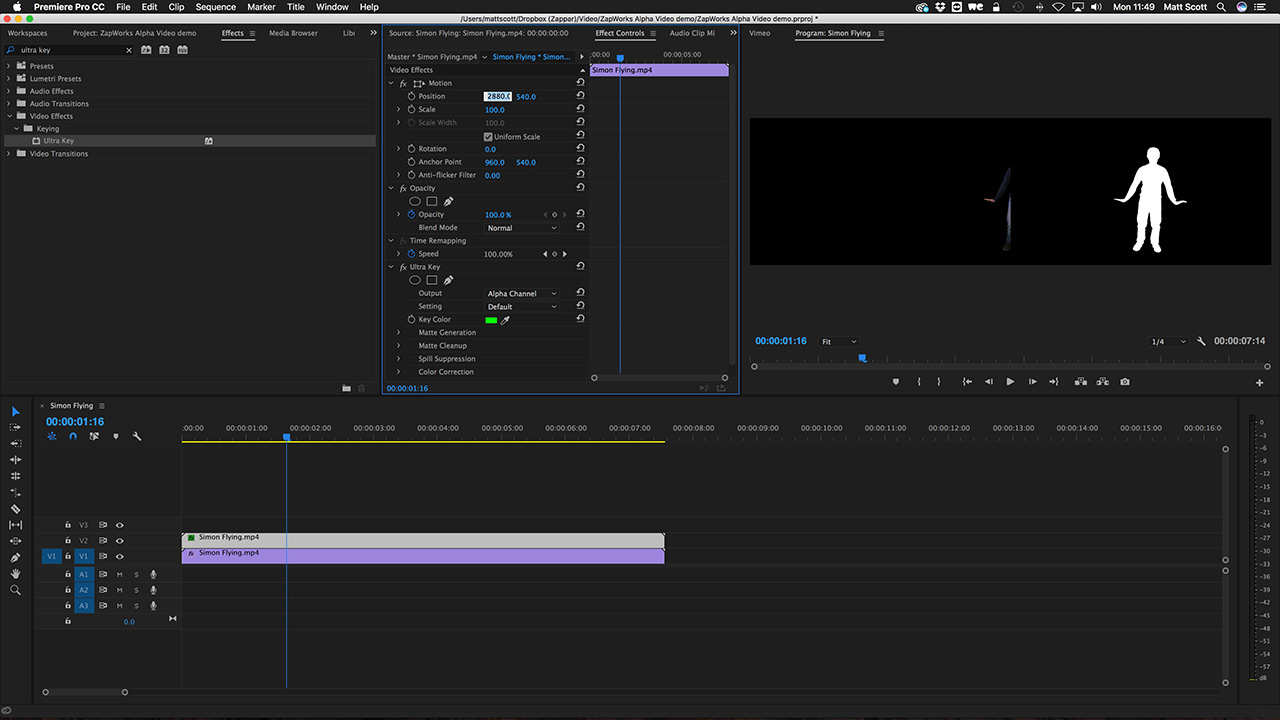
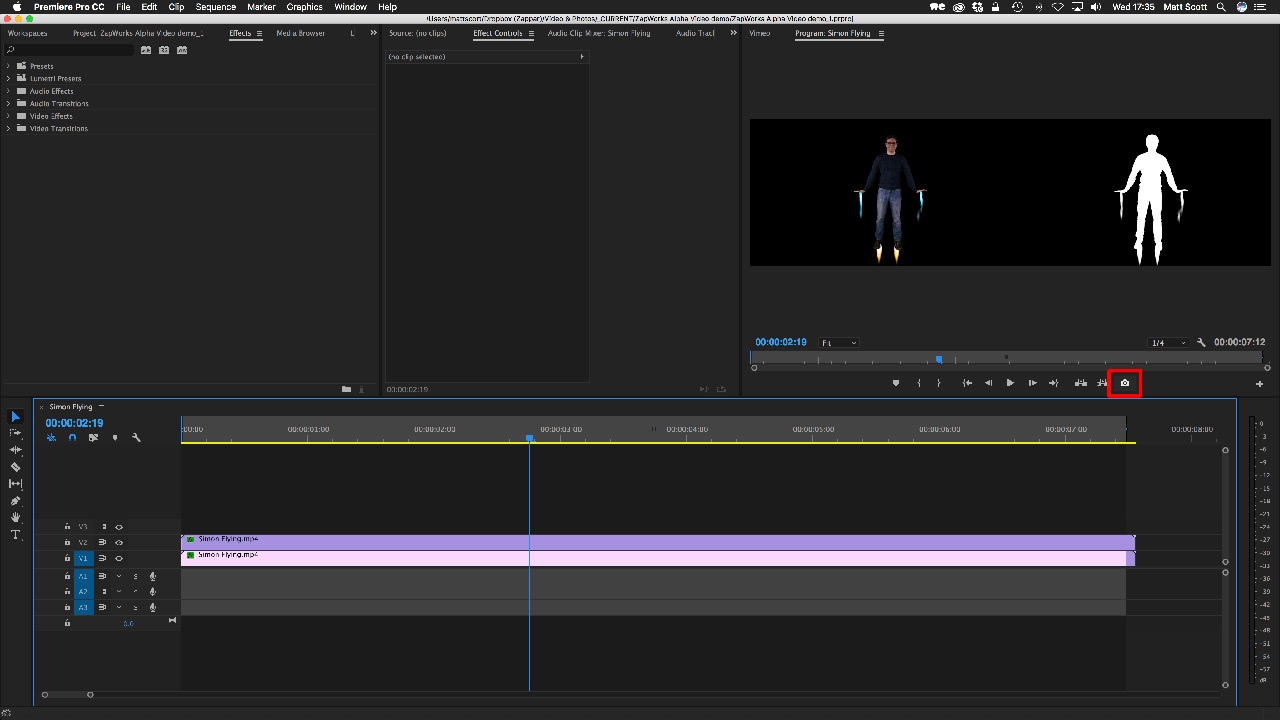
- Reselect the top clip, and in the Ultra Key Effect Control, select ‘Alpha Channel’ as the Output.
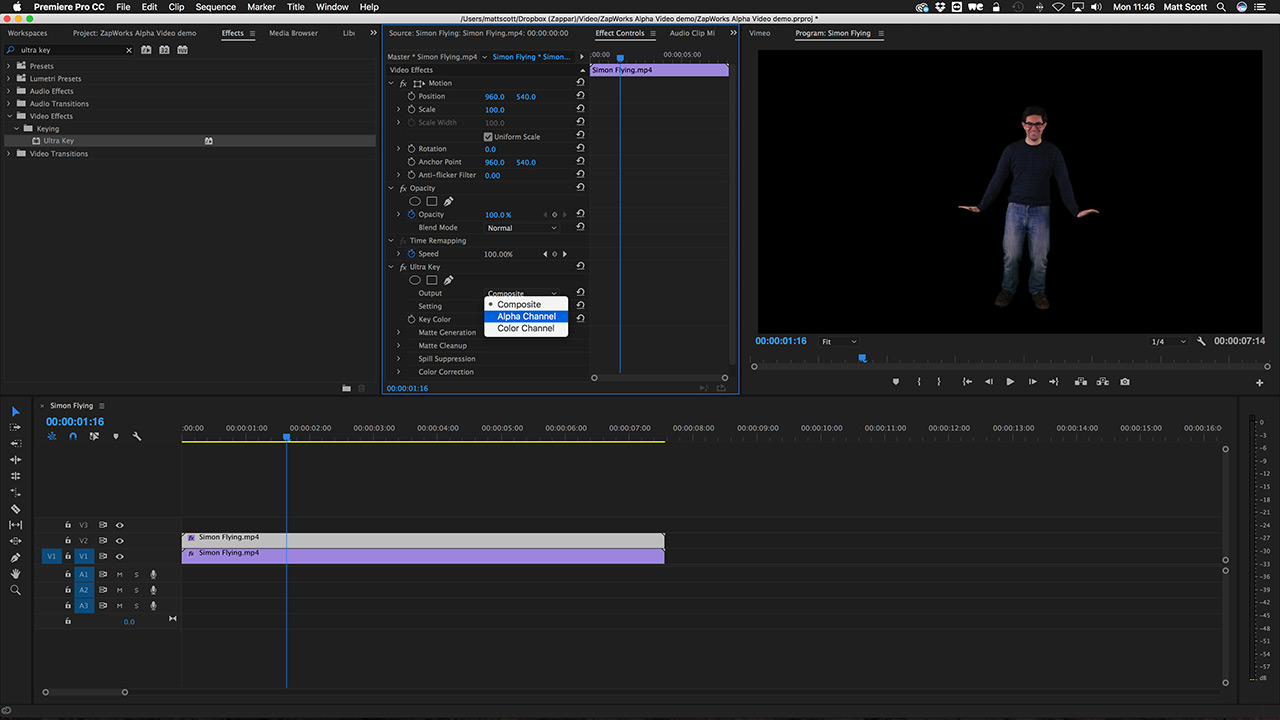
Simon becomes a solid white shape.
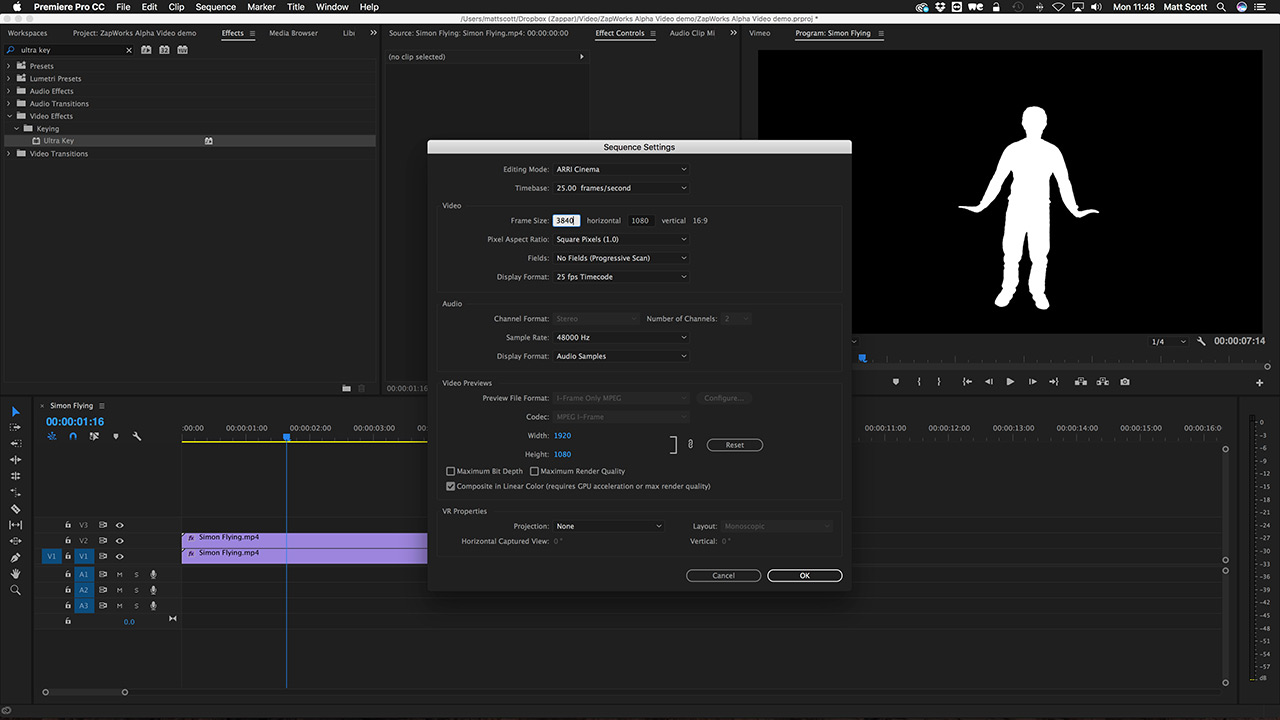
- We need to make the sequence we have been working in twice as wide so select Sequence > Sequence Settings and change the Horizontal Frame Size to double the width of your original video (3840 in our case as the video was 1920 pixels wide).
- We need to position the clips so they are side by side. The position needs to be pixel perfect, so don’t move the clips by eye. Double click the top clip in the timeline to open the Effect Controls panel. Change the horizontal position to 75% of the width of the sequence (2880 in our case). The solid white version of Simon should move over to the right in the Program Monitor.
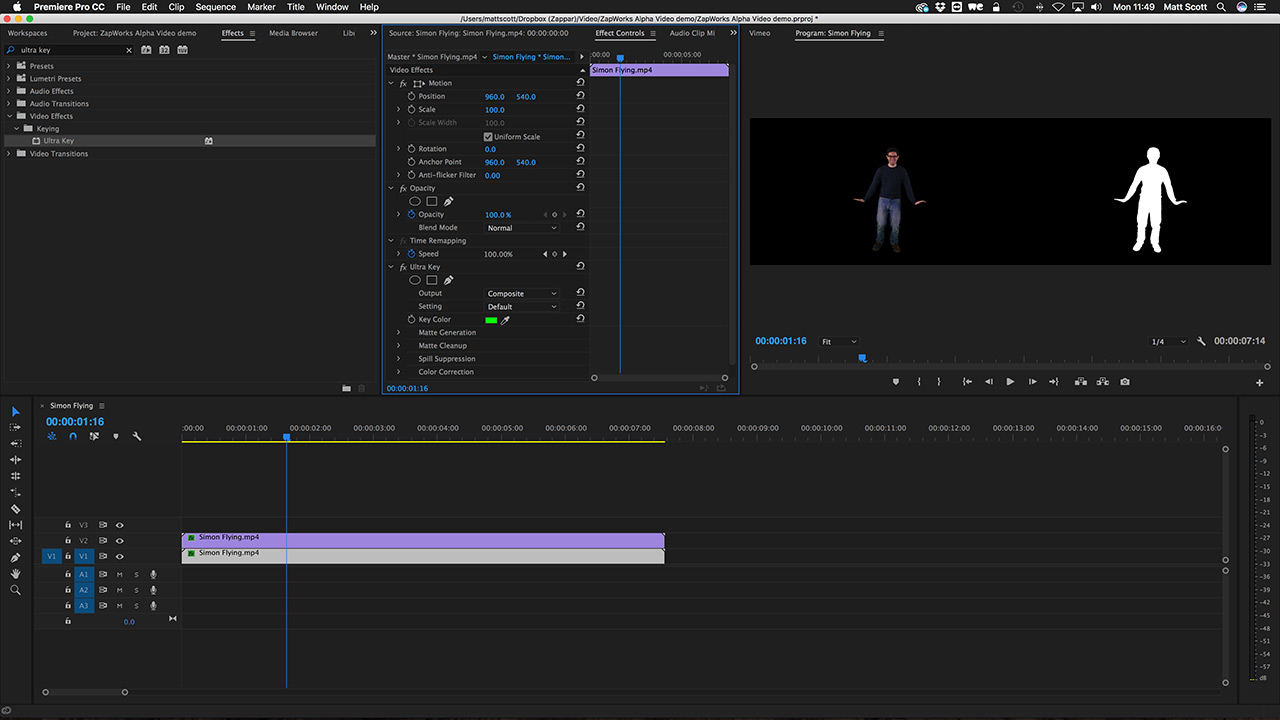
- Double click the bottom clip, and change the horizontal position to 25% of the width of the sequence (960 in our case).
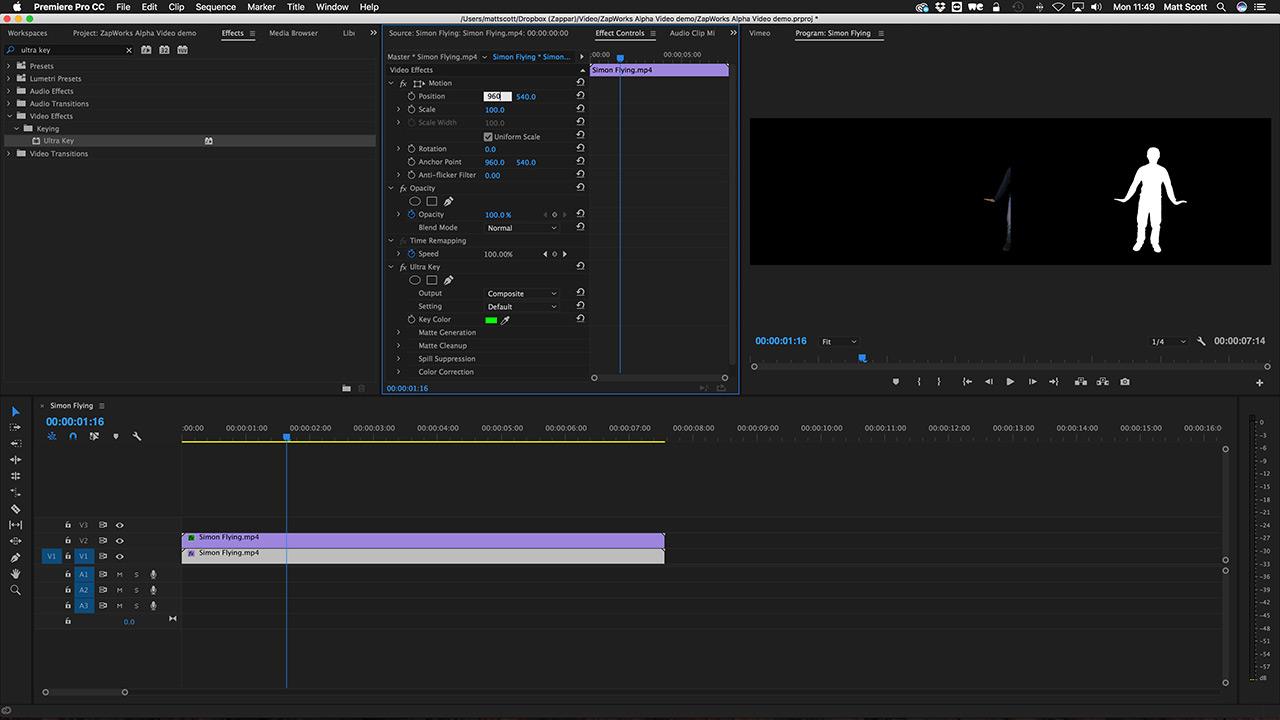
The full-color version should move over to the left.
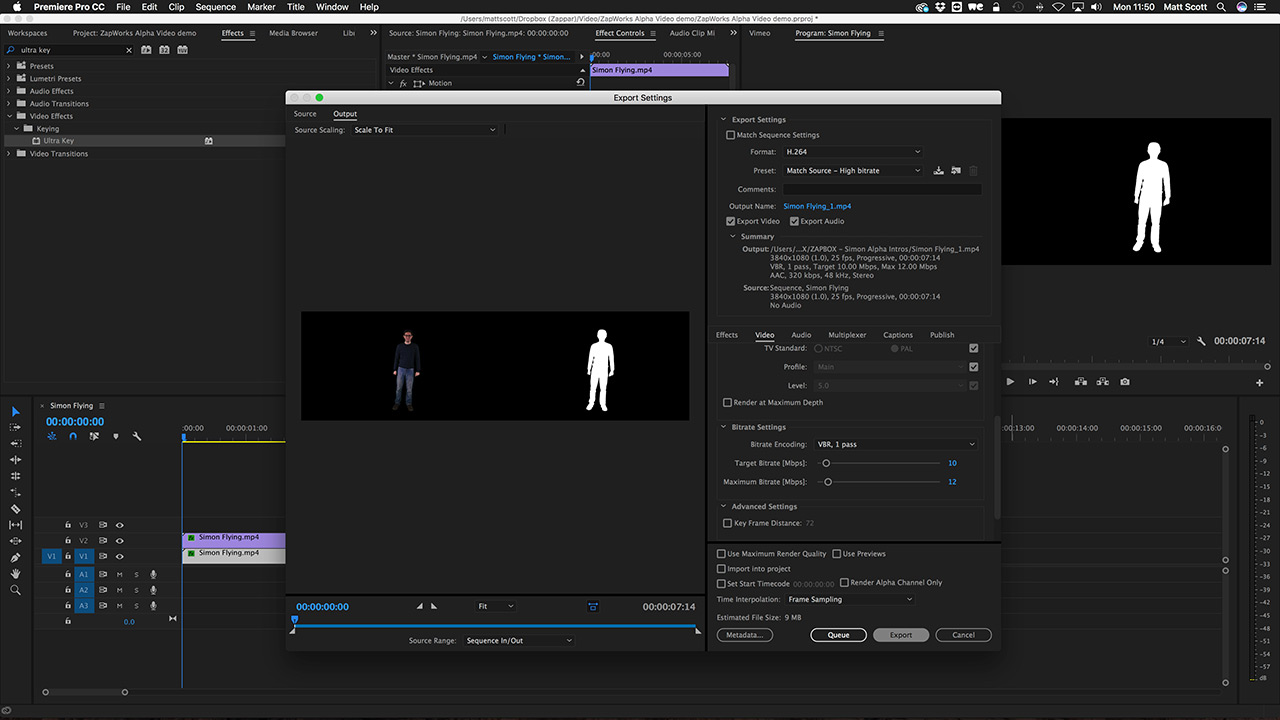
- Export the video as an h.264 mp4 file.
Below you can see the before and after of this process.
Before:
After:
While these steps initially output a video with a resolution of 3840x1080 (from a 1920x1080 source file) we compress our final video to 1920x540 before importing it into ZapWorks Studio.
Videos with a resolution higher than 1920 pixels in either dimension may not work on all devices.
- The final preparation step is to grab a single frame snapshot of the video to be used as a reference when creating our experience within ZapWorks Studio. In Premiere, you can create a snapshot by clicking the camera icon in the Program Monitor.
Snapshot:

Next Steps
Section titled “Next Steps”With the steps above completed the video is ready for use. ZapWorks Studio supports alpha video playback using one of two methods: