Exporting 3D Models for Studio
Studio is being deprecated, please head over to the documentation page for Mattercraft, our most advanced 3D tool for the web, where you can find the most recent information and tutorials.
In this guide, we’ll be providing steps on how to export your 3D model to one of ZapWorks Studio’s supported formats.
We’ll be discussing Maya, 3DS Max, and Blender but the export settings should be similar across other 3D software.
Before exporting your model make sure that it adheres to ZapWorks Studio’s limitations
FBX
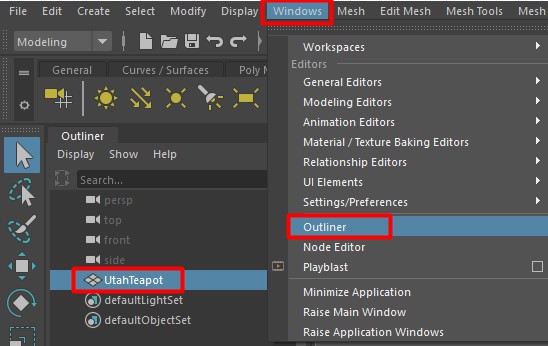
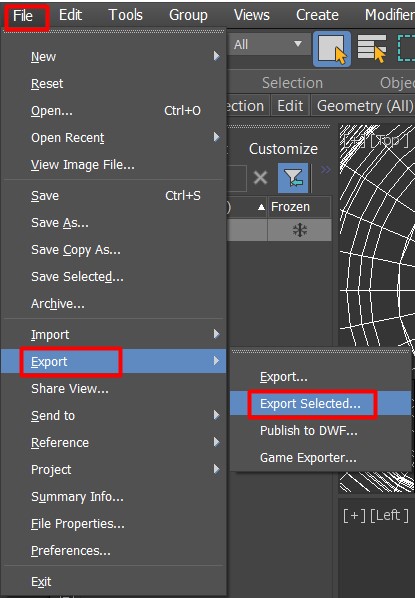
Open the Outliner and select the model(s) you’d like to export.

Select File from the menu bar, then click on the box next to Export Selection. This will launch the export selection options.
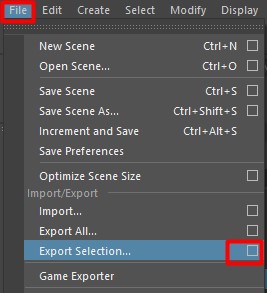
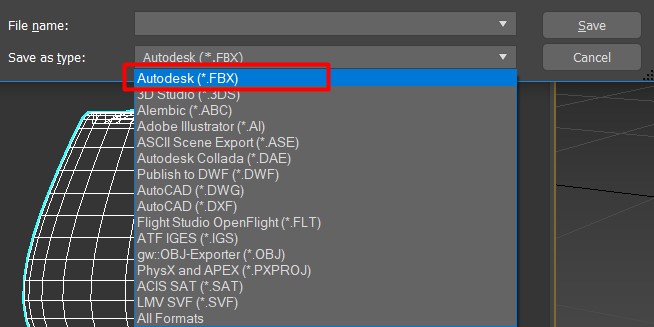
Set the file type to FBX Export, and click Export Selection.
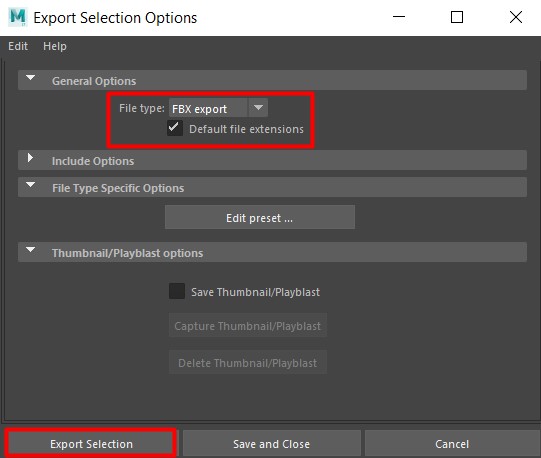
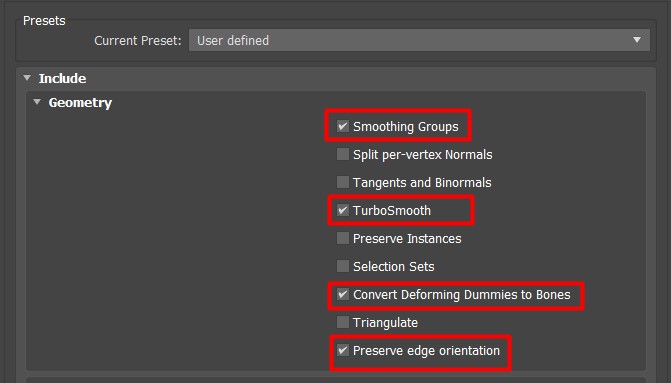
On the right side of the new window you’ll see export options for your file.
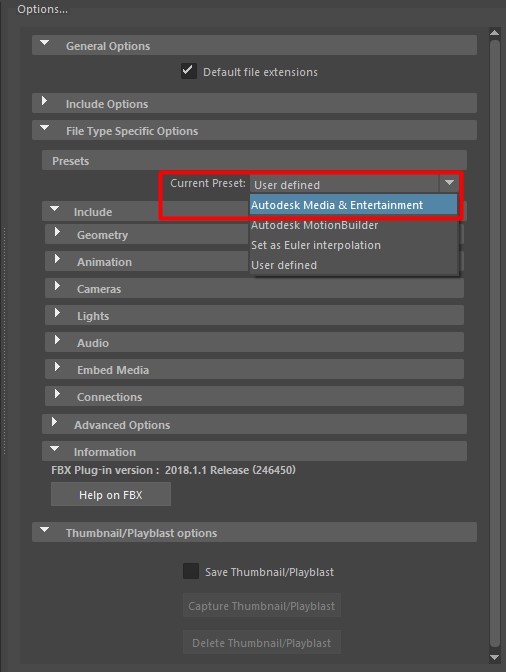
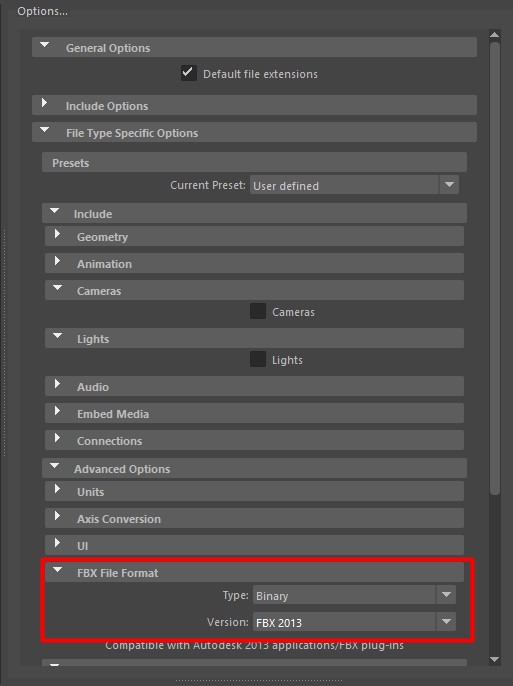
Under File Type Specific Options > Presets set the current preset to Autodesk Media & Entertainment.
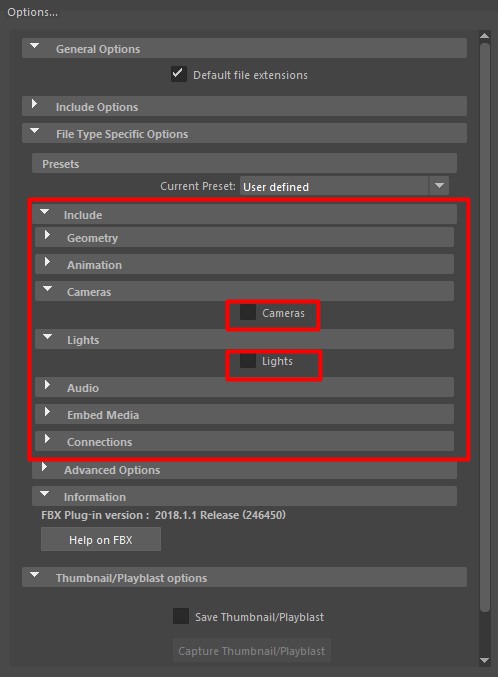
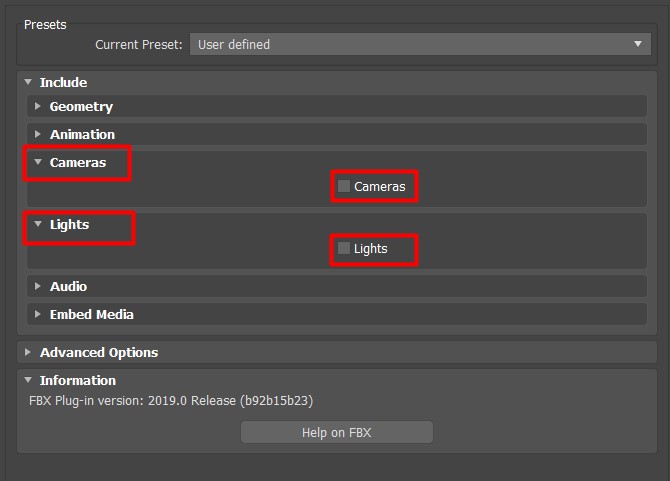
Within the Include options, make sure to uncheck Cameras and Lights, along with any other elements not present in your file.
Lastly, under Advanced Options > FBX File Format make sure the type is set to Binary and version is FBX 2013.
Once you’ve specified a name and path for your file you can click Export Selection.
The resulting .fbx file should be ready to import to Studio, along with your texture file(s).
OBJ
Open the Outliner and select the model(s) you’d like to export.
Select File from the menu bar, then click on the box next to Export Selection. This will launch the export selection options.

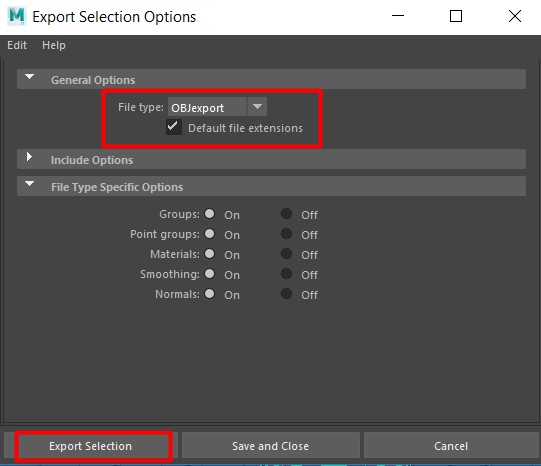
Set the file type to OBJ Export, and click Export Selection.
If the OBJ file type is not listed in the options the plugin may not be loaded. You can load the OBJ exporter plugin by going to Windows > Preferences > Plugin Manager and making sure objexport.mll is set to loaded.
The Default file extensions option in the General Options tab should be enabled.
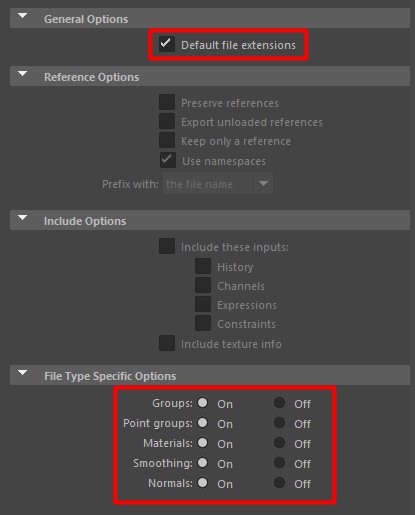
The File Type Specific Options can be left at their default values.
The OBJ format does not support animations. If you’d like to export a model with animations you should export your model to an FBX, POD, or GLTF/GLB file format instead.
Once you’ve specified a name and path for your file you can click Export Selection.
The resulting .objand .mtl files (the MTL file stores the object’s material definition) should be ready to import to Studio, along with your texture file(s).
3DS Max
Section titled “3DS Max”FBX
In the Scene Explorer, select the model(s) you’d like to export.

Select File from the menu bar, then Export > Export Selected.
Select FBX in the Save as type dropdown menu, then click Save to launch the FBX export settings window.
In the Geometry tab, enable the following options:
Within the Include options, disable the Cameras and Lights options, along with any other elements not present in your scene.
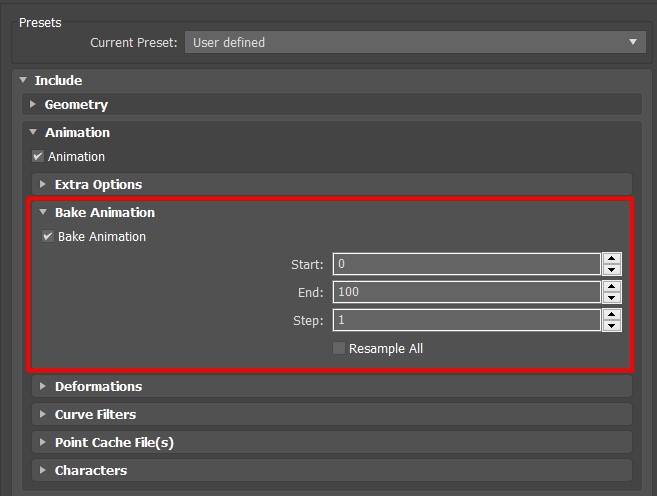
If you’d like to include animations in your FBX export, within the Animations tab select the Bake Animations option and set the keyframe range to export.
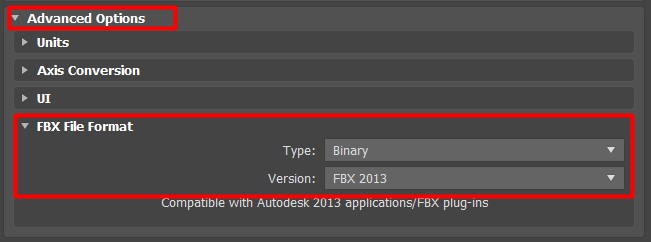
Lastly, within the Advanced Options tab set the FBX file format to Binary and FBX 2013.
Once you’ve specified a name and path for your file you can click Export.
The resulting .fbx file should be ready to import to Studio, along with your texture file(s).
OBJ
In the Scene Explorer, select the model(s) you’d like to export.

Select File from the menu bar, then Export > Export Selected.

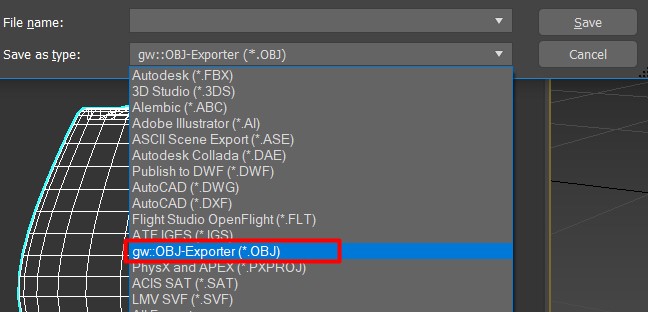
Select OBJ in the Save as type dropdown menu, then click Save to launch the OBJ export settings window.
In the Geometry options, select Flip YZ-axis. This will transfer the Y-axis values to the Z-axis and vice versa, to ensure the exported model matches Studio’s coordinate system.
Disable the Hidden objects option, to avoid exporting any unwanted objects with your file.
The Faces type should be set to Quads to ensure compatibility with Studio.

In the Material options, select Export materials and Create mat-library.
Click on the Map-Export button to access the map export settings. In the resulting pop-up you can set the format and size of your maps.

Back in the main export settings window match the Target to the operating system you’ll be using the file on.
The Optimize settings can be left in their default enabled state, before clicking the Export button.

The resulting .obj and .mtl files (the MTL file stores the object’s material definition) should be ready to import to Studio, along with your texture file(s).
Blender
Section titled “Blender”FBX
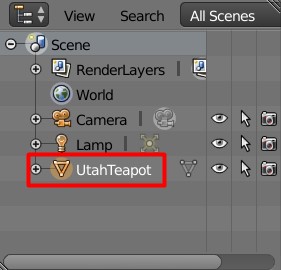
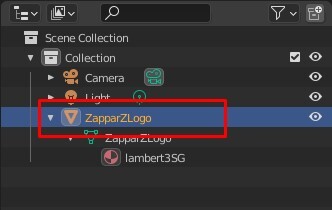
In the Outliner, select the model(s) you’d like to export.

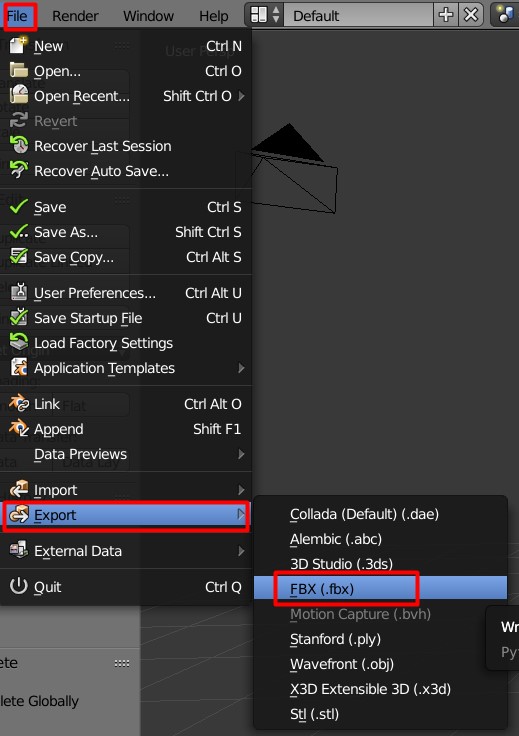
Select File from the menu bar, then Export > FBX (.fbx).
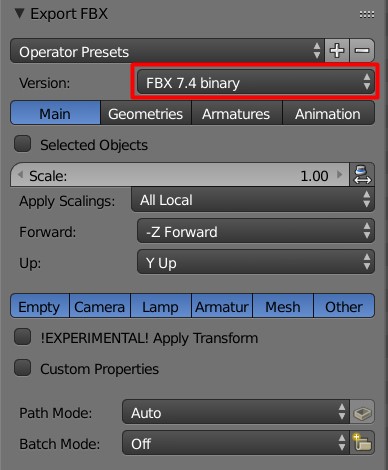
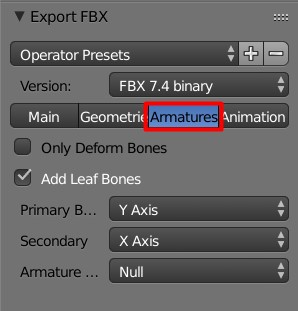
In the Export FBX tab, set the version to FBX 7.4 Binary.
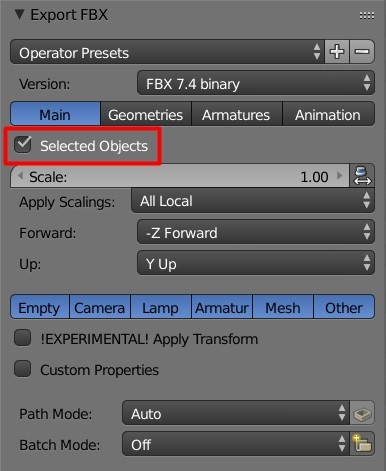
Select the Main tab and make sure the Selected Objects option is selected. This will ensure only the objects you selected in the Outliner will be exported, rather than everything in the scene.
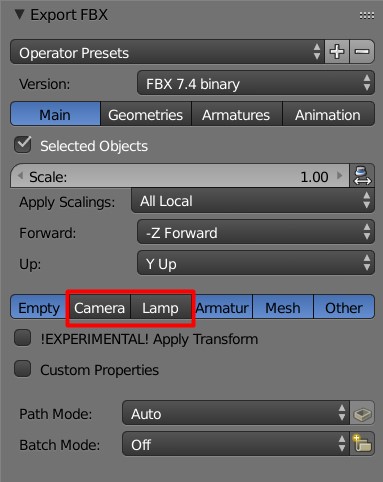
By default Blender will export several object types, but the Camera and Lamp objects should be removed, along with any other elements that aren’t relevant to your model.
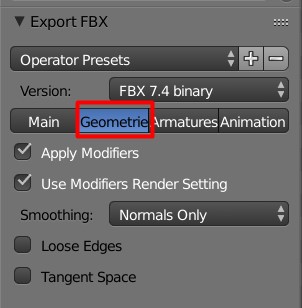
The settings in the Geometries and Armatures tabs can be left at their default values.
In the Animation tab, make sure the Baked Animations option is selected. Disabling this option may cause animation errors in Studio.

Once you’ve specified a name and path for your file you can click Export FBX.
The resulting .fbx file should be ready to import to Studio, along with your texture file(s).
OBJ
In the Outliner, select the model(s) you’d like to export.
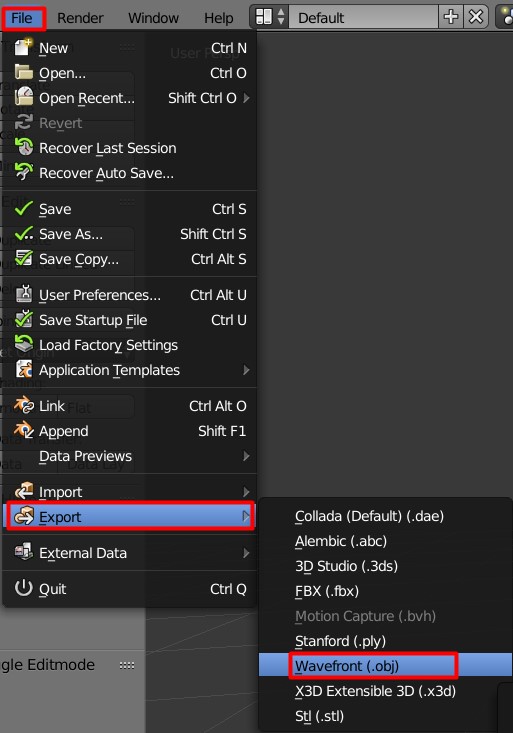
Select File from the menu bar, then Export > Wavefront (.obj).
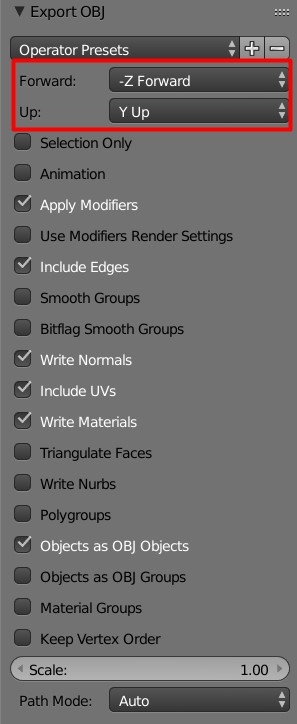
Set the Forward and Up settings to -Z Forward and Y Up respectively.
The rest of the settings should be left at their default values.
The OBJ format does not support animations. Enabling the Animation setting will not export animations to your obj file. It will instead create a separate OBJ file for each frame of animation in your scene. If you’d like to export a model with animations you should export your model to an FBX or POD file format instead.
Once you’ve specified a name and path for your file you can click Export OBJ.
The resulting .obj and .mtl files (the MTL file stores the object’s material definition) should be ready to import to Studio, along with your texture file(s).
GLTF/GLB
To get started, select the object(s) you’d like to export. If you select multiple objects, they will be imported as a multi-part model.
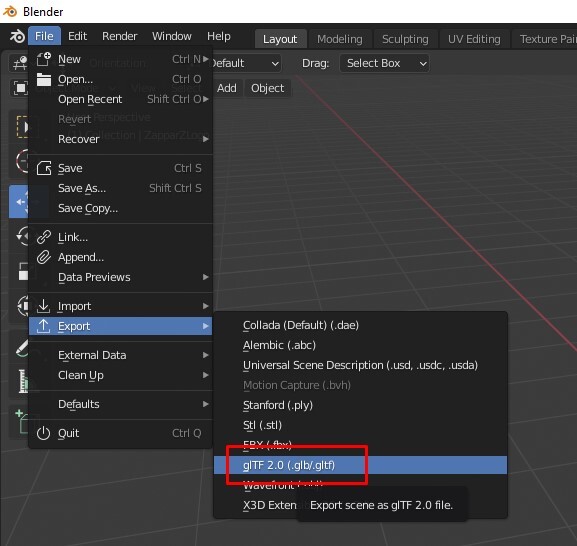
Choose File > Export Selection from the menu bar, then Export > glTF 2.0 (.glb/.gltf).
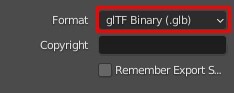
Set the format to glTF Binary (.glb).
Under the Include tab, check Selected Objects.
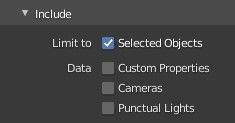
Under the Geometry tab, check Apply Modifiers.
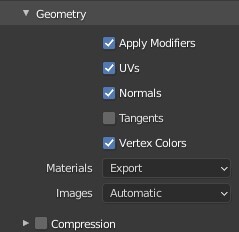
If you don’t want to include the 3D model animation, uncheck the Animation box in the Animation tab (leave checked if you want to export the model with its animations assigned).

Once you’ve specified a name and path for your file you can click Export .glb.
The resulting .glb file should be ready to import to Studio.
Exporting to POD (All Software)
Section titled “Exporting to POD (All Software)”The PVRGeoPOD plugin is available for Maya, 3DS Max and Blender, and allows you to export your 3D models directly to the POD file format.
Once installed you should find the option to export your file using the PowerVR Exporter from within your software’s usual export options.
As PVRGeoPOD is a third party plugin, the following export settings remain constant across the 3D software.
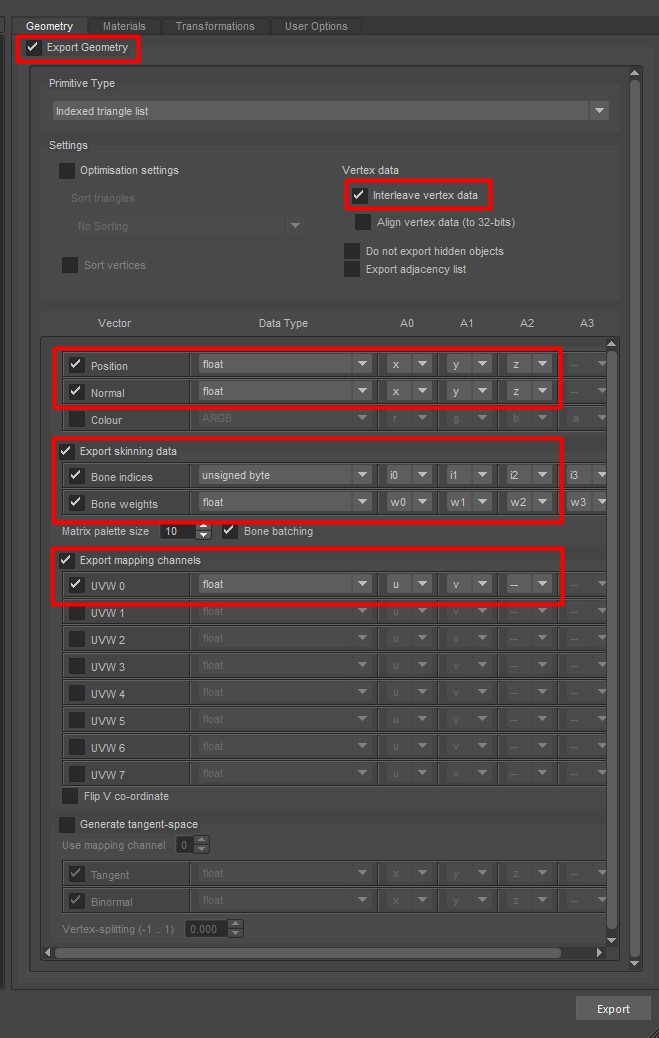
The Export Geometry and Interleave Vertex Data options in the Geometry tab will be selected by default and can be left as is.
Beneath these options you’ll be able to control the vertex data that will be exported with the file.
The Position and Normal rows should have their data types set to float, with the 3 channels set to X, Y, Z in order.
The Export mapping channels option should be enabled, its data type set to float, and its channels set to U, V, - in order.
For characters that have been animated with bones the Export skinning data option will need to be enabled.
The Bone indices option should have its data type set to unsigned byte, and its channels set to i0, i1, i2, i3 in order.
The Bone weights option should have its data type set to float, and its channels set to w0, w1, w2, w3 in order.
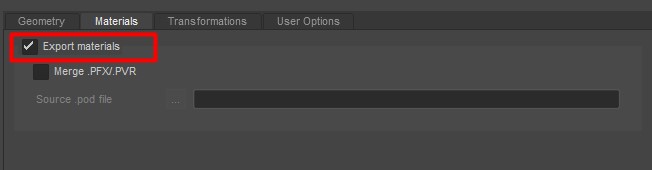
In the Materials tab, enable the Export materials option.
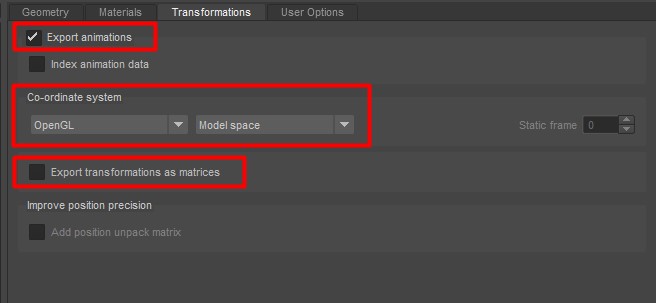
If your model includes animations, enable the Export animations option in the Transformations tab.
If your model contains animations and this option is not enabled, only the static mesh will be exported.
Set the coordinate system to OpenGL and Model space.
The Export transformations as matrices option should preferably be left disabled. If your animations look incorrect in Studio, then re-exporting with this option enabled may resolve the issue.
Storing transformation data (i.e. position, scale and rotation) in a matrix, rather than as individual elements, can increase file size.
Once you’ve specified a name and path for your file you can click Export.
The resulting .pod file should be ready to import to Studio, along with your texture file(s).