Opening Transition - Sliding Door
Studio is being deprecated, please head over to the documentation page for Mattercraft, our most advanced 3D tool for the web, where you can find the most recent information and tutorials.

Difficulty Level: Beginner
Coding Knowledge Required: Beginner
Time to Complete: 10-15 minutes
In this step-by-step tutorial, we will create an AR experience’s opening transition consisting of an experience’s target image breaking apart.
To show you how to add this opening transition to an existing project we’ve built it on top of the Augmented Portal step-by-step project available in the ZapWorks documentation.
We’ve decided to give users the illusion of 2 doors sliding away from each other, progressively revealing the inside of a room. Using Photoshop we’ve horizontally split the target image into 2 images, a top, and a bottom one. After importing these images into Studio, we’ve created a timeline to animate the opening transition and we’ve set it to play when the target image is detected, that’s it! Click here to download a zip file containing the images and the project’s zpp file. Once the file has been downloaded, unzip it.
Download the completed project.
Step by Step
Section titled “Step by Step”1) Setting up your project
Open Studio and import the Augmented Portal project’s zpp file previously downloaded. If you’ve already built this experience, you can open the project directly.
2) Importing your assets
Import the top and bottom images previously downloaded into the Media Library.
3) Create a group in the hierarchy
In the Hierarchy, within the target image node, add a new group called ‘target image cover’ and place it under the ‘Scene Ornaments’ group. To add a group inside a node, right click on the node, select ‘New > Group’ and name the new group.

4) Add the top half of the image to your group
Drag ‘target-image-top.jpg’ from the Media Library into the Hierarchy within the ‘target image cover’ group. For the ‘target-image-top.jpg’, set:
- The
layer modetotest_3d, - The
positionto(0, 0.5, -0.01), - The
scaleto(1, 0.5, 1).
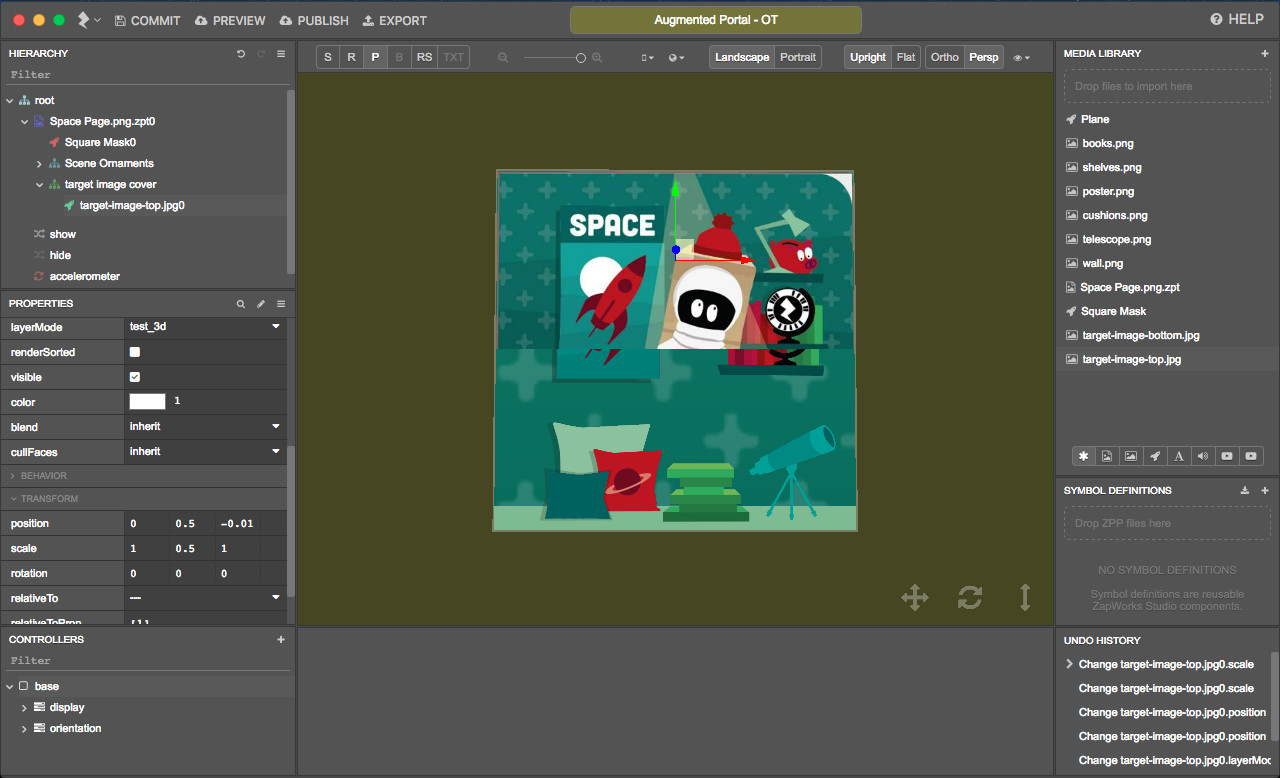
To change the value of an object’s property (scale, position, rotation, color etc.) select the object in the Hierarchy and in the Properties panel change the value of the property.
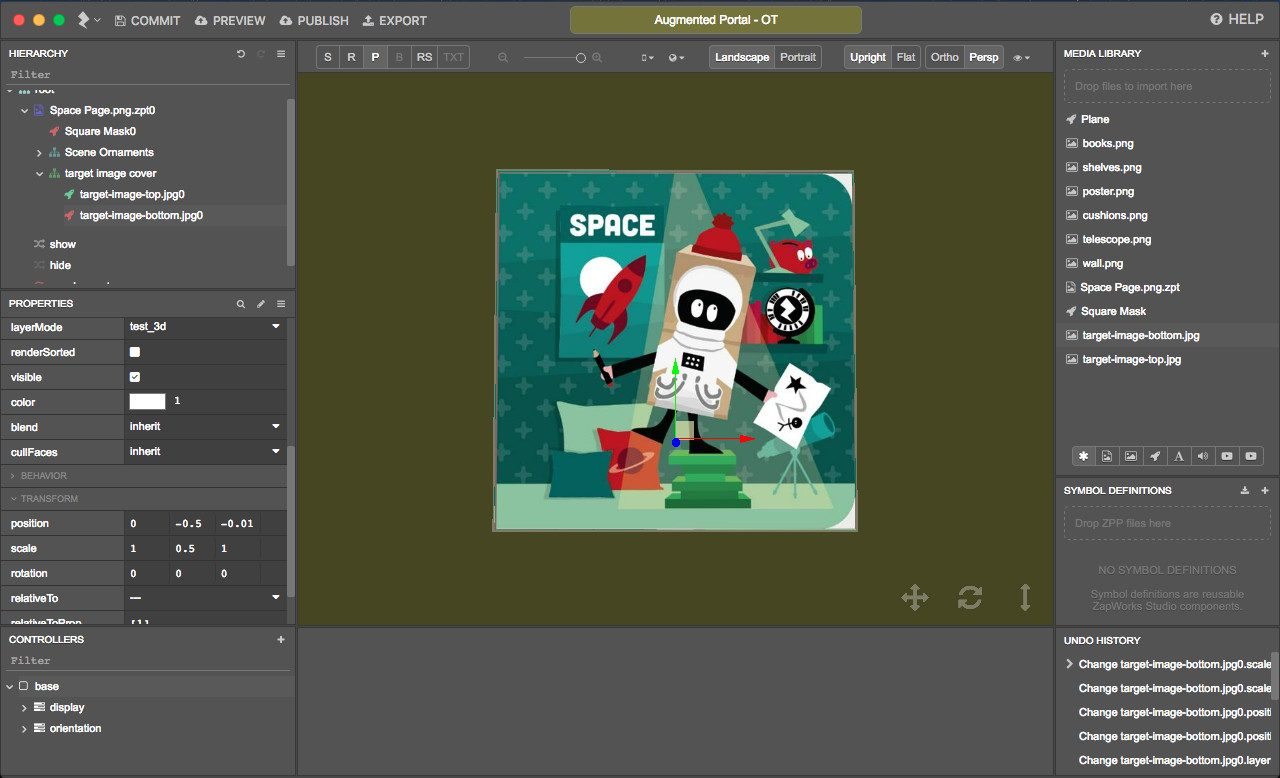
5) Adding the bottom half of the image to your group
Drag ‘target-image-bottom.jpg’ from the Media Library into the Hierarchy within the ‘target image cover’ group. For the ‘target-image-bottom.jpg’ node, set:
- The
layer modetotest_3d, - The
positionto(0, -0.5, -0.01), - The
scaleto(1, 0.5, 1).
6) Creating your opening transition controller
Create a new controller called “opening transition”. To create a controller, in the Controllers panel, click on the ‘+’ icon next to ‘Controllers’, select ‘New Controller’ and name it.
7) Create a timeline for the animation
Create a standalone timeline called ‘animation’ for the ‘opening transition’ controller. Set the length of the timeline to 4000.
To add a standalone timeline to a controller, right click on the controller, select ‘New Timeline’ and name it. To change the length of the timeline, in the timeline panel, update the value next to ‘Length’.
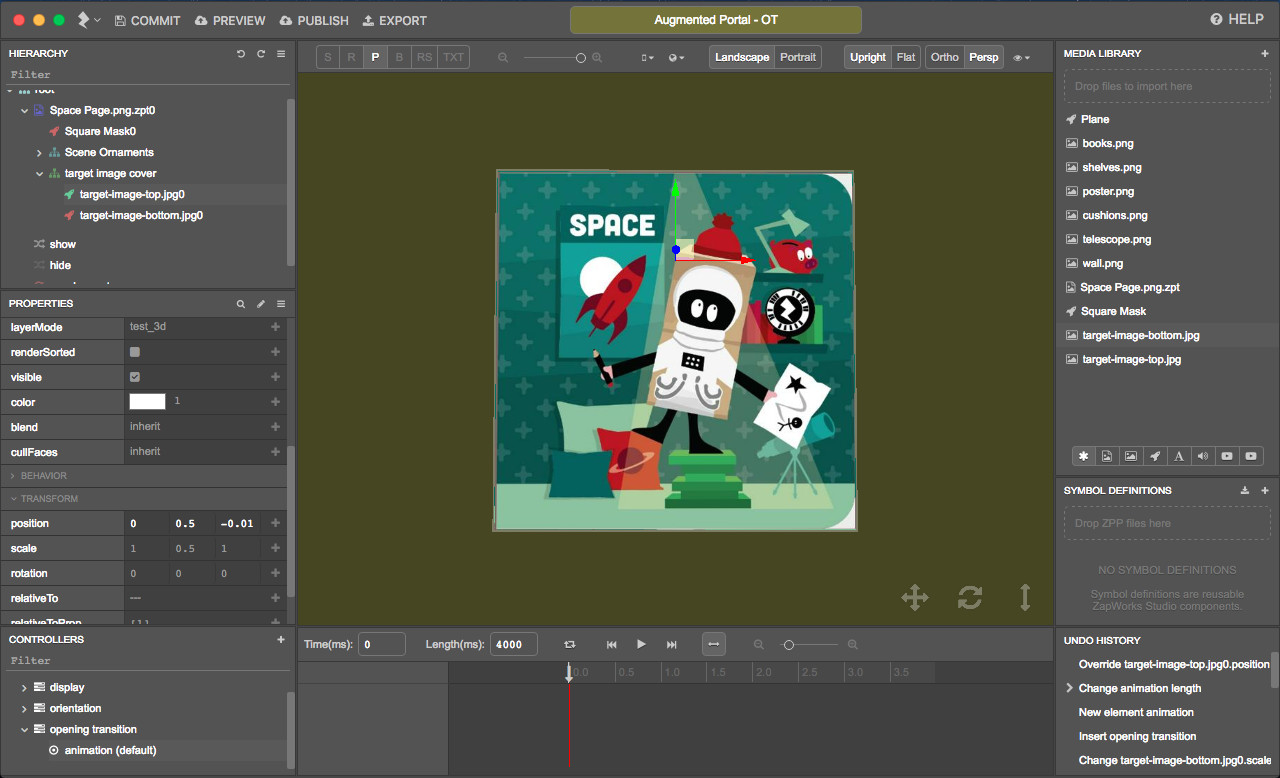
We recommend that you use the zoom in/out tool to make sure you see the entire timeline (between 0 and 4000ms).

8) Add the position property to the animation timeline
Add to the ‘animation’ timeline the position property of the ‘target-image-top.jpg0’ node.
To add an object’s property to a timeline, select the timeline in the Controllers panel, in the Hierarchy select the object and in the Properties panel click on the ‘+’ button next to each property that needs to be added to the timeline.
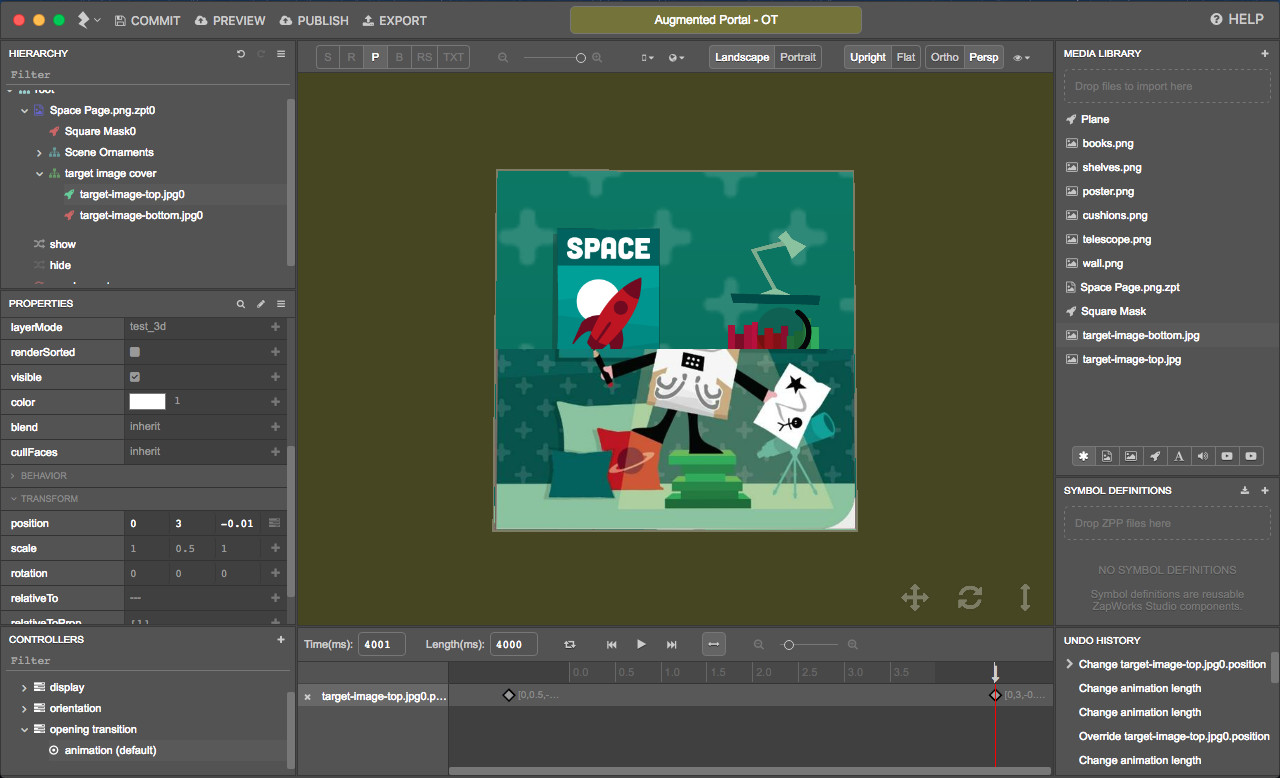
9) Adjust the top image position
In the ‘animation’ timeline, set the ‘Time’ (not Length) to 4001ms and change the value of the ‘target-image-top.jpg0’ node’s position to (0,3,-0.01).
To change the value of a node’s property in a timeline, make sure the correct timeline is selected in the Controllers panel, and that in the Hierarchy the correct node is selected as well. You can then edit the node’s property value in the Properties panel.
10) Create a transition block
In the ‘animation’ timeline, on the ‘target_image_top.position’ line, create a transition block between the first and last keyframes.
To create a transition block between two keyframes, select both keyframes, right click on the line between them and select ‘Make Transition’.
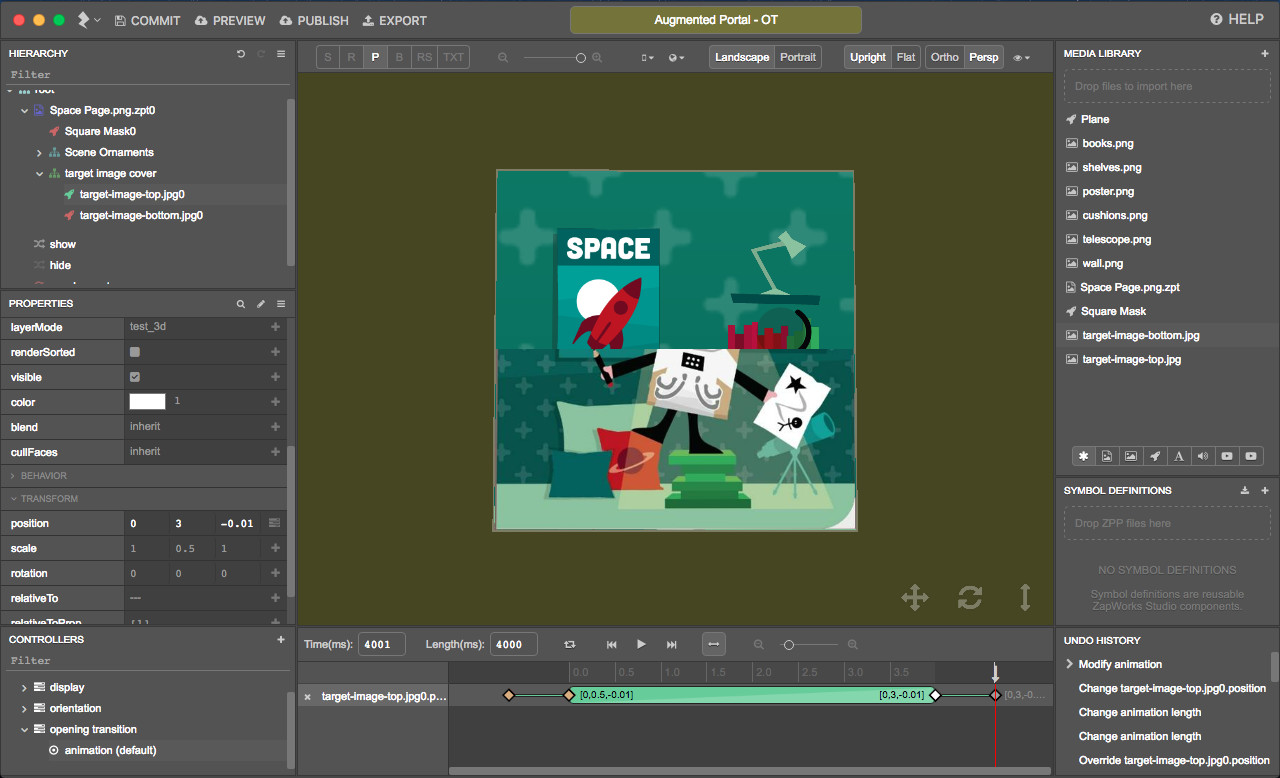
You can set the ‘Time’ to 0 and play the timeline to see how the transition looks so far.
We will now repeat this process for the bottom part of the target image:
11) Add the bottom image position to your timeline
Add to the ‘animation’ timeline the position property of the ‘target-image-bottom.jpg0’ node.
12) Adjust the bottom image position
In the ‘animation’ timeline, with the time still set to 4001ms, change the value of the ‘target-image-bottom.jpg0’ node’s position to (0,-3,-0.01).
13) Create a transition block
In the ‘animation’ timeline, on the ‘target_image_bottom.position’ line, create a transition block between the first and last keyframes.
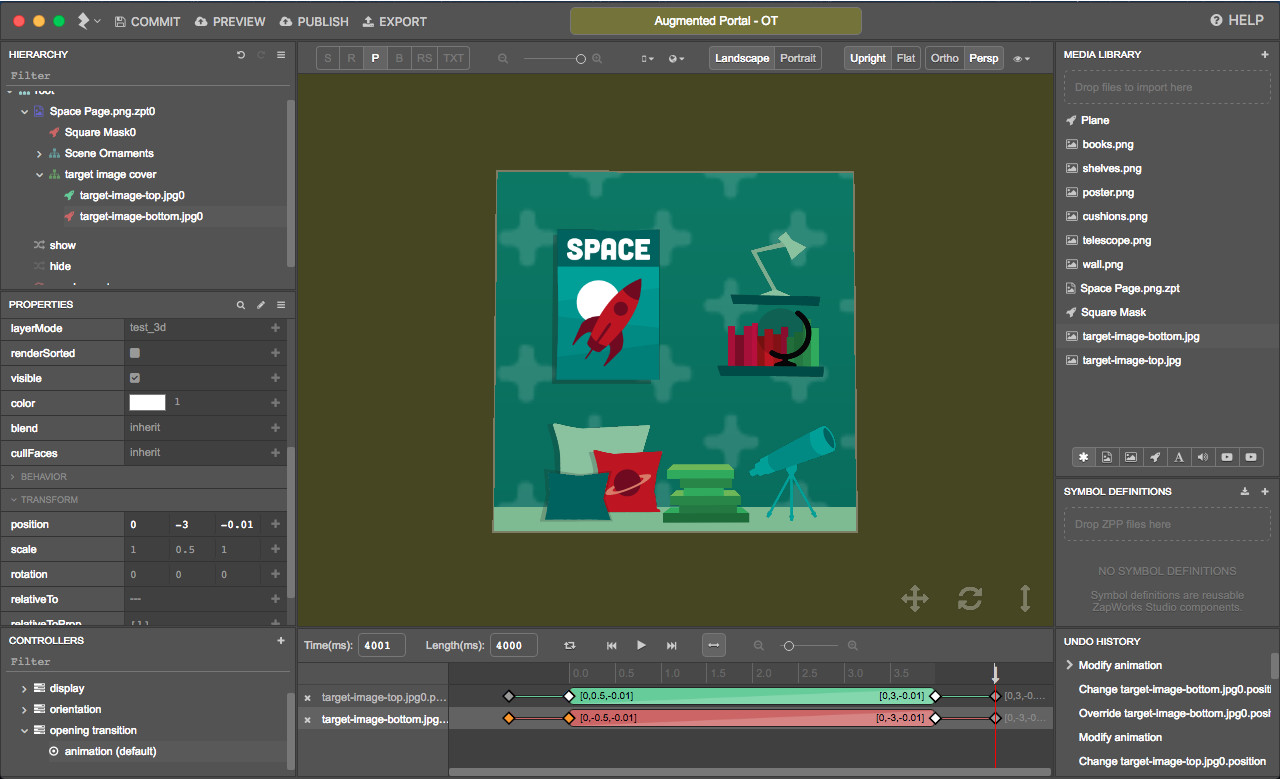
You can set the ‘Time’ to 0 and play the timeline to see how the transition looks.
To give the illusion that, as the top and bottom parts of the tracking image slide in opposite directions light progressively enters the room and illuminates its content, we will make the color of the ornaments change from black (as if there were not light) to normal (as if a light had entered the room).
14) Adding the color property
Add to the ‘animation’ timeline the color property of the ‘Scene Ornaments’ group.
15) Adjusting the color property
In the ‘animation’ timeline, set the time to -1 and change the value of the ‘Scene Ornaments’ group’s color to black (in the Color Picker window, make sure Normalised is set to R = 0, G = 0 and B = 0).
16) Create a transition block
In the ‘animation’ timeline, on the ‘Scene Ornaments.color’ line, create a transition block between the first and last keyframes.
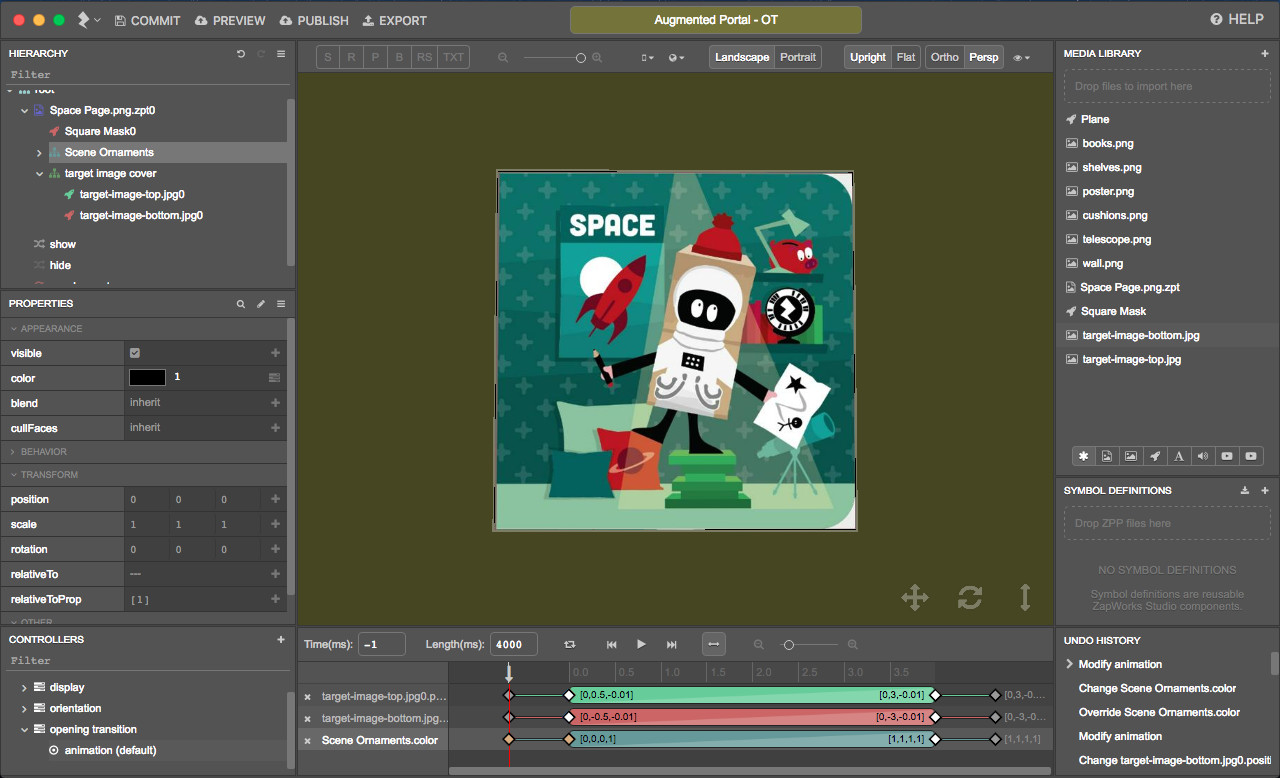
You can set the ‘Time’ to 0 and play the timeline to see how the transition looks now. It’s almost ready!
We will add a delay at the beginning of the timeline to make sure the user has time to see the tracking image on their device screen before the transition starts happening.
17) Delay the launch of the animation
In the ‘animation’ timeline, set the time to 1000ms (we’ve chosen to launch the animation after 1 second, but feel free to change this value!). For each property line, move the second keyframe from Time = 0ms to the cursor (red vertical line positioned in Time = 1000ms).

You can set the ‘Time’ to 0 and play the timeline one more time to see how it looks.
The opening transition is ready and all you need to do now is set it to play!
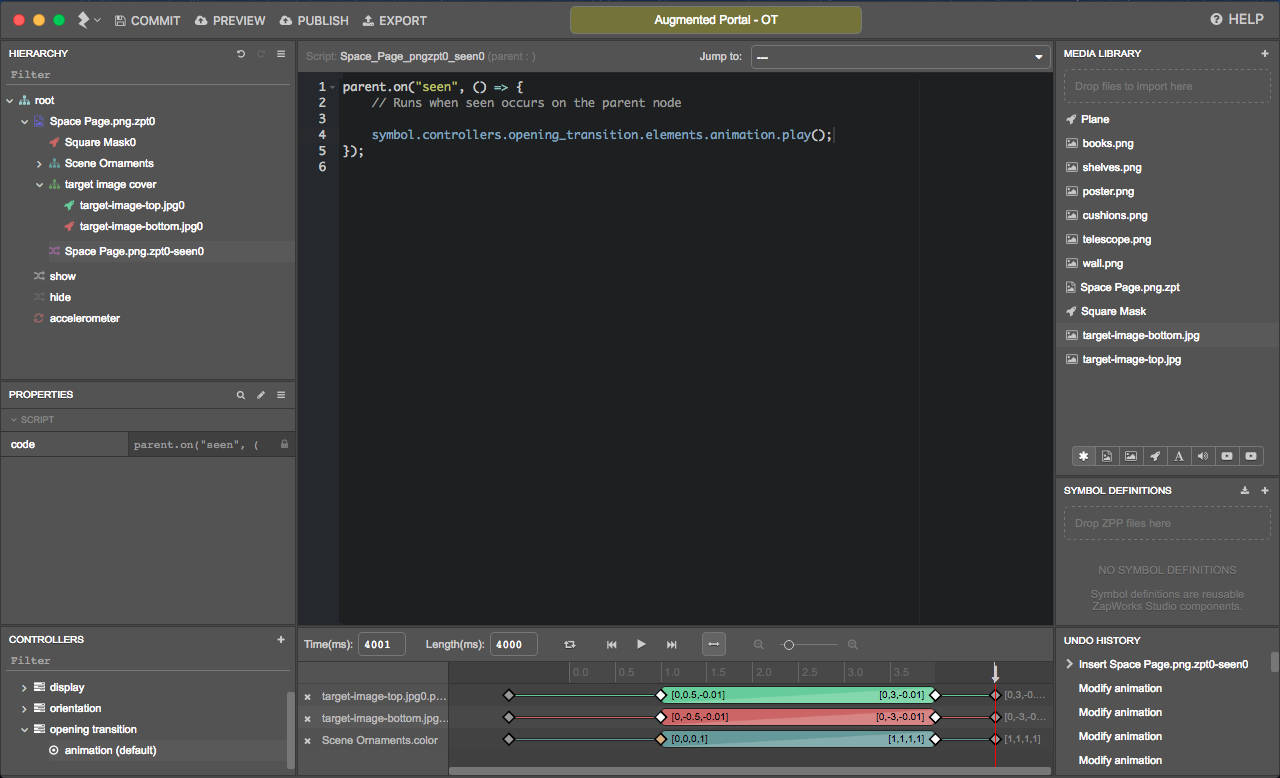
We’d like the transition to start playing when the tracking image is detected. Consequently, we’ll need to trigger it when a target image’s ‘seen’ event occurs (for more info, see the Target Events section of our Image Tracking article).
18) Add a ‘seen’ script
Add a ‘seen’ script to the target image node.
To add a ‘seen’ script to a target image node, right click on the target image node in the Hierarchy and select ‘New > Script > seen’.
19) Set the animation to play on seen
Set the ‘animation’ timeline to play within the ‘seen’ script.
To set a timeline to play within a script, drag the timeline from the Controllers panel into the script, inside the function and when releasing select ‘play’.
Congratulations!
The opening transition has been added to your experience and is now set to play as soon as the tracking image is detected! You can preview the updated experience by clicking the ‘Preview’ button in the top left of ZapWorks Studio. Scan the temporary zapcode generated and once the experience has been loaded, place the tracking image in front of the camera of your device.
Suggested Next Steps
Section titled “Suggested Next Steps”- Think about where else you could add a transition and how you could add them to your projects.
Further Reading
Section titled “Further Reading”To learn more about the concepts covered in this tutorial, please see the following pages: