Opening Transition - Penalty Shootout Game
Studio is being deprecated, please head over to the documentation page for Mattercraft, our most advanced 3D tool for the web, where you can find the most recent information and tutorials.

Difficulty Level: Beginner
Coding Knowledge Required: Beginner
Time to Complete: 30-40 minutes
Prefer to look at the final version? You can download the completed project along with the assets in Step 1 below.
In this step-by-step tutorial, you will learn how to use Studio’s timeline animation feature to create an impressive opening transition. Once you have then created your animations, you will learn how to set the timeline to play once the end-user has scanned the target image.
To show you how to add an opening transition to an existing project, the steps in this tutorial build on top of the penalty shootout game project.
This project uses the technique of animating the individual elements of a target image, giving the impression of the target image coming to life. We recommend that you try this technique in your own projects. To allow us to do so, we have used Photoshop to isolate each element of the tracking image (background, title, subtitle, and football) and exported them as PNG images.
Step by Step
Section titled “Step by Step”Part 1: Setting up the scene and creating a timeline
1. Set up project
Click here to download a zip file containing all the assets we’ll need for this experience.
Open Studio and import the Bezier Football Tutorial project previously downloaded. However, if you’ve already built this experience, you can simply open it in Studio.
2. Import asset files
Import into the Media Library the files that are in the assets folder previously downloaded.
We will create new groups in the Hierarchy to keep it clear and well organized.
3. Create ‘Content’ group
In the Hierarchy, right click on the tracking image node, select ‘New > Group’ and call it ‘Content’.
4. Drag experience assets into Content group
Drag the ‘Pitch.png0’ node along with the ‘Football’, ‘Goal’ and ‘Buttons’ groups inside the Content node, making sure they remain in the same order.
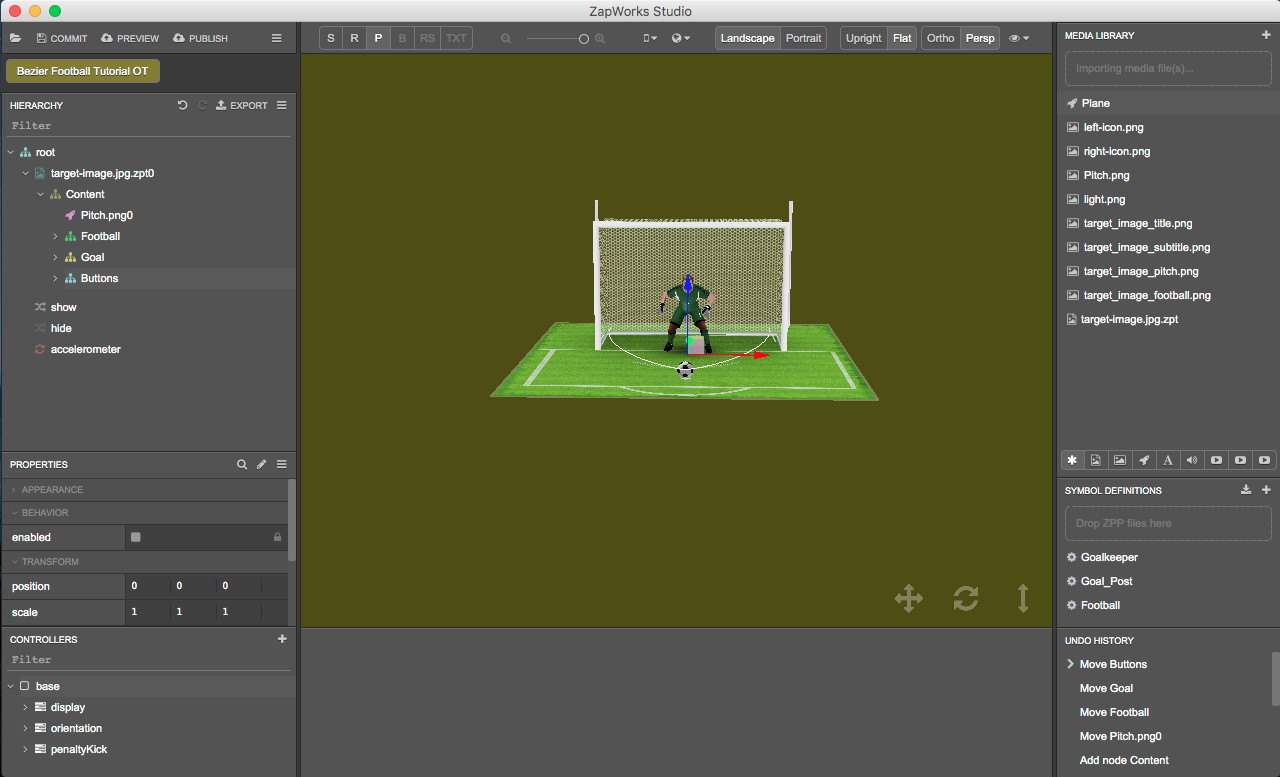
The ‘Content’ group contains the content that currently appears on screen when the experience is launched: the pitch, goal, goalkeeper, ball and left and right icons.
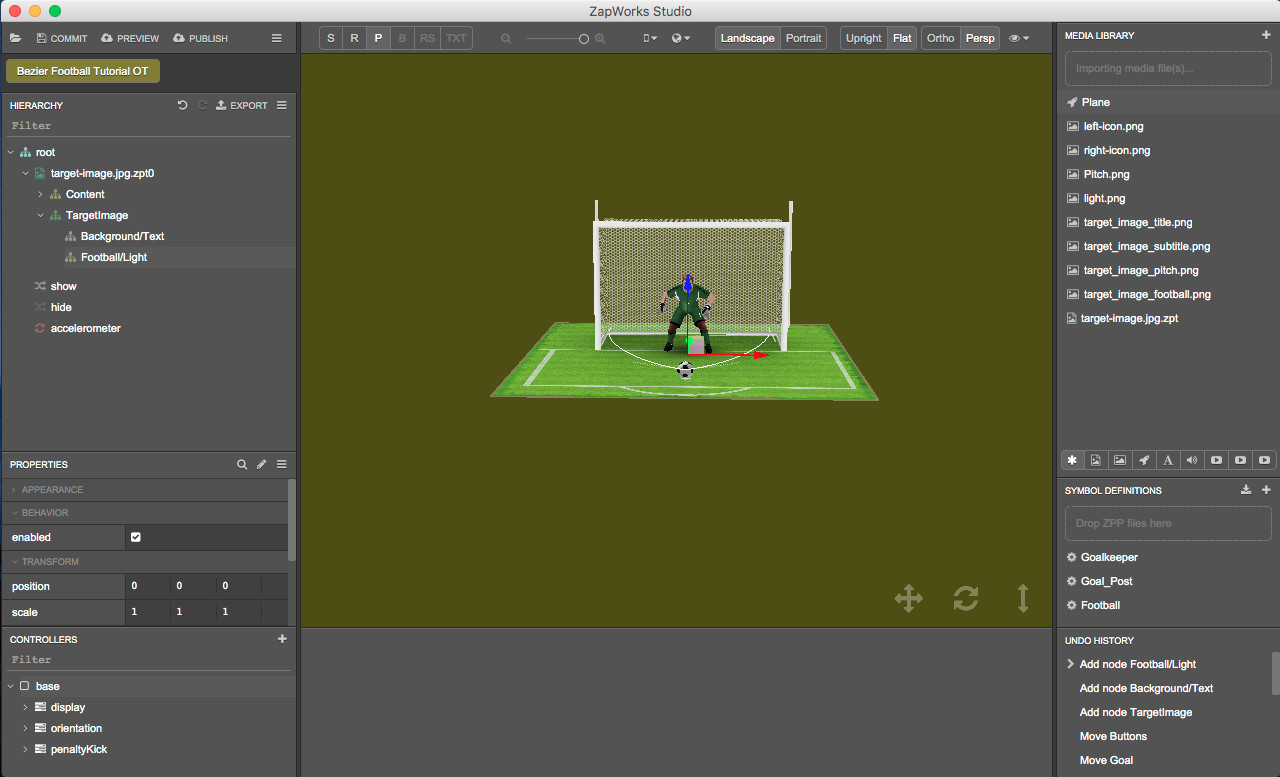
5. Create ‘TargetImage’ group
In the Hierarchy, inside the ‘tracking-image.jpg.zpt0’ add a new group called ‘TargetImage’.
To add a group inside a node, right click on the node, select ‘New > Group’ and name the new group.
We will add to this group the objects that will be used in the opening transition only: the elements of the tracking image and the flashlight.
6. Create ‘Background/Text’ group
Inside the ‘TargetImage’ node add a new group called ‘Background/Text’. This group will contain the objects that will vanish behind the flashlight and football: the target image’s background, title, and subtitle.
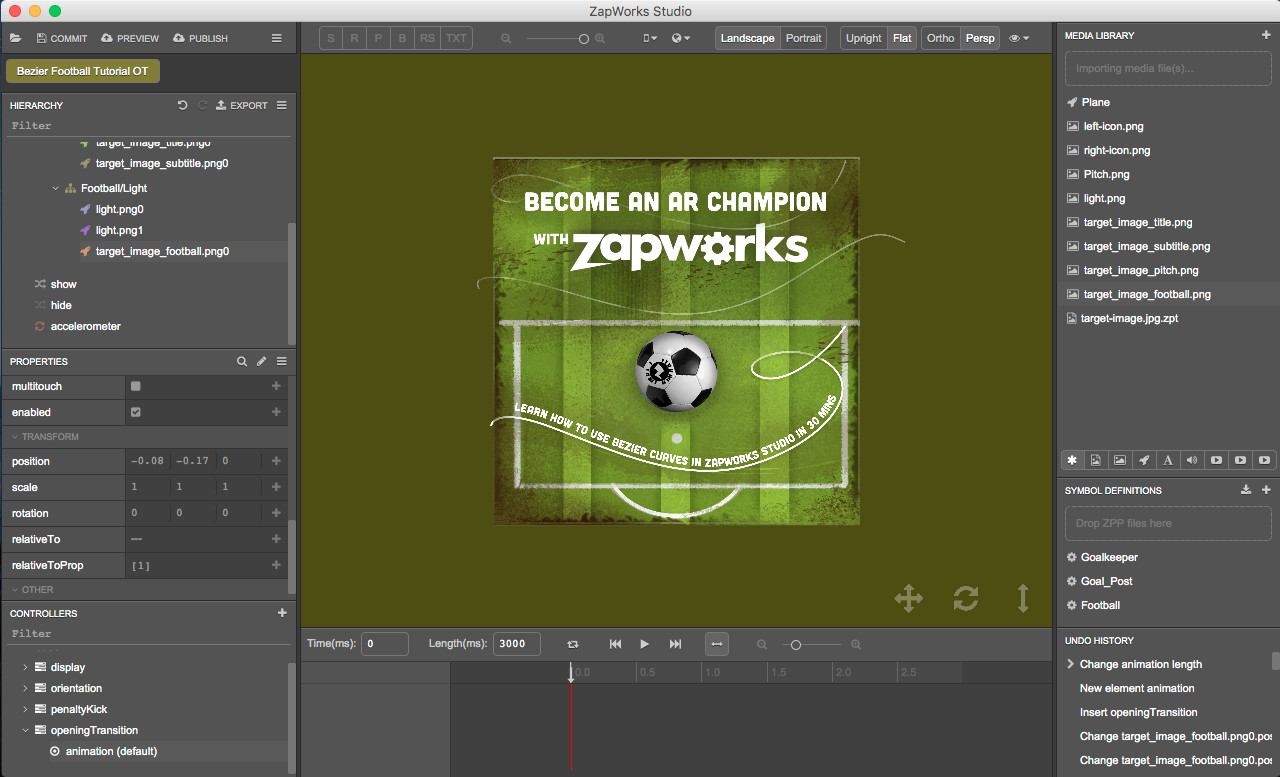
7. Create ‘Football/Light’ group
Again, inside the ‘TargetImage’ node add a new group called ‘Football/Light’. This group will contain the flashlights and football.
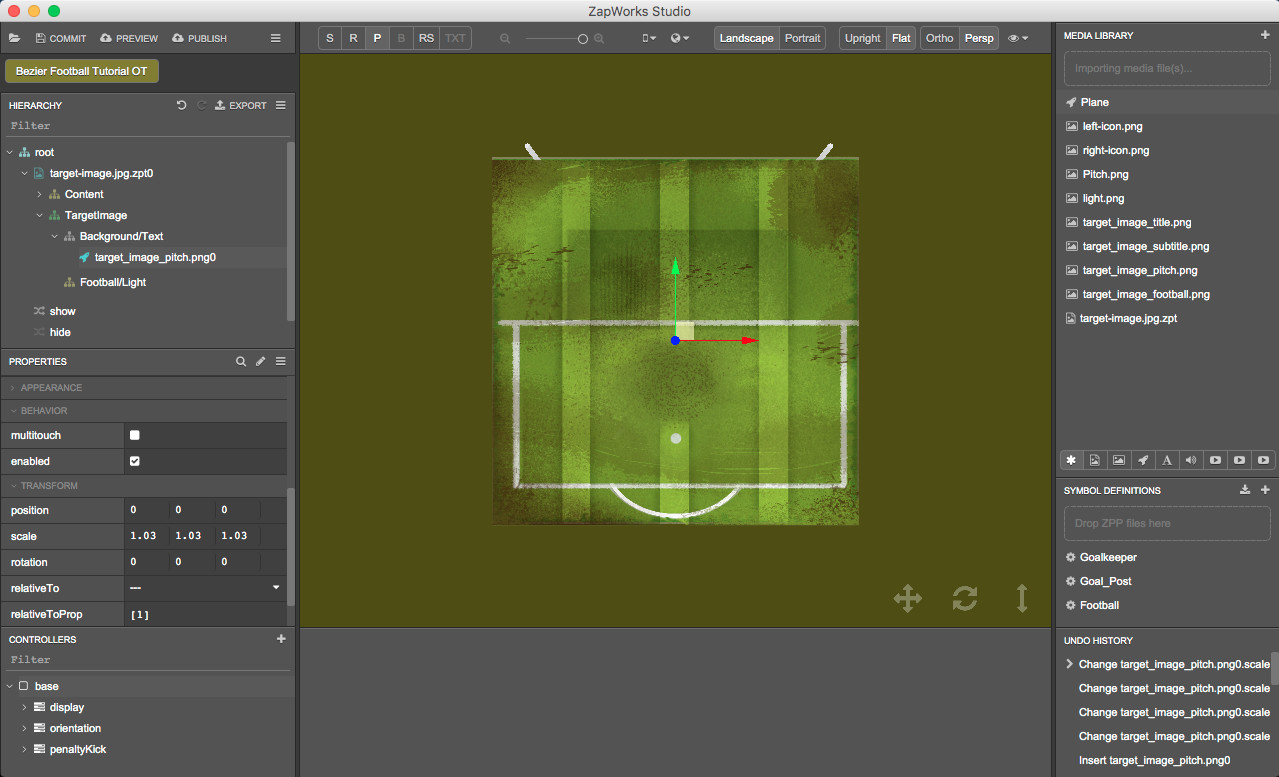
8. Drag pitch image into the ‘Background/Text’ group
Drag ‘target_image_pitch.png’ from the Media Library into the Hierarchy, within the ‘TargetImage > Background/Text’ group. Set the scale of the ‘target_image_pitch.png0’ to (1.03, 1.03, 1.03).
To change the value of an object’s property (scale, position, rotation, color etc.) select the object in the Hierarchy and in the Properties panel change the value of the property.
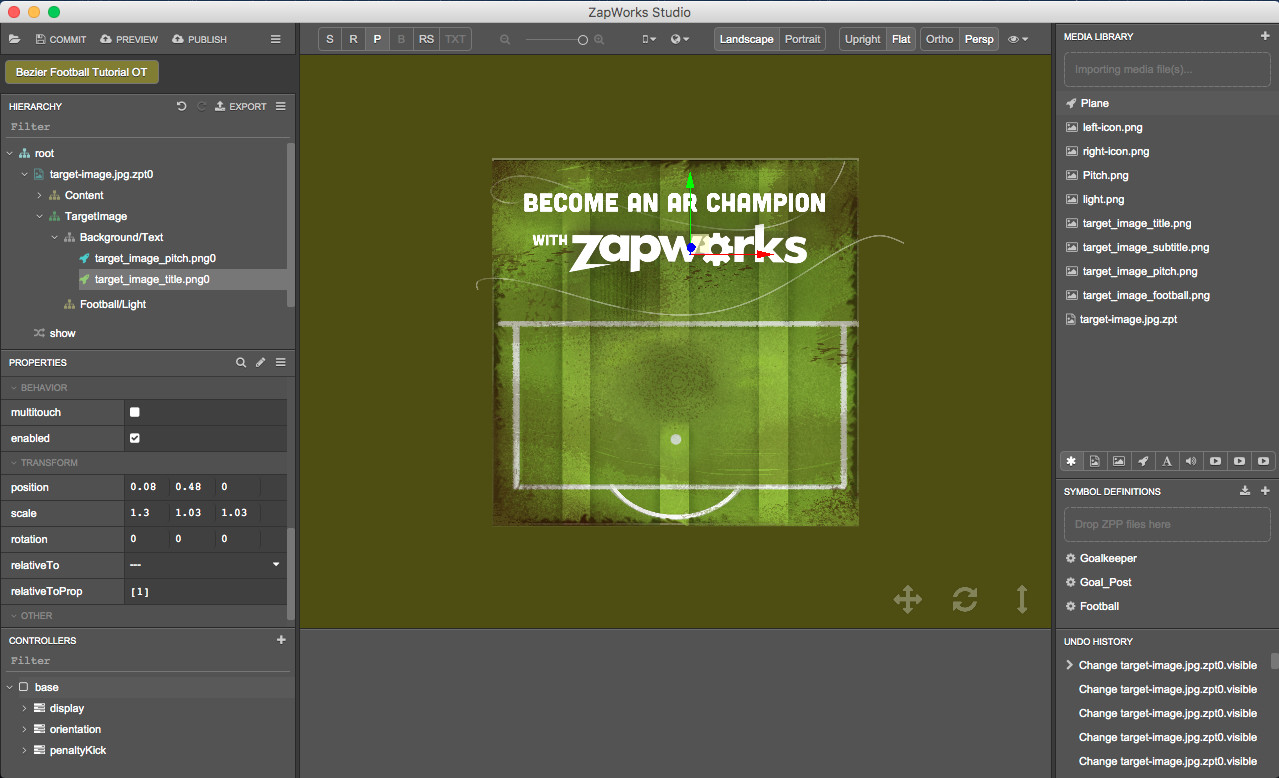
9. Drag title image into the ‘Background/Text’ group
Drag ‘target_image_title.png’ from the Media Library into the Hierarchy, within the ‘TargetImage > Background/Text’ group and place it below ‘target_image_pitch.png0’. For ‘target_image_title.png0’, change the values of:
- the position to (0.08, 0.48, 0);
- the scale to (1.3, 1.03, 1.03).
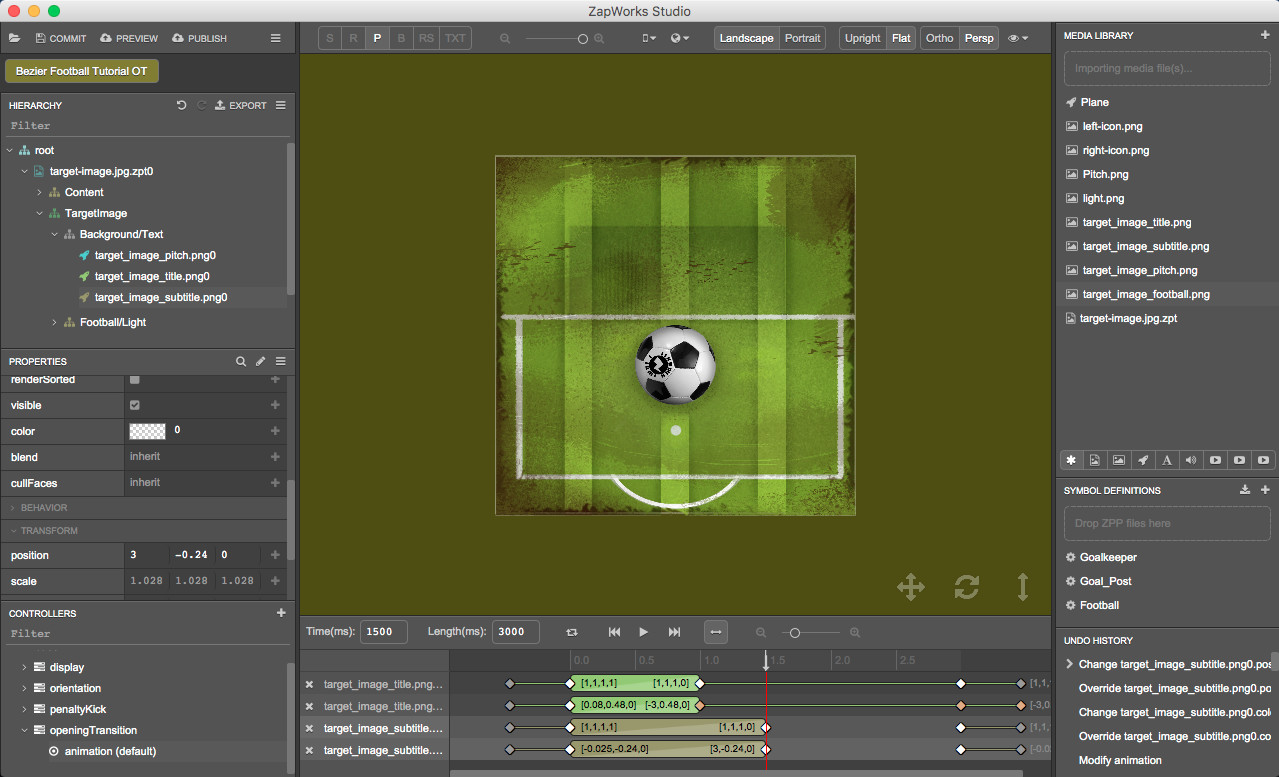
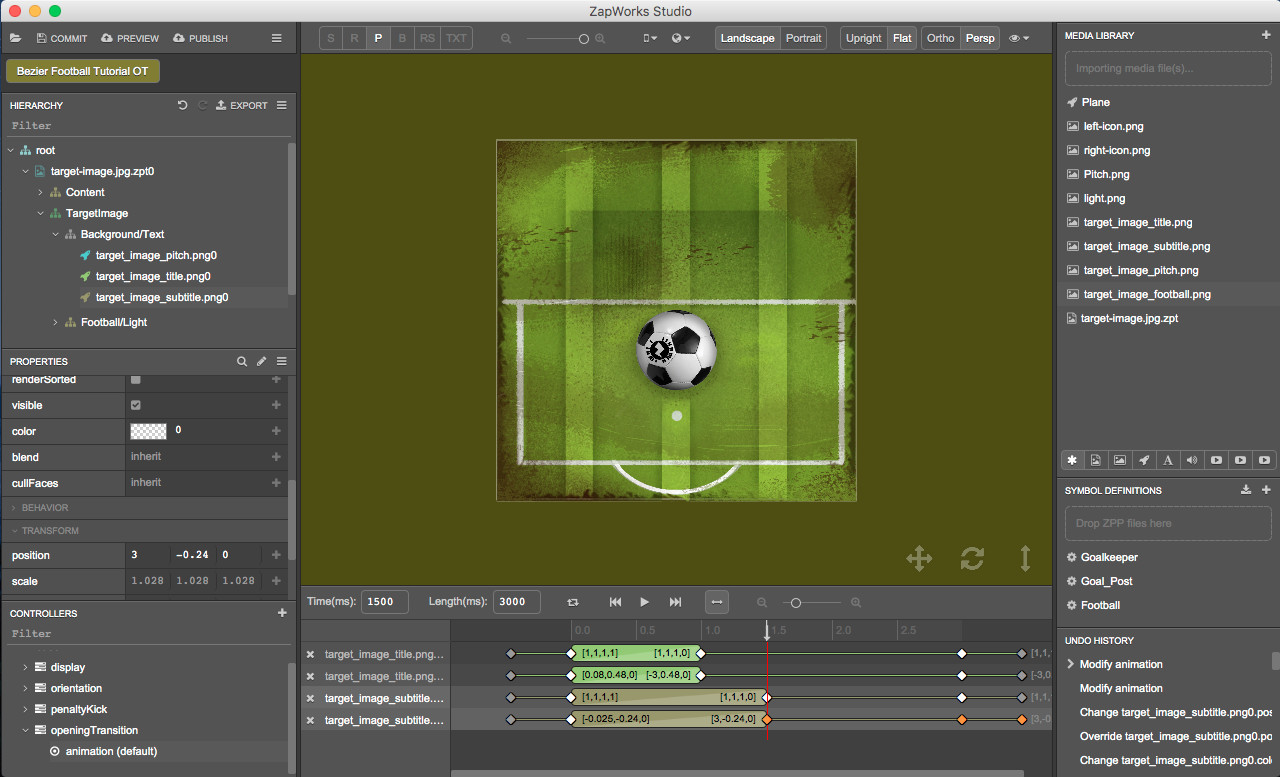
10. Drag subtitle image into the ‘Background/Text’ group
Drag ‘target_image_subtitle.png’ from the Media Library into the Hierarchy, within the ‘TargetImage > Background/Text’ group and place it below ‘target_image_title.png0’. For ‘target_image_subtitle.png0’, change the values of:
- the position to (-0.025, -0.24, 0);
- the scale to (1.028, 1.028, 1.028).

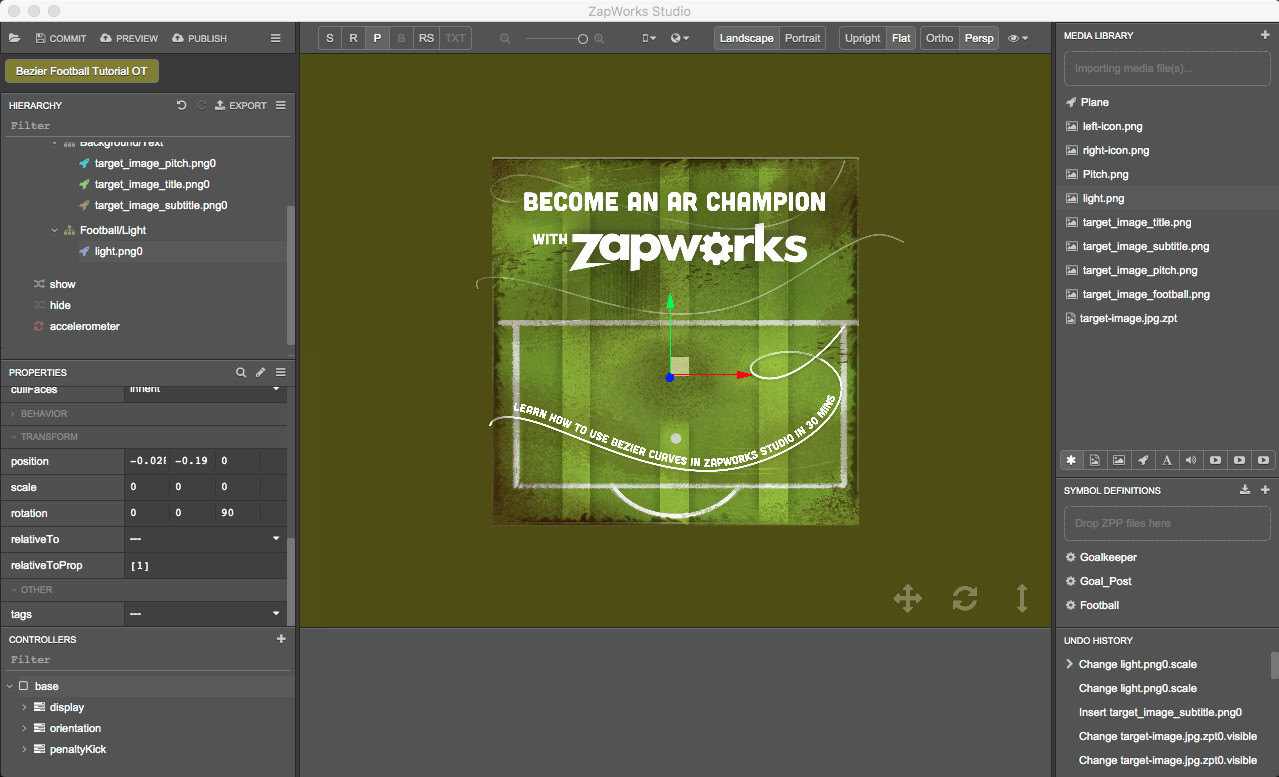
11. Drag light image into ‘Football/Light’ group
Drag ‘light.png’ from the Media Library into the Hierarchy, within the ‘TargetImage > Football/Light’ group. For ‘light.png0’ change the values of:
- the position to (-0.028, -0.19, 0);
- the scale to (0, 0, 0).
- the rotation to (0, 0, 90)
To give the illusion of a flashlight we’ll use the image twice. We position the second image on top of the first one and we make them rotate at different paces.
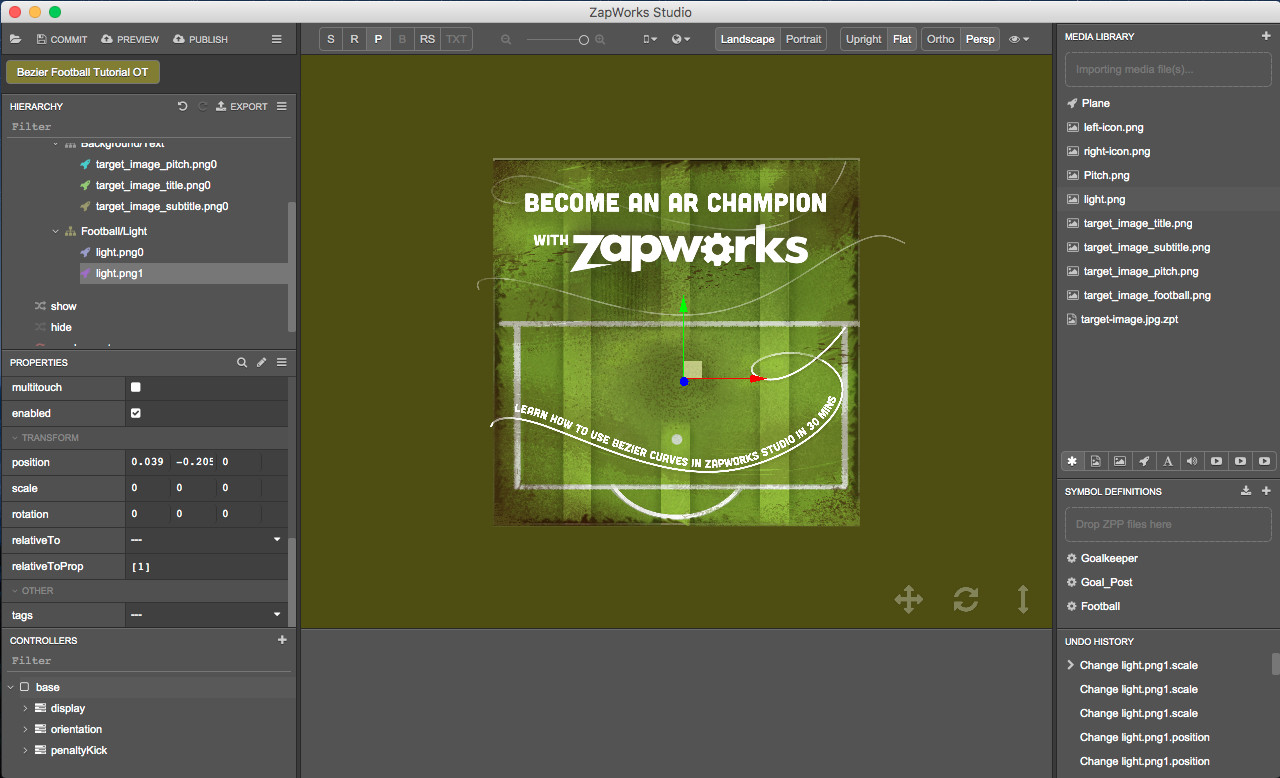
12. Drag a second instance of light image into ‘Football/Light’ group
Once more, drag ‘light.png’ from the Media Library into the Hierarchy, within the ‘TargetImage > Football/Light’ group and below ‘light.png0’. For ‘light.png1’ change the values of:
- the position to (0.039, -0.205, 0);
- the scale to (0, 0, 0).
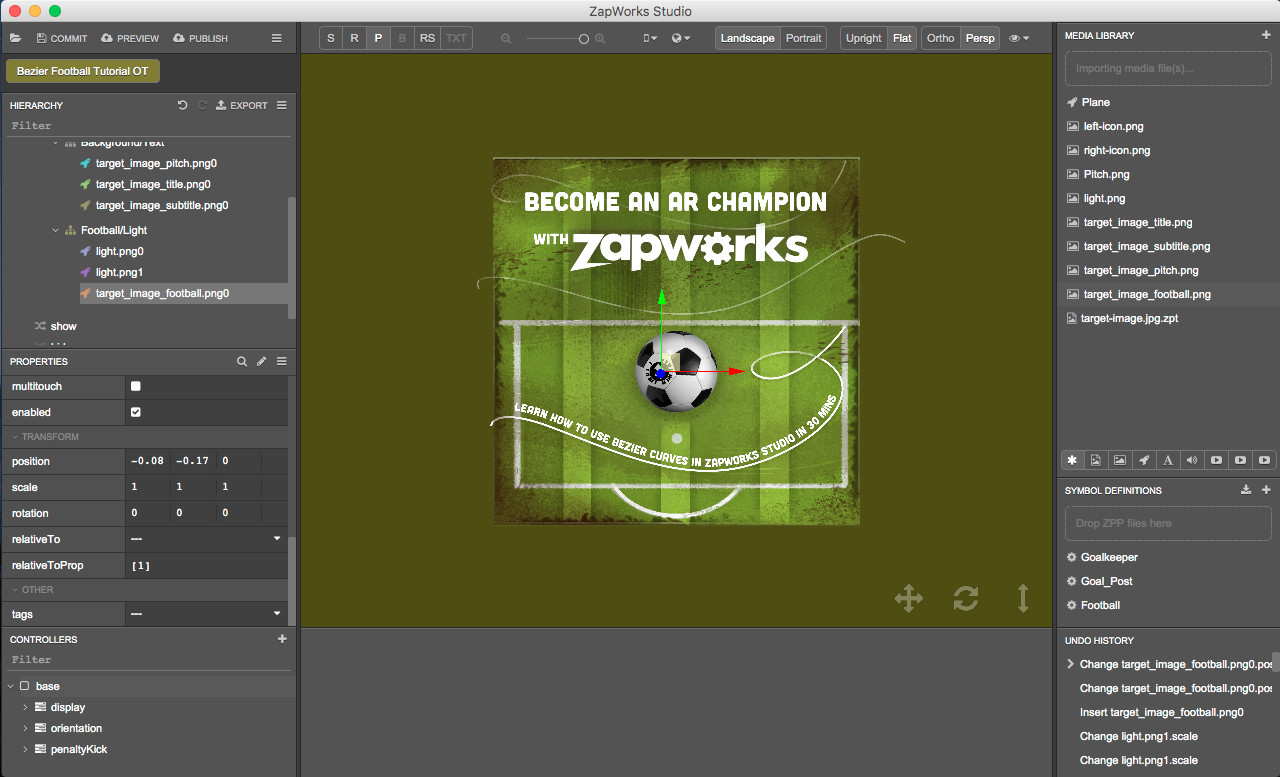
13. Drag football image into ‘Football/Light’ group
Drag ‘target_image_football.png’ from the Media Library into the Hierarchy, within the ‘TargetImage > Football/Light’ group, below ‘light.png1’. Change the values of:
- the position to (-0.08, -0.17, 0);
- the scale to (1, 1, 1).
We will now create the opening transition timeline.
14. Create ‘openingTransition’ controller
In the Controllers panel, click on the ‘+’ button next to ‘Controllers’, select ‘New Controller’ and give it the name ‘openingTransition’.
**15. Add timeline to ‘openingTransition’ controller **
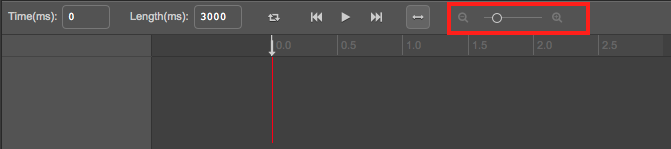
Add a timeline called “animation” to the ‘openingTransition’ controller. Set the length of the timeline to 3000ms.
To add a standalone timeline to a controller, right click on the controller, select ‘New Timeline’ and name it. To change the length of the timeline, in the timeline panel, update the value next to ‘Length’.
We recommend that you use the zoom in/out tool to make sure you see the entire timeline (between 0 to 3000ms).
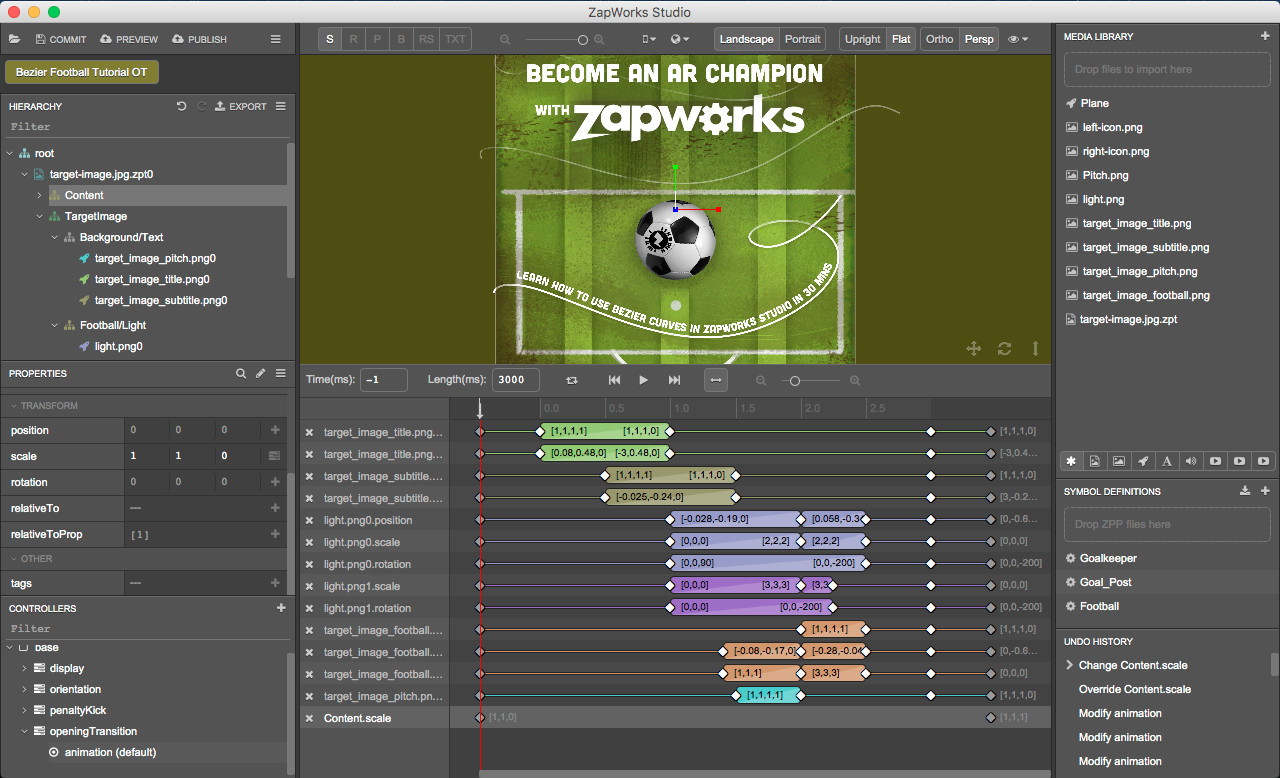
Part 2: Animating the target image’s title & subtitle
When a user points at the tracking image with their device, they should see the target image’s title sliding on the left and fading out followed by the subtitle sliding on the right and fading out as well.
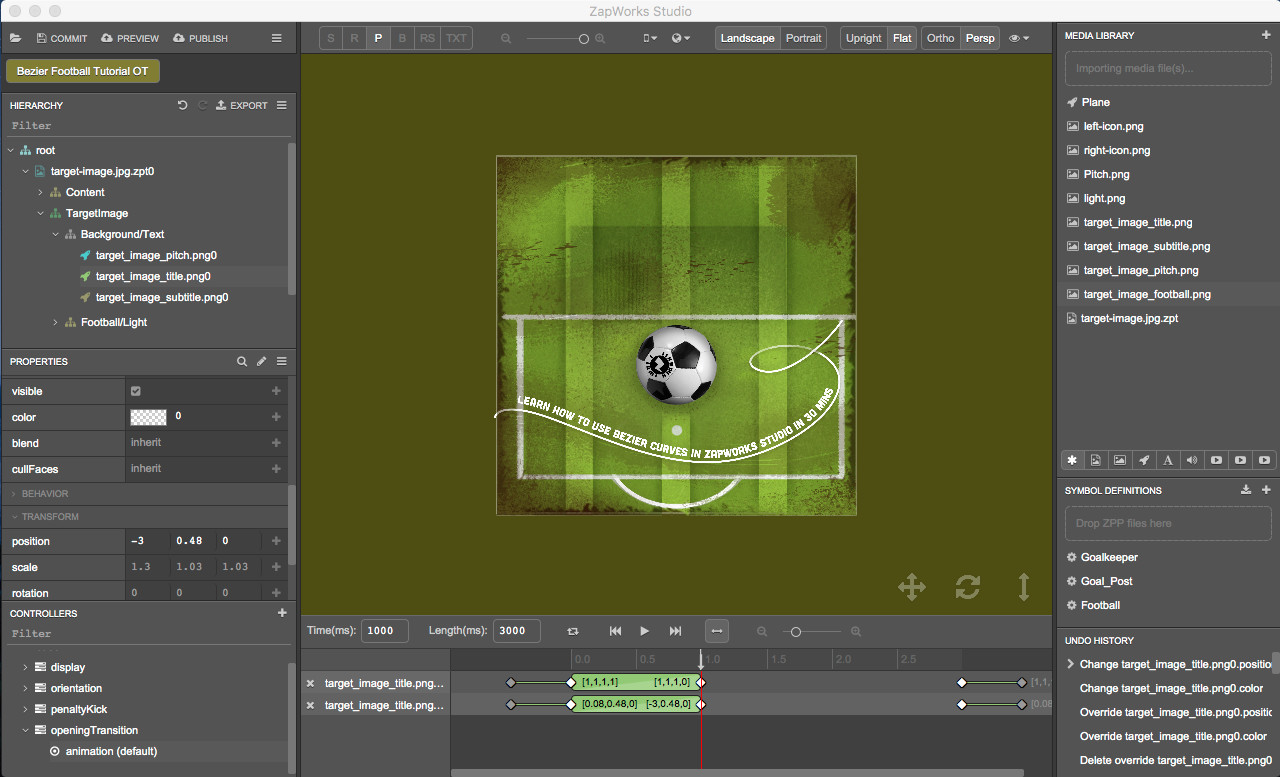
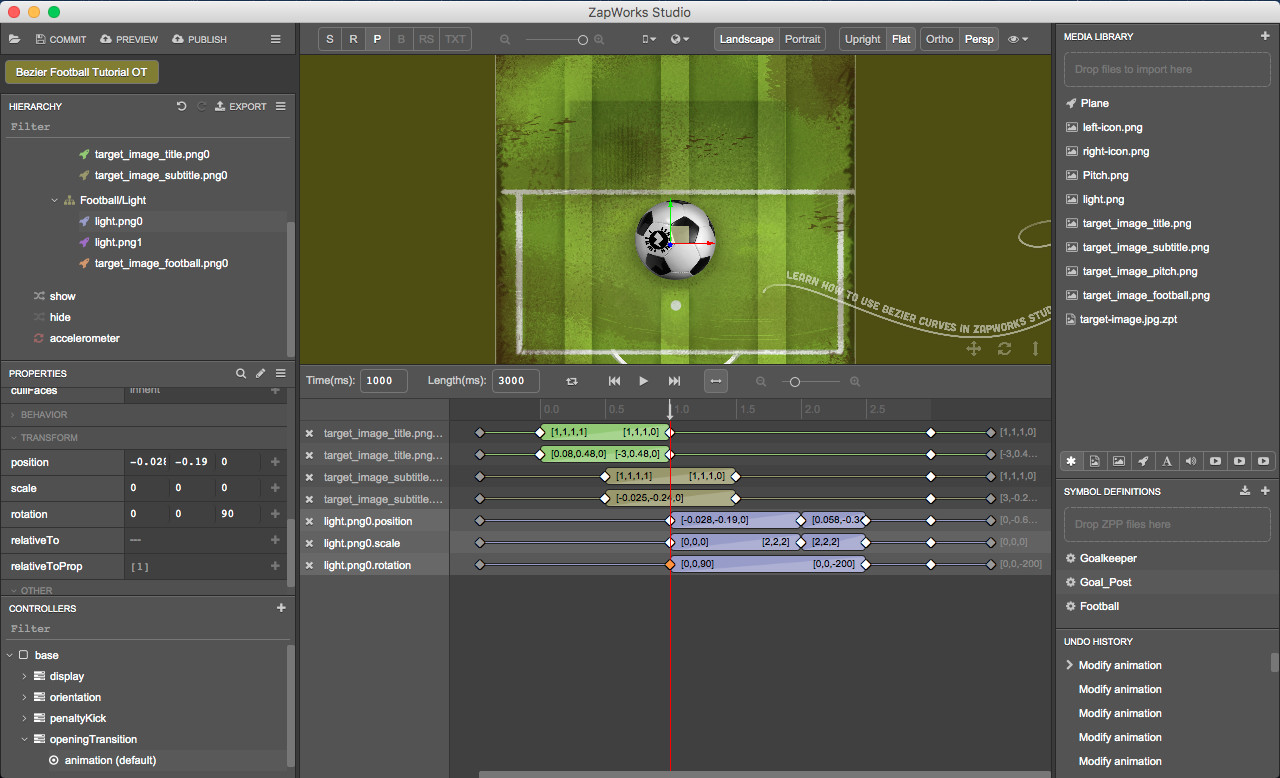
16. Add title image color and position properties to animation timeline
In the ‘animation’ timeline, set the time to 1000ms and add to the timeline the color and position properties of the ‘TargetImage > Background/Text > target_image_title.png0’. Change the values of:
- The color transparency to 0;
- The position to (-3, 0.48, 0).
To add an object’s property to a timeline, select the timeline in the Controllers panel, in the Hierarchy select the object and in the Properties panel click on the ‘+’ button next to each property that needs to be added to the timeline.
17. Create link between title image keyframes in animation timeline
For the ‘target_image_title.png0.color’ line in the timeline panel, make a link between the keyframes at 1000ms and 3000ms so that the color in 3000ms matches the color in 1000ms.
Creating a link between two keyframes will make their property values match. To create a link between two keyframes, drag over the two keyframes, right click on the line in between and select ‘Make link > with left/right value’. Selecting ‘Make link > with left value’ will make the property value of the keyframe on the right match the property value of the keyframe on the left. Selecting ‘Make link > with right value’ will make the property value of the keyframe on the left match the property value of the keyframe on the right. You can take a look at the Timelines tutorial to learn more about links.
Repeat this step for the ‘target_image_subtitle.png0.position’ line.
18. Add subtitle image color and position properties to animation timeline
In the ‘animation’ panel, set the time to 1500ms. Add to the timeline the color and position properties of ‘TargetImage > Background/Text > target_image_subtitle.png0’. Change the values of:
- The color transparency to 0;
- The position to (3, -0.24, 0)
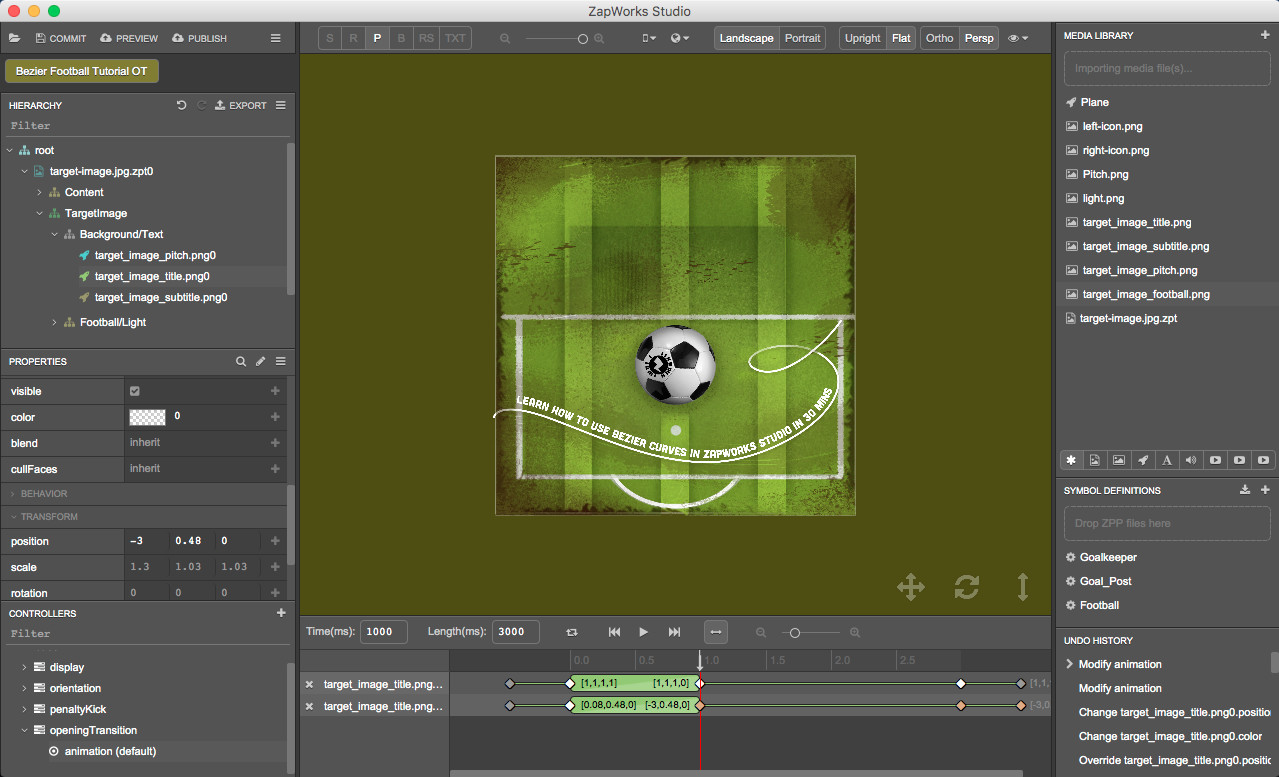
19. Create link between subtitle image keyframes in animation timeline
For both properties, in the timeline panel, create a link between the keyframes at 1500ms and 3000ms so that the property values in 3000ms matches the property values in 1500ms.
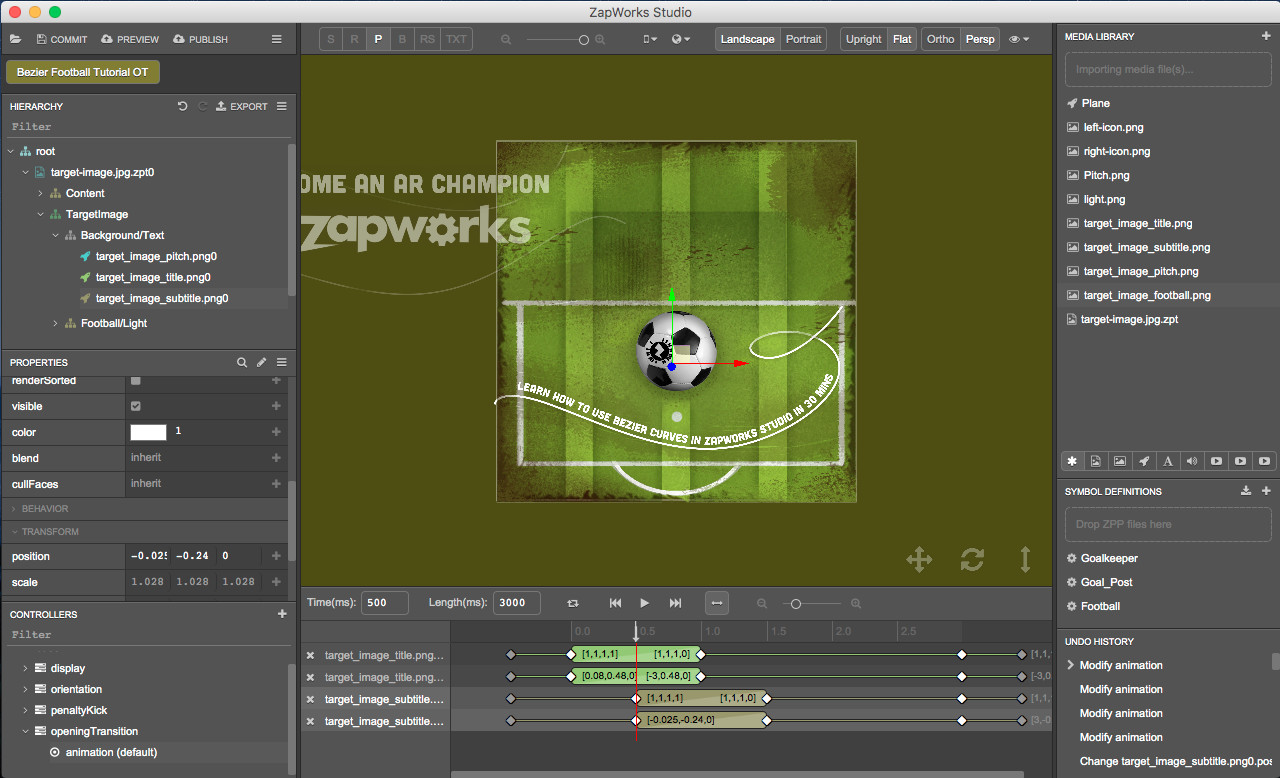
20. Move subtitle image start keyframes to 500ms
For both properties, drag the keyframe that is in 0ms to 500ms. Set the ‘Time’ to 500 since this will move the time handle to 500ms and drag the keyframe until it reaches the time handle’s red line.
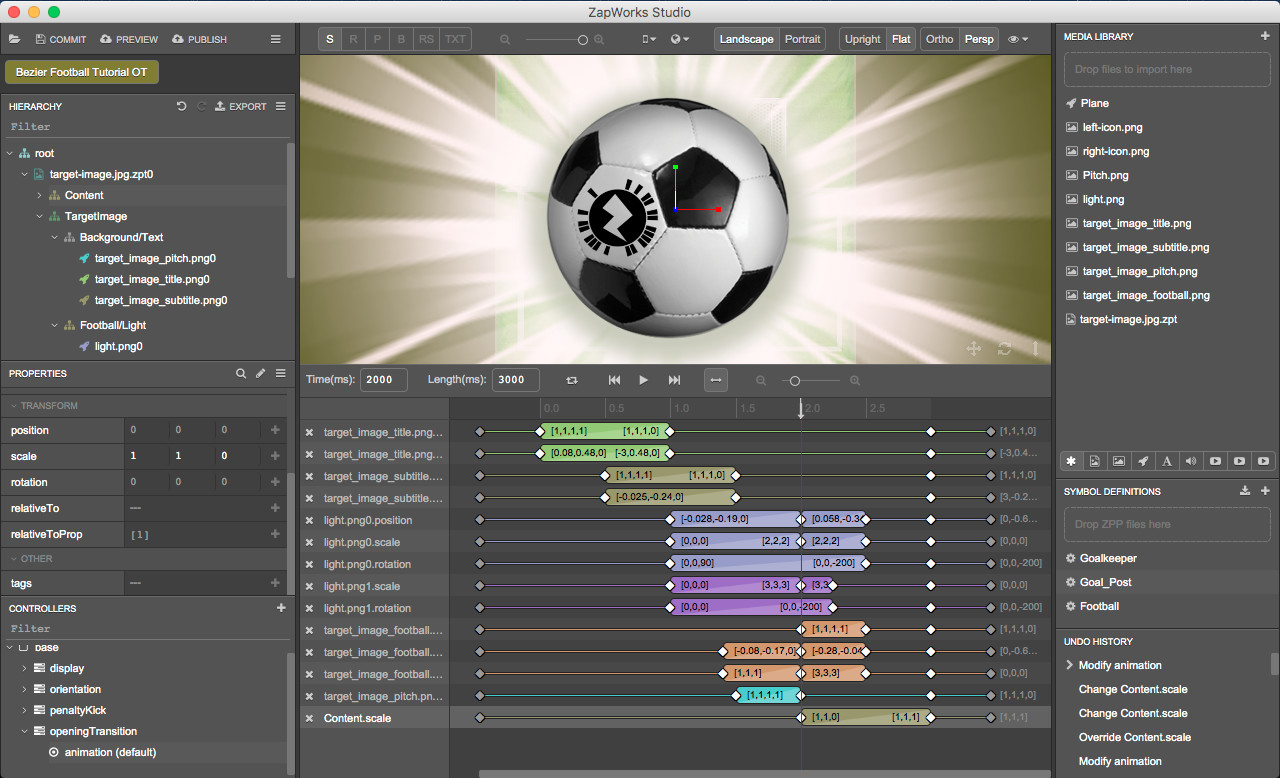
Part 3: Animating the flashlight
The tracking image’s title and subtitle have been set to vanish. We will now make the flashlights appear from behind the football.
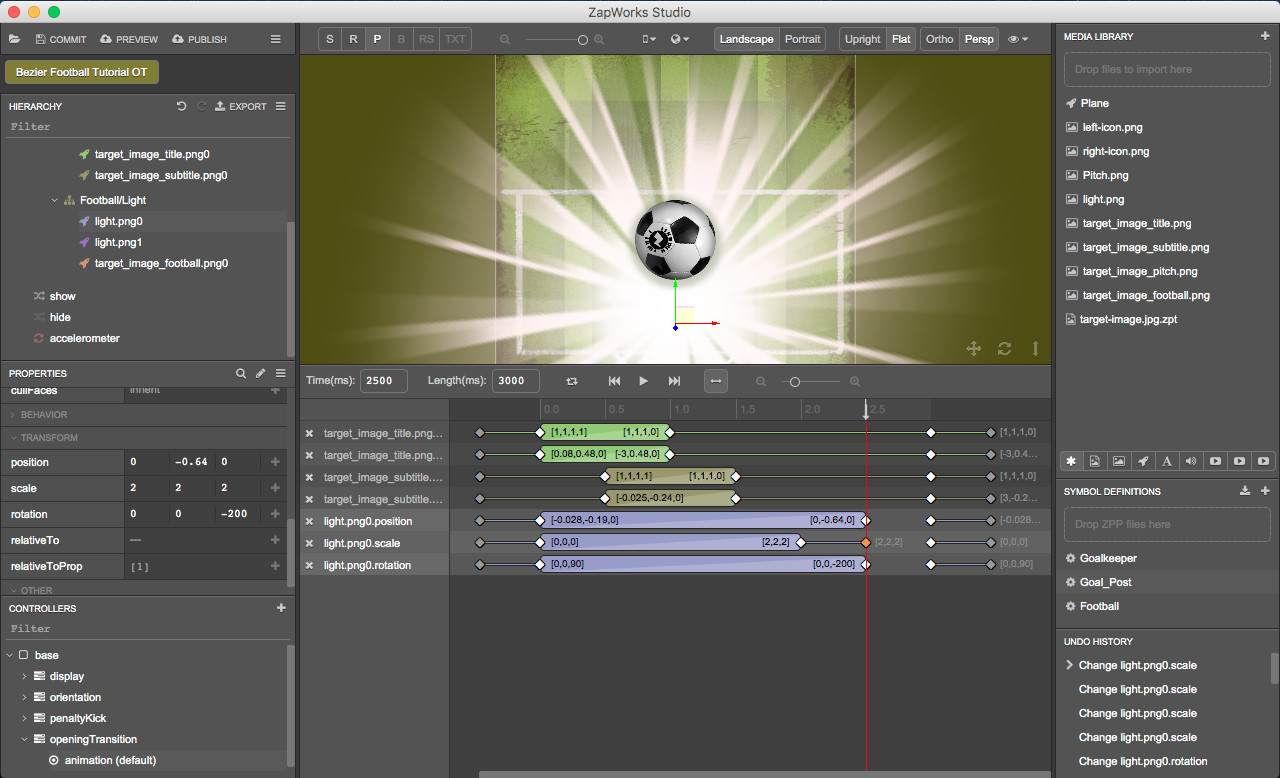
21. Add light image properties to animation timeline
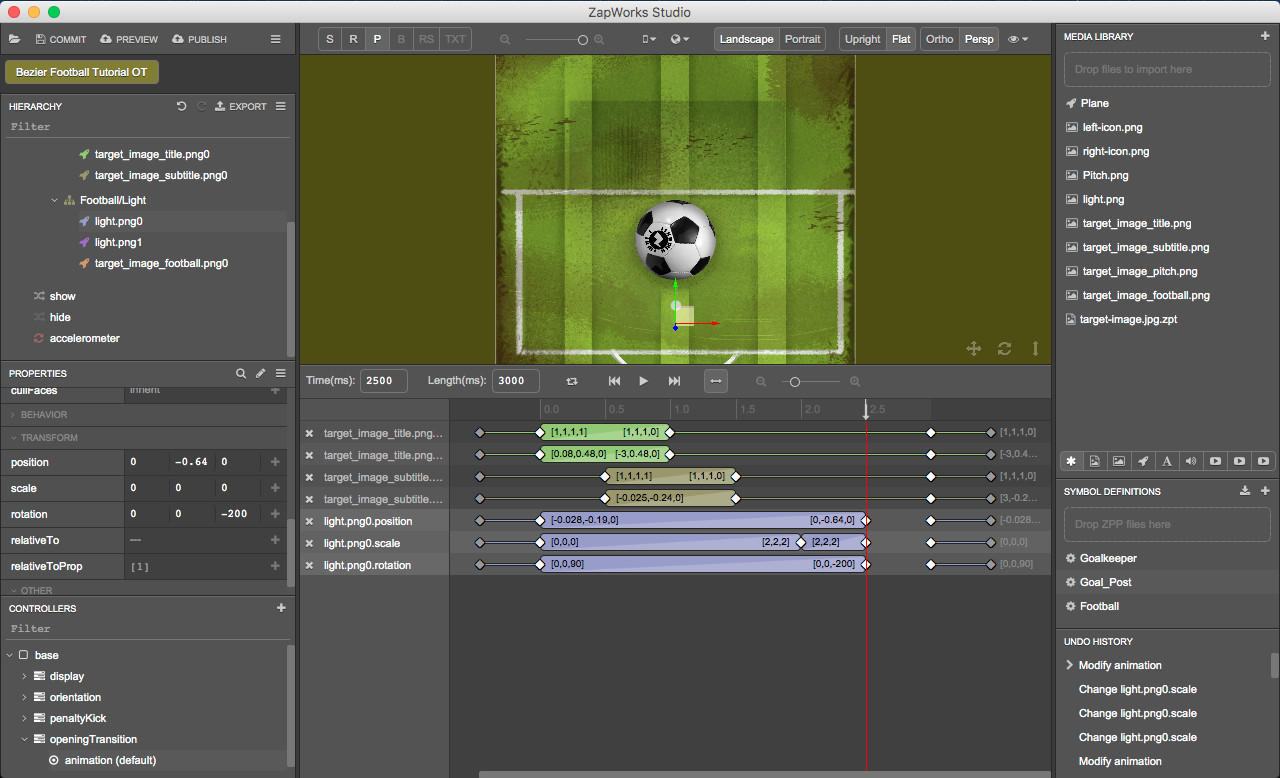
In the ‘animation’ timeline, set the time to 2500ms and add to the timeline the position, scale and rotation properties of ‘TargetImage > Football/Light > light.png0’. Change the values of:
- the position to (0, -0.64, 0);
- the rotation to (0, 0, -200).
Now set the time to 2000ms and change the values of:
- the scale to (2, 2, 2).
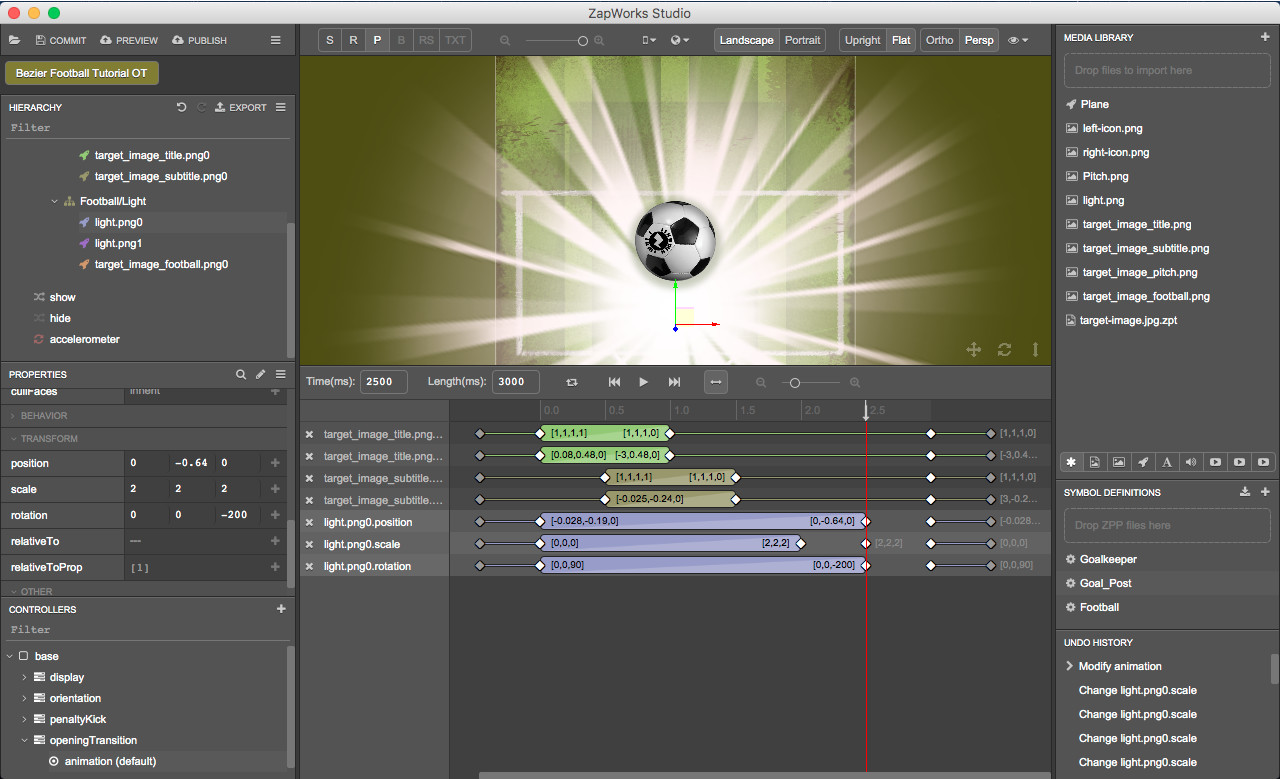
22. Create keyframe on light image scale property
Set the time to 2500ms again and on the ‘light.png0.scale’ property line, right click and select ‘Add Keyframe at Current Time’. This will automatically create a link between the keyframe just created and the previous one.
23. Set scale of light image property to disappear
Since we want to set the scale back to (0,0,0) here, we will need to delete the link and replace it with a transition block. Right-click on the link between the two keyframes and select ‘Delete Link’.
24. Create transition between light image scale keyframes
In the ‘animation’ timeline, set the scale of ‘light.png0’ to (0,0,0) at 2500ms. Create a transition between the keyframes at 2000ms and 2500ms.
To create a transition block between two keyframes, drag over the keyframes (they should become yellow), right click on the line between the keyframes and select ‘Make transition’.
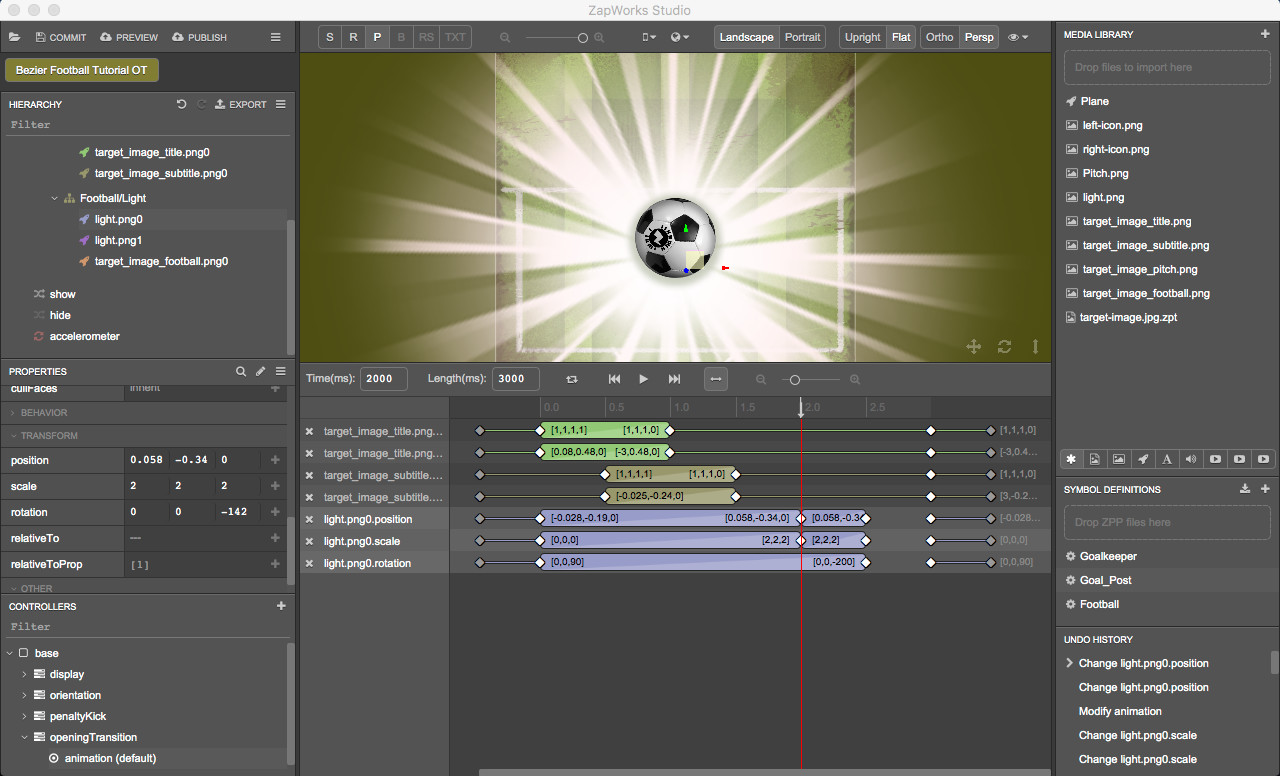
25. Set light position at 2000ms
Set the time to 2000ms in the ‘animation’ timeline and set the position of ‘light.png0’ to (0.058, -0.34, 0).
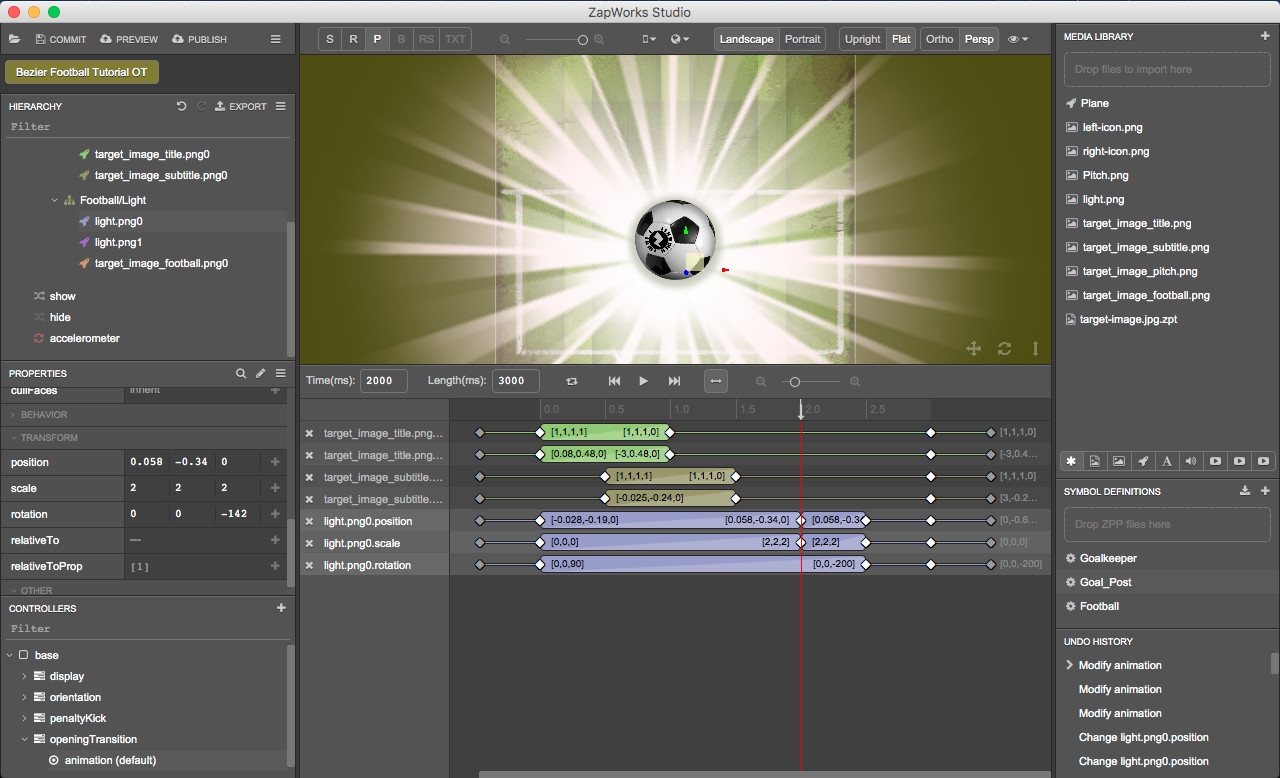
26. Create link between light position keyframes
In the timeline panel, on the ‘light.png0.position’ line, create a link between the final 3 keyframes so that the property values of the second and last keyframes match the property value of the first keyframe.
Repeat this step for ‘light.png0.scale’ and ‘light.png0.rotation’.
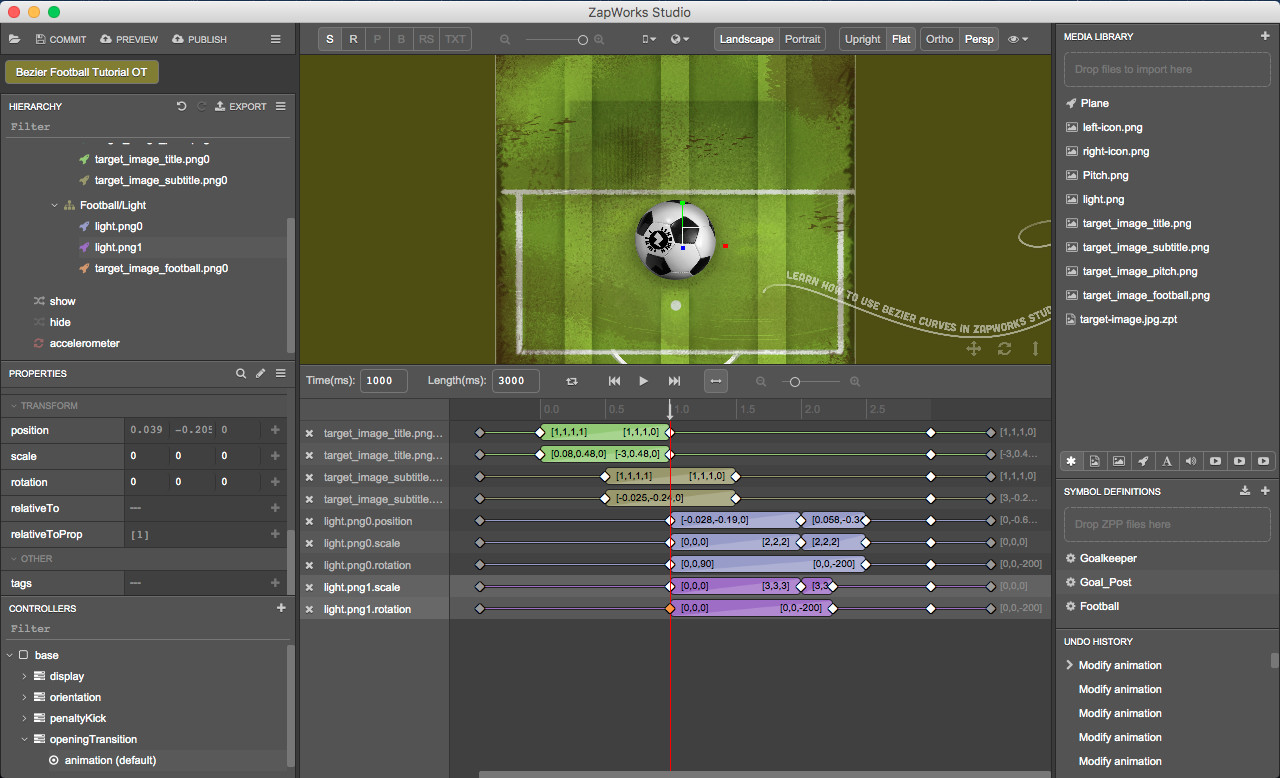
27. Move light position keyframe to start at 1000ms
On the ‘light.png0.position’ line in the ‘animation’ timeline, drag the keyframe at 0ms from 0ms to 1000ms.
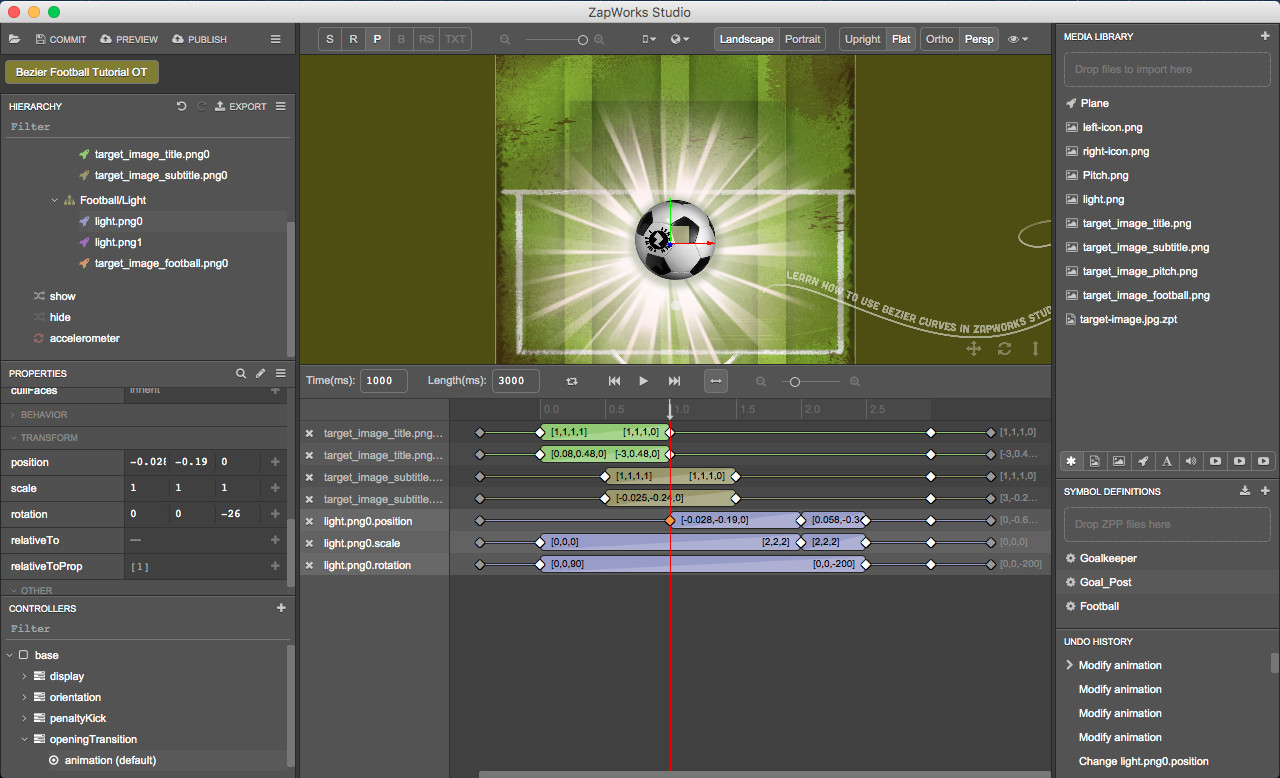
Repeat this step for ‘light.png0.scale’ and ‘light.png0.rotation’.
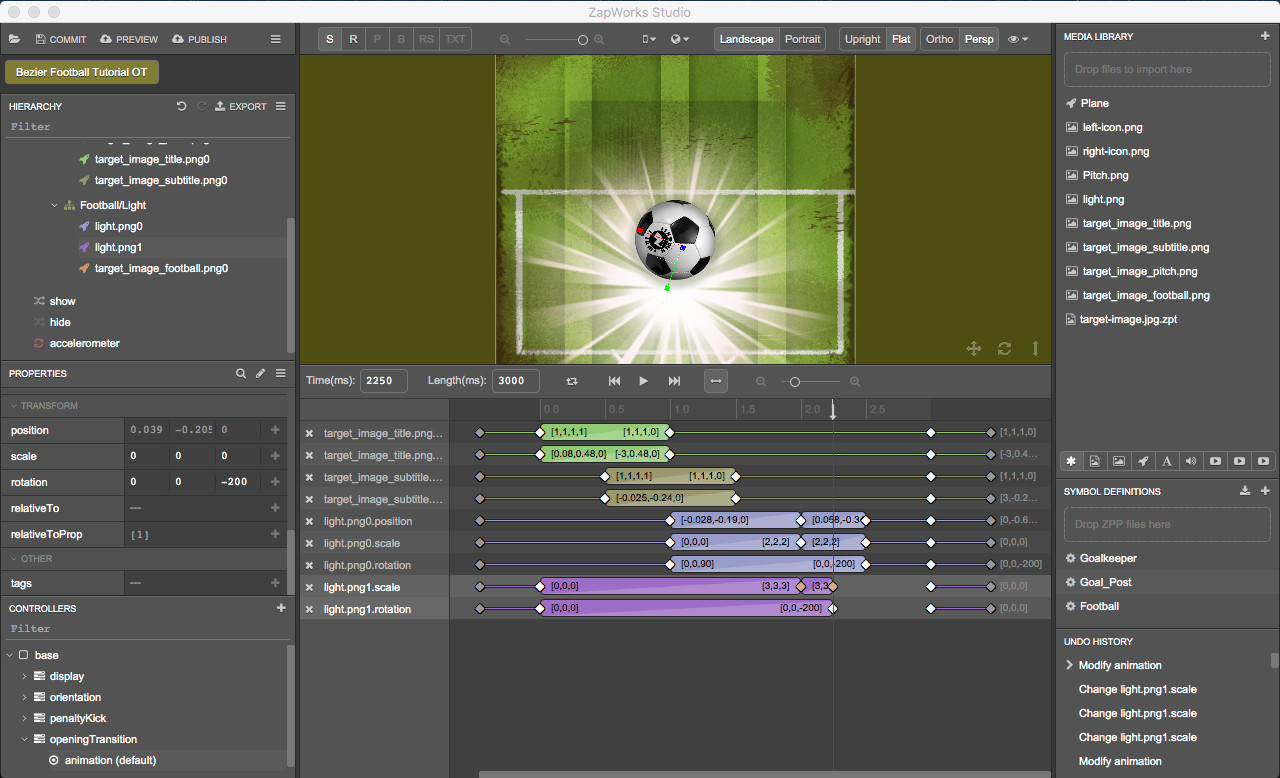
28. Add light.png1 scale and rotation properties to timeline
In the ‘animation’ timeline, set the time to 2250ms and add to the timeline the scale and rotation properties of ‘TargetImage > Football/Light > light.png1’. Change the rotation value to (0, 0, -200).
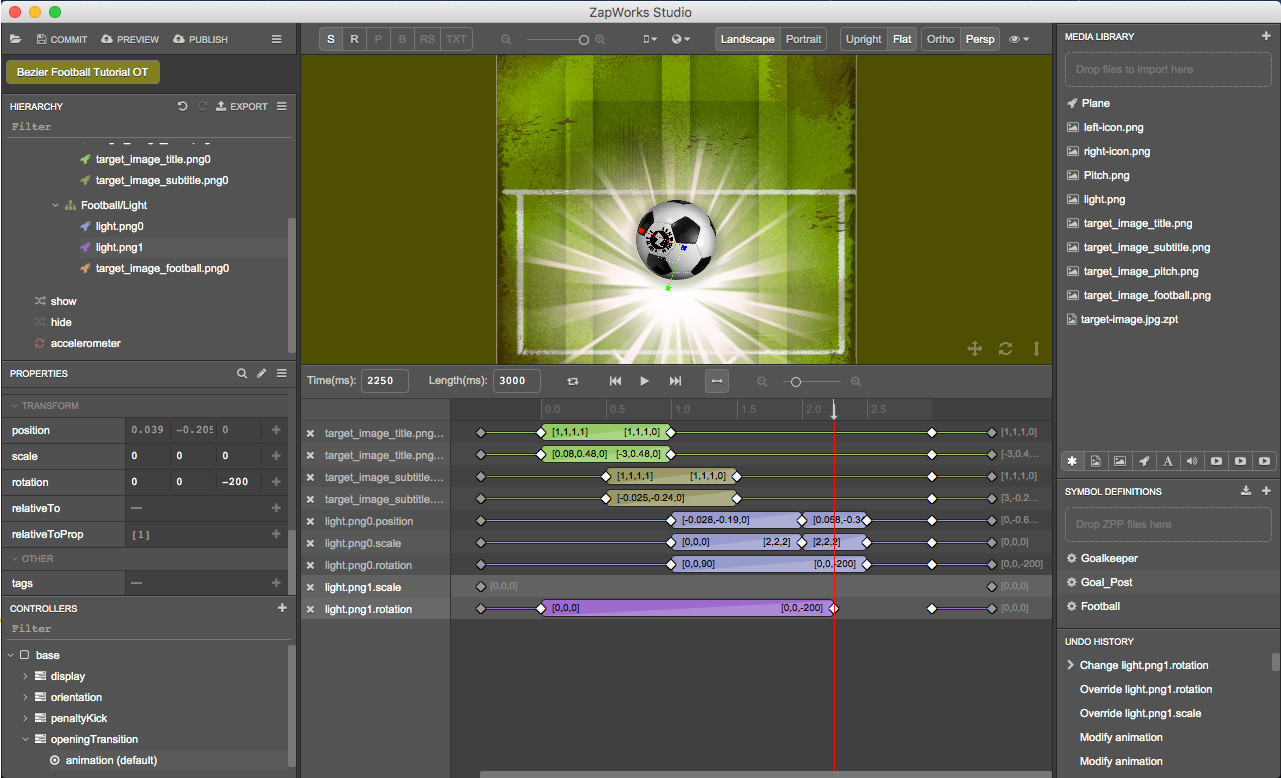
29. Set light position at 2000ms
In the ‘animation’ timeline at 2000ms, set the scale of ‘light.png1’ to (3 ,3 ,3).
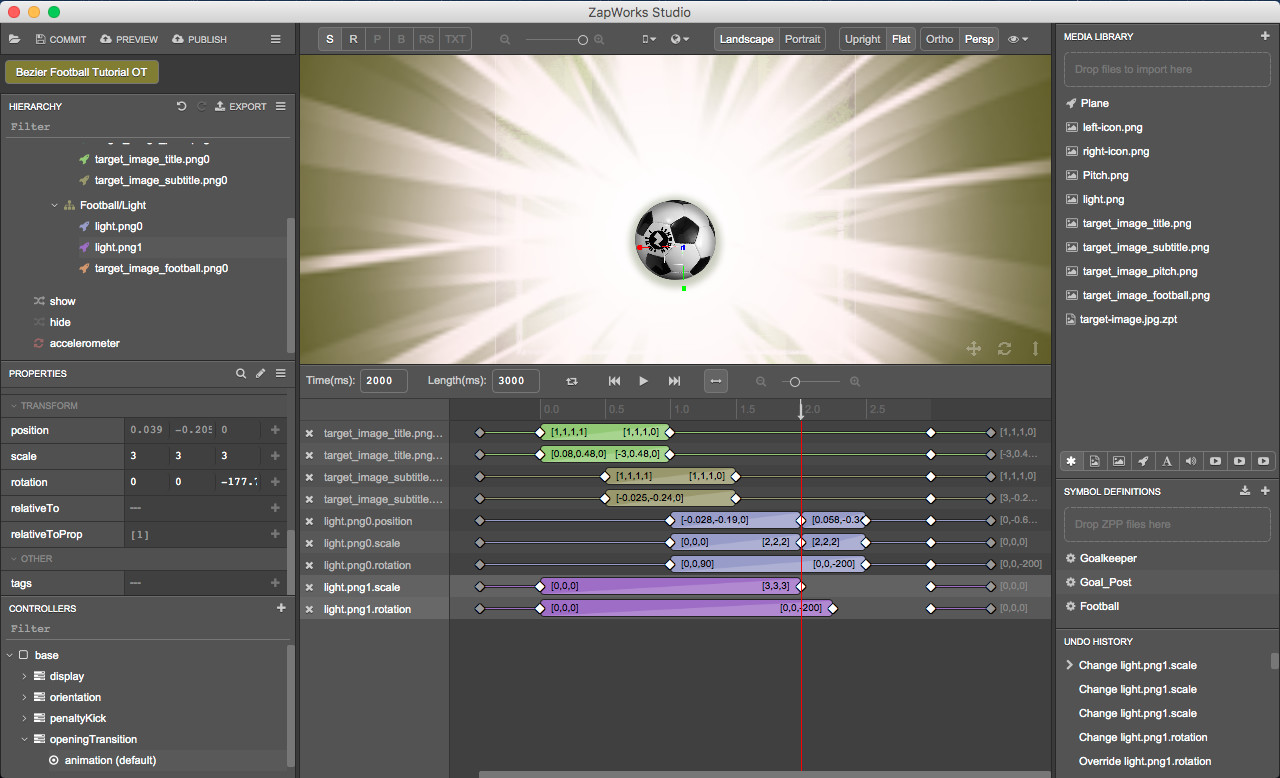
30. Create keyframe on light scale property
In the timeline panel, set the ‘Time’ to 2250ms. On the ‘light.png1.scale’ line, right click and select ‘Add Keyframe at Current Time’.

31. Create transition block on light scale property
Since we want to set the scale back to (0,0,0) here, we will need to delete the link and replace it with a transition block. Delete the link between the two keyframes.
With the ‘light.png1’ node still selected in the Hierarchy, set the scale to (0,0,0). Drag over the current keyframe (at 2250ms) and the previous one (at 2000ms), right click on the line in between the keyframes and select ‘Make Transition’.
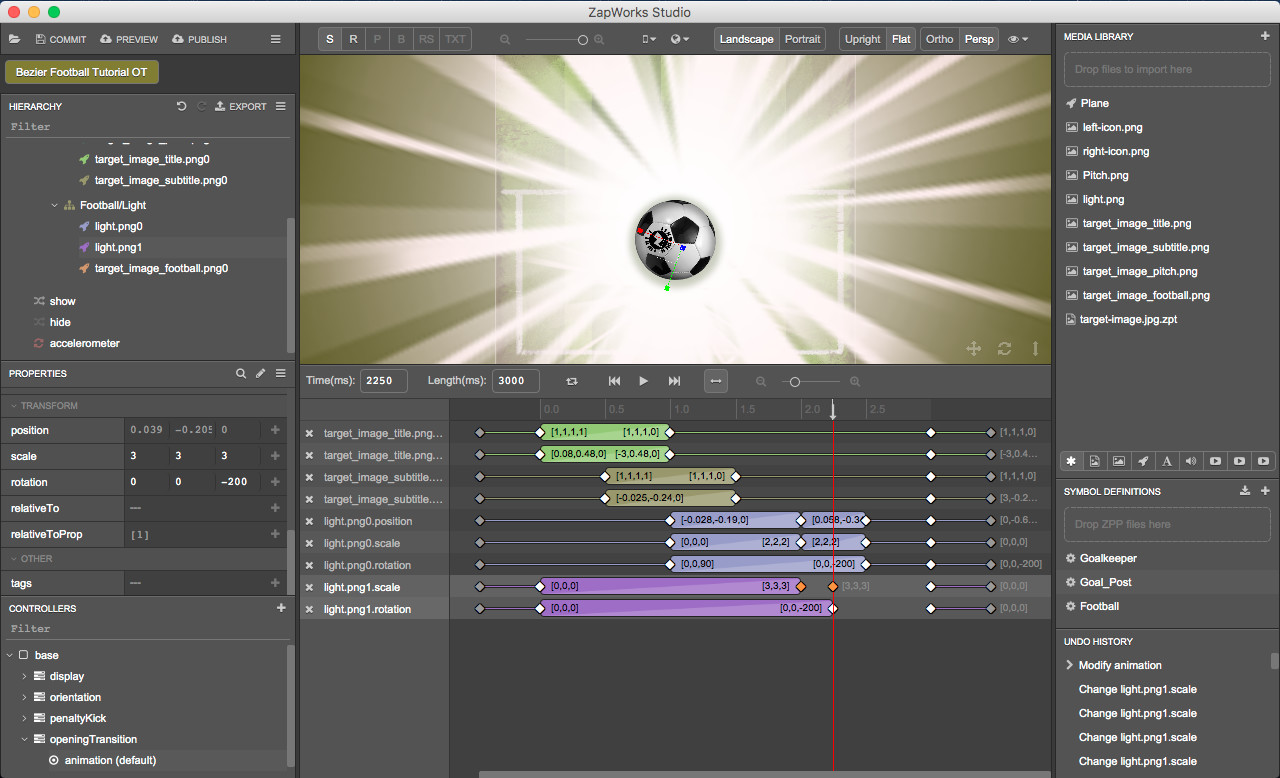
32. Create link between final three light scale property keyframes
In the timeline panel, on the ‘light.png1.scale’ line, drag over the final 3 keyframes, create a link between them so that the property values for the second and third keyframes match the property value of the first keyframe.

33. Create link between final three light rotation property keyframes
Repeat the previous step for ‘light.png1.rotation’.

34. Move light scale and rotations keyframes to 1000ms
In the timeline panel, on the ‘light.png1.scale’ line drag the second keyframe from 0ms to 1000ms. Repeat for ‘light.png1.rotation’.
Part 4: Animating the football image
We’d like the football to scale up, giving the illusion it comes closer to the user’s camera and away while moving down on the tracking image and fading out until reaching the position of the football’s 3D model.
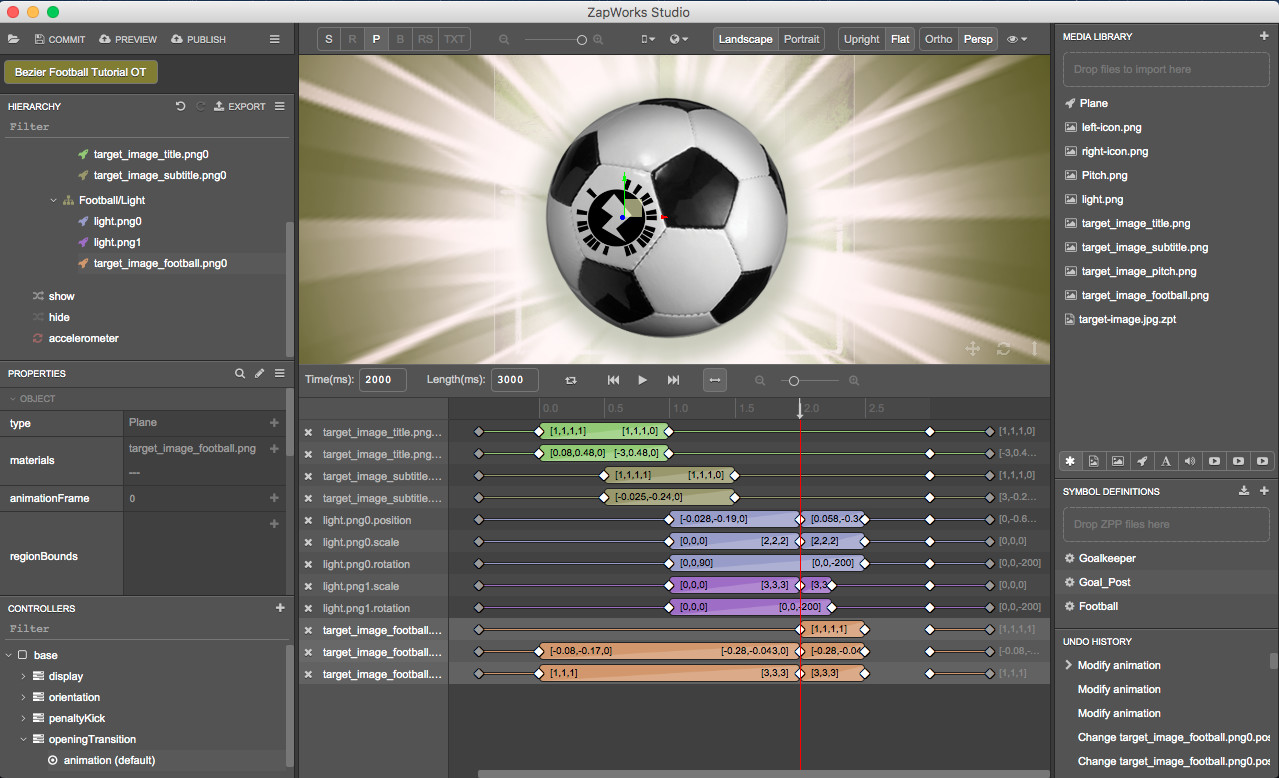
35. Add football image properties to animation timeline
In the ‘animation’ timeline set the time to 2500ms and add the color, position and scale properties of ‘TargetImage > Football/Light >target_image_football.png0’. Change the values for:
- The color transparency to 0;
- The position to (0, -0.64, 0);
- The scale to (0, 0, 0).
36. Set football image position and scale at 2000ms
In the ‘animation’ timeline, set the time to 2000ms. With ‘target_image_football.png0’ still selected in the Hierarchy, in the Properties panel, set the position to (-0.28, -0.043, 0) and the scale to (3,3,3).
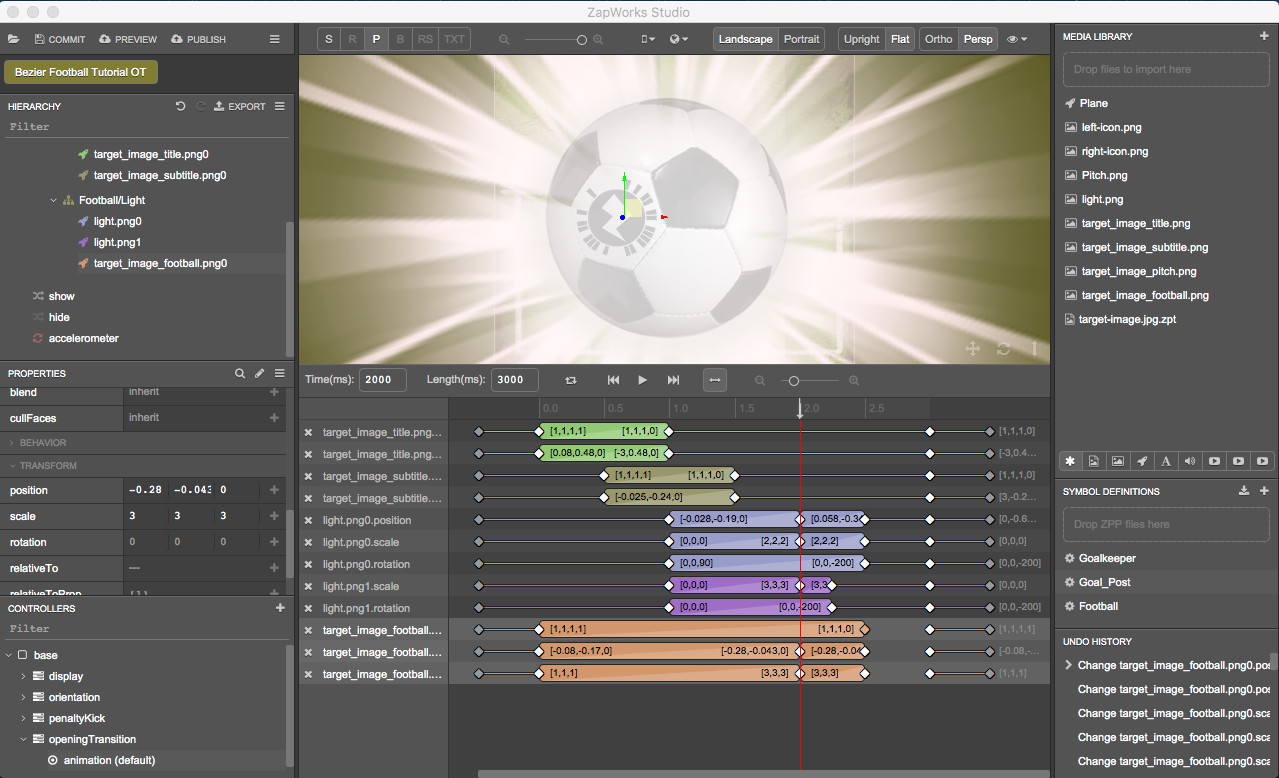
In the timeline panel, on the ‘target_image_football.png0.color’ line, drag the second keyframe from 0ms to 2000ms.
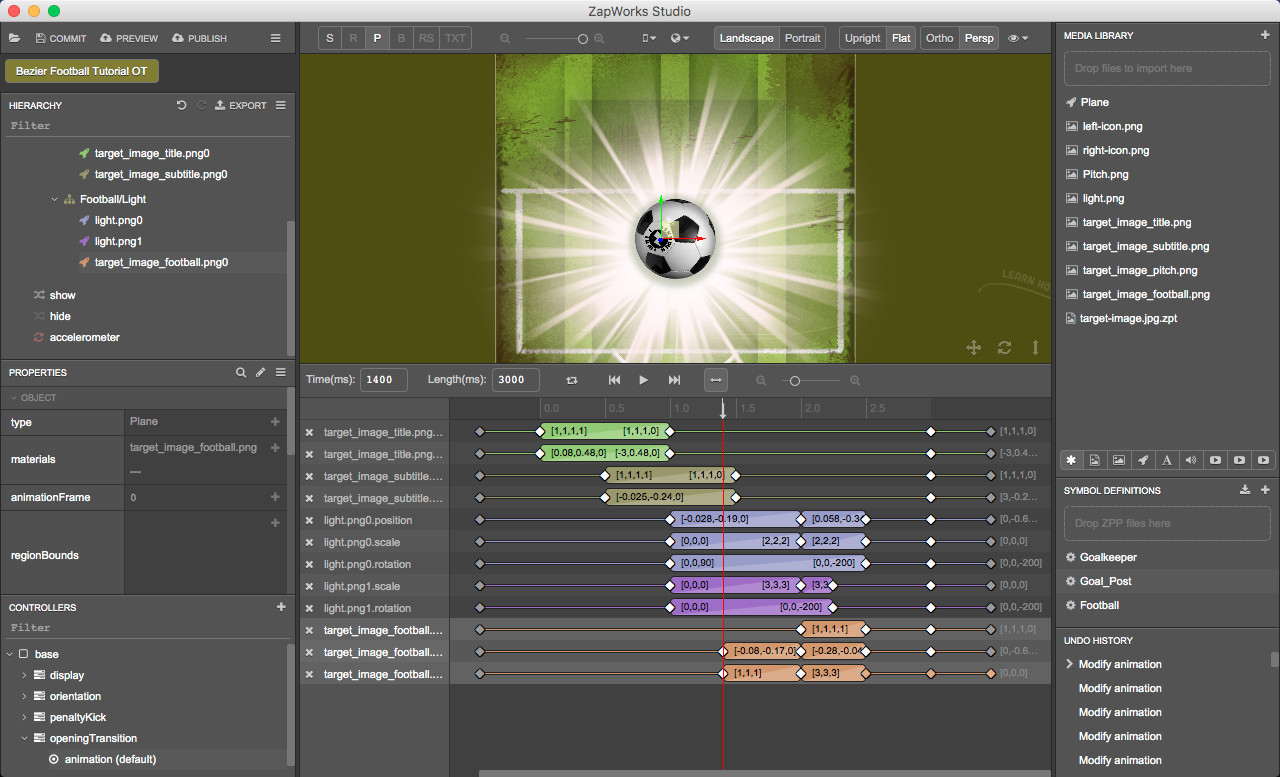
37. Move football image position keyframe to 1400ms
In the ‘animation’ timeline set the time to 1400ms and on the ‘target_image_football.png0.position’ line, drag the second keyframe from 0ms to 1400ms.
Repeat this step for the ‘target_image_football.png0.scale’ line.

38. Create link between final three football image keyframes
In the timeline panel, on the ‘target_image_football.png0.color’ line, drag over the final 3 keyframes and create a link so that the property values of the second and third keyframes match the property value of the first one.
Repeat this for ‘target_image_football.png0.position’ and ‘target_image_football.png0.scale’.
Part 5: Transitioning from the tracking image to the experience’s environment
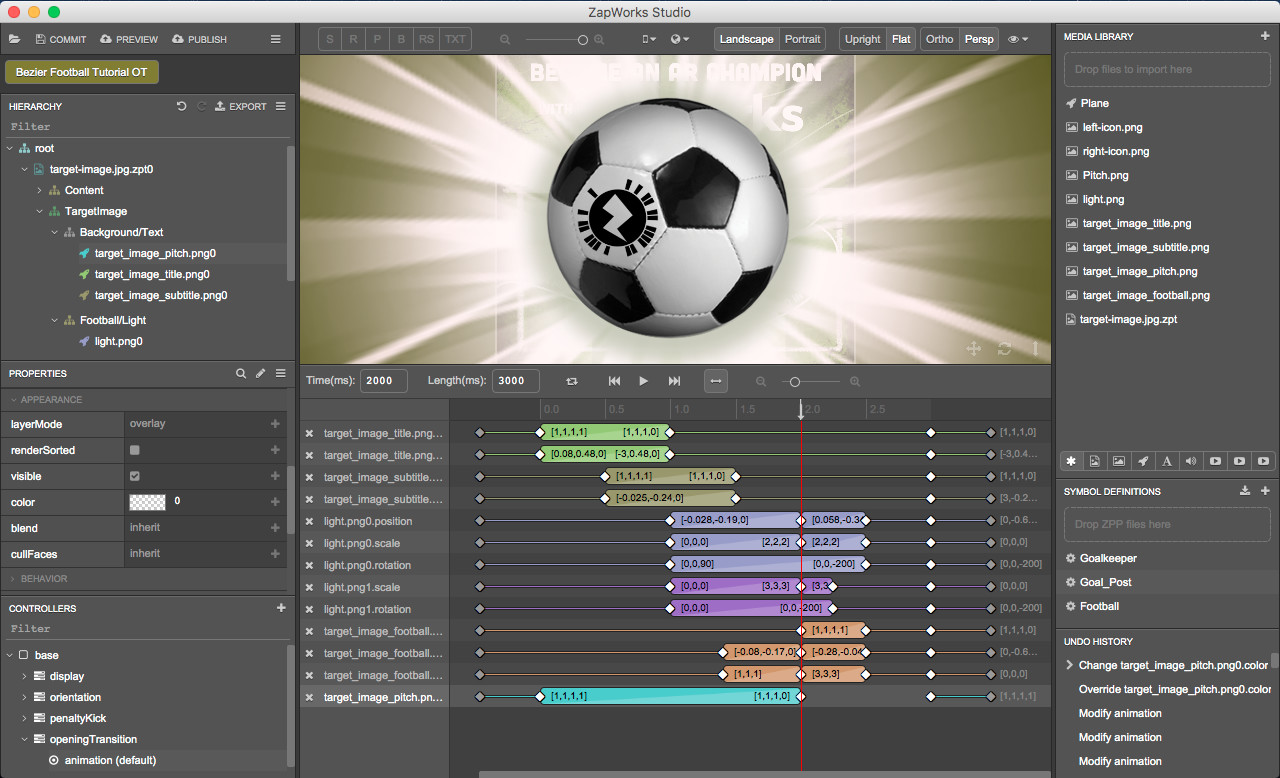
39. Add pitch image color to animation timeline
In the ‘animation’ timeline, set the time to 2000ms and add the color property of ‘TargetImage > Background/Text > target_image_pitch.png0’. Change the value of the color transparency to 0.
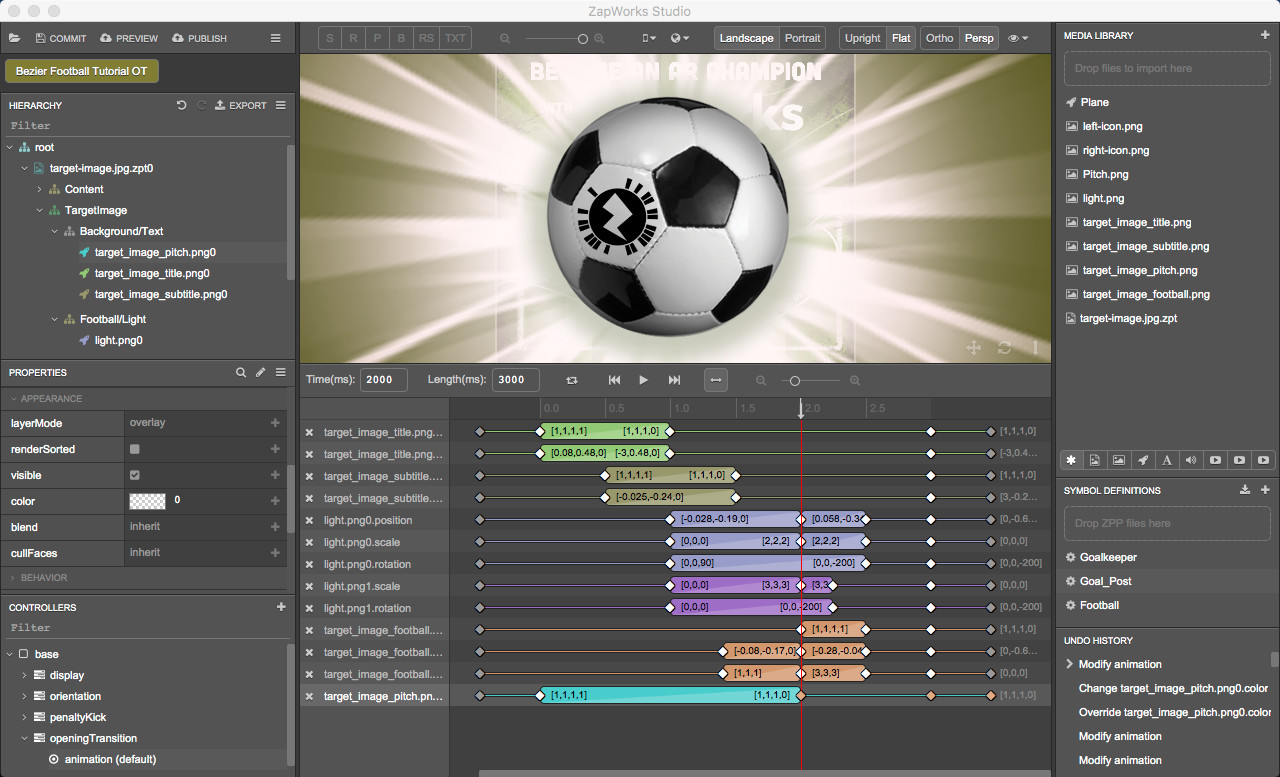
40. Create link between final three pitch color keyframes
In the timeline panel, on the ‘target_image_pitch.png0.color’ line, drag over the final 3 keyframes and create a link so that the property values for the second and third keyframes match the property value for the first keyframe.
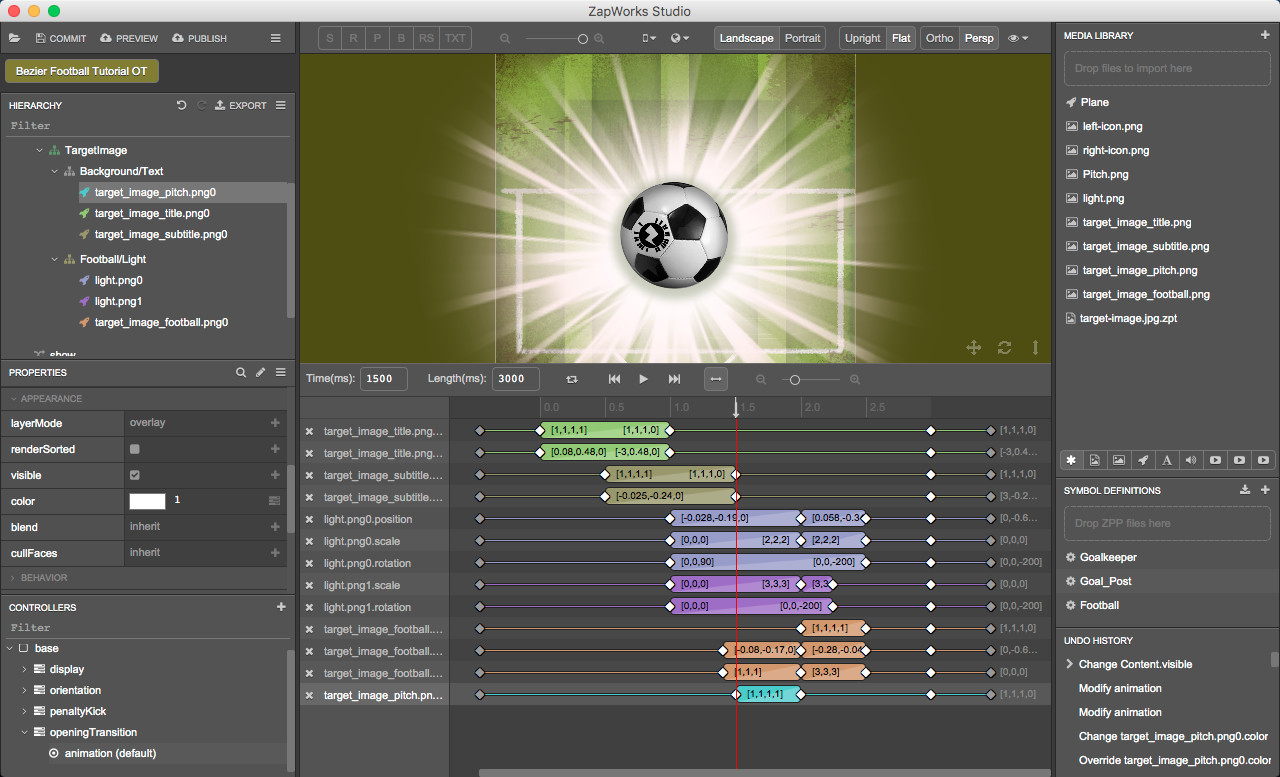
41. Move pitch image keyframe to 1500ms
In the ‘animation’ timeline, set the time to 1500ms and on the ‘target_image_pitch.png0.color’ line, drag the second keyframe from 0ms to 1500ms.
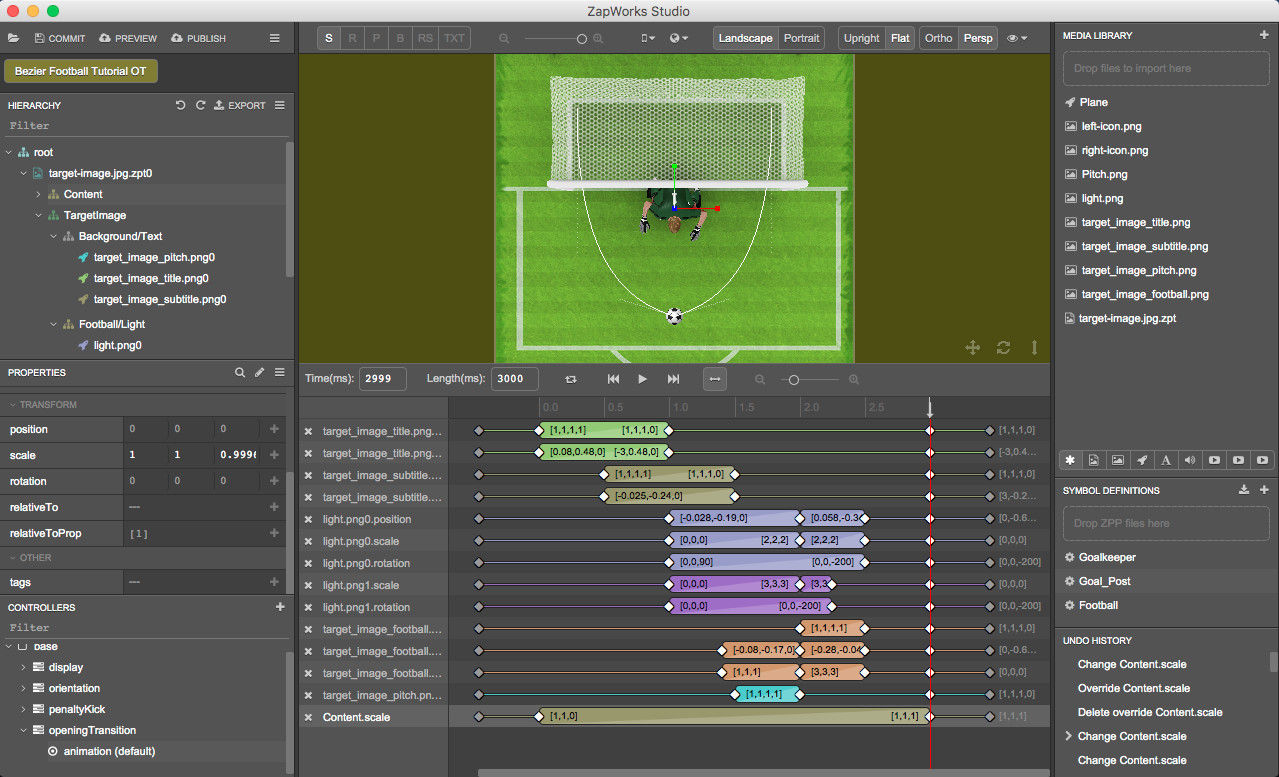
The pitch background of the tracking image is set to fade out and fully vanish when the light is flashing. We will now set the content of the experience (pitch, football, goal, goalkeeper) to appear. We would like the 3D content to be flat initially and give the illusion that it pops from the pitch while bouncing.
42. Add content group scale to animation timeline
In the ‘animation’ timeline, set the time to -1 and add the scale property of the ‘Content’ node to the timeline. Set the value of the scale to (1, 1, 0). The 3D content will then appear in 2D since we’ve set it to be flat along the Z-axis.
43. Set content group scale at 3000ms
In the ‘animation’ timeline, set the time to 3000ms. Set the scale of the ‘Content’ node to (1, 1, 1).
44. Move content scale keyframe to 2000ms
Now set the time to 2000ms and on the ‘Content.scale’ line, drag the second keyframe from 0ms to 2000ms.
45. Add bounce effect to content scale
We will add an effect to the transition block on the ‘Content.scale’ line to make the content of the experience bounce. Right-click on the ‘Content.scale’ transition block and select ‘Interpolation > bounce > easeOutBounce’.

The opening transition timeline is ready. All you need to do now is set it to play. If you are not happy with any of the animations, feel free to make adjustments that you think would improve it.
Part 6: Setting the opening transition timeline to play
46. Create ‘seen’ script on the target image
In the Hierarchy, right click on the ’ target-image.jpg.zpt0’ node and select ‘New > Script > seen’.
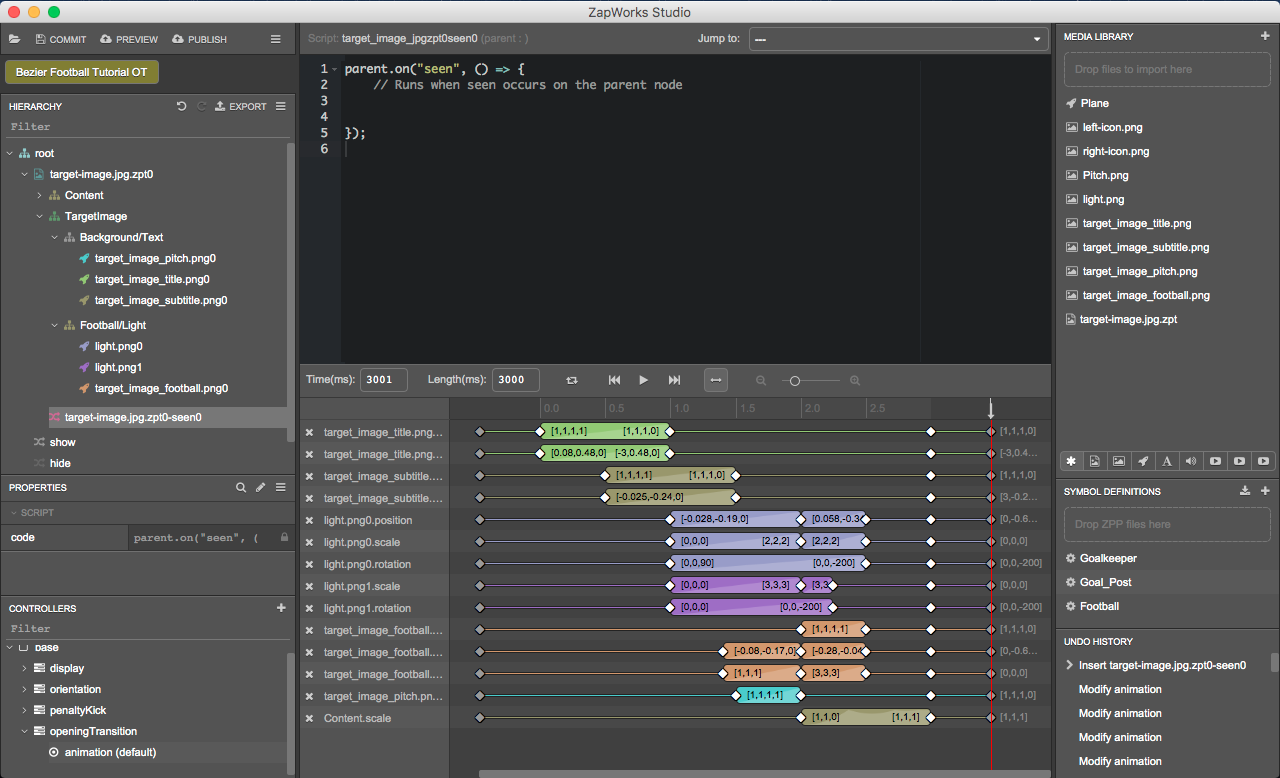
To learn more about the target image’s seen script, take a look at the target events section of our Image Tracking article.
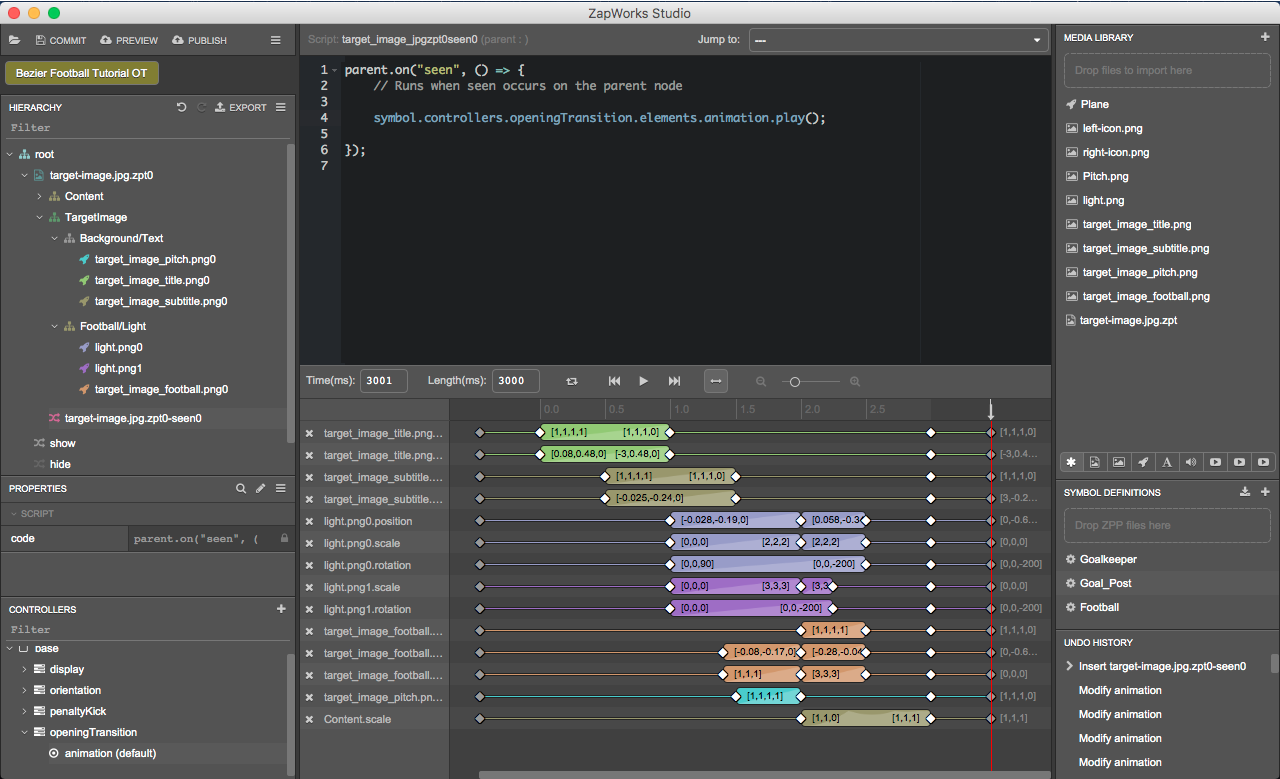
47. Set timeline to play from within the target image ‘seen’ script
Drag the ‘animation’ timeline from the Controllers panel, into the script, within the function and when releasing, set it to play.
We will slightly amend the target image’s ‘seen’ script to make sure that the opening transition timeline plays when the target image is detected for the first time only, and not each time the user point at it with a device since this may interrupt the experience.
48. Set animation to only be played on seen once
In the ‘seen’ script, replace the “parent.on” with “parent.one”. This sets the function that is in the seen script to be called only the first time the target image’s ‘seen’ event is triggered.

To learn more about one(), please take a look at the article linked here.
You can preview the updated experience by clicking the ‘Preview’ button in the top left of ZapWorks Studio. Scan the temporary zapcode generated and once the experience has been loaded, place the tracking image in front of the camera of your device.
Congratulations!
That’s it. You have completed all the steps in this tutorial and created an advanced opening transition for this experience. You are well on your way to mastering ZapWorks Studio. Nice!
Suggested Next Steps
Section titled “Suggested Next Steps”- Think about where else you could add a transition and how you could add them to your projects
Further Reading
Section titled “Further Reading”To learn more about the concepts covered in this tutorial, please see the following pages:
- Timelines - More information on timelines.