Controllers and States
Studio is being deprecated, please head over to the documentation page for Mattercraft, our most advanced 3D tool for the web, where you can find the most recent information and tutorials.
Controllers and states are the building blocks for transition animations in ZapWorks Studio. A controller stores a user-defined set of node properties and acts as a holder for states and timelines.
The values of these properties can be edited within any states that belong to the given controller. For example, a node’s position property can be assigned to a controller and any states within it would be able to alter the value of the node’s position.
Adding Controllers and States
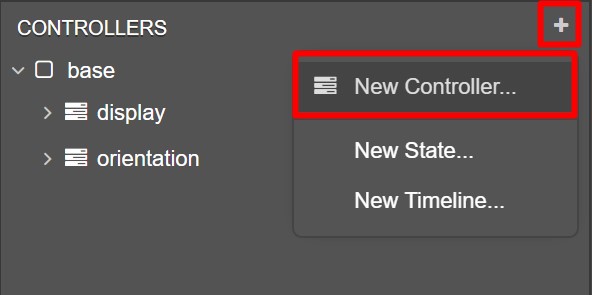
Section titled “Adding Controllers and States”Both Controllers and States can be added and managed from the Controllers Panel, located in the bottom left of Studio’s UI.
To add a controller, click on the plus (+) icon in the Controllers Panel and select New Controller.
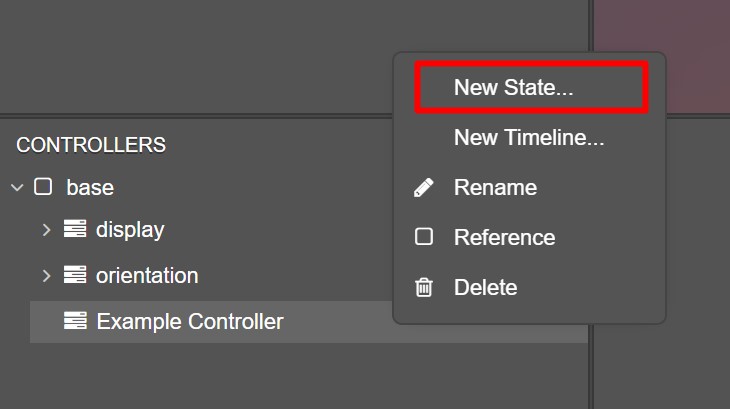
To add a state to a controller, right-click on a controller and select New State.
Giving your controllers and states brief but descriptive names makes them easier to manage, especially when activating them with an Action or from within a script.
Assigning Properties
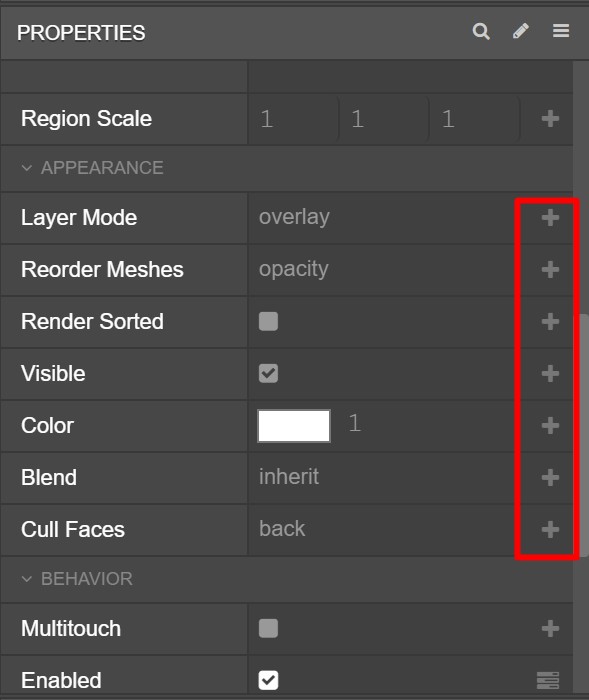
Section titled “Assigning Properties”Properties can only be modified from within a controller that explicitly manages them. By default, all properties are managed by the root base controller.
To assign a property to a new controller, select the controller first, then a node in the Hierarchy. Clicking the plus (+) icon to the right of a property in the Properties panel will add it to the controller.
The value of the property will then be editable from any states within the controller.
Remember to select the base controller when you’re done editing properties within a state to return to the default behaviour.
State View Panel
Section titled “State View Panel”While a state is selected, and if it has properties assigned, the state view panel is shown.
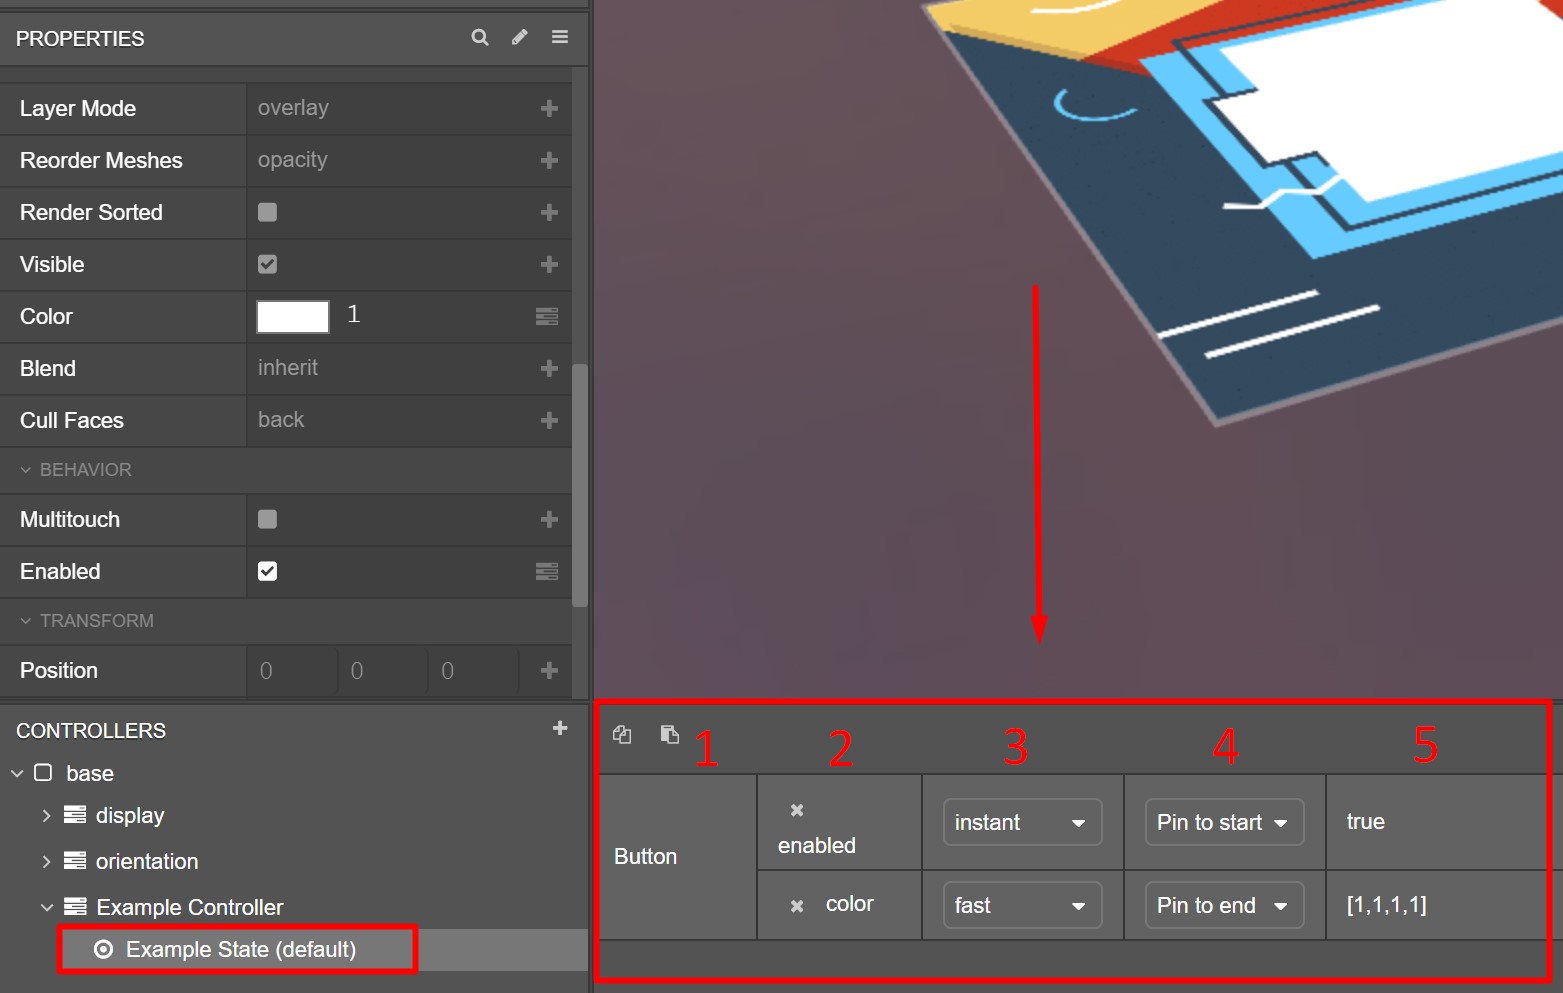
This panel has five columns:
| Diagram ID | Description |
|---|---|
| 1 | The node(s) from the Hierarchy which has properties assigned to this controller. |
| 2 | The specific properties of the node managed by this controller. Clicking the (x) will remove a property from the controller. |
| 3 | Sets the speed at which a transition between states in the controller will occur. |
| 4 | Sets whether a property will transition to the value in the selected state at the beginning or end of its activation. This is only applicable to properties that transition over time, such as position or color. |
| 5 | The current value of the properties stored in the selected state. |
Activating States
Section titled “Activating States”States can be activated via user interaction (e.g. a button) or event triggers (e.g. on target seen) using one of two methods:
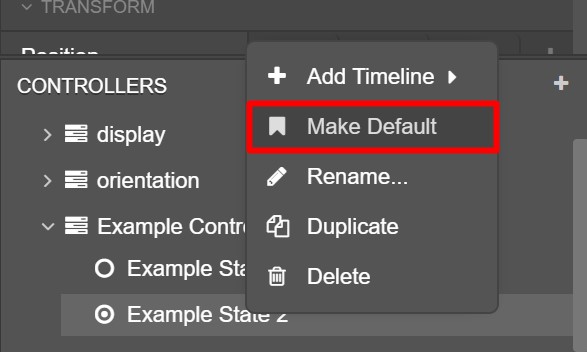
Default States
Section titled “Default States”The first state added to a controller will be marked as its default state, meaning it’s the initial state that will be active when the experience is scanned.
To set a different state in a controller as the default one, right-click it and select Make Default.
Next article: Timelines