Embedding Alpha Video
Studio is being deprecated, please head over to the documentation page for Mattercraft, our most advanced 3D tool for the web, where you can find the most recent information and tutorials.
ZapWorks Studio supports local alpha video by assigning color and mask transformed textures to an object’s material.
Studio requires alpha video as a single mp4 containing a side-by-side alpha mask.
Check out our Alpha Video Preparation article for a guide on how to produce a supported alpha video.
Step by Step
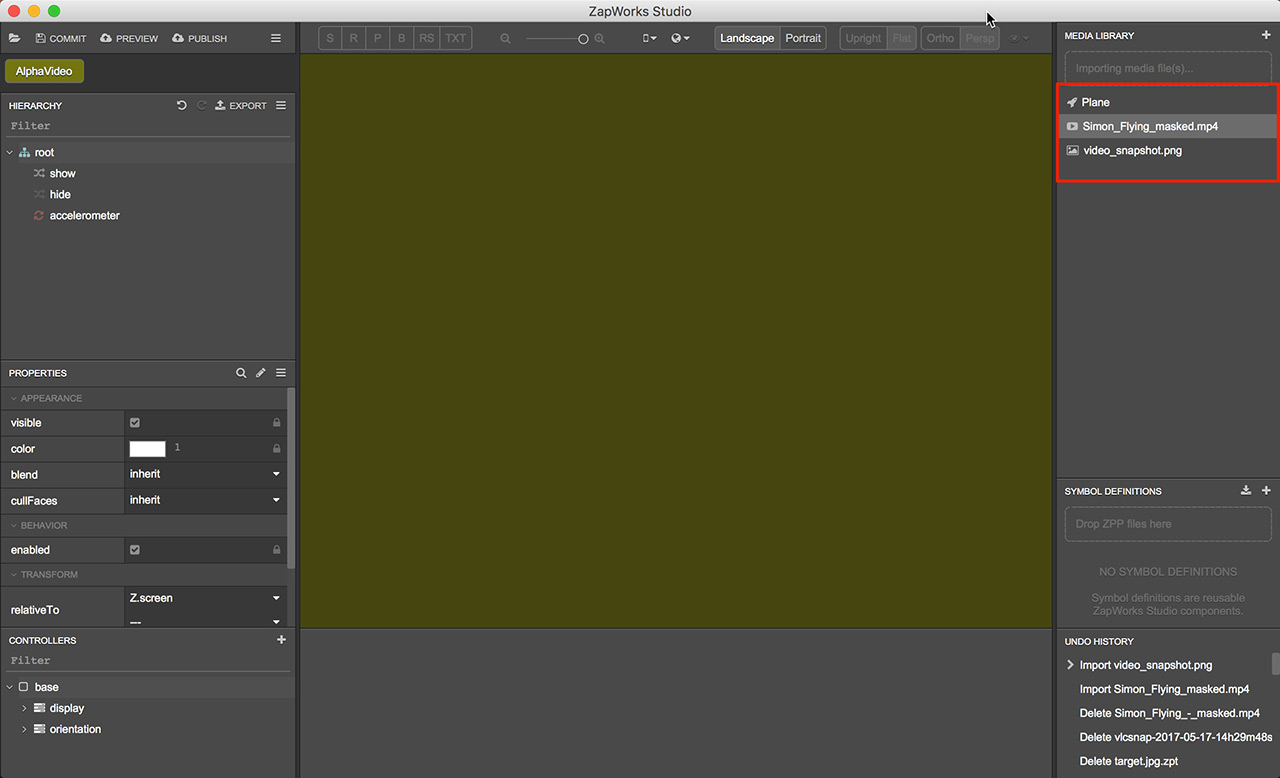
Section titled “Step by Step”- Start a new project and import your exported side-by-side mp4 video along with your snapshot image into the Media Library.
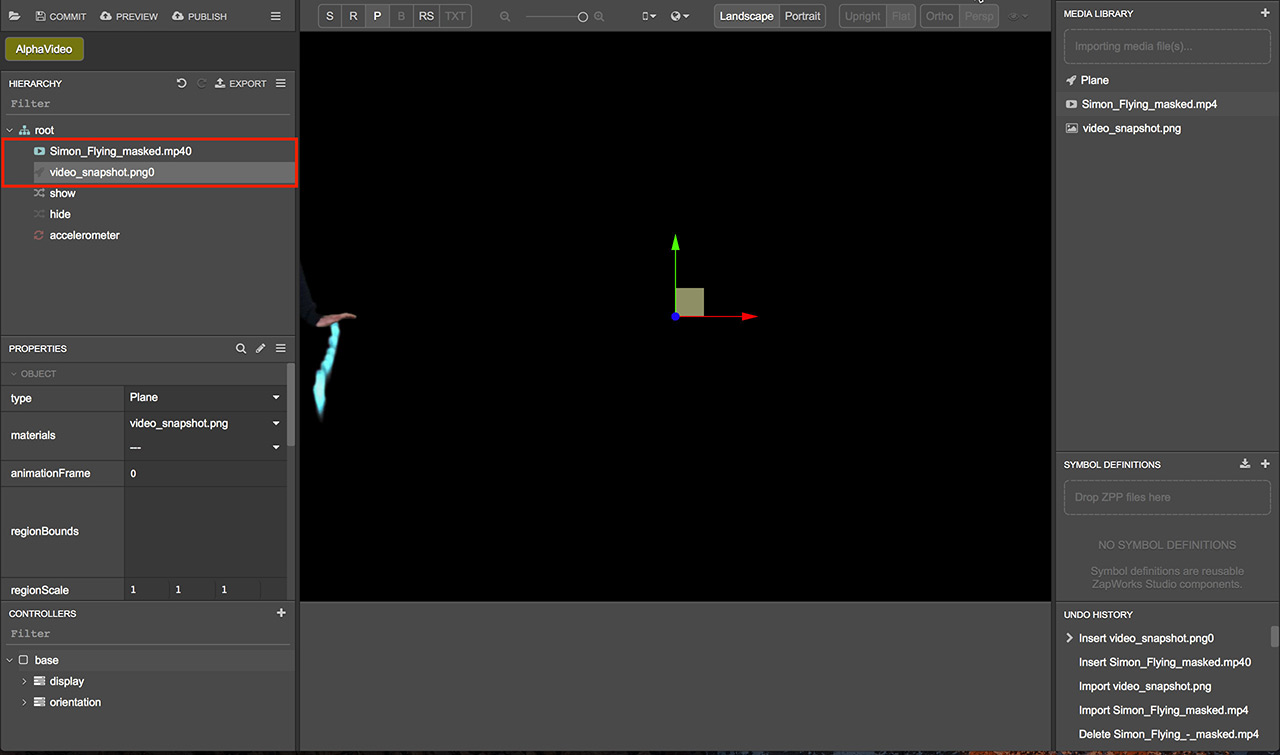
- Drag both the video and image into the Hierarchy.
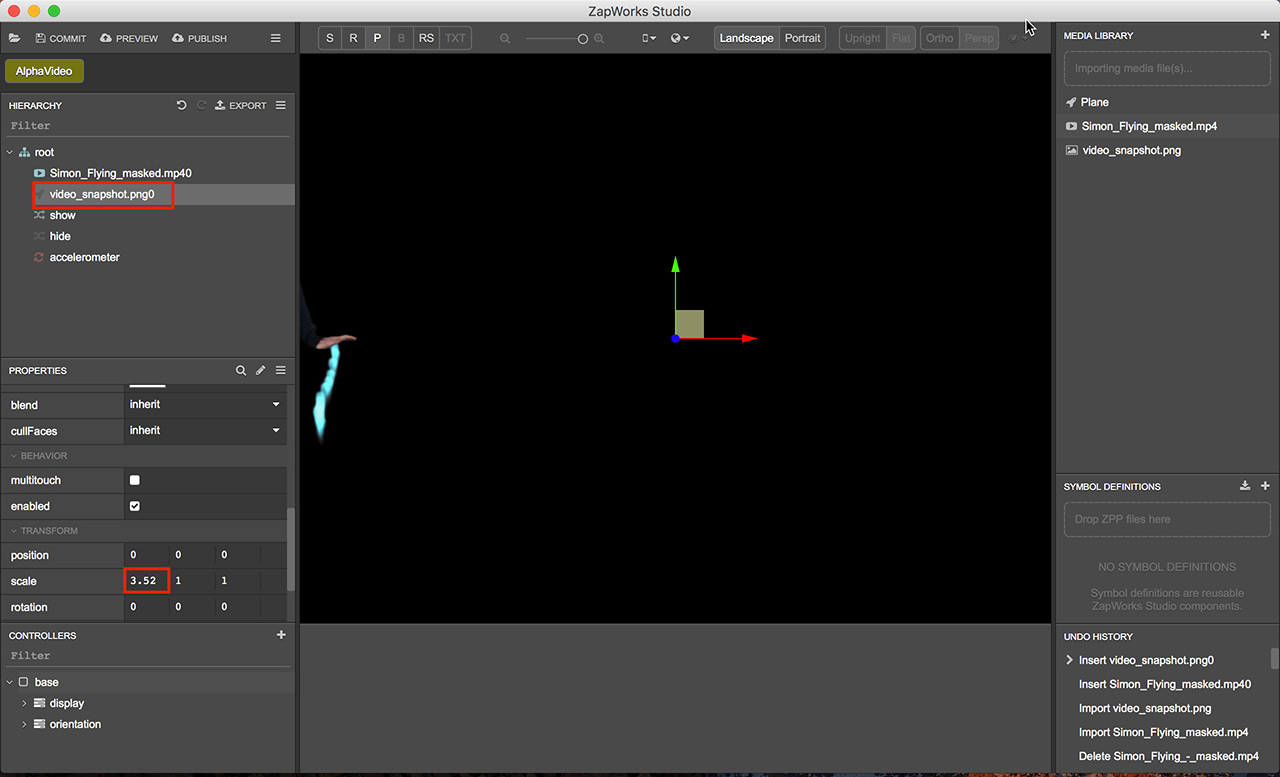
- Select the snapshot image node in the Hierarchy and scroll down to the scale property within the Properties panel. Make a note of the first value (in our case 3.52) as it will be used in an upcoming step.
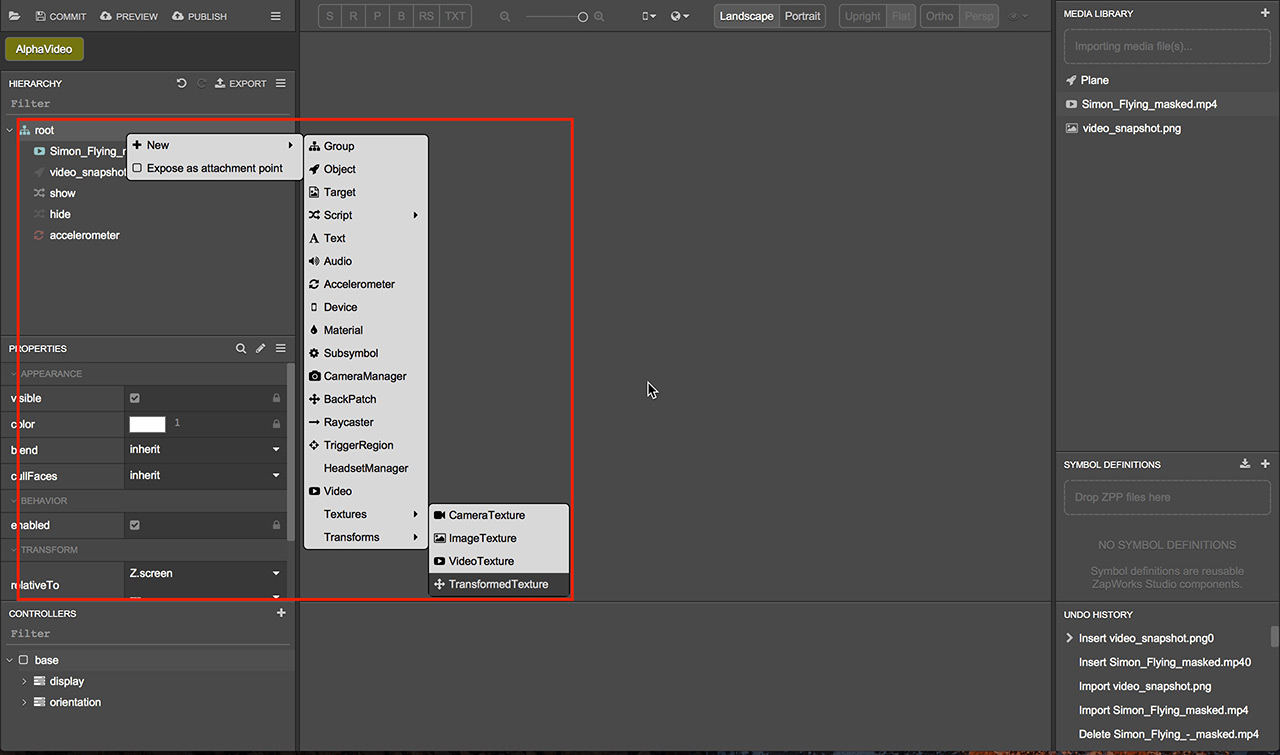
- Add two TransformedTextures which will allow us to separate out the left and right side of our video as if they were two separate video textures. We add TransformedTextures by right clicking on the root node and selecting ‘New > Textures > TransformedTexture’. Do this twice to get two TransformedTexture nodes.
- Rename one of the TransformedTextures to “colorTexture” and the other to “maskTexture” to help differentiate them.
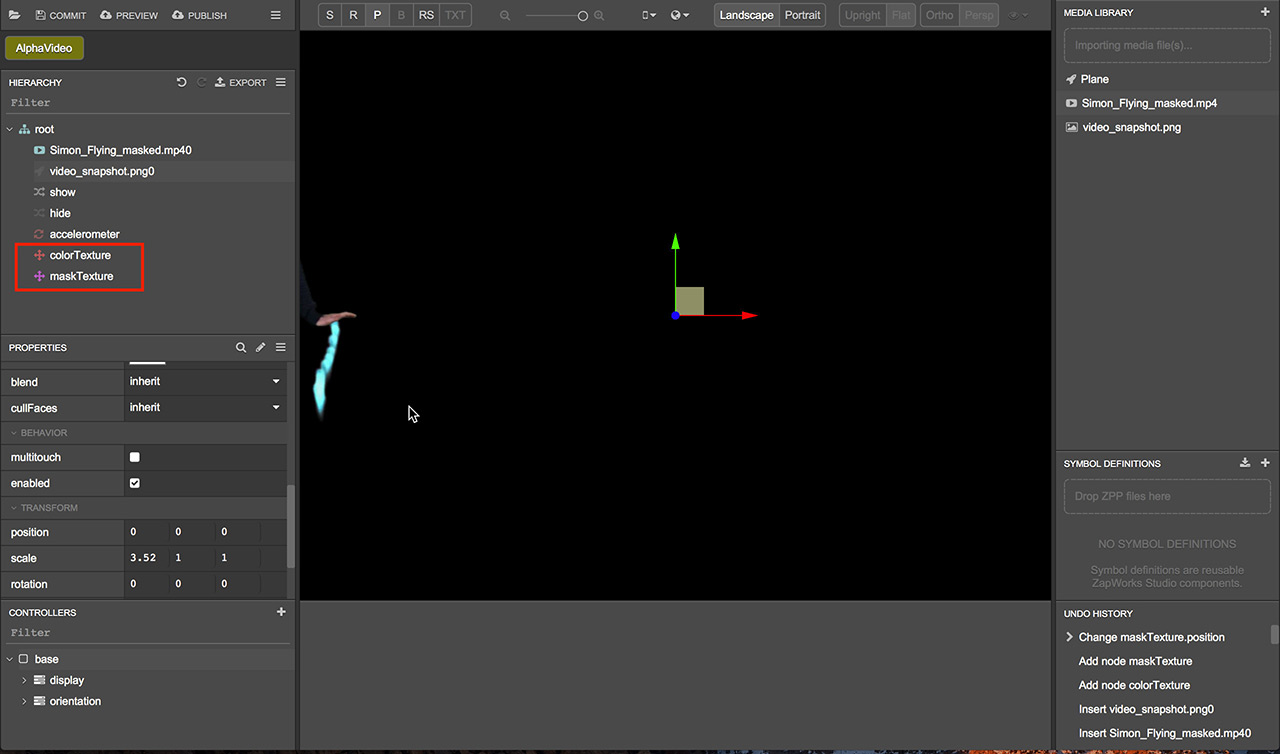
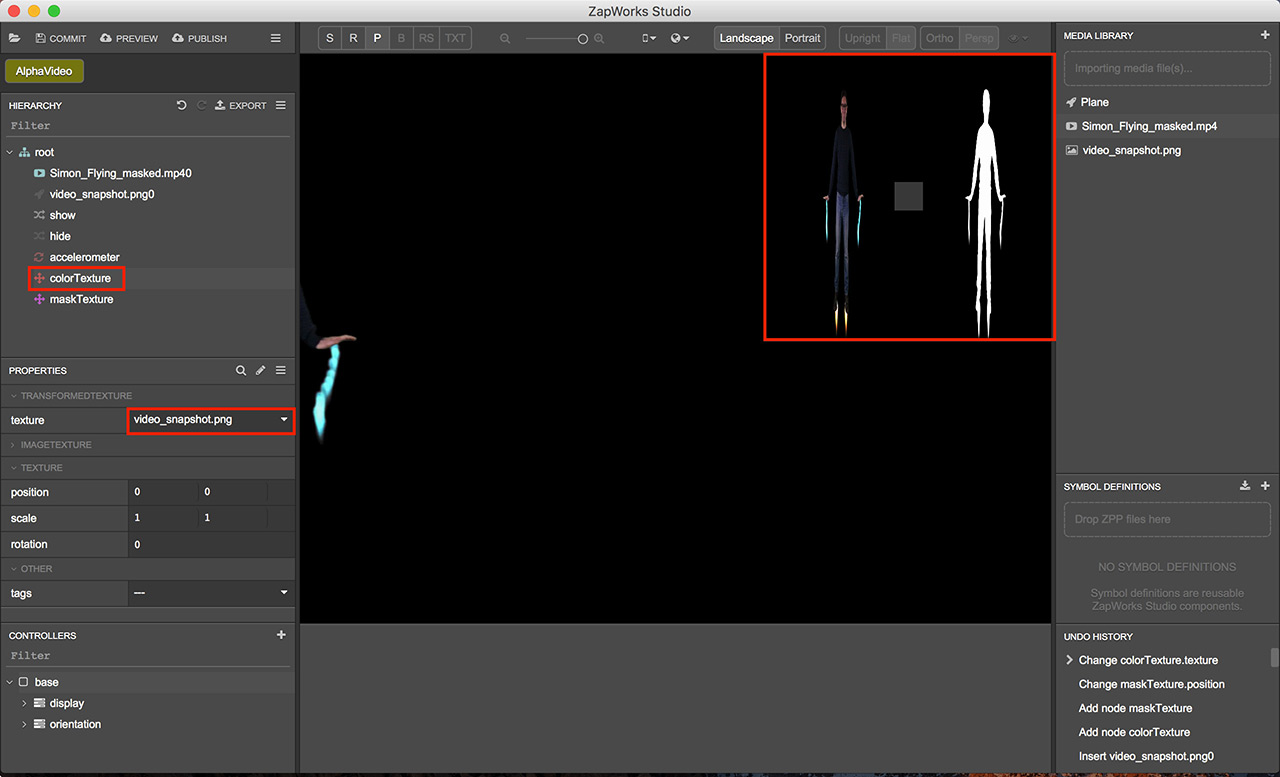
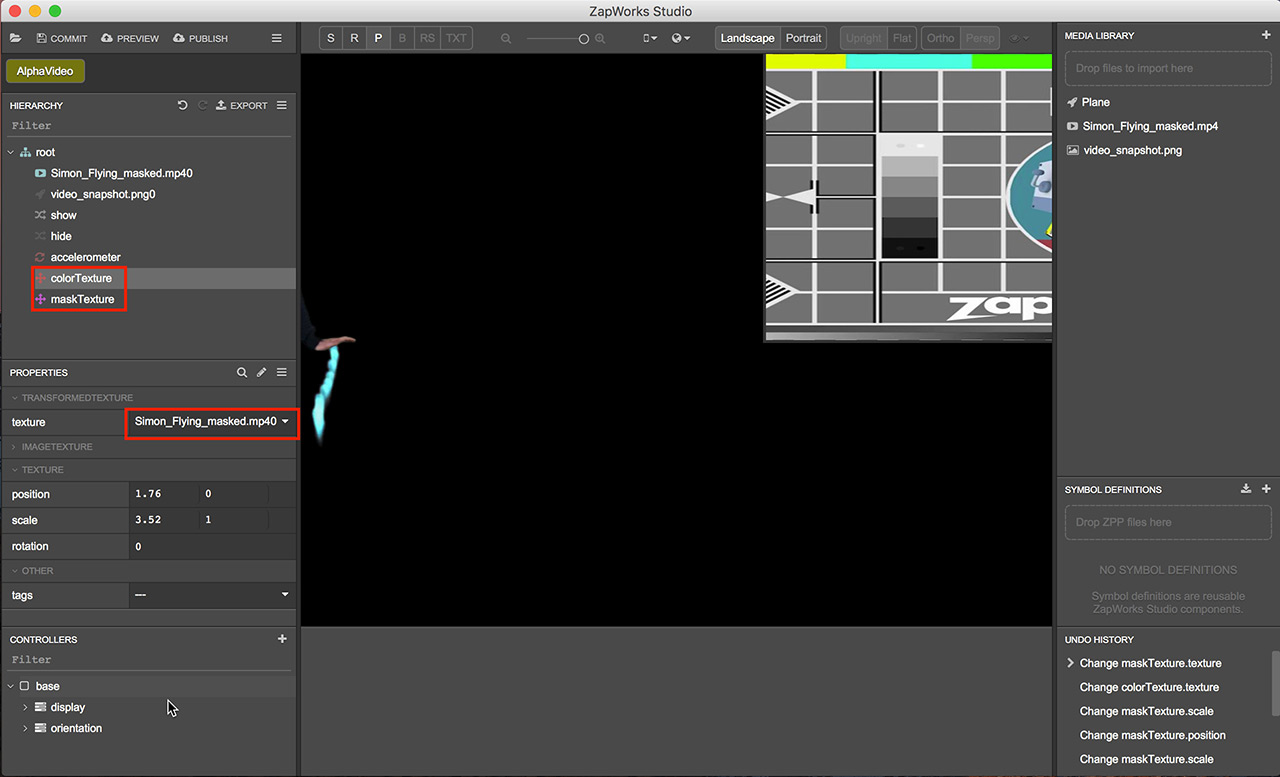
- Select the colorTexture and in the Properties panel set its texture to be that of the snapshot image. This will help us line things up for the final video texture which at this moment in time has no preview (that’s why we are using the snapshot). After doing this, you should see the snapshot appear in a small window in the top right of the 3D view.
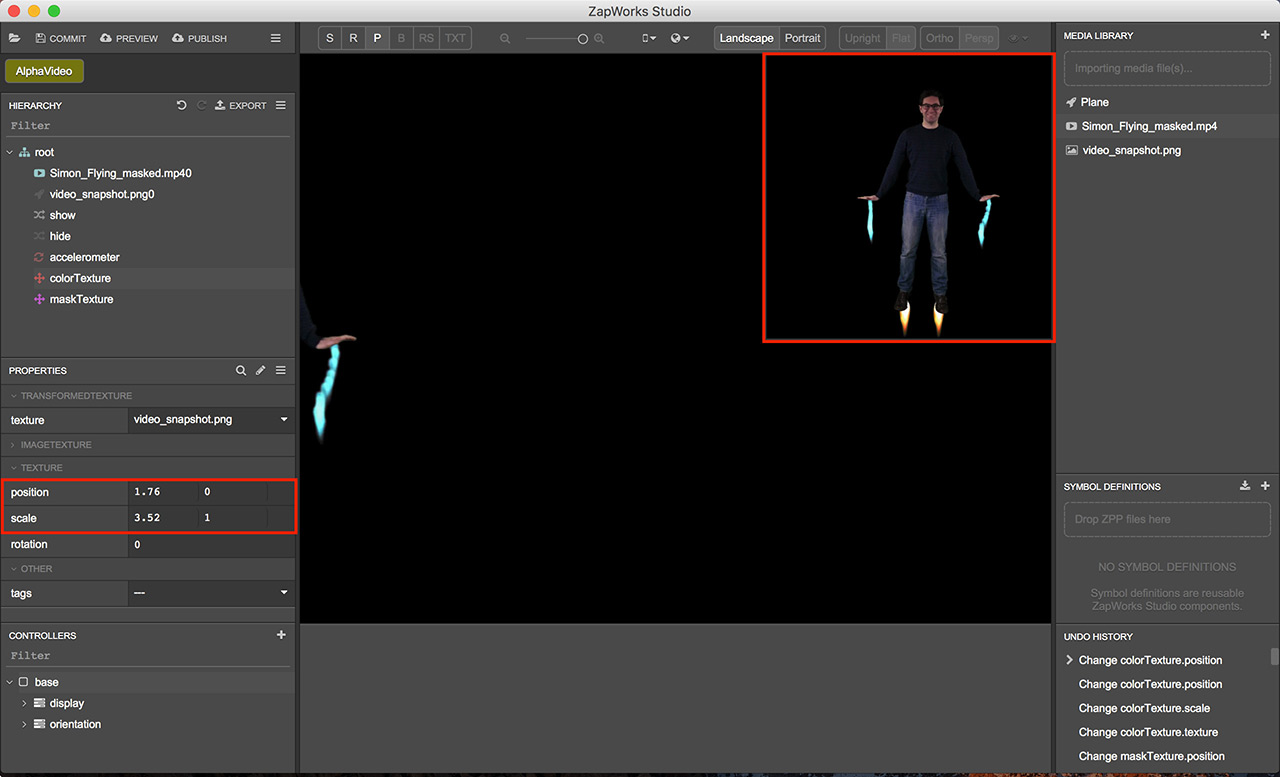
- We want to position and scale the colorTexture so that it fits perfectly on the color side of our video. To do this, we want to recall the scale number from before (3.52) and use that as the first (x-axis) scale value here. We then need to move the texture over to the color side of the snapshot, so we take half of the scale value (1.76) and use that to set the first (x-axis) position. With this done we can now see that the color portion of the video shown in the preview box in the top right of the 3D view.
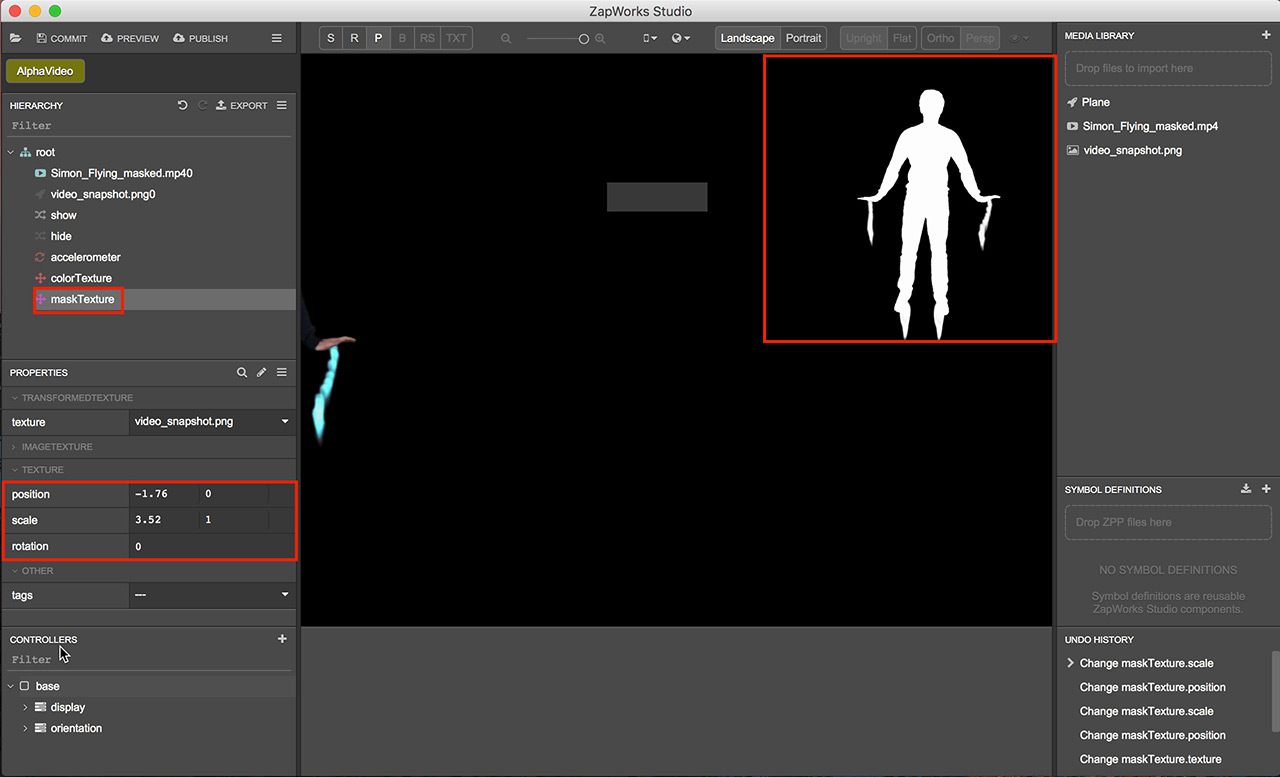
- Now we want to setup our maskTexture in the same way following steps 6 and 7, however, this time we want the texture to cover the other side of the snapshot, so we set the first (x-axis) position value to -1.76 instead of 1.76. We now see the mask portion of the snapshot in the preview box.
- With the TransformedTextures setup using the snapshot for guidance, we can now switch both of their textures to the video. This will cause a default preview image to appear in the preview box, but the video will be used when the experience is run.
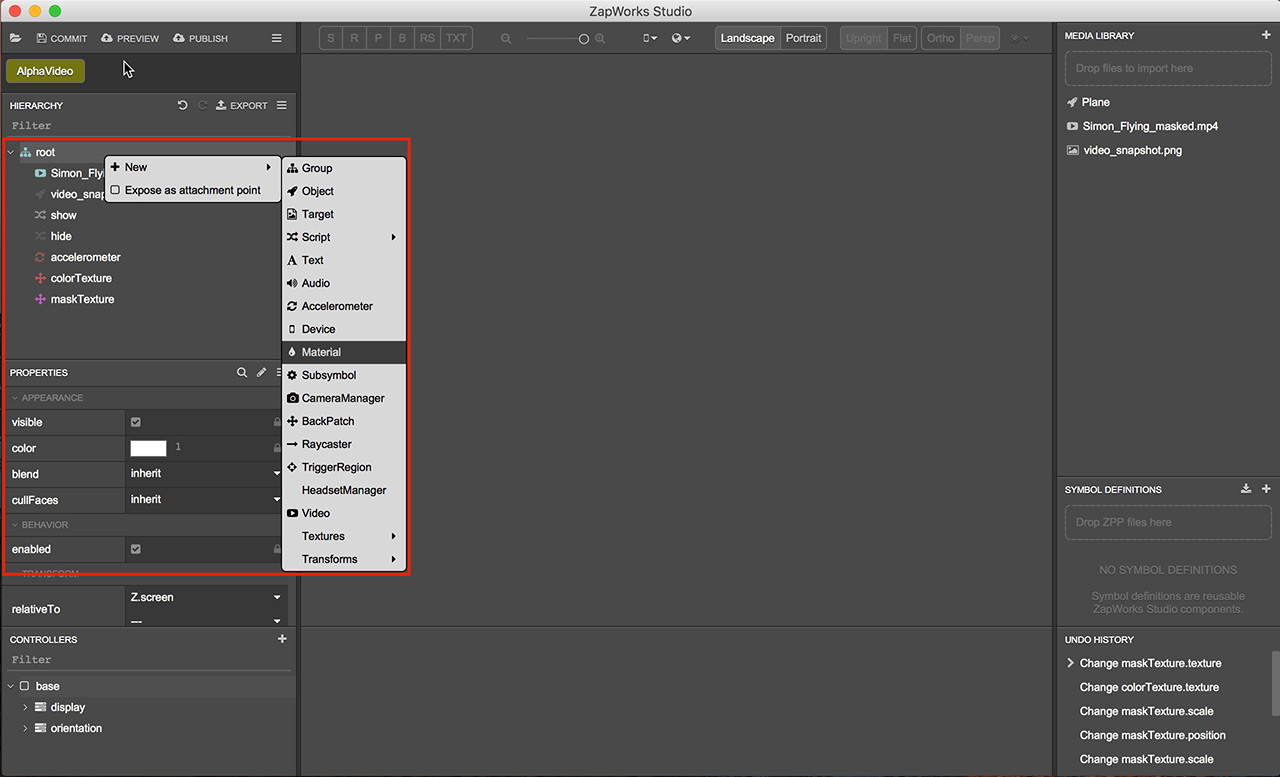
- Next, we want to create a new material that will use our TransformedTextures to create the alpha video effect. We do this by right-clicking the root node in Hierarchy and selecting ‘New > Material’ and naming it videoMaterial or something similar for clarification.
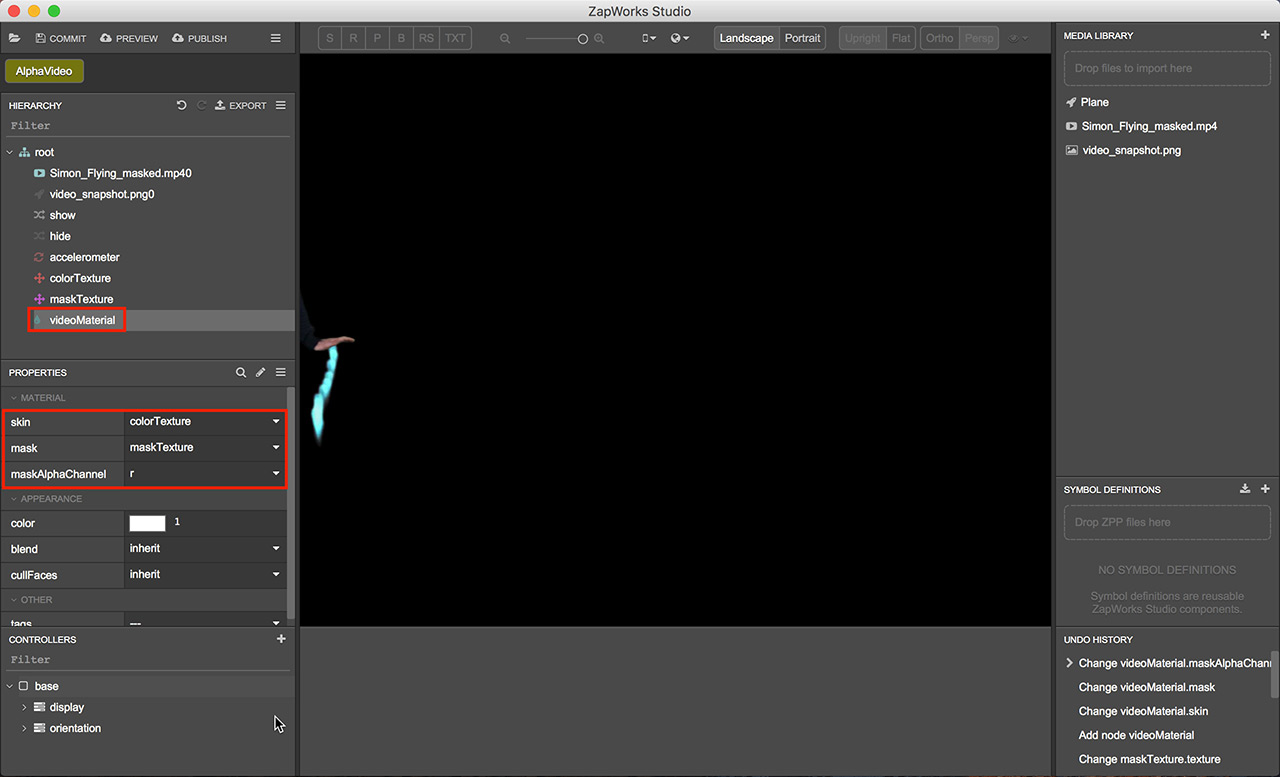
- Selecting the material node in the Hierarchy, we set the skin property to the color TransformedTexture, the mask property to the mask TransformedTexture, and the maskAlphaChannel to either r, g or b (we’ll pick r). It doesn’t matter because our mask is using black and white, so either of the color channels is fine.
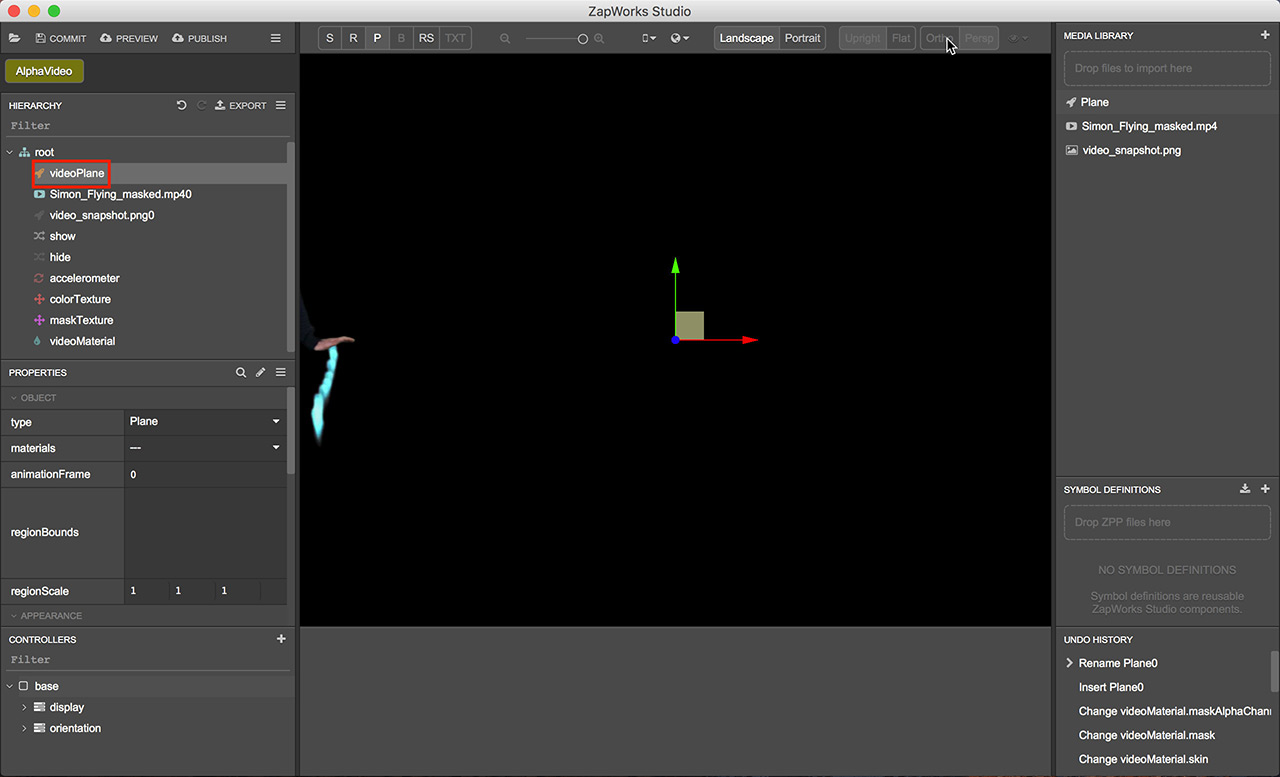
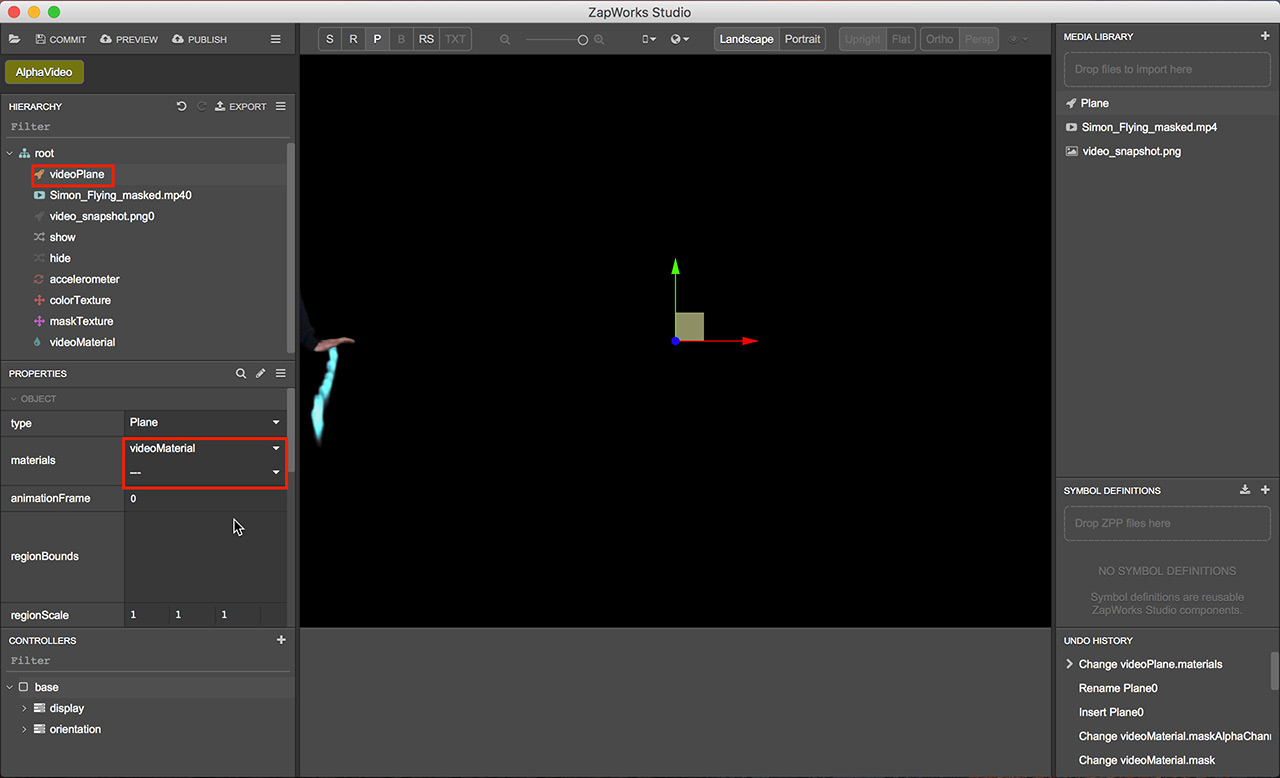
- Now we need a plane to display our video on so we drag one from the Media Library into the Hierarchy renaming it “videoPlane”.
- With our plane selected in the Hierarchy, we change its material property to the video material we created in step 10.
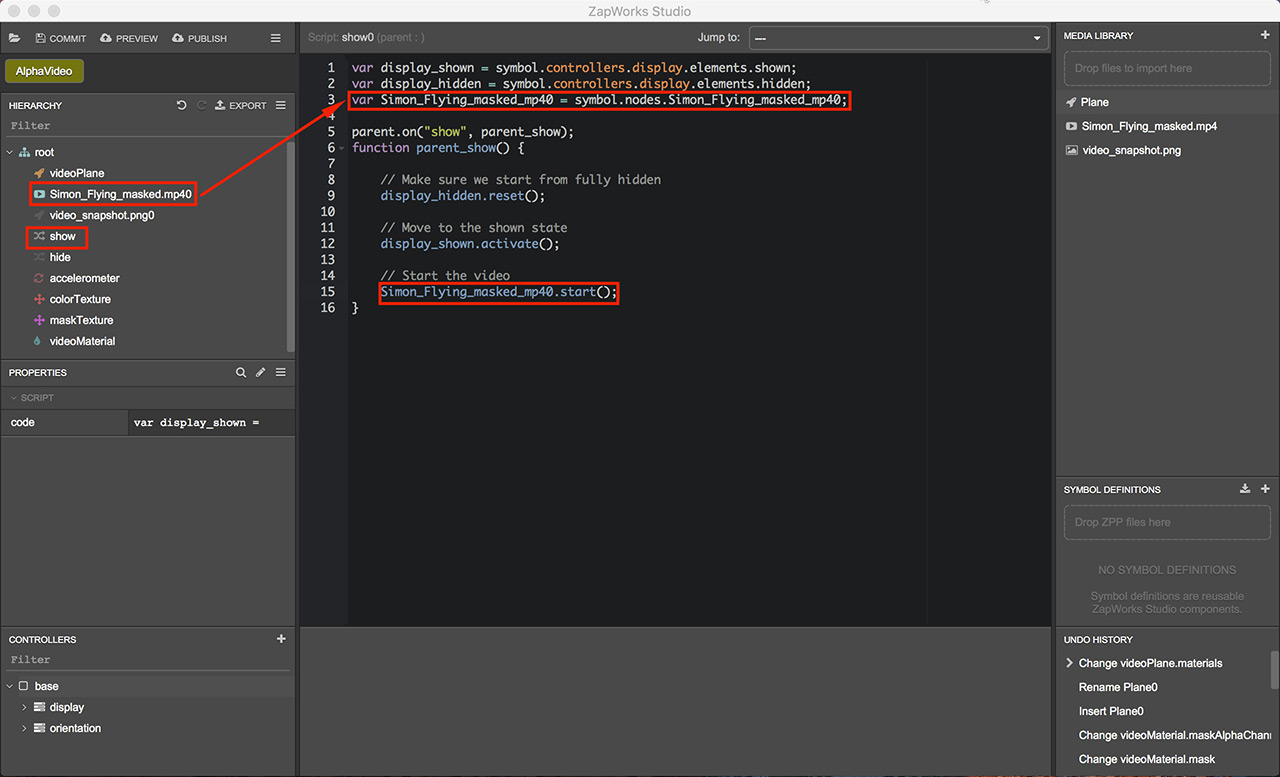
- We now just need to tell our video to play at some point during our experience, for ease of use we’ll use the existing ‘show’ script. With the show script selected in the Hierarchy, we’re presented with an editor view where we can drag our video node (not the video plane or material but our original video node) into. We can drag it in above the parent show function and insert it as a variable then allowing us to call the start function on it within the show function.
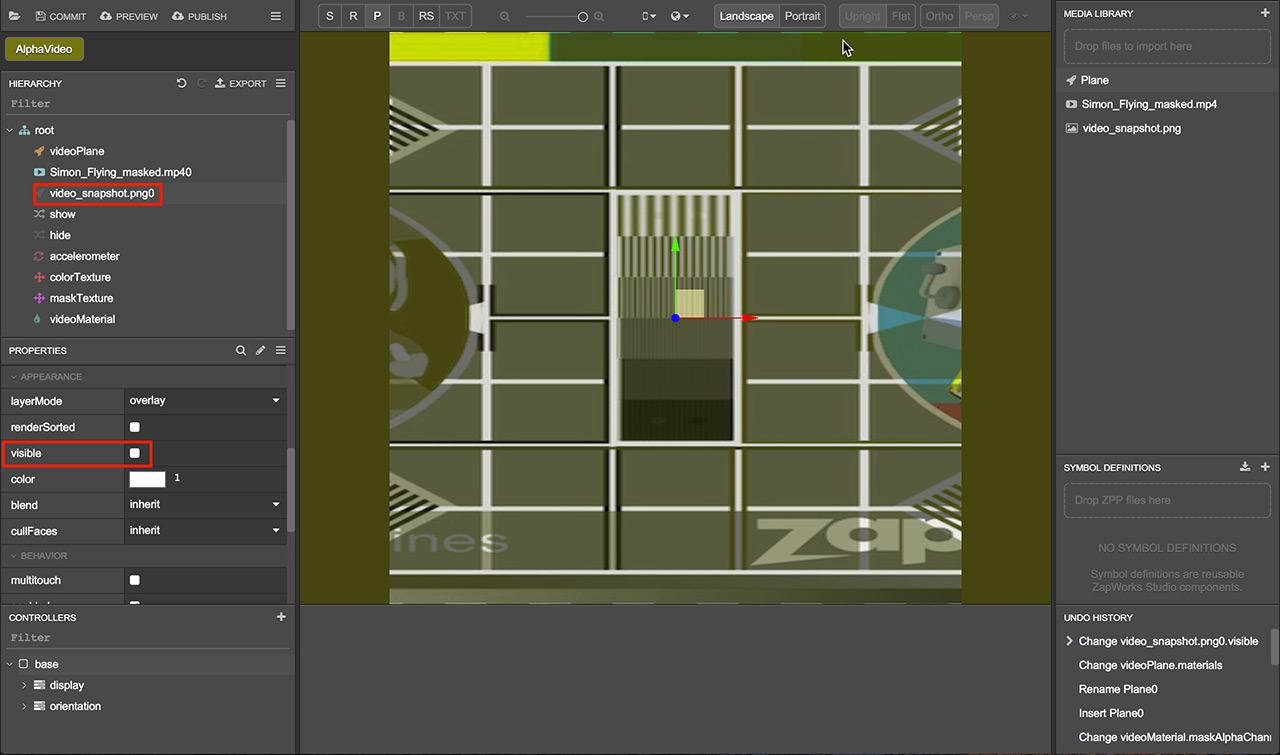
- The final thing we want to do before previewing our experience is to select the snapshot image we used for guidance earlier and set its visibility property to false, so this doesn’t appear within our experience. We do this by selecting it in the Hierarchy and navigating to the visible property in the Properties panel and unchecking it.
If necessary, the snapshot can be removed from the Hierarchy and Media Library once you have positioned the TransformedTextures as it is only used as a guide.
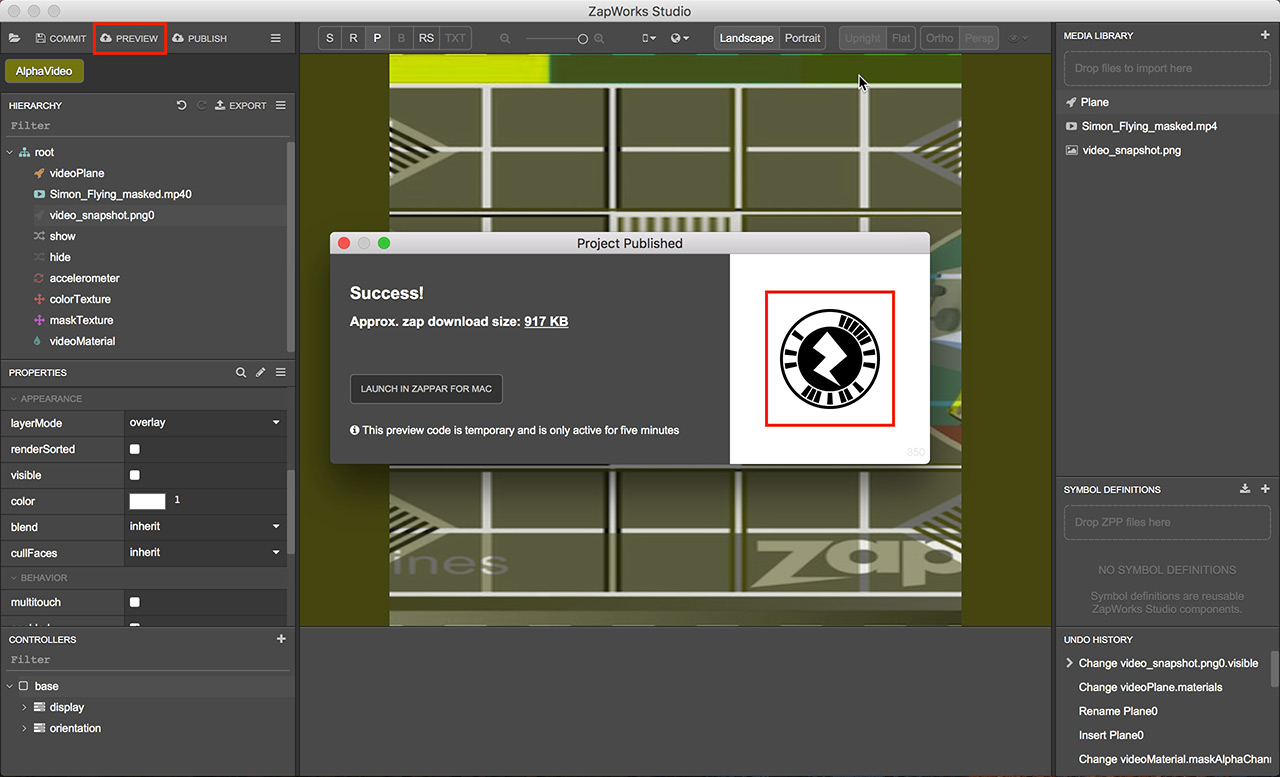
- We can now preview our experience by selecting the preview option in the top left and giving the resulting code a scan with the Zappar app!
ZapWorks Studio also supports streamed alpha video.