Face Tracking
Studio is being deprecated, please head over to the documentation page for Mattercraft, our most advanced 3D tool for the web, where you can find the most recent information and tutorials.
ZapWorks Studio’s face-tracking functionality allows for the effortless creation of face-tracked experiences, whether as the main feature of your project or as part of a more complex experience.
Adding Face Tracking
Section titled “Adding Face Tracking”Two types of face tracking options (Face Group and Face Paint) are available from the Tracking menu, which appears when right-clicking on the root node (or a group node) and selecting New > Tracking.
<Image src=“/img/zappar-studio/face-tracking/trackingMenu.png)
The Face Group tracking option allows 2D and 3D content to be tracked to the user’s face by placing content relative to a Face Attachment Point, while the Face Paint tracking option projects an image of your choice onto the user’s face.
A face mesh will appear in the 3D view when a Face Tracking object is added to the Hierarchy and can be used to preview your content.
When creating face-tracked experiences, remember to switch to the front-facing camera.
This can be done either by adding a Use Front Facing Camera action to a node, or with the
useFrontCamera()function in a script.Alternatively, you can include a prompt within your experience that asks the user to manually switch to the front-facing camera using the option in the Zappar app’s UI.
Face Group
Section titled “Face Group”By default, when a new Face Group is added to the Hierarchy, the Origin, Left Eye, Right Eye, Mouth Center and Chin attachment points will be exposed.
Dragging a node into one of these attachment points will make the content track from the user’s face, at the position specified, when the experience is scanned.
Additional attachment points can be added to the Hierarchy by right-clicking on the Face Group node and selecting New > Face Attachment Point > ____.
<Image src=“/img/zappar-studio/face-tracking/newAttachmentPoint.png)
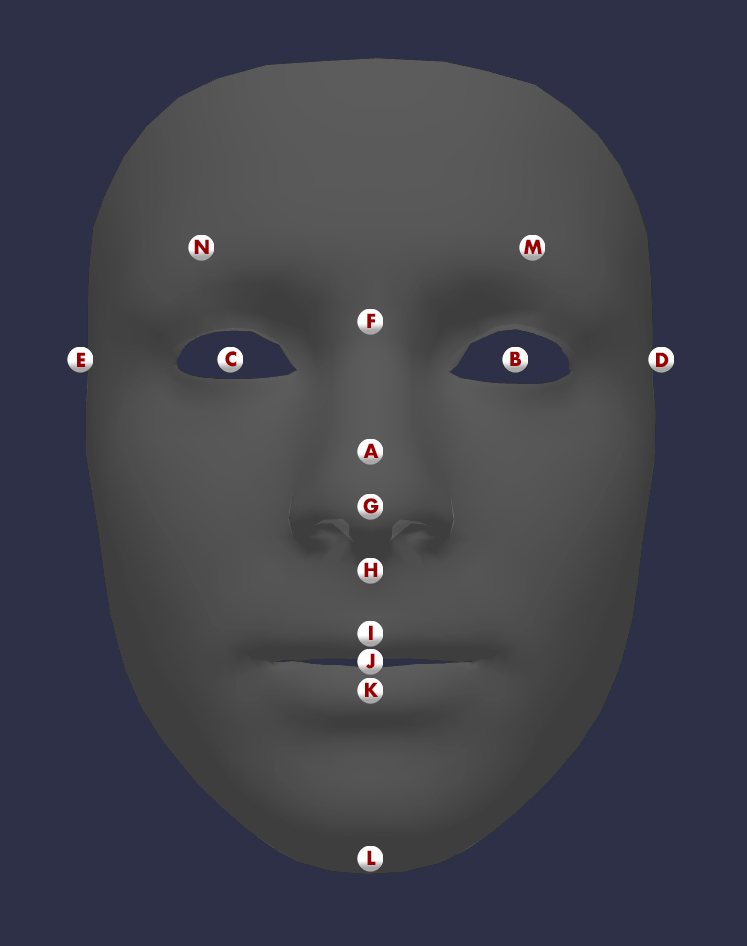
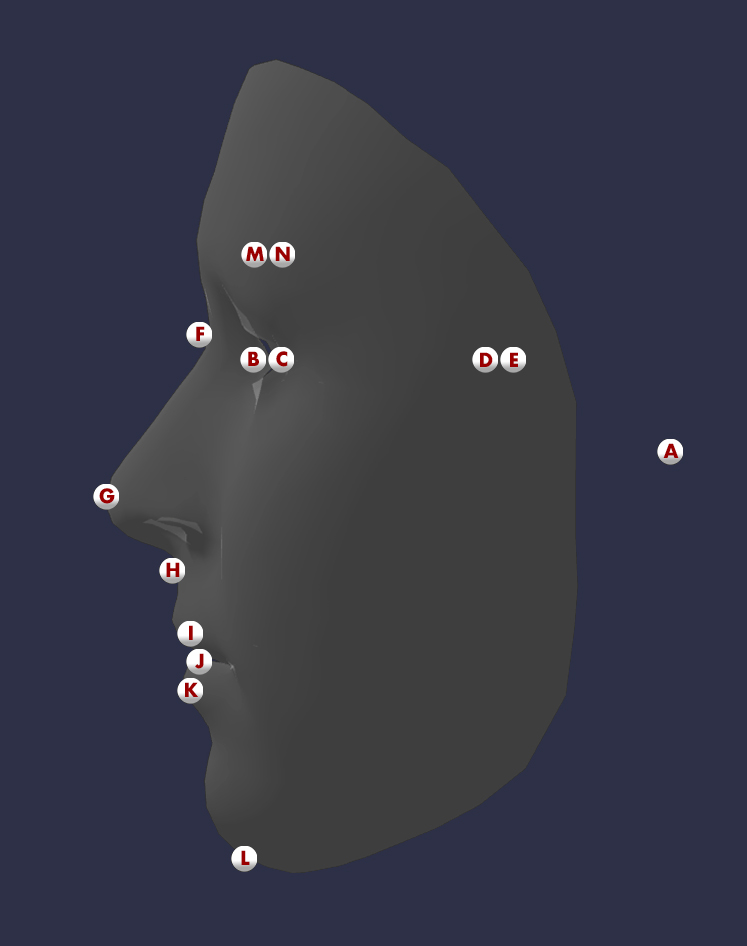
A full list of the available Face Attachment Points is shown below, along with their respective position on the user’s face:
Face Events
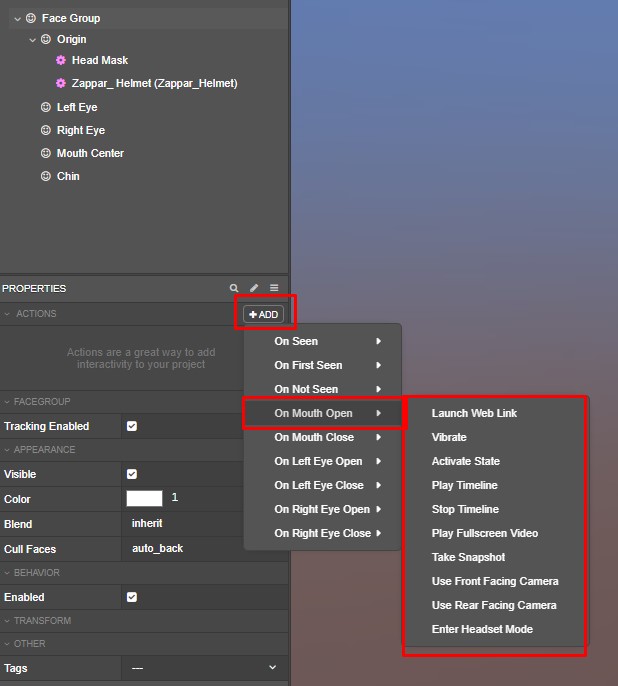
Section titled “Face Events”The Face Group emits events based on different facial movements. These can be activated using actions or by listening for the event in a script.
For a full list of the events and functions available, please refer to the tables in the Buttons and Interactivity documentation.
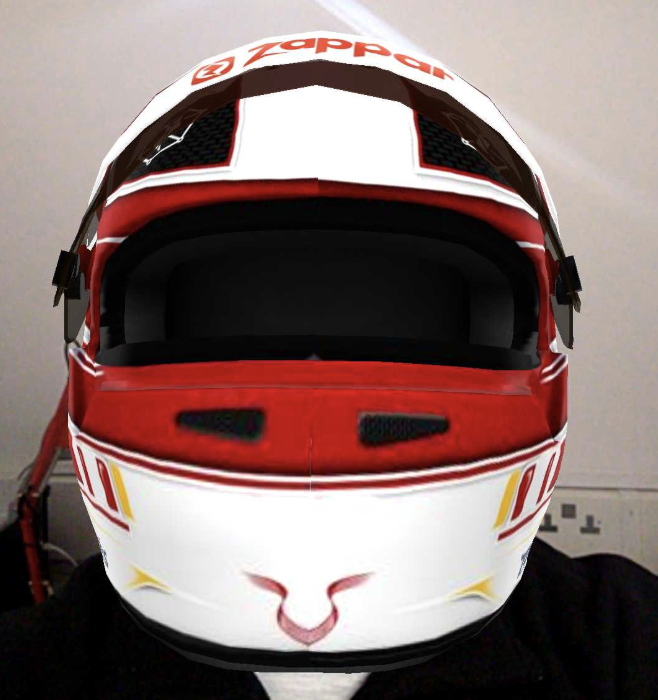
Head Mask
Section titled “Head Mask”By default, content within a Face Group is not masked, meaning that a 3D model will be rendered entirely over the user’s face.
In cases where a model should be partially obscured by the user’s head, a Head Mask object, which simulates a user’s head, can be used to mask 3D objects positioned behind.
The Head Mask subsymbol is available under the Components section, shown after clicking the + icon in the Symbol Definitions panel.

Face Paint
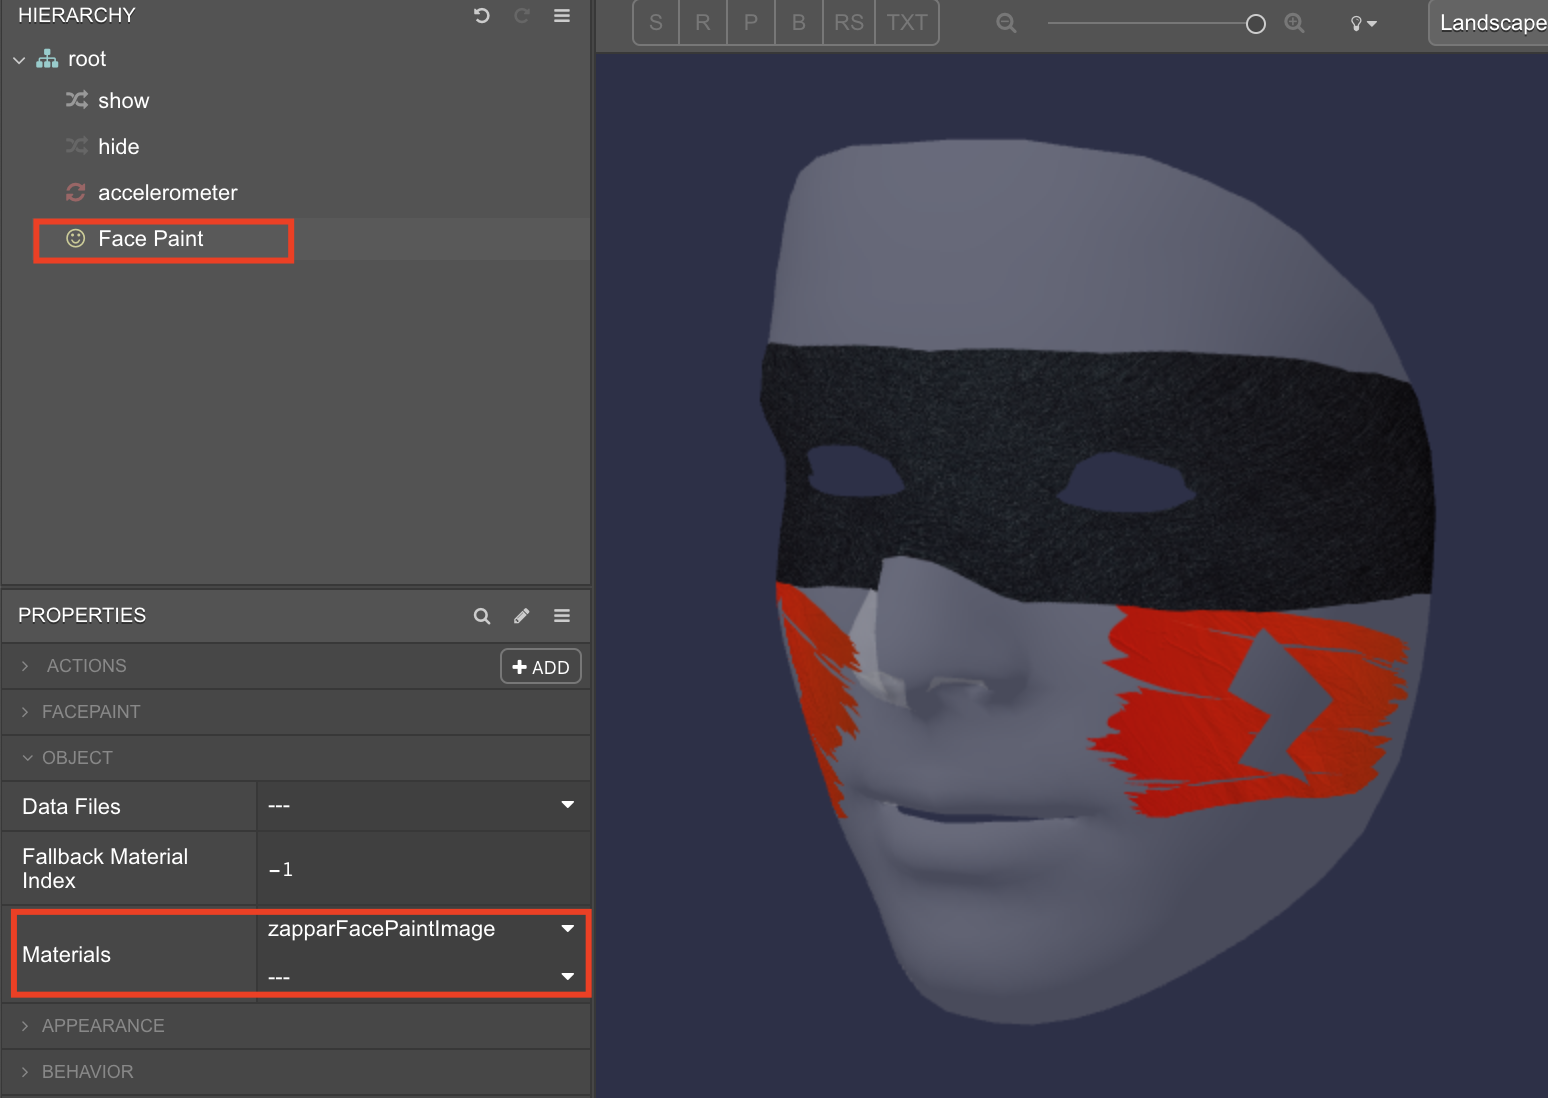
Section titled “Face Paint”Unlike the Face Group tracking type, the Face Paint node does not expose any attachment points in the Hierarchy (nor can they be added through the right-click menu), as the chosen image will be projected over the entirety of the user’s face, rather than positioned around it.
To change the projected image select the Face Paint node and change its Materials property from within the Properties panel. Once an image has been chosen, the face mesh preview will be updated in the 3D view.
Please note that distortion may occur due to the image being stretched and squashed when projected onto the contours of the user’s face. To create more accurate face paint imagery, download our face mesh template below and use it as a guide when creating your graphics.
Click here to download our face mesh template image.
Face Paint nodes also have access to the same Actions as Face Group nodes.
Helpful Links
Section titled “Helpful Links”Next article: Image Tracking