Image Tracking
The Zappar Image Tracking Target lets you attach digital content to a physical image as it moves around in the camera view. It’s great for putting 3D content onto posters, business cards, flyers, etc.
The Zappar package can detect and track content to a Target Image. Before developing an image tracked project in Unity you must first train an image into a Target Image (.zpt file).
Zappar Image Trainer
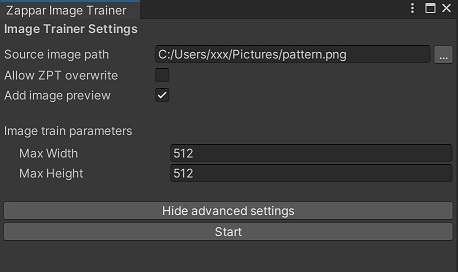
Section titled “Zappar Image Trainer”To train an image using the Zappar Image Trainer, follow the steps below:
- Open the
Zappar Image Trainerwindow in from theEditortab in the Zappar Menu entry. - Add an image to the
Source imagepath field. - We recommend setting default parameters for the first use of the image trainer but please note that you will need to enable
ZPT Overwriteexplicitly if the file already exists in theStreamingAssetsfolder. - You can also decide not to include an image preview with your
.zptfile to minimize your build size. maxWidthandmaxHeightrefers to the training model parameters and won’t resize your source or preview image. We recommend keeping it unchanged for optimum usage.- Click Start.
The resulting image will be automatically added to your
StreamingAssetsfolder.
ZapWorks CLI
Section titled “ZapWorks CLI”If you’d prefer, you can use the ZapWorks CLI tool to generate a target image easily via the following command:
zapworks train myImage.pngThe ZapWorks CLI will generate a .zpt file (i.e. myImage.png.zpt) that should be placed in a folder named StreamingAssets in the root level of your project.
Please note that you will have to manually drag and drop the .zpt file into the StreamingAssets folder, as Unity will not recognize it as a file type that can be imported using “Import New Asset”.
You will need to create a
StreamingAssetsfolder inside the mainAssetfolder, if one doesn’t already exist.
Image Tracking Target
Section titled “Image Tracking Target”- Add the Image Tracking Target into your Hierarchy.
- Select on the Zappar Image Tracking Target in the Hierarchy.
- Update the
Targetproperty to the recently trained Target Image (found in theStreamingAssetsfolder). - Drag and drop digital content on top of the Zappar Image Tracking Target in the Hierarchy.
This content should become a child of the Image Tracking Target and appear tracked to it in the viewport.
Curved Image Tracking Target
Section titled “Curved Image Tracking Target”While training a flat image is straightforward, curved images require a few extra parameters such as:
top_radiusbottom_radiusside_lengthcircumference
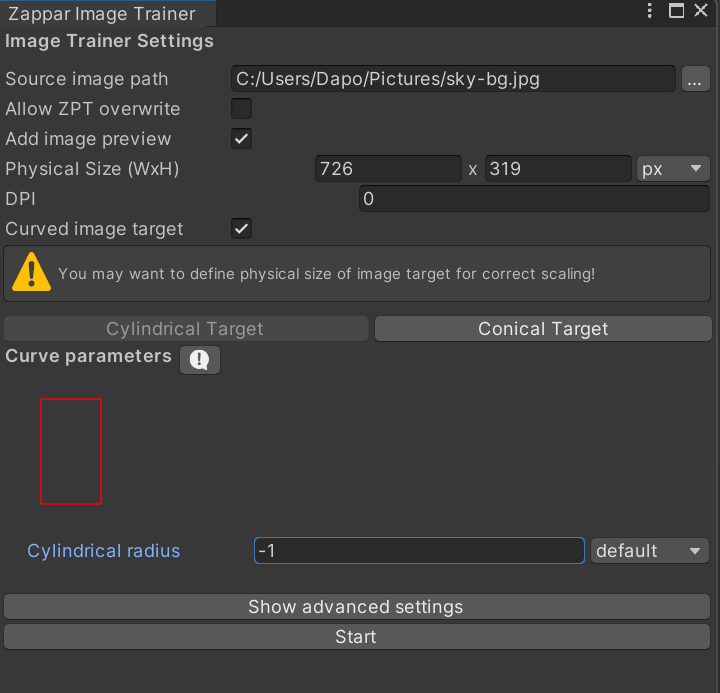
However, training an image for a cylindrical target with the Zappar Image Trainer is identical to training one for an ordinary flat target, except for step 6.
Cylindrical Targets
- Open the
Zappar Image Trainerwindow in from theEditortab in the Zappar Menu entry. - Add an image to the
Source imagepath field. - We recommend setting default parameters for the first use of the image trainer but please note that you will need to enable
ZPT Overwriteexplicitly if the file already exists in theStreamingAssetsfolder. - You can also decide not to include an image preview with your
.zptfile to minimize your build size. maxWidthandmaxHeightrefers to the training model parameters and won’t resize your source or preview image. We recommend keeping it unchanged for optimum usage.- Make sure the
Curved image targetbox is checked andCylindrical targetis selected (see screenshot below) - Click Start.
Please note that the
maxWidthandmaxHeightrefers to the training model parameters and doesn’t resize your source or preview image. We recommend keeping it unchanged for optimum use.
Conical Targets
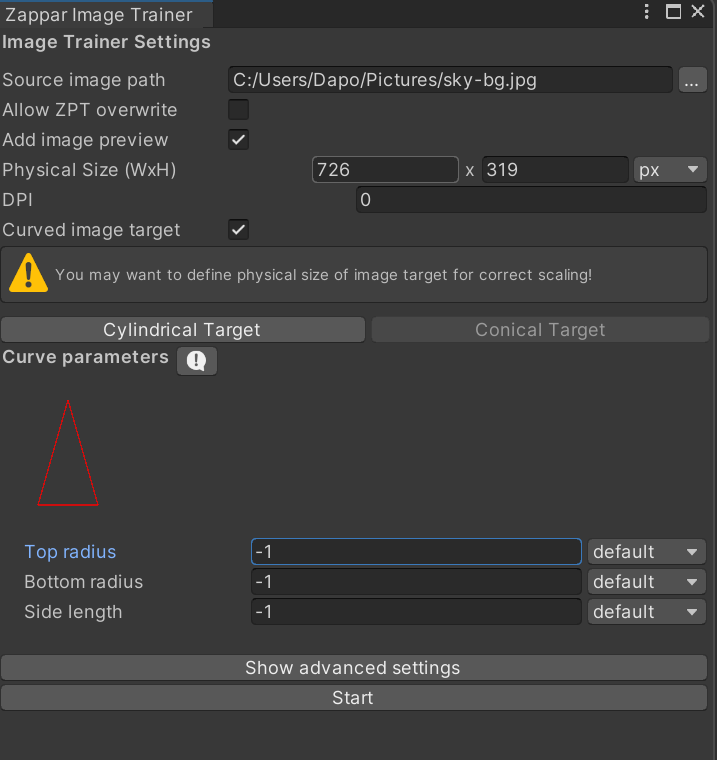
For conical targets, most of the steps are once again the same except for step 7 and 8.
- Open the
Zappar Image Trainerwindow in from theEditortab in the Zappar Menu entry. - Add an image to the
Source imagepath field. - We recommend setting default parameters for the first use of the image trainer but please note that you will need to enable
ZPT Overwriteexplicitly if the file already exists in theStreamingAssetsfolder. - You can also decide not to include an image preview with your
.zptfile to minimize your build size. maxWidthandmaxHeightrefers to the training model parameters and won’t resize your source or preview image. We recommend keeping it unchanged for optimum usage.- Make sure the
Curved image targetbox is checked andConical targetis selected (see screenshot below). - Enter the
Top radius,Bottom radiusandSide lengthparameters. - Click Start.
Conical targets can either have a larger top or bottom radius. The outlines shown below represent the case where the top radius is larger than the bottom radius. The conical target will be a cone in the unique case where either the top or bottom radius is 0.
Again, the training image must be adjusted to match (i.e. the inner circle in the image below wouldn’t exist and the diagonal lines would meet in the middle).
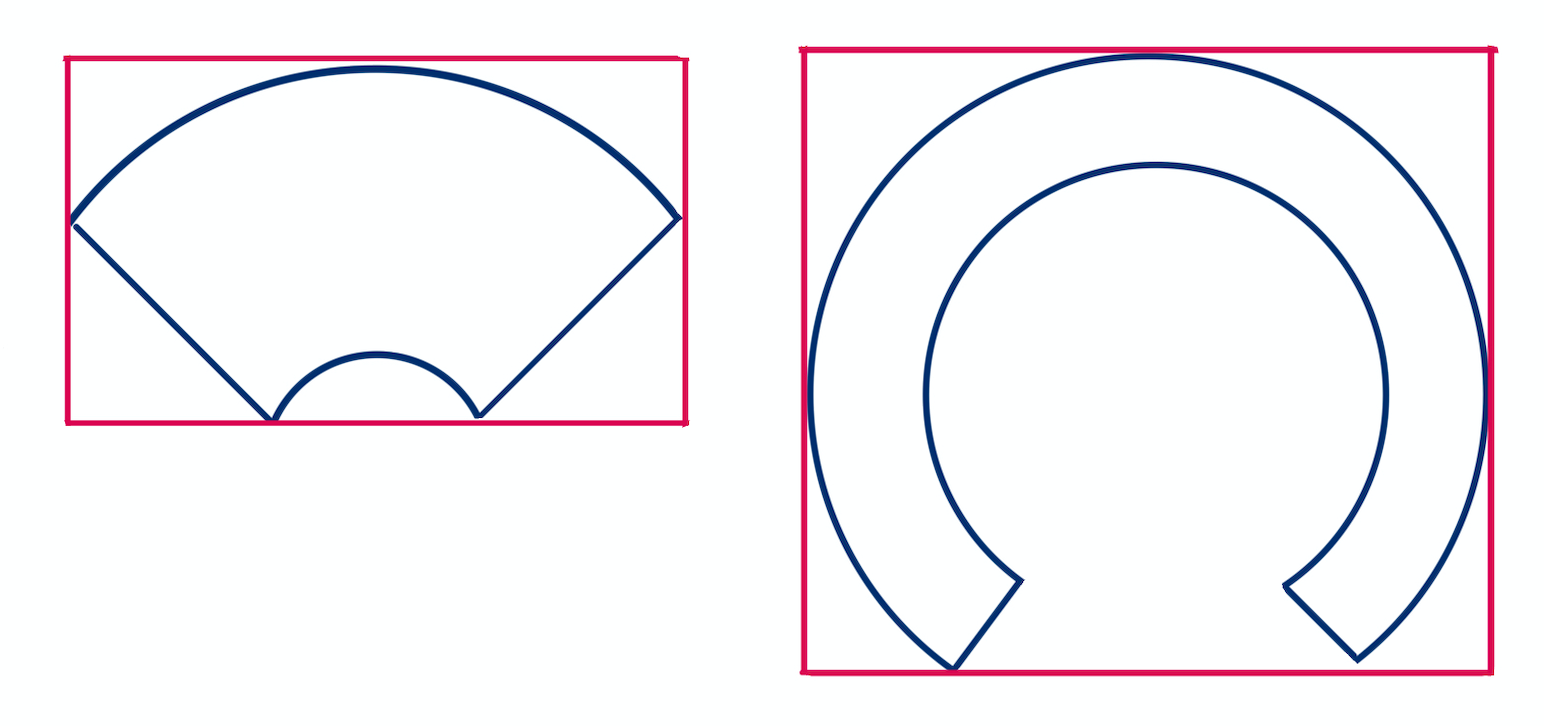
All physical units specified are converted to default coordinates such that one unit is equal to half the height of the input image.
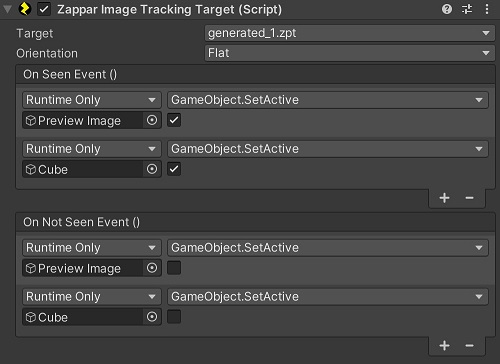
On Seen and On Not Seen Events
Section titled “On Seen and On Not Seen Events”The Zappar Image Tracking Target triggers events when the physical target image enters and exits the camera view (On Seen and On Not Seen, respectively). With these events, you can specify something to happen when either of these events is triggered. For example, showing and hiding content:
Please refer to the Advanced Usage article for further details.