Getting Started
Mattercraft provides WebXR Project Templates for AR/VR/MR to quickly get you started on creating a basic immersive experience. Our templates come preconfigured with everything you need to quickly get an AR or VR WebXR experience.
We highly recommend using a dedicated project template from scratch, however, if you want to add XR features to an existing project, or wish for more control, you can install our NPM WebXR package
@zcomponent/three-webxr.
Using a Project Template
Section titled “Using a Project Template”Once you select a template, like the VR/MR passthrough Starting Template for example, it will configure your project with the specific components for that type of immersive experience.

These templates demonstrate certain WebXR functionalities and can be easily modified by swapping in your own assets.
You may click on a project template to learn more about it before you launch the project in the Mattercraft editor.
Using the WebXR Package
Section titled “Using the WebXR Package”We highly recommend using a dedicated project template from scratch, however, if you decide not to use a template and opt for the WebXR package, you will need to install it within your project first. Mattercraft allows you to easily add npm packages through its Add-ons & Dependencies tab.

Follow these instructions to install the Zappar WebXR package:
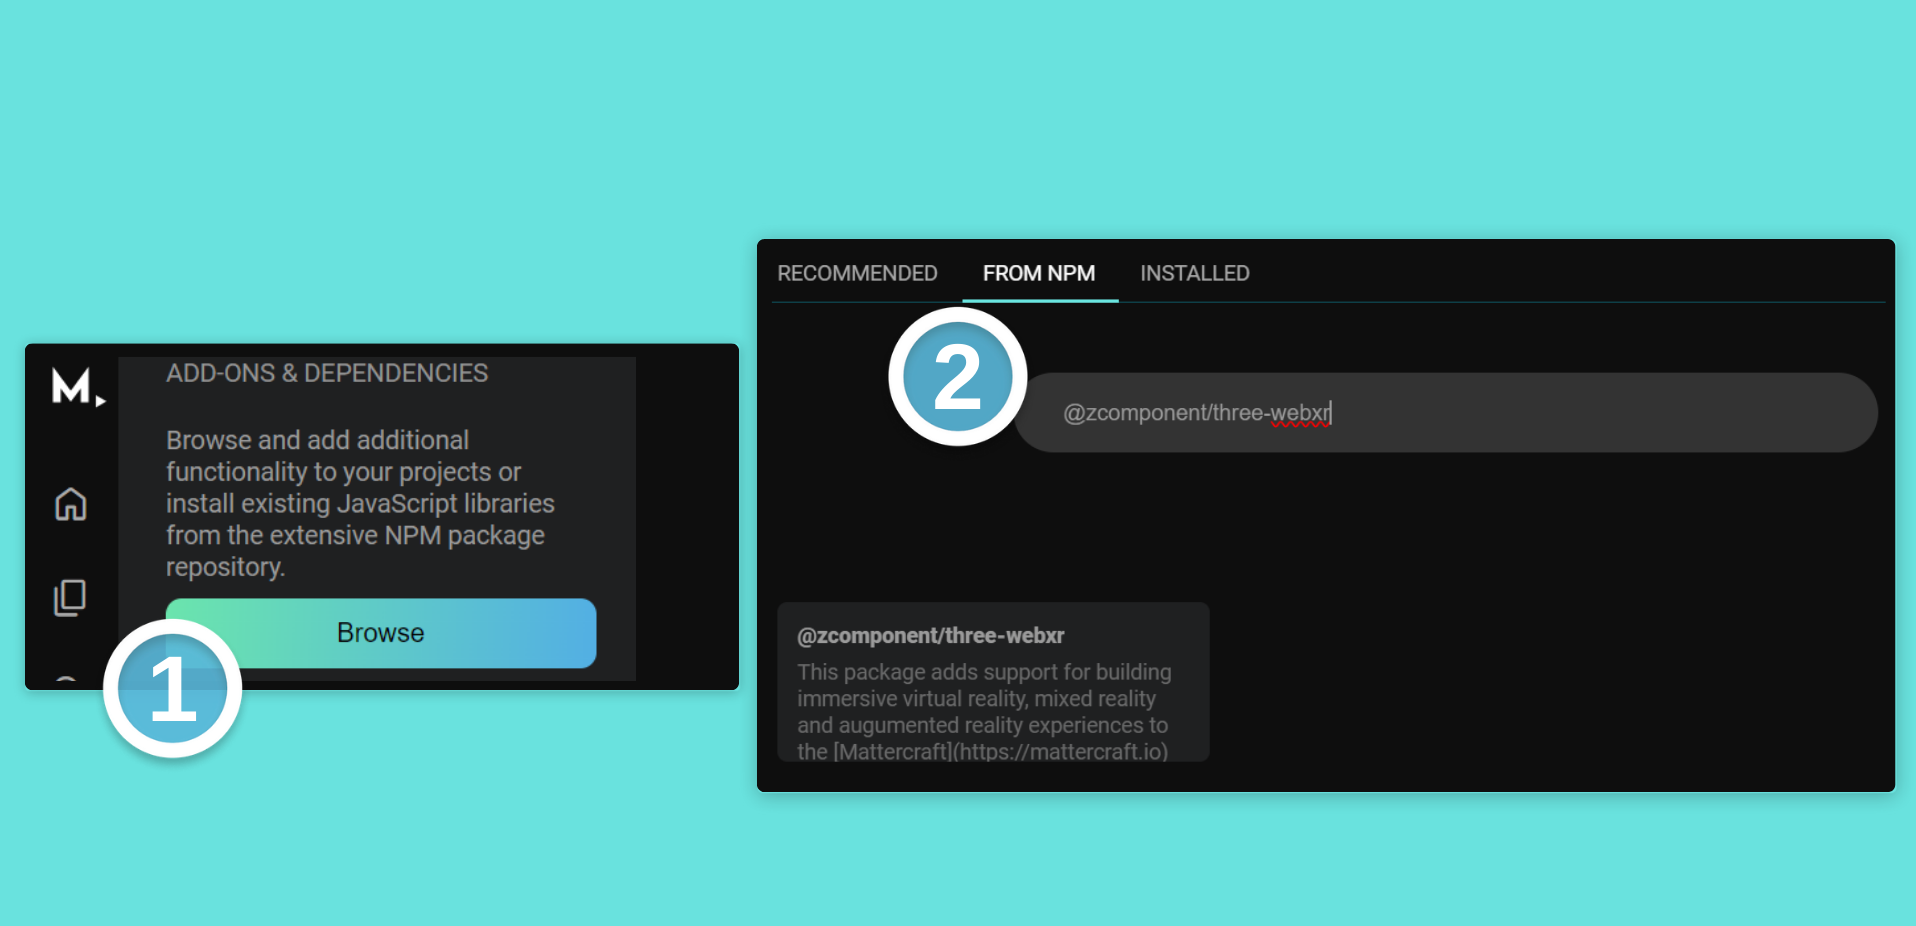
- Navigate to the Add-ons & Dependencies tab within the Left menu, and click on Browse.
- In the modal that pops up, click on the From NPM tab at the top.
- Within the search bar, type in
@zcomponent/three-webxrand then click on the module to install it.
As you have installed the WebXR package instead of getting started with a template, you will need to manually add the following snippet to your mattercraft.json file to enable the Launch on Meta Quest button:
{  // ...mattercraft.json set-up  "supportedDevices": {    "metaQuest": true  }
}
Understanding the WebXR Components
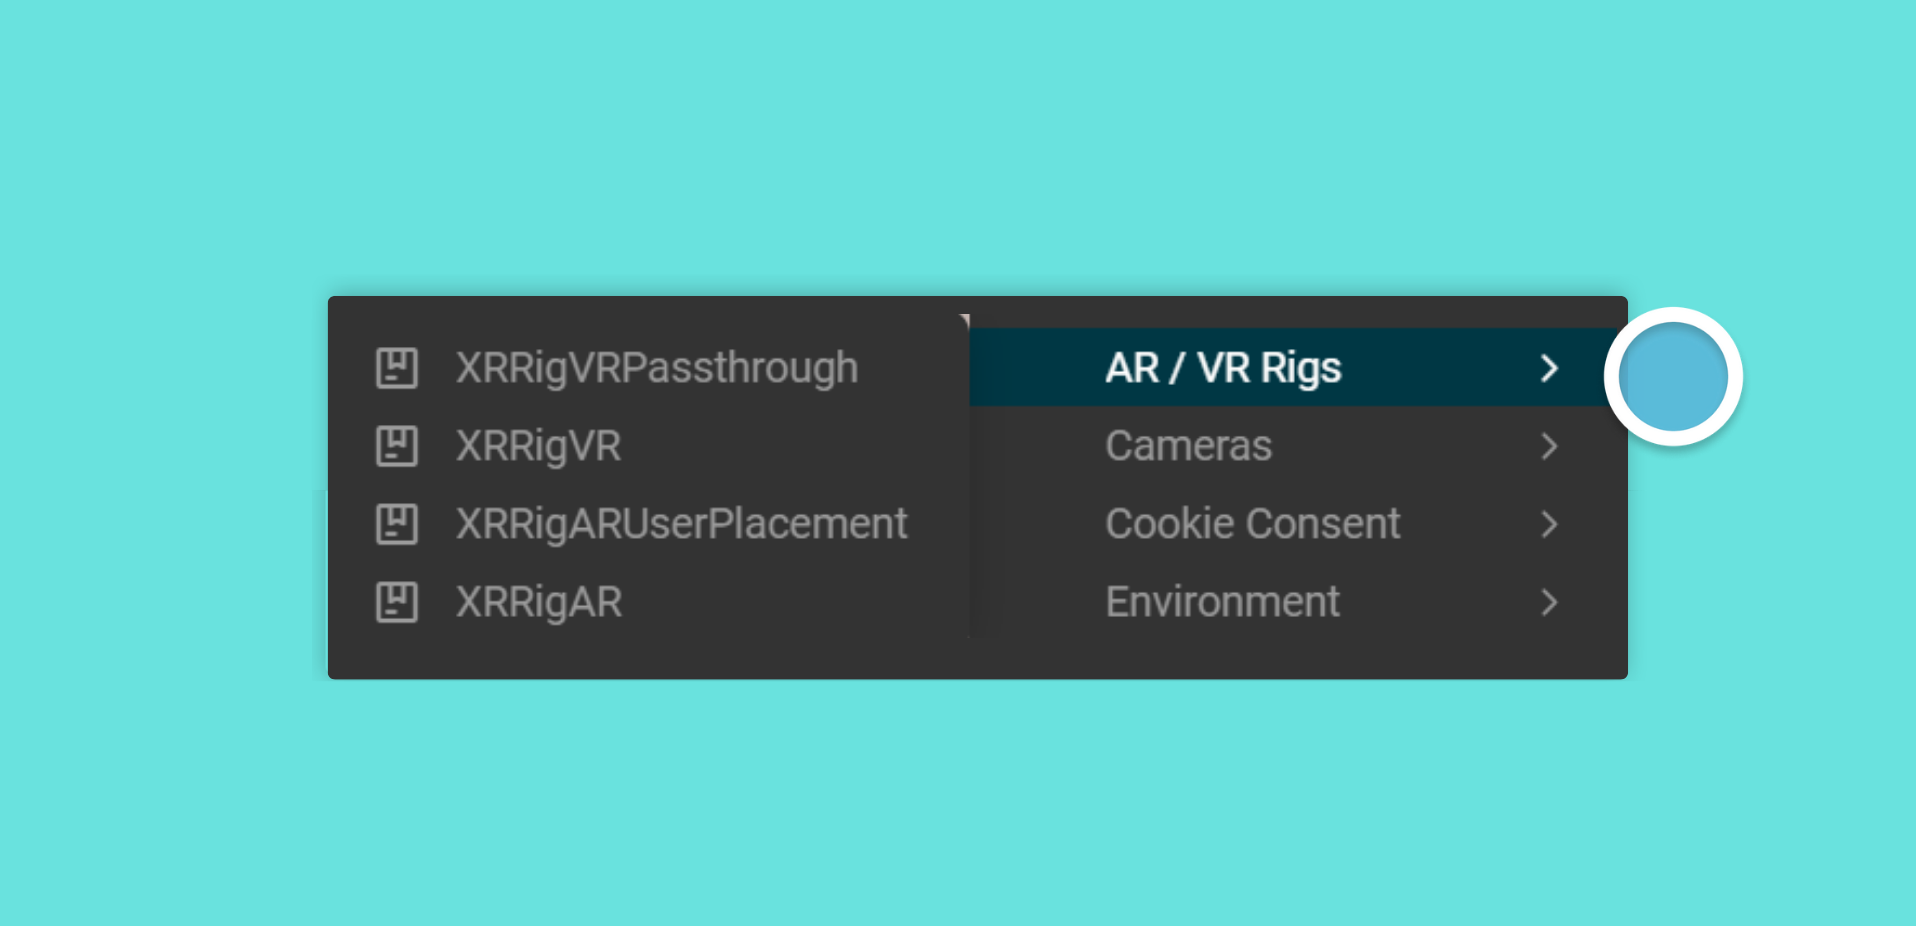
Section titled “Understanding the WebXR Components”Whether you use a template or install the NPM package, you can access all the WebXR components if you right-click on the menu next to the Hierarchy and click New under root(Group) . You will then see all the availablerigs to choose from the AR/VR Rigs menu.
You can then add a rig that corresponds with the immersive experience you aim to build.

A rig is a group of components that enables and manages user navigation and interaction within the headset experience you wish to build. It contains a virtual camera system that mimics the user’s perspective—in Mattercraft, this is typically the standard perspective camera. Additionally, it integrates input methods for tracking user movements and gestures, along with facilitating user movement.
You can essentially think of it as the users, eyes, ears, and hands within the immersive experience. We recommend starting from a rig as it has everything you need for each of the different headset-type experiences, including:
| Rig | Components Included | Description |
|---|---|---|
XRRigAR | Controllers Camera XR Manager | Sets up AR experiences within the user’s real-world environment; suitable for hand-held AR. |
XRRigVR | Controllers Camera Environment Teleport & Turn Managers XR Manager | Provides a fully immersive VR experience with a configurable sky environment and user movement controls. |
XRRigARUserPlacement | Controllers Camera User Placement Manager XR Manager | Designed for AR with user-defined placement of content in the real-world environment. |
XRRigVRPassthrough | Controllers Camera Teleport & Turn Managers XR Manager | Facilitates VR experiences that blend the real world with virtual elements, leveraging passthrough capabilities. |
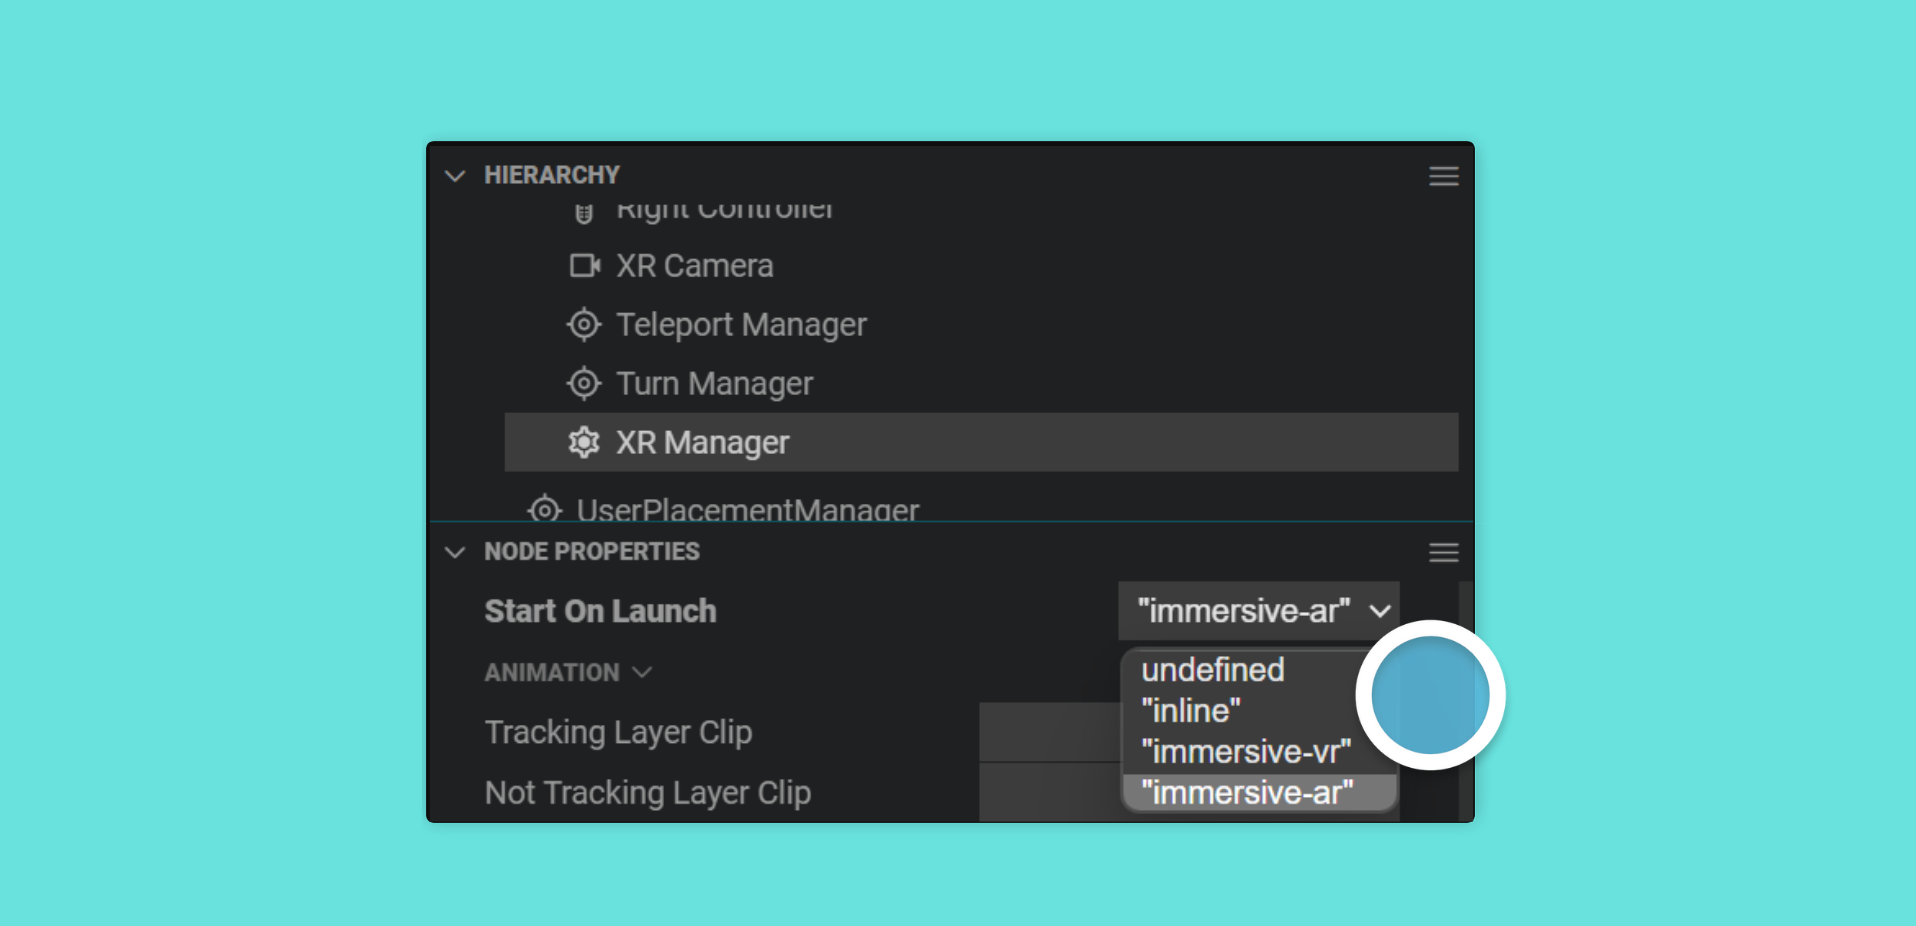
You can build WebXR experiences directly in Mattercraft, using these two main modes accessed via the XRmanager component within all the rigs:
- Immersive AR mode: Allows web pages to have 3D experiences that use the high-quality native world tracking support (on Android provided by ARCore). Also enables passthrough AR experiences.
iOS native world tracking provided by ARkit is not fully available for WebXR at the moment.
- Immersive VR mode: Allows web pages to show fully immersive 3D VR content through a headset. The web browser applications on Meta Quest and Hololens support this mode, and if this mode is activated by a web page on Chrome for Android the device will provide a ‘Google Cardboard’ (and Zapbox!) compatible experience. PC VR headsets (such as Vive, Rift, Index etc) also support this mode.

WebXR is not a replacement for the Augmented Reality by Zappar package but is a great alternative given the correct usage and use case.
Configuring the WebXR Package
Section titled “Configuring the WebXR Package”Once you have selected a rig, you can edit the node properties of the different components within it. Each rig contains an XR Camera, XR Manager, Left Controller and Right Controller.
Depending on the selected
rig, you might also have additional options.
This table summarizes the main node properties for each available component within the various rig options.
| XR Rig Components | Main Node Properties | Description |
|---|---|---|
XR Manager | Start On Launch | Determines which mode (“immersive-vr” or “immersive-ar”) to start when the application launches. |
Turn Manager | Controller SelectionInput SelectionAdvanced | Sets which controller (e.g., “left” or “right”) to use for turn input, Thumbsticks or Touchpads for input, and sensitivity parameters |
Teleport Manager | Controller SelectionInput SelectionAdvancedTeleportManager | Sets which controller (e.g., “left” or “right”) to use for turn input Thumbsticks or Touchpads for input Sensitivity parameters Teleport design properties |
Sky Environment | Show At Run TimeSky | Show Sky Environment when the experience runs Use an environment map Adjust other sky properties |
XR Camera | Perspective Camera | Adjust the Far and Near clipping planes of the camera. |
Controller (Right and Left) | Allow Left Hand ControllersAllow Right-Hand ControllersAllow Unspecified Hand ControllersAllow Physical ControllersAllow HandsAllow Screen InputsAllow Gaze InputsLoad ModelSpaceDesign Time ModelXRController | Adjust controller and input permissions as well as design, adjust pointer emulation behavior, and set tracking layer animation clips |
User Placement Manager | UserPlacementManagerAnimation | Manage the preferred controller for user placement, as well as adjust placement behavior and placing layer animation clip |
If you want to activate States or Timelines based on whether the content is placed or not placed in the environment, you can update the values of the
Placing Layer ClipandNot Placing Layer Clipproperties. You can refer to our Layers documentation to learn more.