Face Tracking
Face Tracking can detect and track digital content to the user’s face. This is great for building face-filter experiences which allow users to try on different virtual glasses or hats for example.
Creating a Face Tracking experience
Section titled “Creating a Face Tracking experience”To create a Face Tracking experience, you may customize a ready-made Project Template or add a Face Tracker component to an existing project.
Customizing a template
When you open Mattercraft, you will be presented with a few Project Templates to help you get started.
![]()
Upon selecting a Face Tracking template, your .zcomp will display a project which includes a head mesh in the Viewport to indicate where to place your content; as well as some simple content and basic behaviors.
The template may also include a Head Mask Mesh, which will automatically hide content inside the head. This is used to mask 3D objects positioned behind the head, for example in the case of hats or helmets.
You may customize any Mattercraft template like an ordinary Mattercraft project.
To learn more about getting started with Mattercraft’s templates, check out our dedicated Project Templates documentation.
Adding to an existing project
To add Face Tracking to an existing project, you will first need to follow the instructions on our dedicated Zappar Camera article if you have not already.
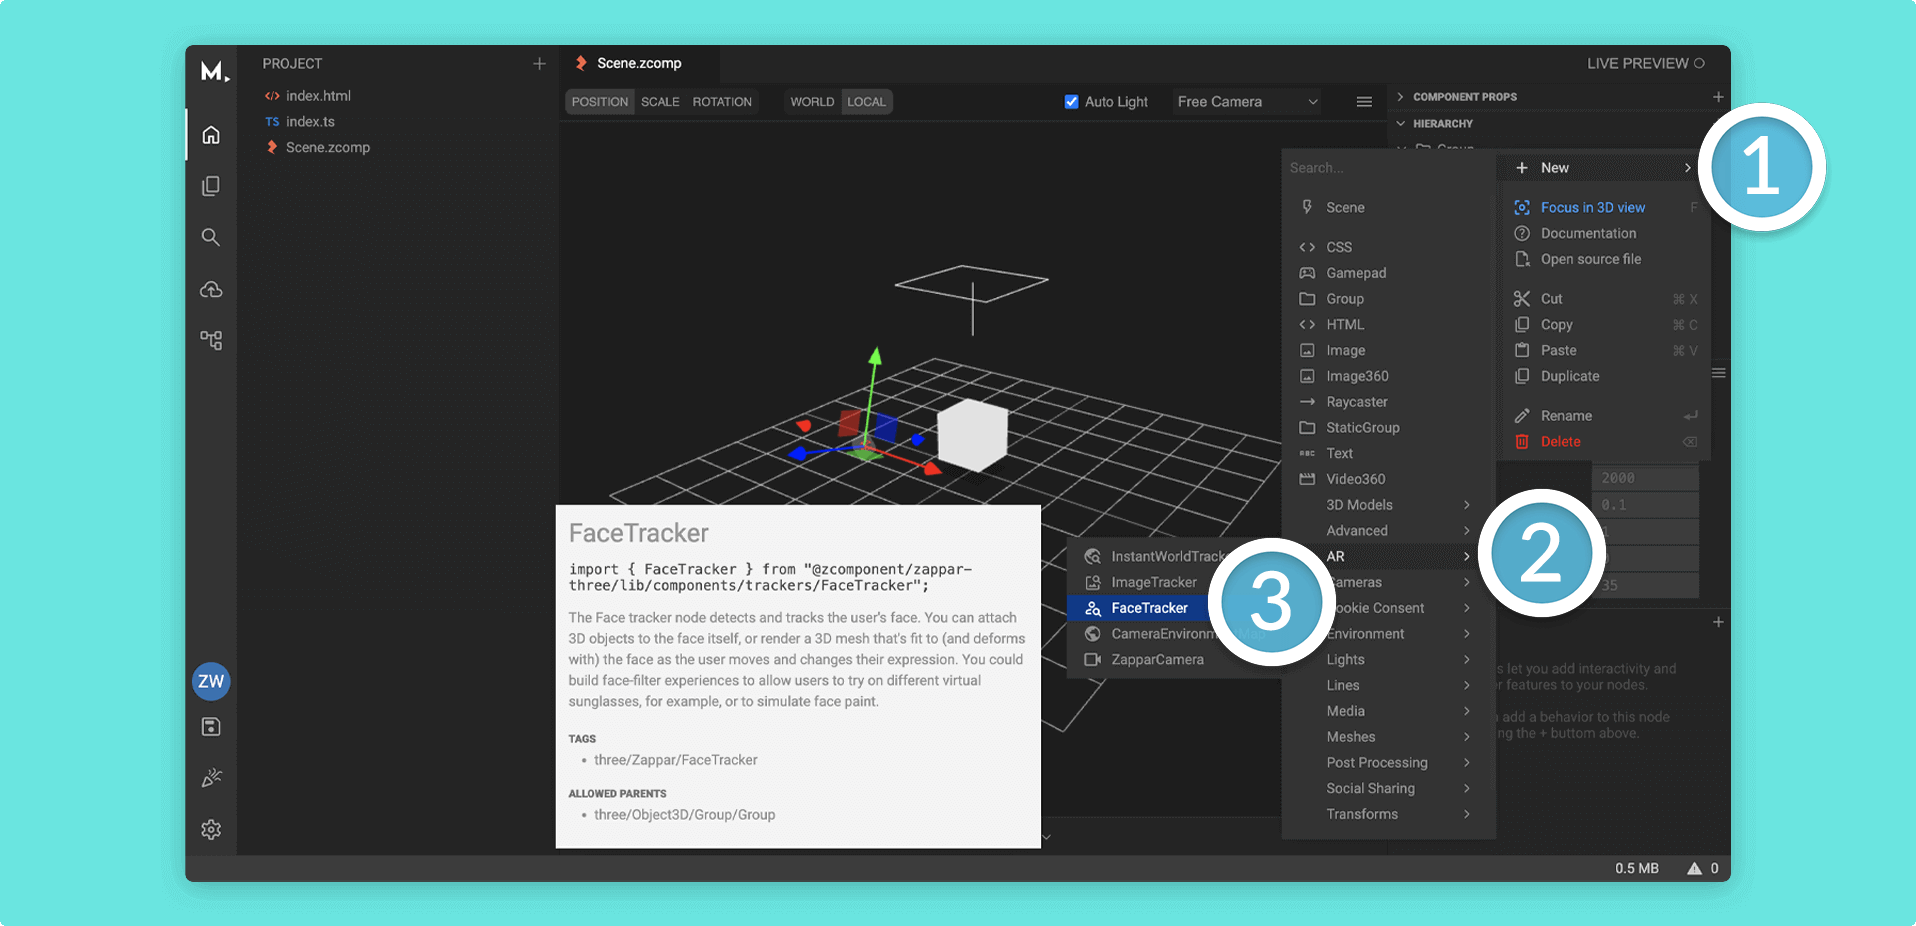
After following the pre-requisites, you can then add a FaceTracker component to your .zcomp. To do this:
- Click on the + (plus) icon in the Hierarchy (or right click on a Group Node)
- Find the
ARcomponent category and from here, selectFaceTracker
FaceTracker properties
Section titled “FaceTracker properties”The FaceTracker has the following specific property:
| Property | Description |
|---|---|
Max Faces | The total amount of faces that can be detected by the FaceTracker component. |
Note that setting a value of two (2) or more faces may impact the performance and frame rate of the experience. We recommend sticking with the default value of one, unless your use case requires tracking multiple faces.
Face Anchor Group
Section titled “Face Anchor Group”Each FaceTracker has an Anchor Group for faces detected and tracked in the camera view.
![]()
By default, a maximum of one (1) face is tracked at a time, however, you can change this by heading into the Node Properties Panel for the FaceTracker and updating the Max Faces parameter.
For example, you could then add another
Anchor Groupand set an individualAnchor IDif you wanted different content to appear on eachAnchor Group.
The Anchor Group has the following specific properties:
| Property | Description |
|---|---|
Anchor ID | The identifier for a particular Anchor Group. |
Show Preview At Design Time | Show or hide the face mesh as a reference in the 3D Viewport. |
Tracking content to a face
Section titled “Tracking content to a face”When your FaceTracker is in your Hierarchy and has an Anchor Group, you can start adding tracked content by placing components inside of the Anchor Group, or any Face Landmarks.
![]()
After understanding the basics of Face Tracking, you can learn more about this tracking type by exploring the following articles: