Videos
Videos are a powerful tool for showcasing dynamic content in your experiences.
Supported formats
Section titled “Supported formats”Mattercraft currently supports the following formats:
- MP4
- OGG/OGV
Adding Videos
Section titled “Adding Videos”Adding videos to your project is super easy in Mattercraft. You have three options:
Drag and Drop
Simply drag and drop your video into the project files menu:
From your Computer
Click on the + (plus) icon in the project files menu (located in the Left Menu) and select From your computer to browse and import your video:
Streaming
Your video must be hosted on a server and have a direct link to use this method (e.g.
https://myHostingServer.com/myVideo.mp4).
Click on the + (plus) icon in the Hierarchy (or the three dots on a Group) and find the Media option. Then select Video to add a video component to your Hierarchy. In the video’s Source property, enter the video’s direct URL from a hosting server to stream your video:
Green Screen Video
Section titled “Green Screen Video”For videos requiring transparent areas, Mattercraft offers the chromaKey feature.
Follow these steps to use it:
- Add your Green Screen Video following the steps above
- Drag the Video into the Hierarchy
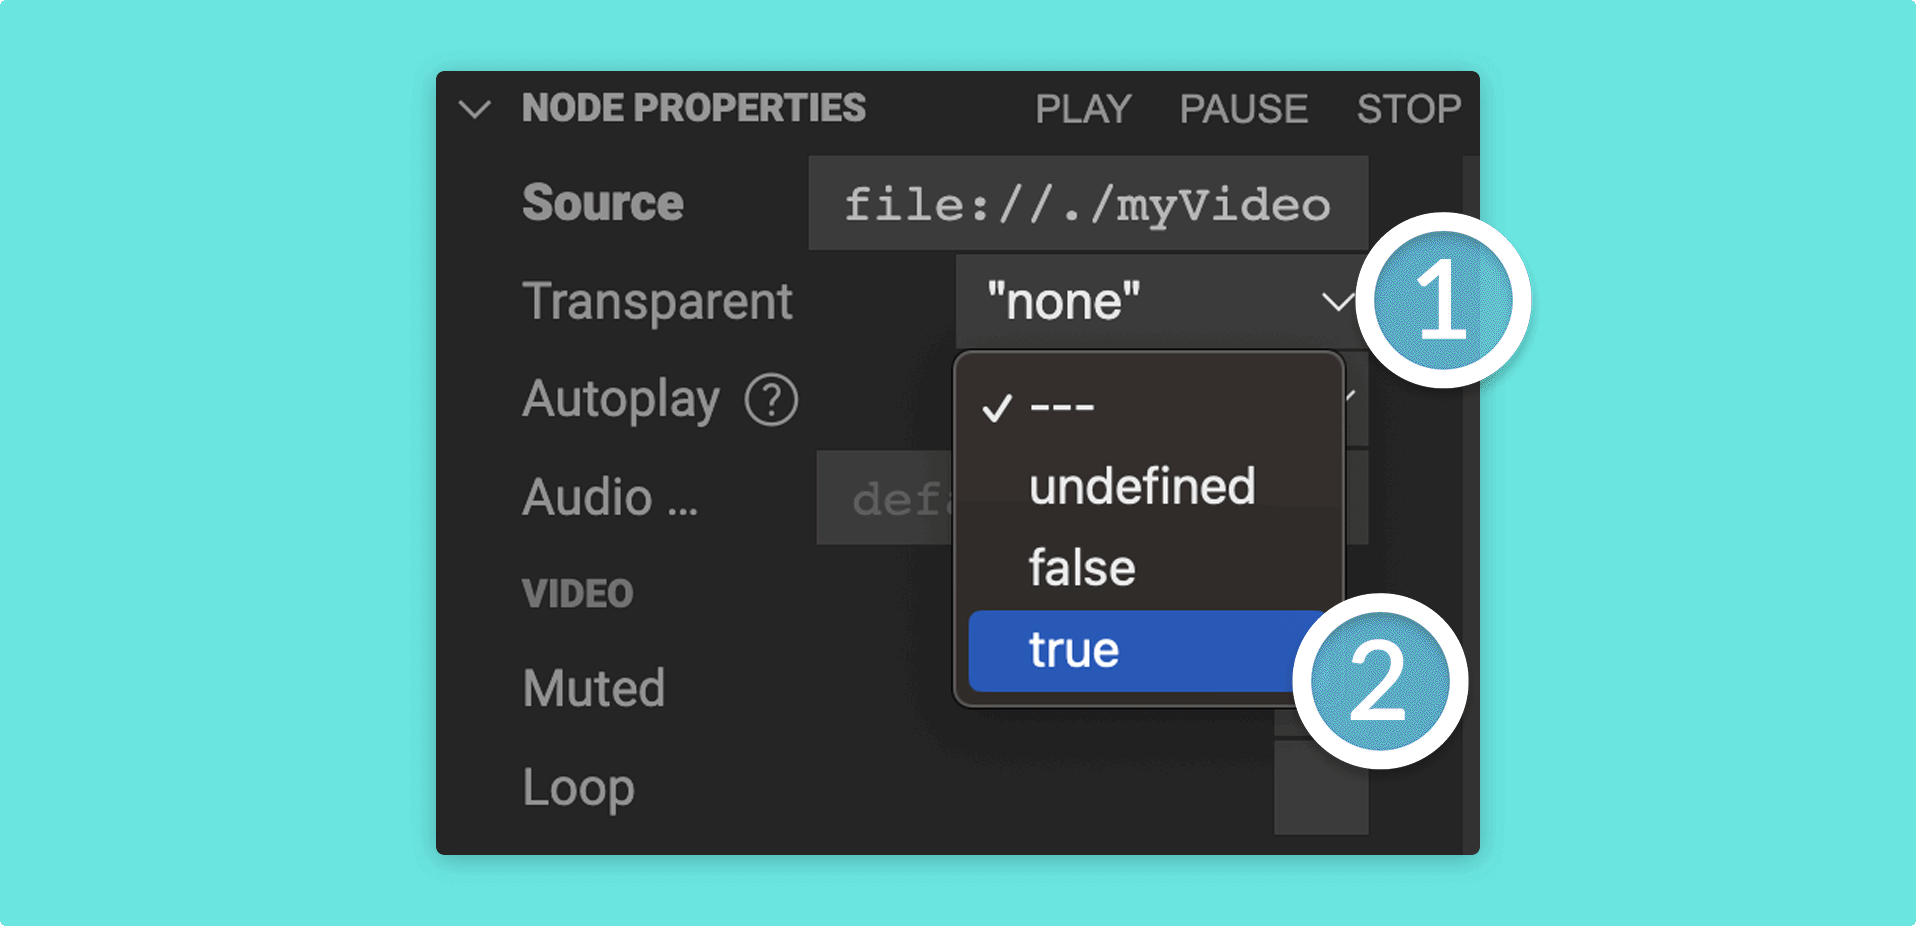
- In the Properties Panel, set the
Transparentproperty tochromaKey - Still within the Properties Panel, scroll down to the
Chroma Key Transparencysection and click on theKey Color - Use the color picker to select the green color in your video that you want to make transparent
This should update the video and mask out the green screen. You can further refine the Similarity, Smoothness, or Spill properties in the same section for the perfect green screen effect.
Side by Side Videos
Section titled “Side by Side Videos”If you have a masked side-by-side video, you can use the sideBySide property value to create transparency:
You may use the following instructions for side by side video:
- Add your Masked Side By Side Video following the importing steps above
- Drag the Video into the Hierarchy
- In the Properties Panel, set the
Transparentproperty tosideBySide
This should update the video and mask out the video properly. You can further refine the Direction or Alpha First properties in the same panel for the perfect masking effect.
Playing Videos
Section titled “Playing Videos”Once you have added your video to the Hierarchy, you have several options for playing it:
Autoplay
Enable the Autoplay option in the properties to automatically start the video when your zcomp is loaded.
Stream Action
Use a stream track action to trigger video playback via an event:
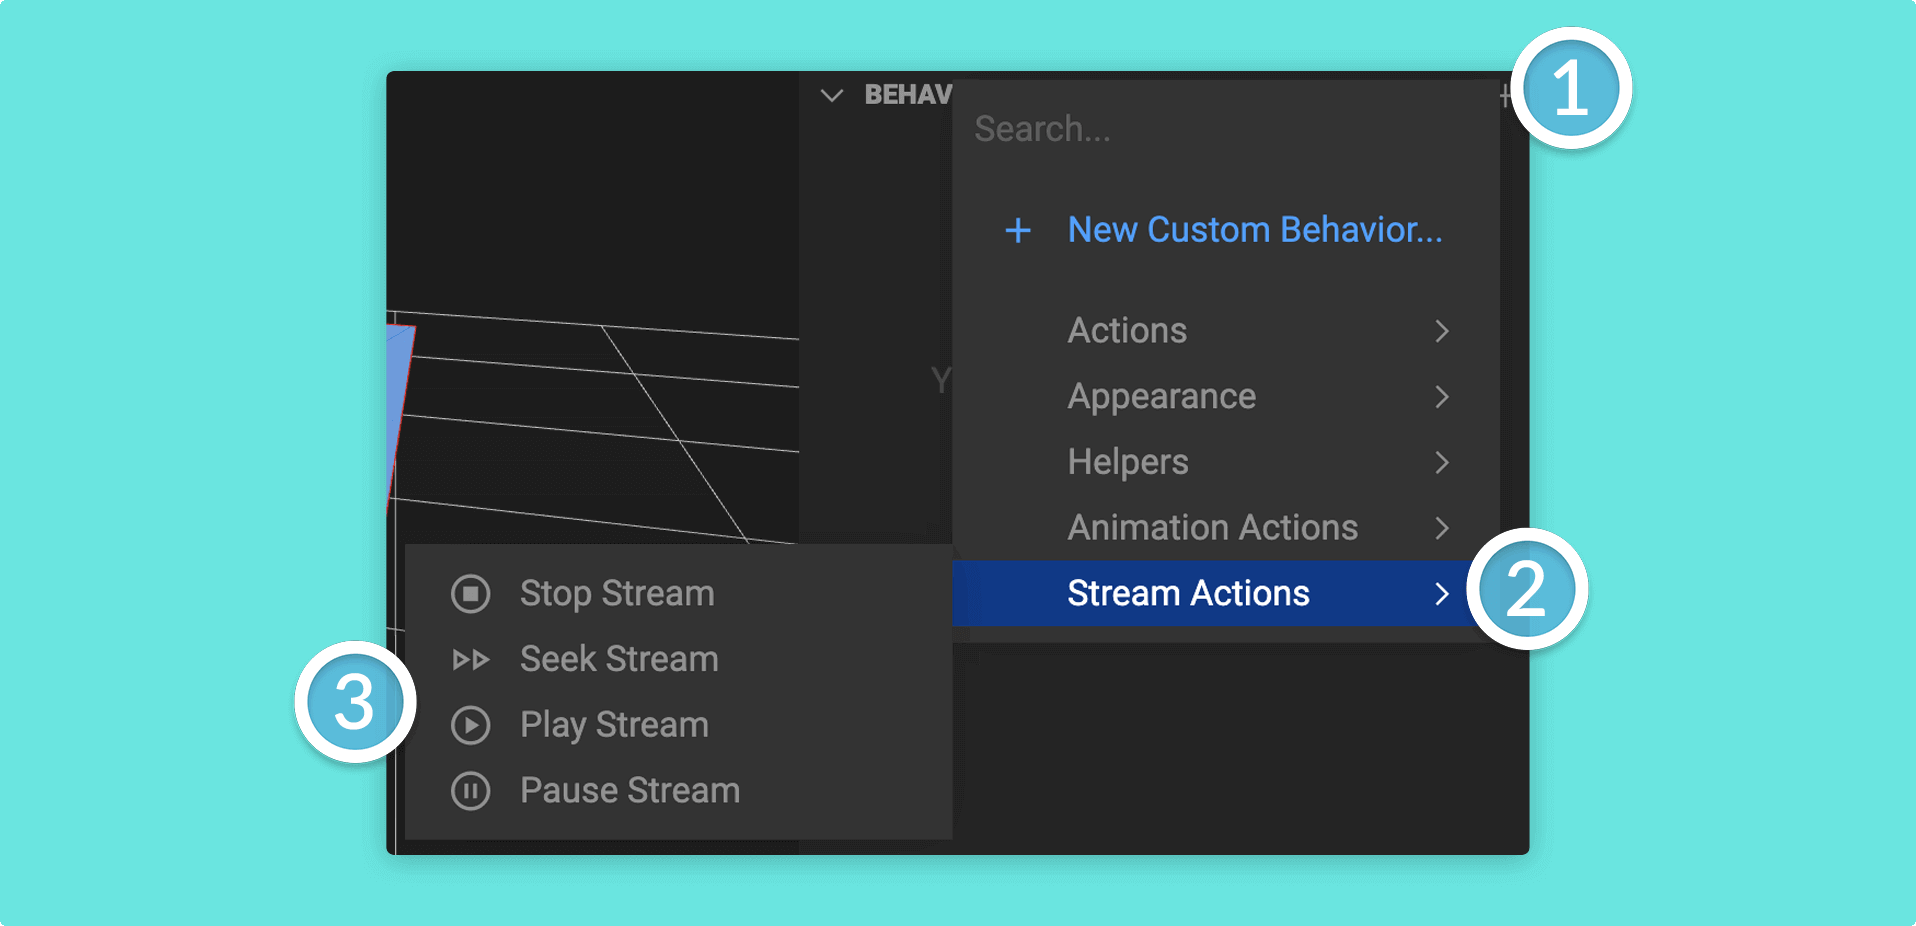
Select the node in the Hierarchy that you want the event to fire on, choose Stream Actions, and use the desired action (e.g. Play Stream).
To learn more about adding interactivity to your Mattercraft projects, see our dedicated Behavior Actions articles.
Stream Tracks
You can add videos to a timeline by using it’s stream track:
To utilize this feature, follow these steps:
- Click on the Animations panel to open it up
- Click on Layers if your Timeline is inside a layer or Clips if it is independent
- Find and click on the Timeline you wish to add the Stream Track to
- Go to the Timeline Clip editor and find the + (plus) icon
- Find Streams and then click on the video you wish to add to the Timeline
- Mattercraft will automatically add the Stream Track to the Timeline
You will then be able to use standard timeline methods to edit and update the video along the timeline; such as changing the start, end, offset start, and playback rate (by double clicking on the video bar).
To learn more about timelines and playing stream tracks in Mattercraft, check out our dedicated Stream Tracks article.
In a Script
To play videos in a script, use:
this.instance.play()
If you’re using this in a behavior that isn’t directly instancing the video, replace
this.instance.withthis.nodes.zcomponent.YourVideoNode.
You can also listen for events that the video fires using:
// When the video this code references is playing...this.register(this.instance.onPlay, evt => {
    // ...run this code to handle event    console.log("Video is playing!");
});
Replace
onPlaywith the event you want to listen for.