Using HTML
With HTML-Based Screen UI, you can leverage familiar web technologies to design and develop dynamic UI elements. The integration of HTML content allows you to create custom buttons, menus, information panels, and more, all while effortlessly interacting with the underlying 3D content.
With the flexibility of Mattercraft’s Graphical User Interface and the web standards of HTML, CSS, and TypeScript, you can create sophisticated and visually appealing user interfaces that resonate with your audience.
See Mattercraft’s full API documentation here.
Getting started creating UI with HTML
Section titled “Getting started creating UI with HTML”The HTML component allows you to attach HTML DOM elements (e.g. <div>, <button>) to a point in 3D space, or to the screen.
To begin crafting your UI elements with HTML in Mattercraft, follow these simple steps:
- Right-click on the Hierarchy Panel to add a HTML Node to your project
- Once you’ve added the HTML node, you’ll find a range of useful properties in the Properties Panel that will enable you to customize and position your UI elements precisely
HTML Elements in 3D Space
With the anchor3D property to true, the position of the root HTML element will be updated every frame to coincide with the component’s position in 3D space.
The Horizontal Anchor and Vertical Anchor props determine which point on the root HTML DOM element will be aligned with the point in 3D space.
This is great for creating 3D UI elements, like hotspots on a 3D model.
HTML Elements in 2D Space
With anchor3D set to false, the HTML element will be pinned to the edge of the screen (or, more accurately, the edge of the experience’s <canvas> element) corresponding to the Horizontal Anchor and Vertical Anchor props.
Some of the deployment methods for Mattercraft projects, such as the iOS App Clip, allow for full screen display of your experience. You can use the Safe variants of the anchor properties to ensure any UI is clear of camera notches, etc. For more information, see Full Screen.
This is ideal for creating 2D UI, like on screen buttons or header logos.
Building UI with HTML
Section titled “Building UI with HTML”Once you’ve set up your HTML node with the relevant 2D or 3D and anchor properties, you can start building your UI elements.
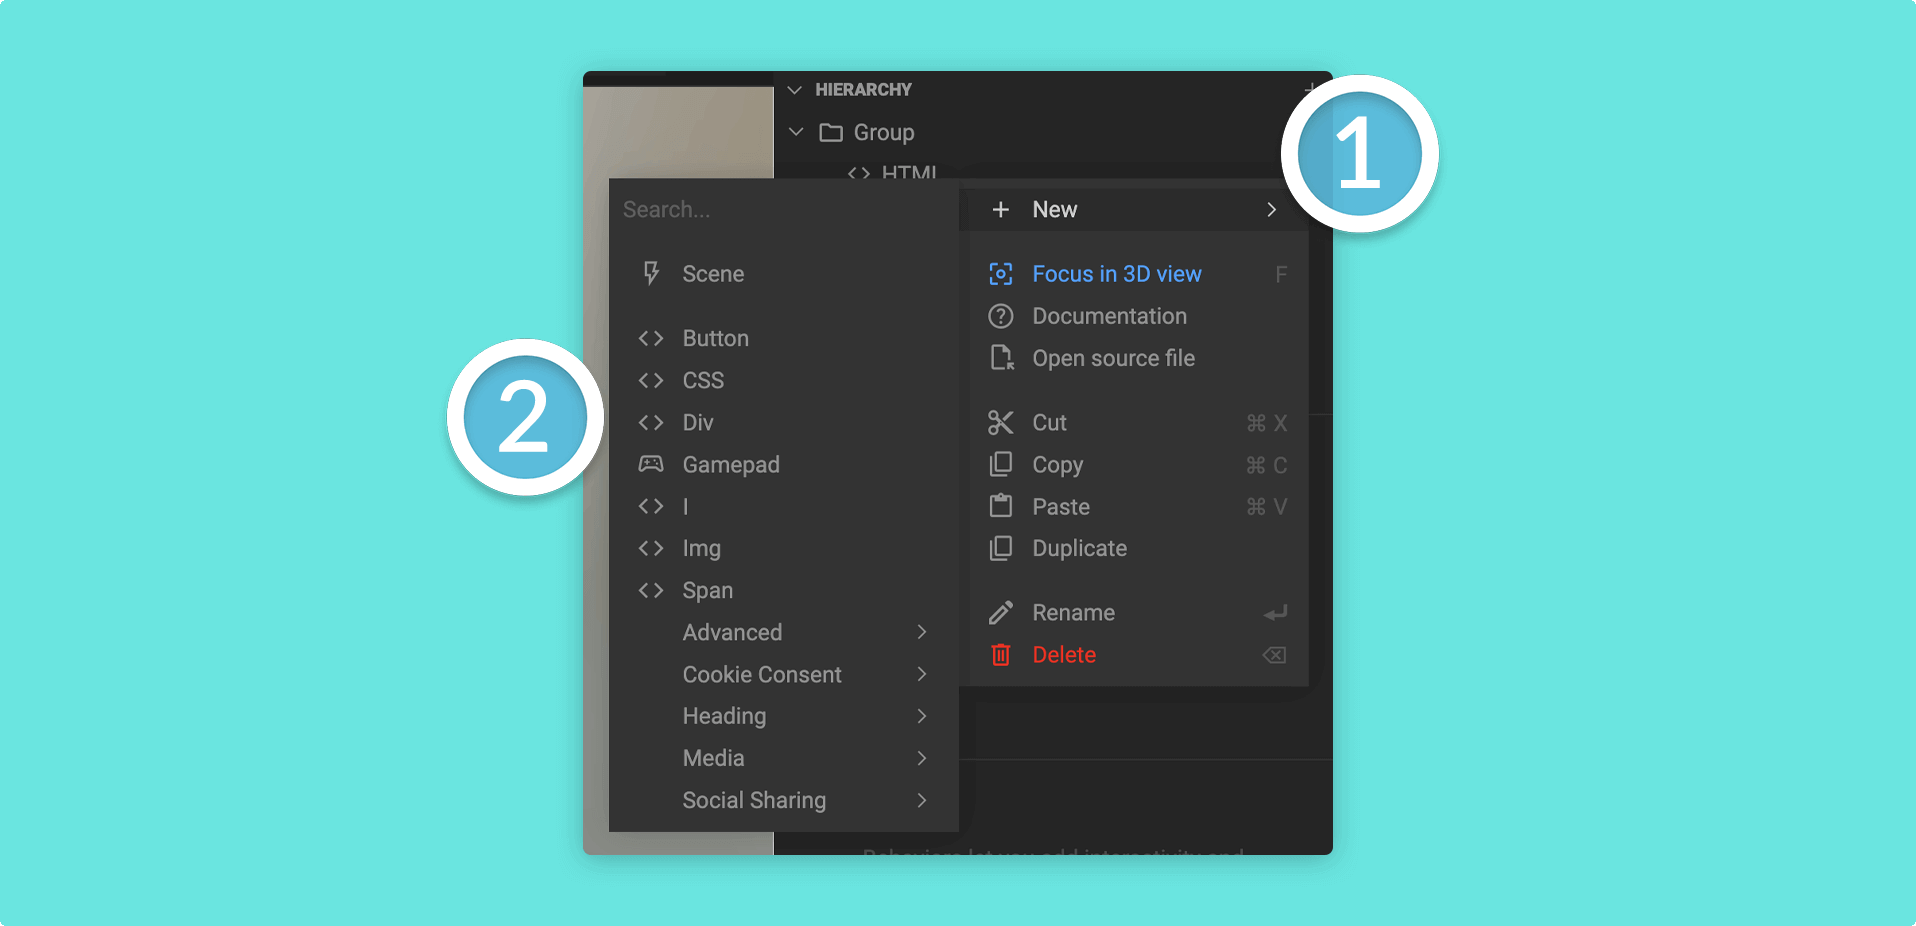
Simply right-click on the HTML node in the Hierarchy to reveal the available elements you can add:
| HTML Element | Description |
|---|---|
Button | Easily create buttons with relevant HTML properties to engage users and trigger interactions. |
Div | Create a container element to organize and structure your UI components. |
Span | Utilize inline text containers for flexible and precise text placement. |
Headings | Use HTML headings (H1-H6) to emphasize titles and headings within your UI. |
img | Embed images directly into your UI for visual appeal. |
I | Add icons or other visual elements using HTML’s inline element. |
CSS | Apply custom styling and formatting to your UI elements using CSS. |
CSS Styling
Section titled “CSS Styling”You can style your HTML elements using CSS, as you would ordinarily:
Follow the steps below to customize your HTML with CSS:
- Add a CSS file into your project files from the + (plus) icon
- Rename your CSS file and add your CSS styles into the editor
- Add a CSS node to your Hierarchy
- Update the
Sourceproperty to your newly created CSS file - Update the
Class listproperty on your other HTML elements (taken from your CSS file setup)
You should see the CSS style pull through into the visual viewport and in your experience at runtime.
Always test your project with Live Preview, as the Mattercraft editor may not support your styles, despite working in the actual experience.