Interactive Button
A button (an image or a HTML node for example) can be made interactive by using the following line of code:
this.register(this.instance.onPointerDown, evt => { // Code to handle event});
this.instancewill target only the node(s) this behavior is attached to, whilstthis.zcomponent.nodeswill search through your project to target a node which may or may not have this behavior attached to it.
Custom interactive button Behavior
Section titled “Custom interactive button Behavior”This tutorial will walk you through creating an interactive button and activate a State or playing a Timeline.
This tutorial assumes that your button, state or timeline has already been added to the Hierarchy.
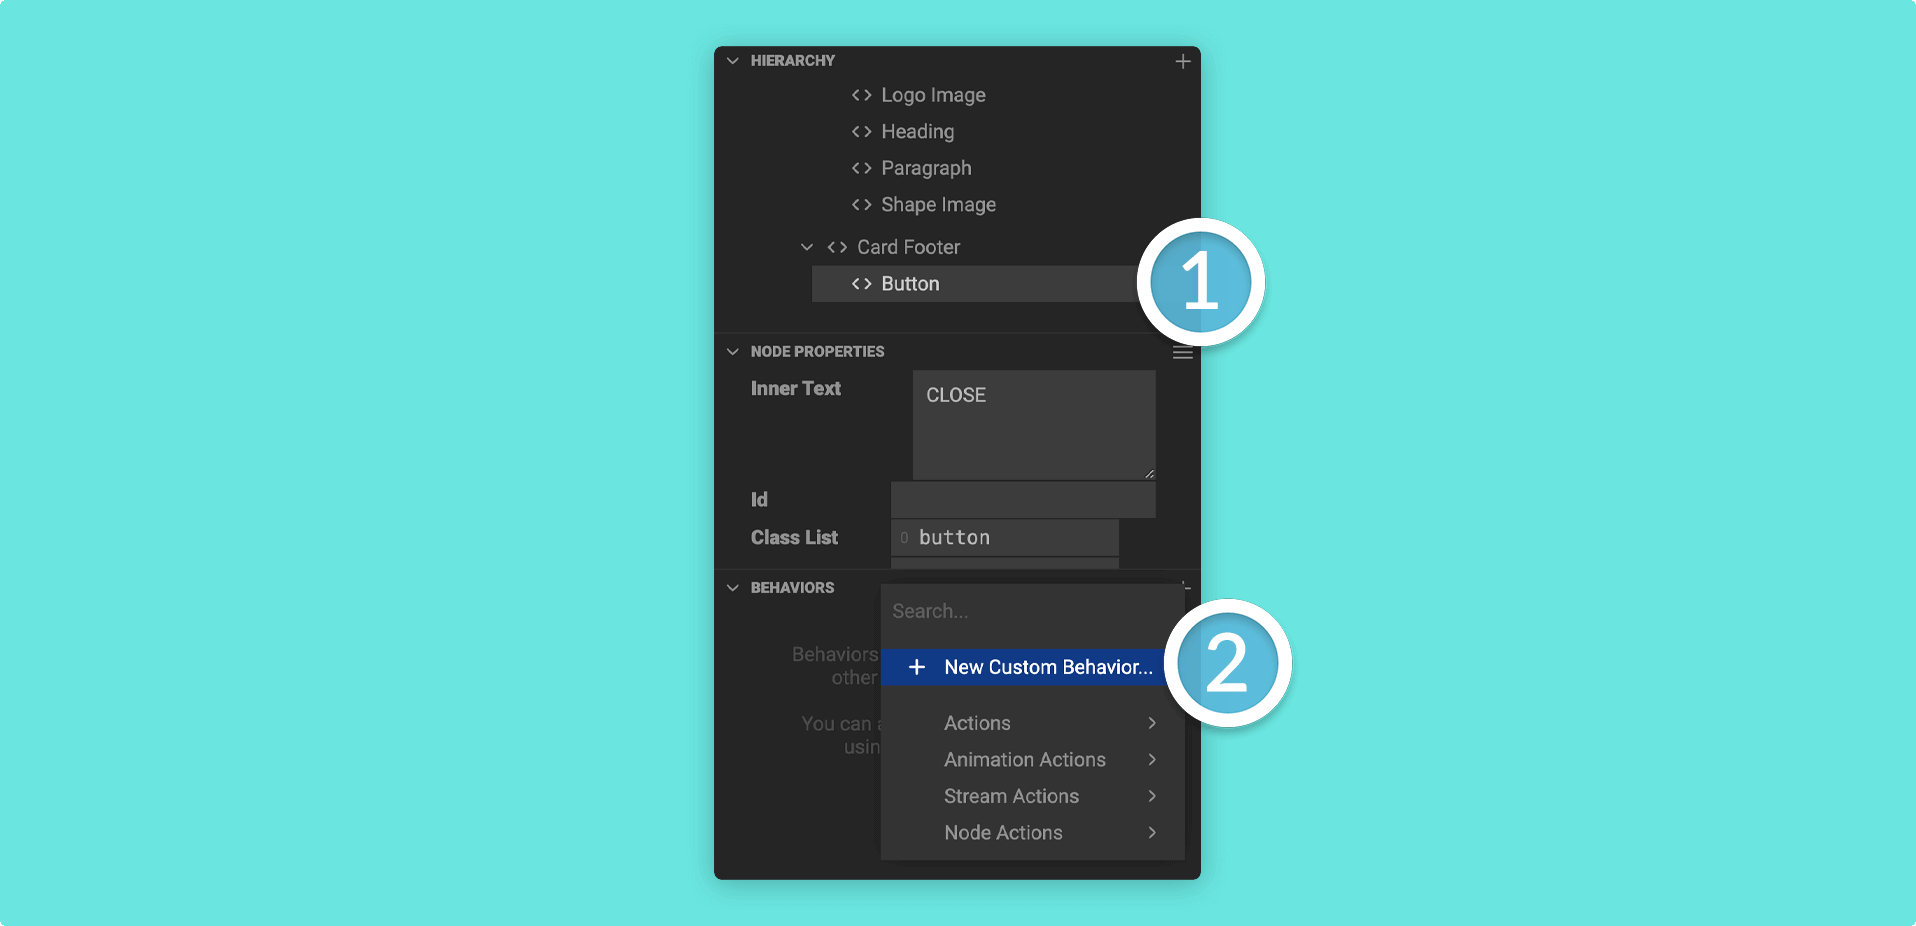
1. Click on your button in the Hierarchy and then find the Behaviors Panel. Click on the plus (+) icon in the Behaviors Panel and then + New Custom Behavior.

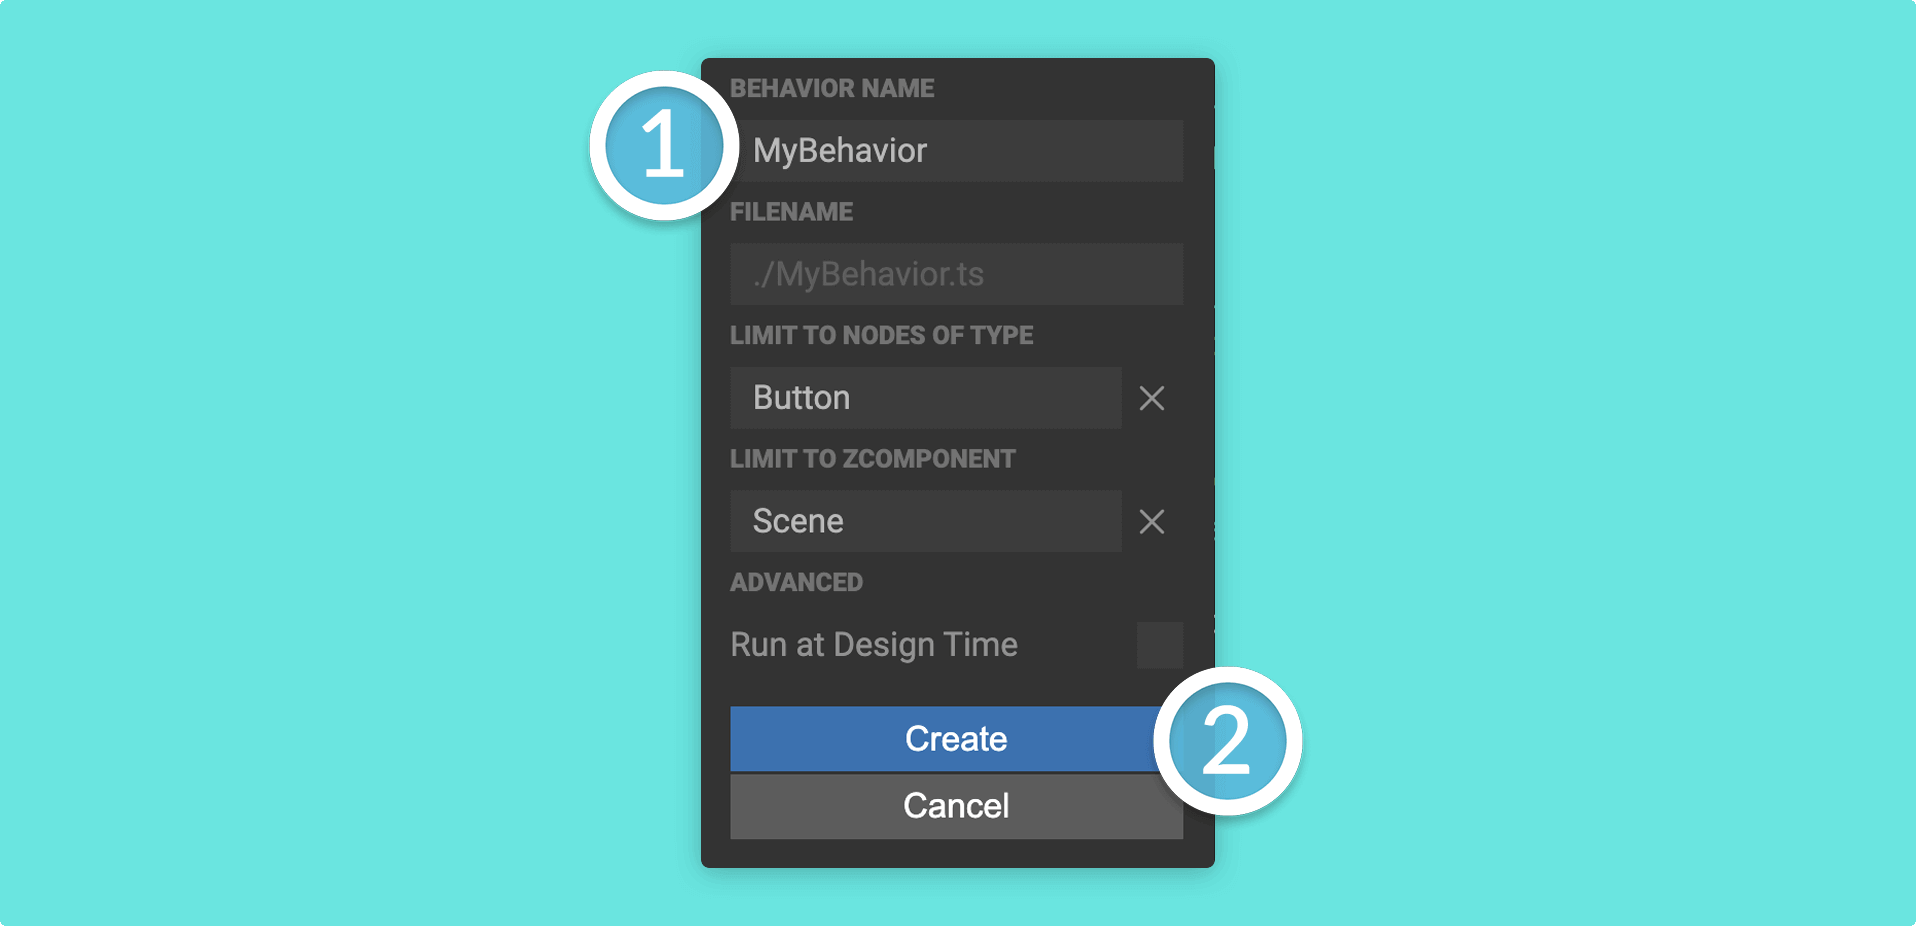
2. Give your custom behavior a name and then click on Create.

If you want your custom behavior to take effect in the Mattercraft editor, check the Run at Design Time box.
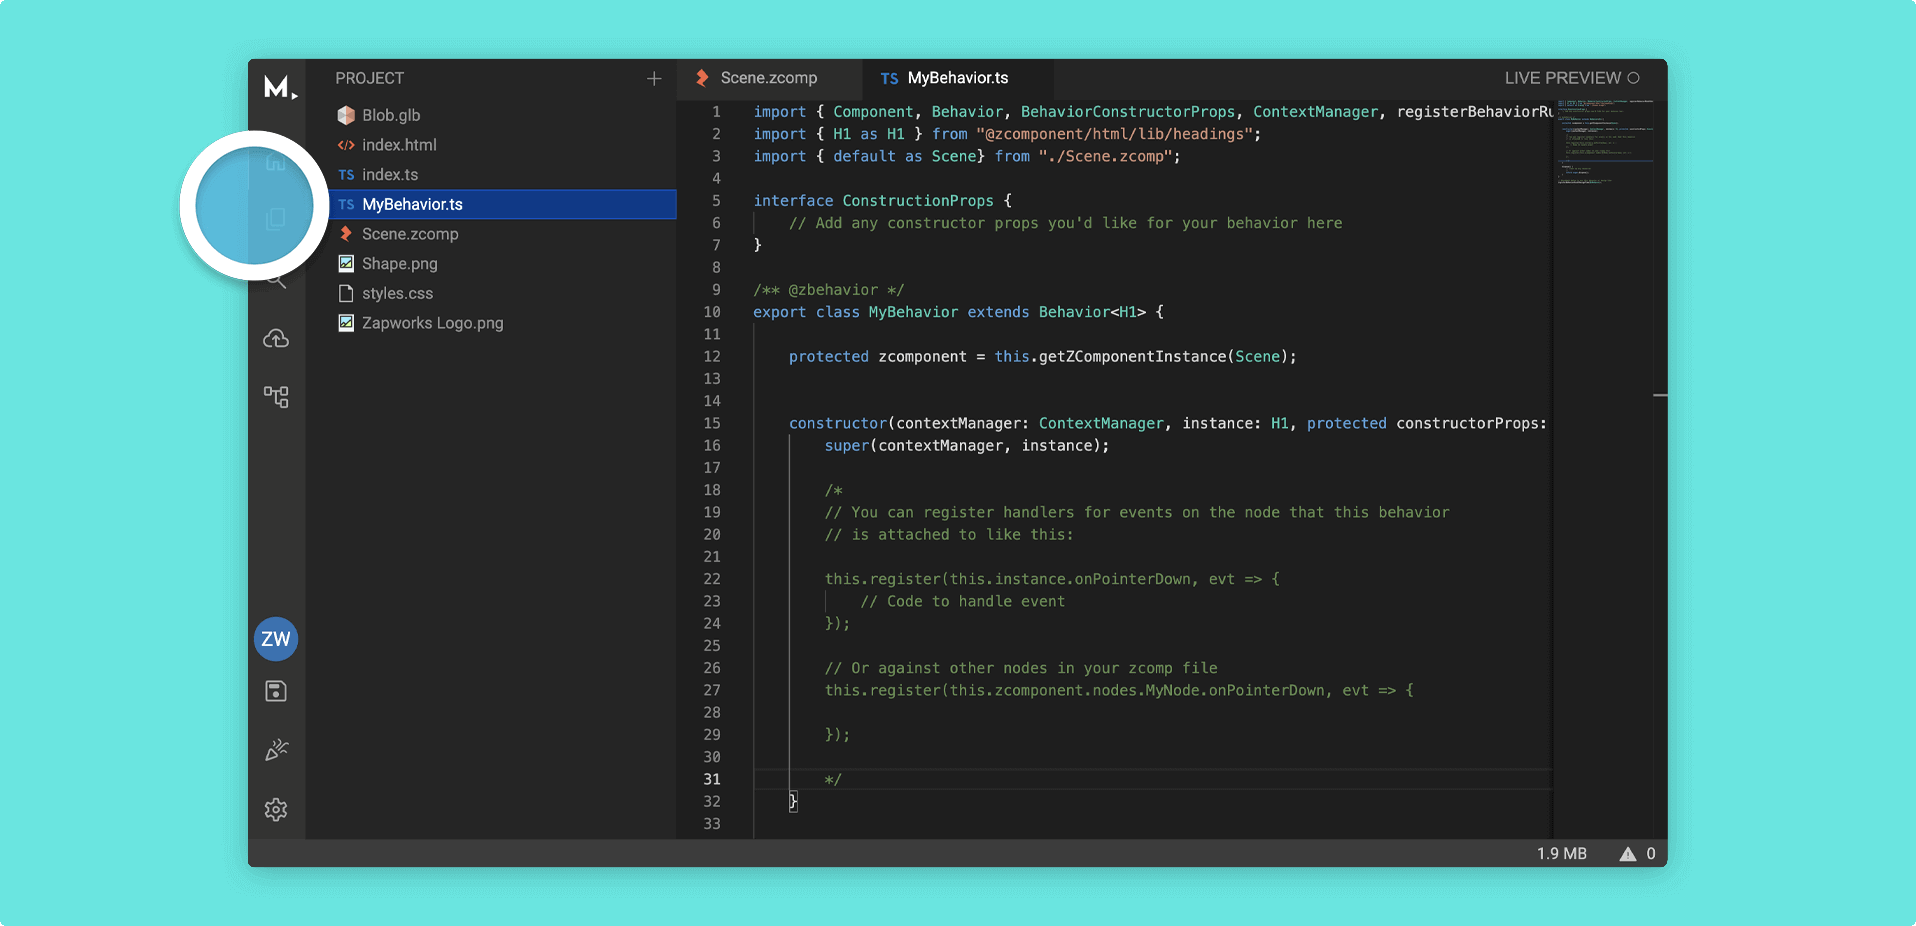
3. Head to the Left Menu and double click on your custom behavior to open it in the Mattercraft scripting environment.

You can also open the script by right clicking on it in the Left Menu and going to Open to the Side
4.1. Find the following code:
/*    // You can register handlers for events on the node that this behavior    // is attached to like this:
        this.register(this.instance.onPointerDown, evt => {            // Code to handle event        });
        // Or against other nodes in your zcomp file        this.register(this.zcomponent.nodes.MyNode.onPointerDown, evt => {
        });*/
4.2. Comment out the this.zcomponent.nodes.MyNode event so that your script looks like this:
    // *** THIS IS NOW ABLE TO RUN ***    // You can register handlers for events on the node that this behavior    // is attached to like this:
        this.register(this.instance.onPointerDown, evt => {            // Code to handle event        });
/**** THIS IS NOT ABLE TO RUN ***
        // Or against other nodes in your zcomp file        this.register(this.zcomponent.nodes.MyNode.onPointerDown, evt => {
        });*/
5.1 Find this code:
this.register(this.instance.onPointerDown, evt => { // Code to handle event});You may have to replace
this.instance.onPointerDownwiththis.instance.onClick, depending on the node you are using as a button.
5.2. Underneath // Code to handle event, type the following code:
this.zcomponent.animation.layers.myLayer.clips.myTimeline.play();Taking care to replace myLayer and myTimeline with your actual layer and timeline.
6. Your full behavior should look something like this:
import { Component, Behavior, BehaviorConstructorProps, ContextManager, registerBehaviorRunAtDesignTime } from "@zcomponent/core";import { Button as Button } from "@zcomponent/html/lib/button";import { default as Scene} from "./Scene.zcomp";
interface ConstructionProps {  // Add any constructor props you'd like for your behavior here}
/** @zbehavior */export class ButtonBehavior extends Behavior<Button> {
  protected zcomponent = this.getZComponentInstance(Scene);
  constructor(contextManager: ContextManager, instance: Button, protected constructorProps: ConstructionProps) {    super(contextManager, instance);
    // You can register handlers for events on the node that this behavior    // is attached to like this:
    this.register(this.instance.onClick, evt => {      // Code to handle event      this.zcomponent.animation.layers.myLayer.clips.myTimeline.play();    });
    /*    // Or against other nodes in your zcomp file    this.register(this.zcomponent.nodes.MyNode.onPointerDown, evt => {
    });    */  }
  dispose() {    // Clean up any resources    // ...    return super.dispose();  }}
// Uncomment below to run this behavior at design time// registerBehaviorRunAtDesignTime(ButtonBehavior);