Getting Started
In general, headset content built in Zapworks Designer should function on devices and browsers that support the WebXR specification. This is because, when launching an experience built with Zapworks Designer which targets a headset, the user is simply using their headset browser with no additional app download requirement.
Zapworks Designer has broad support for headsets such as Meta Quest, Zapbox and Pico. Where the headset allows, it is possible Zapworks Designer to support controllers, camera passthrough and full 360 VR.
You can also launch a headset-targeted experience in mobile AR and it will function as a regular mobile WebAR experience.
Creating a headset experience
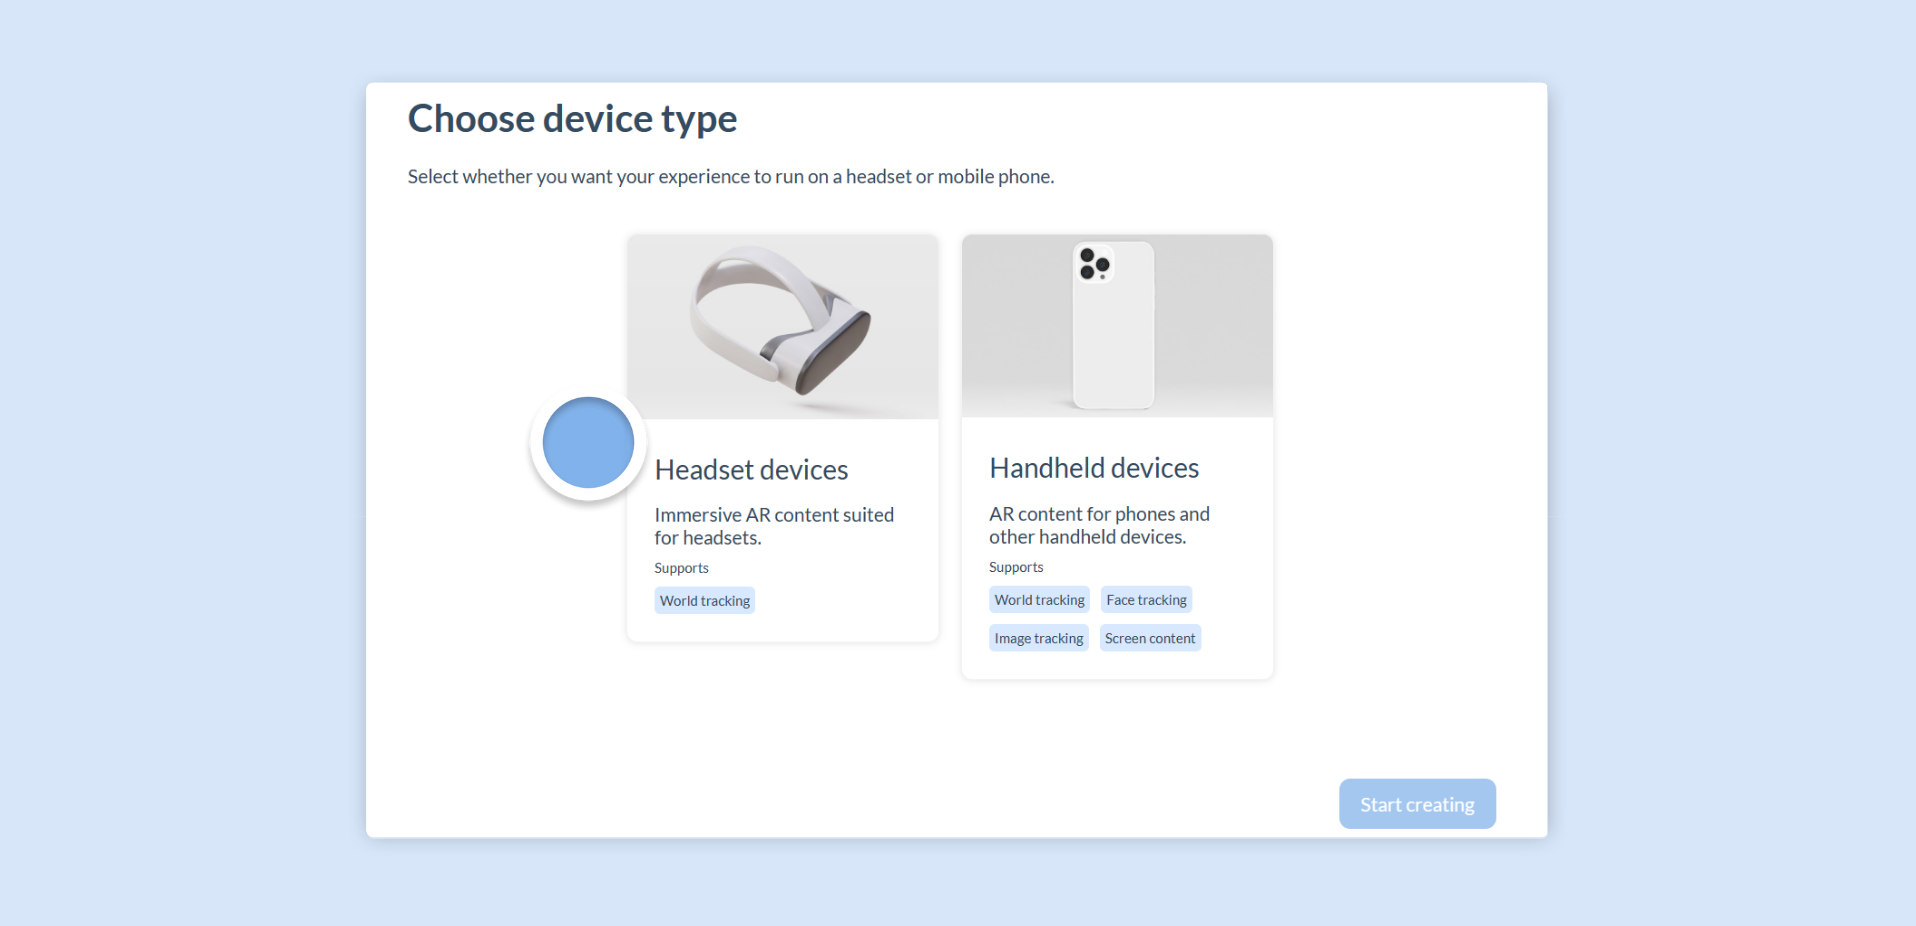
Section titled “Creating a headset experience”There is no extra setup necessary to create a headset experience in Zapworks Designer compared to the usual handheld experience. You simply need to choose which type of device you want to build for.
To start creating immersive experiences for headsets with Designer:
- Start a new Zapworks Designer project
- Select Headset devices
Due to the nature of headsets, they are unable to support some features which would cause a bad user experience such as Face Tracking. You can however build World Tracking and 360 content scenes as you regularly would, with Actions, Applets, and all Components.
Understanding headset interactions
Section titled “Understanding headset interactions”In headset experiences, raycasters are used as a pointer to select items within the augmented reality environment.
A raycaster is a virtual line drawn from a point in space that can detect what it intersects with in the scene. It allows users to aim and interact with virtual objects.
As the user moves their head (or controller, depending on device), the direction of the raycaster adjusts accordingly. This indicates where the user is currently looking or pointing, making it possible for users to select and interact with objects in the AR scene as if they were physically in the space with them.
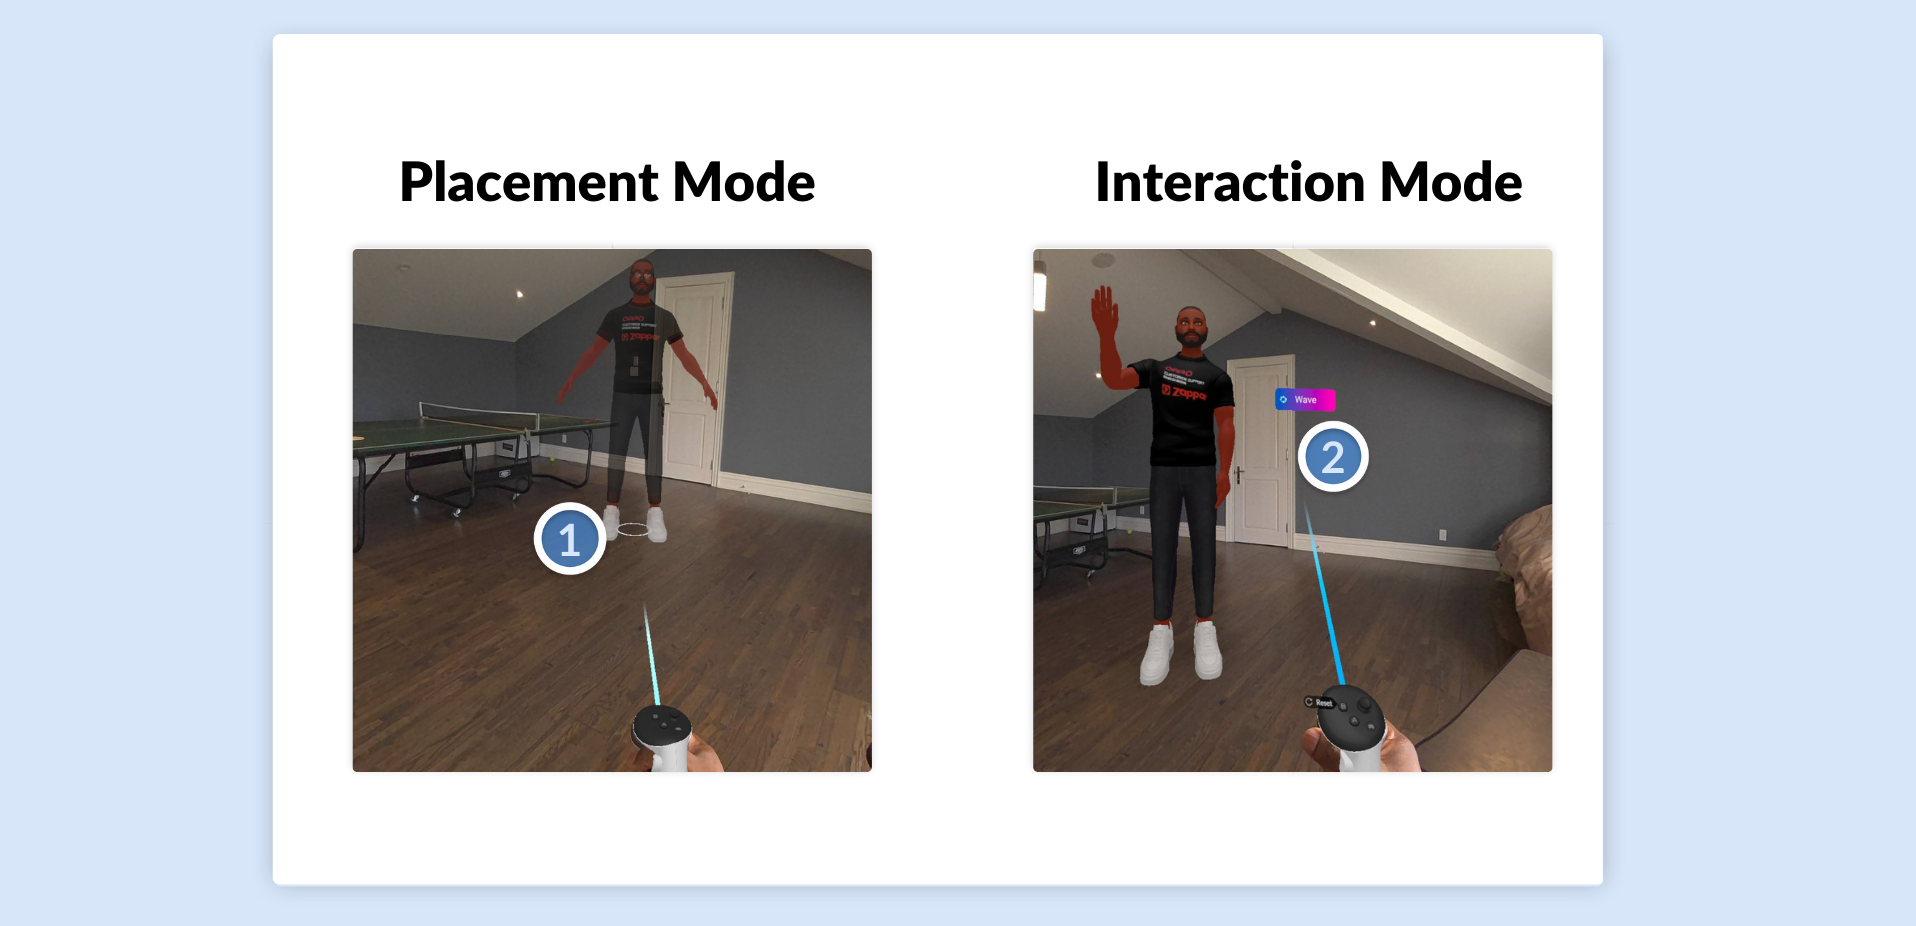
Each raycaster is equipped with a circle at the end to clearly indicate the direction in which it is pointing.
Using headset controllers
Section titled “Using headset controllers”Below is a table of the controller actions that are automatically enabled for headset experiences, with no additional set-up required. These are the actions that users will be able to take within the experience.
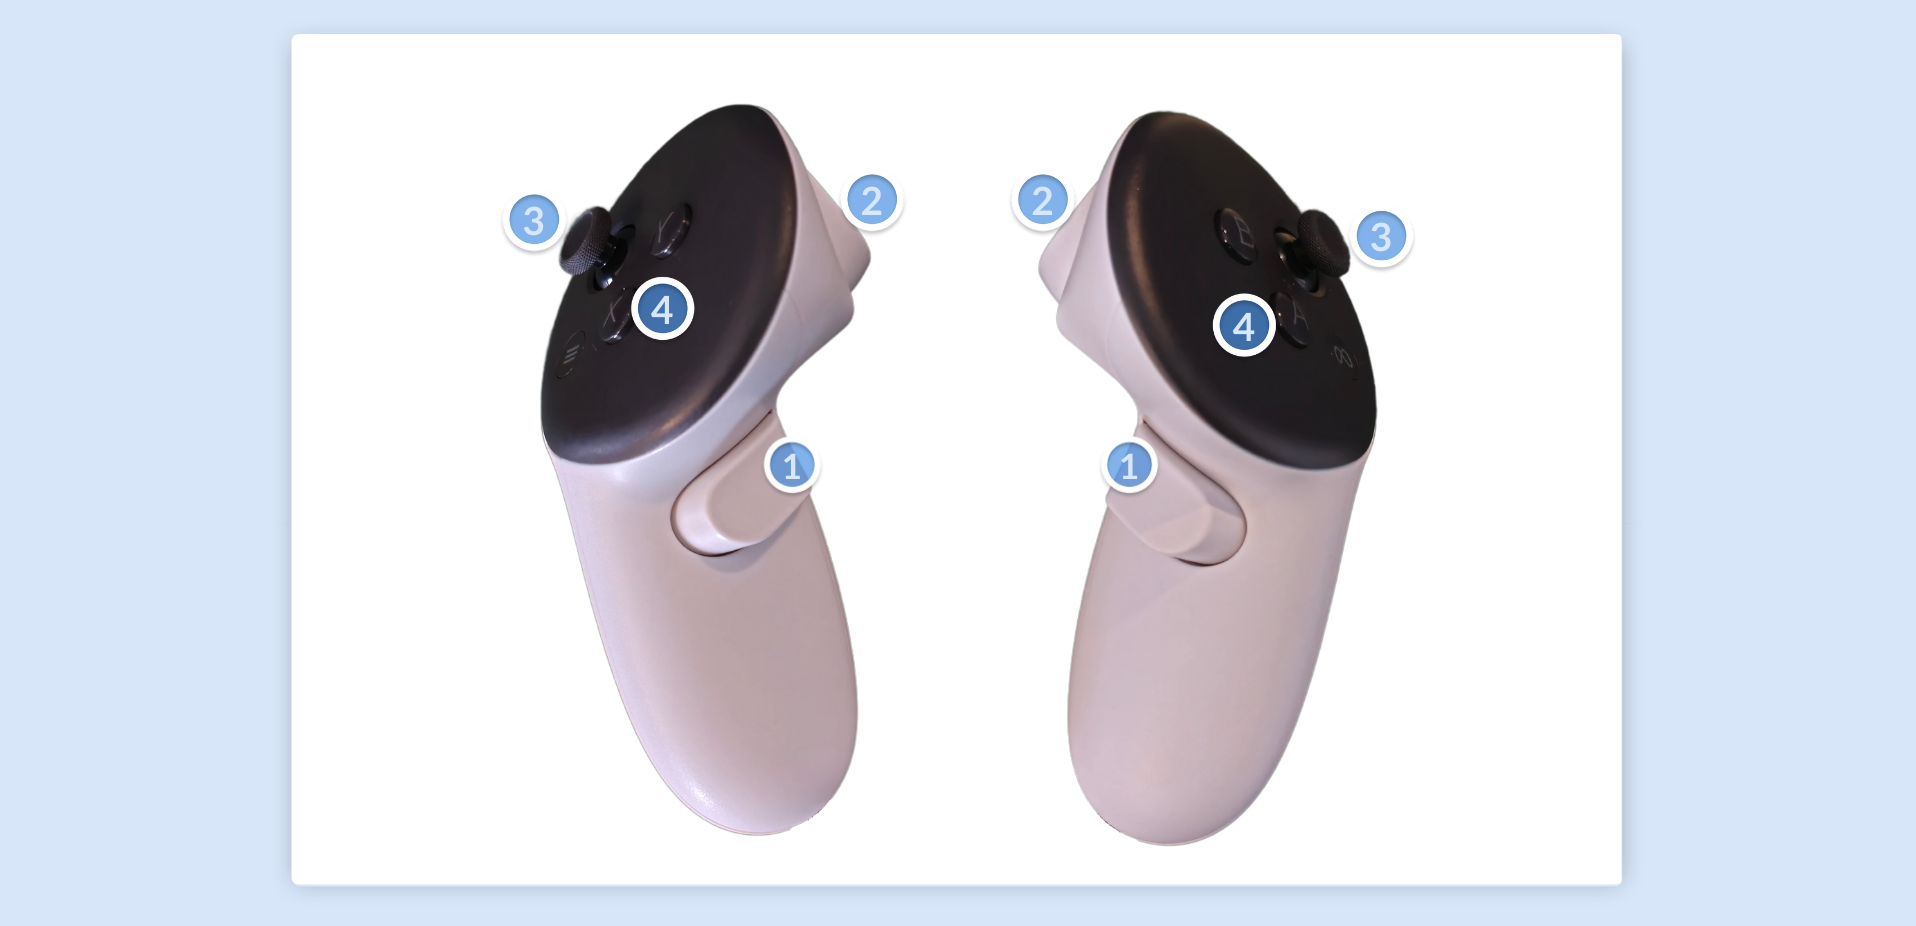
The below controller actions are currently specific to the Meta Quest 2 & 3, but are similar in most headset devices with controllers.
| Name | Action(s) | Description |
|---|---|---|
| (1) Grip Button | Scale & Rotate Scene (Interaction Mode) | Press and hold both buttons. The raycaster turns yellow for Scale & Rotate mode. For scaling, move controllers together or apart. For rotation, move one controller forward and the other backward simultaneously. |
| (2) Trigger | Placement, Tap | Placement: Places the scene once loaded or after resetting. Tap: Allows users to interact with scene components. |
| (3) Thumbstick | Scale & Rotate Scene (Placement Mode) | Allows you to scale (joystick up or down) and rotate (joystick left or right) your scene before you place it in your space. |
| (4) Controller Buttons (Left: B & Y) (Right: A & X) | Reset (B or Y) Placement (A or X) Tap (A or X) | Reset: Initiates placement mode again, there is a visual tooltip appears on the controller buttons. Placement: Places the scene once loaded or after resetting. Tap: Allows users to interact with scene components. |
Interacting with your experience
Section titled “Interacting with your experience”Users can rotate and scale headset experience scenes, as well as interact with components within the scene to be fully immersed. The guides below exemplify how users may take advantage of manipulating scenes when viewing experiences in a headset.
Rotating your Scene
Rotate the scene by pressing and holding both Grip Buttons. Move the right controller forward and the left controller backward to rotate counterclockwise.
Reverse the directions for clockwise rotation.
Scaling your Scene
Scale the scene by pressing and holding both Grip Buttons. Move your controllers apart to enlarge the scene or bring them closer together to reduce its size.
Interacting with Scene Components
Using the Trigger on either controller, the A button on the right controller, or the X button on the left controller, you can tap on any components to trigger any Actions attached to them.
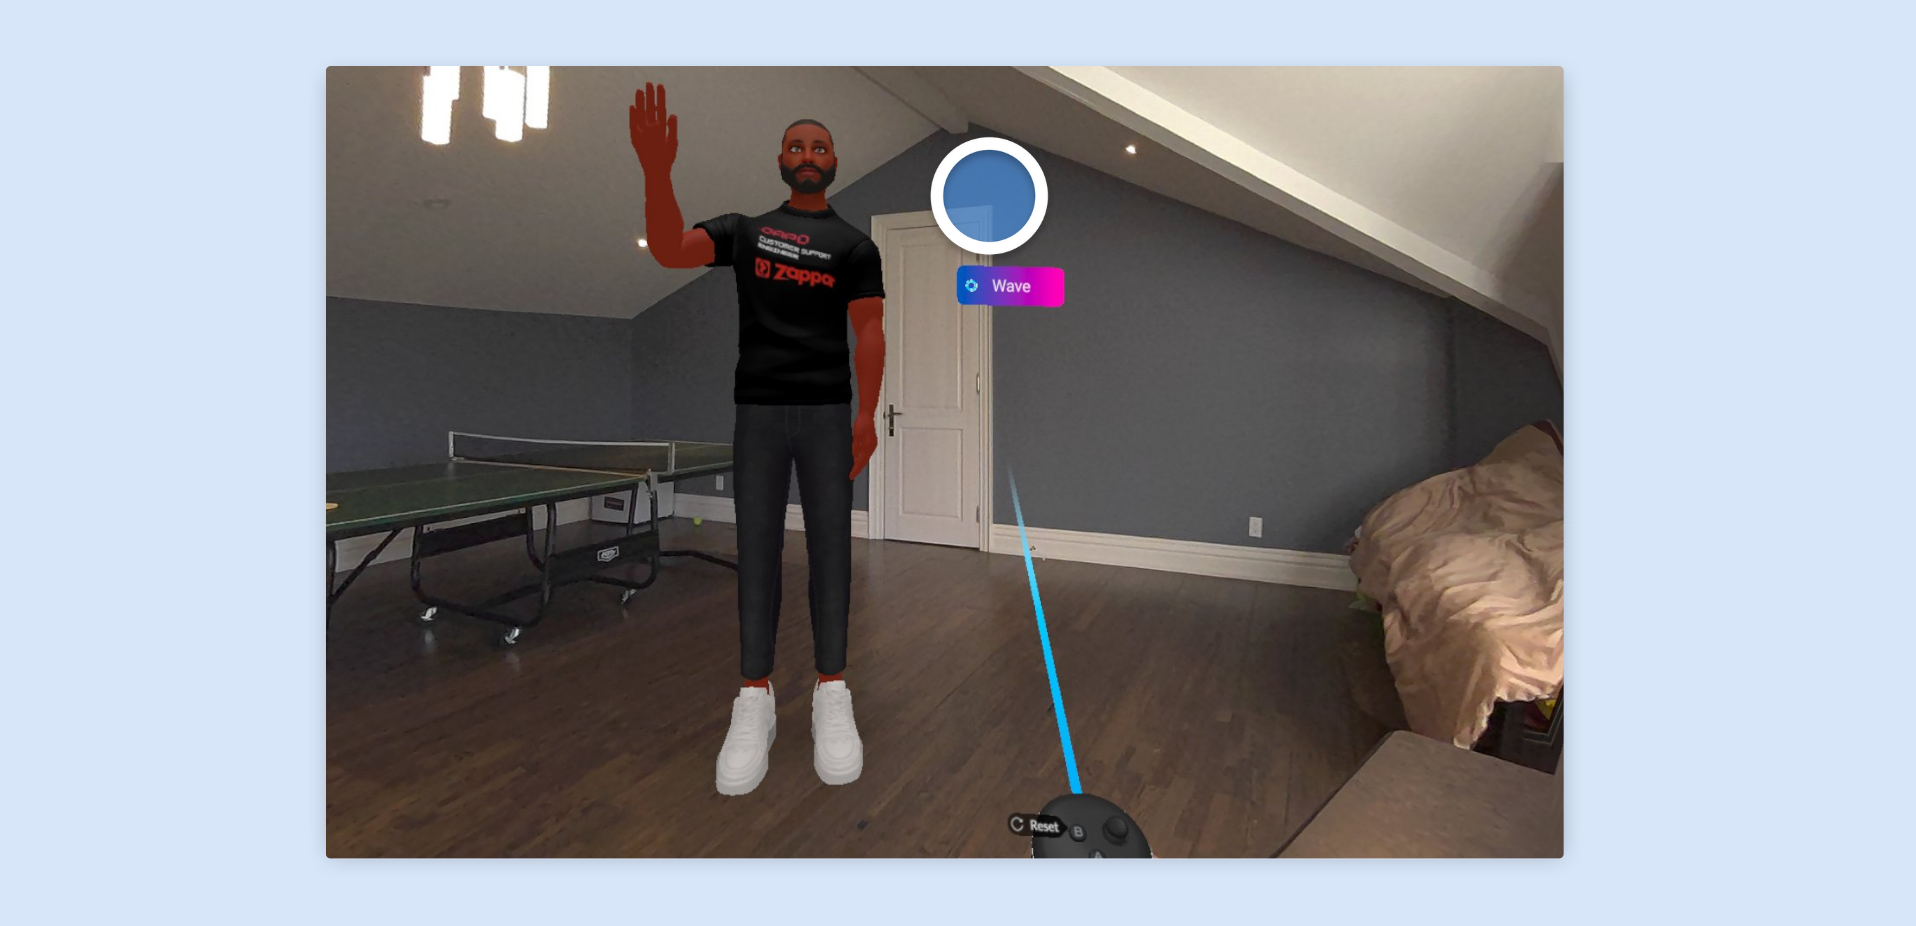
This is also how you place your scene when the experience begins or when you reset it.