Scenes
To set up more complex Designer experiences, you can use Scenes. A scene is an individual canvas of your experience that displays its own unique content. An experience can be made up of multiple scenes to create more dynamic interactive experiences. Scenes can be activated and transitioned to via an Action assigned to a user input, like a button tap.
Although each scene is a unique canvas, they will all track to the same target image you uploaded at the start of your project. World tracked scenes will be placed indefinitely, until your user replaces or launches an image tracked scene.
Working with Scenes
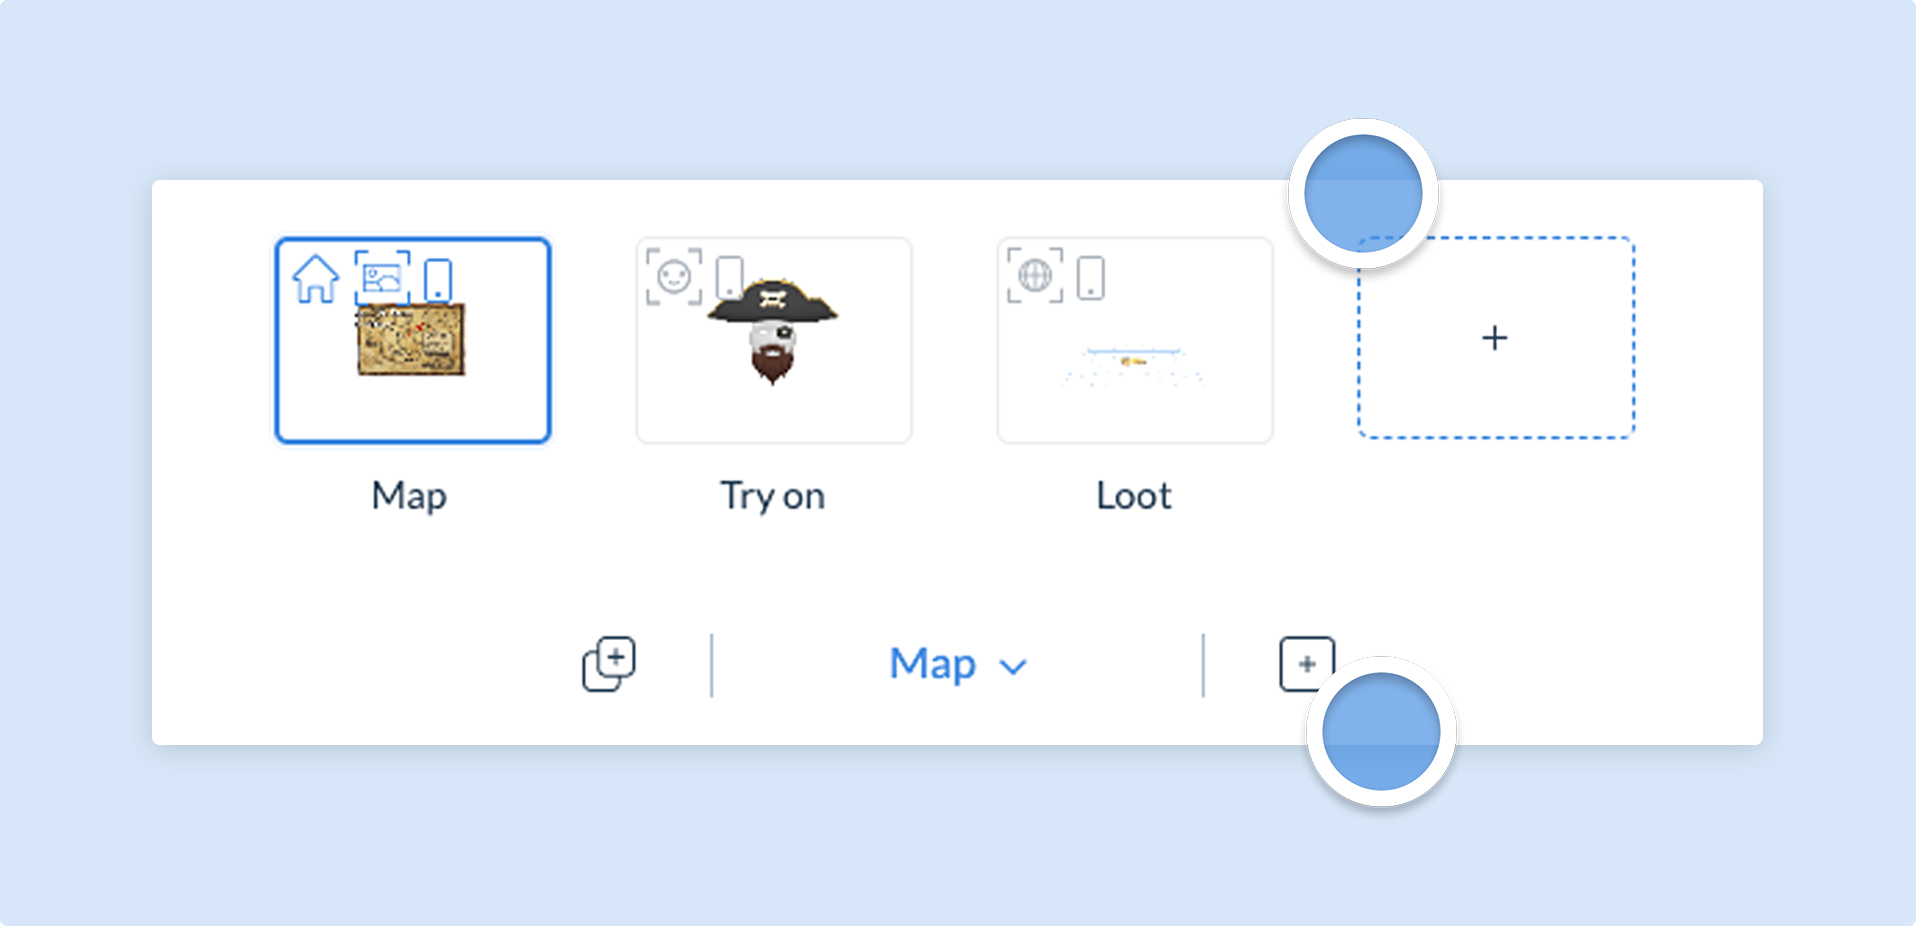
Section titled “Working with Scenes”By default, Designer projects will start with 1 scene. At the bottom of Designer, you will find the Scene Manager Panel. In this panel you can:
- Add a new scene
- Rename an existing scene
- Duplicate an existing scene
- Delete an existing scene
- Reorder scenes
- Select your active scene to edit
The first scene you will see when you preview your experience is denoted by the Home icon. If you want to test a specific scene, you can follow our reordering guide and drag that scene to the front before clicking on the preview button.
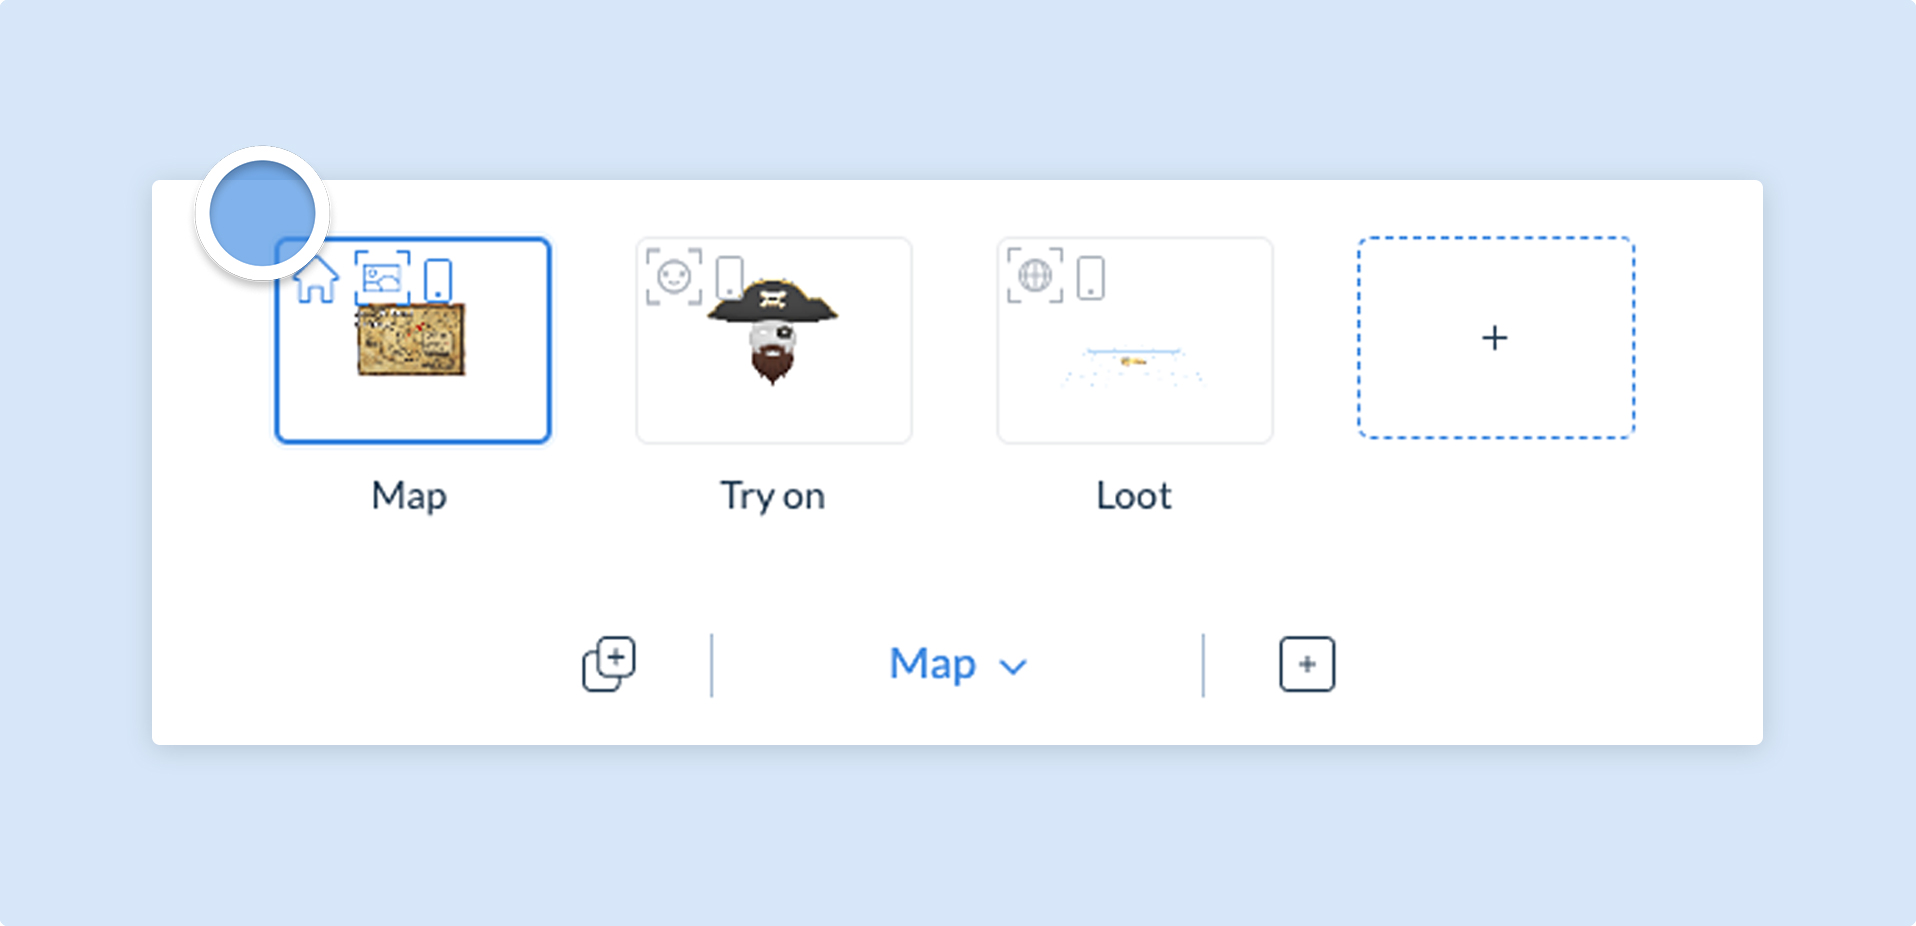
Adding a new scene
To add a new scene, click the either the Add Scene button to the right of the active scene name, or open the Scene Manager Panel and click on the empty (+) scene.
When adding a new scene, you will be asked whether you want your new scene to be World, Image or Face tracked. Your active scene will then be updated to the most recently added scene.
![]()
Your scene will include an icon in the Scene Manager panel that lets you know which tracking is assigned to the respective scene.
Renaming scenes
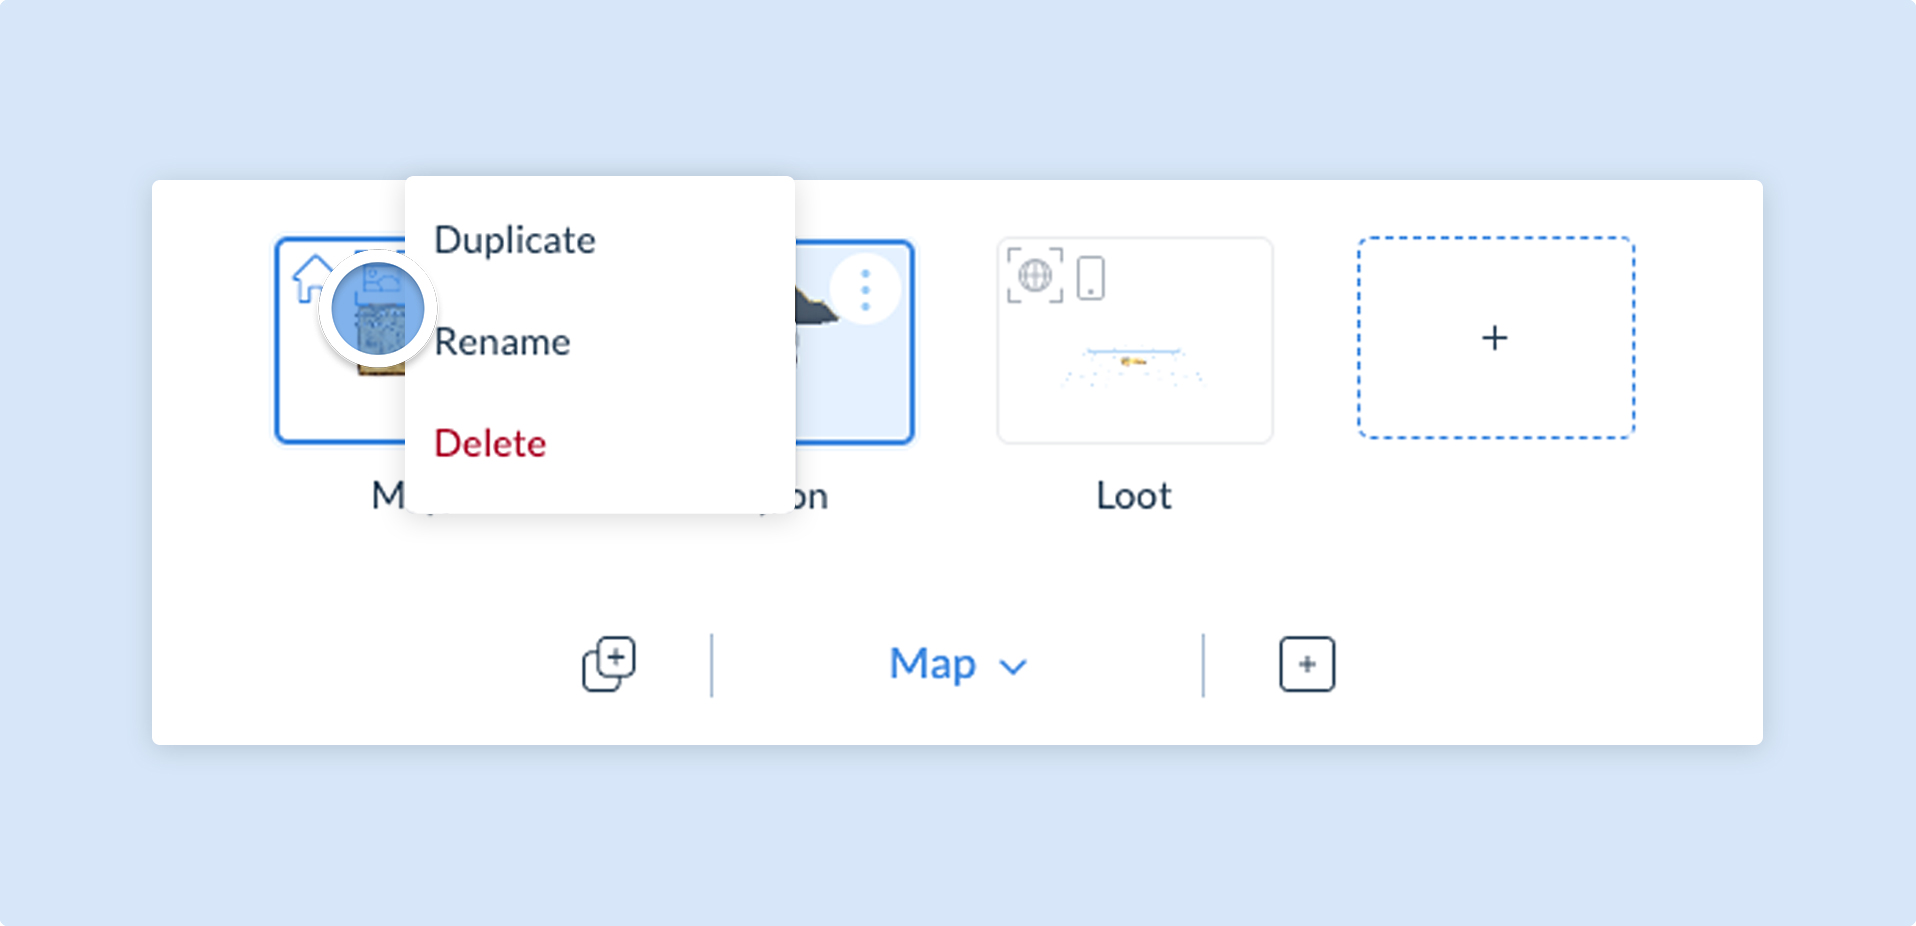
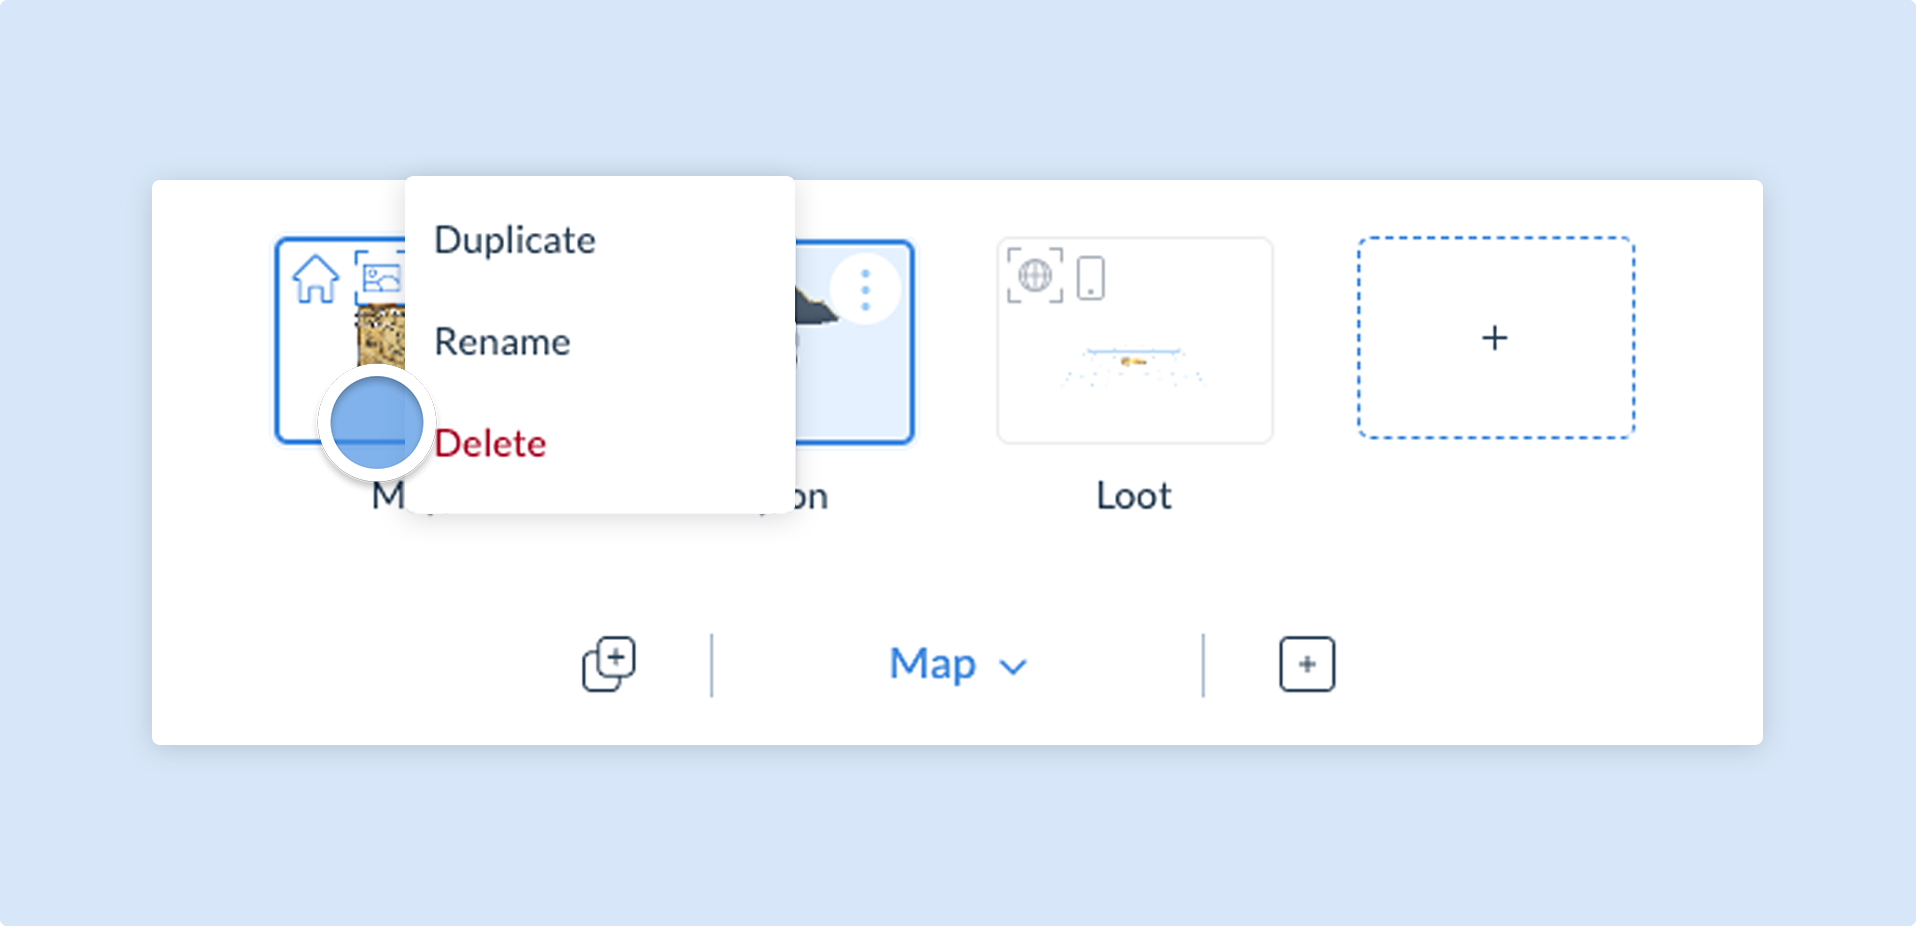
Scenes will be given an auto-generated naming convention. There will be times where you’ll want to rename a scene to help understand the functionality in that specific scene. To do this, hover over the scene you want to change and click on the vertical ellipsis menu. From here you can select Rename and update the name of the scene.
You can also double click on your scene’s name in the Scene Manager panel to rename the scene.
Duplicating a scene
Duplicating scenes removes the need to start from a blank canvas each time. When you duplicate a scene, all the components and content will also be duplicated, which is great for when you have a background image or a button that is consistent throughout all of your scenes.
To duplicate a scene, hover over the scene you want to duplicate, click on the vertical ellipsis menu and select Duplicate. You might want then to rename the scene using the method above.
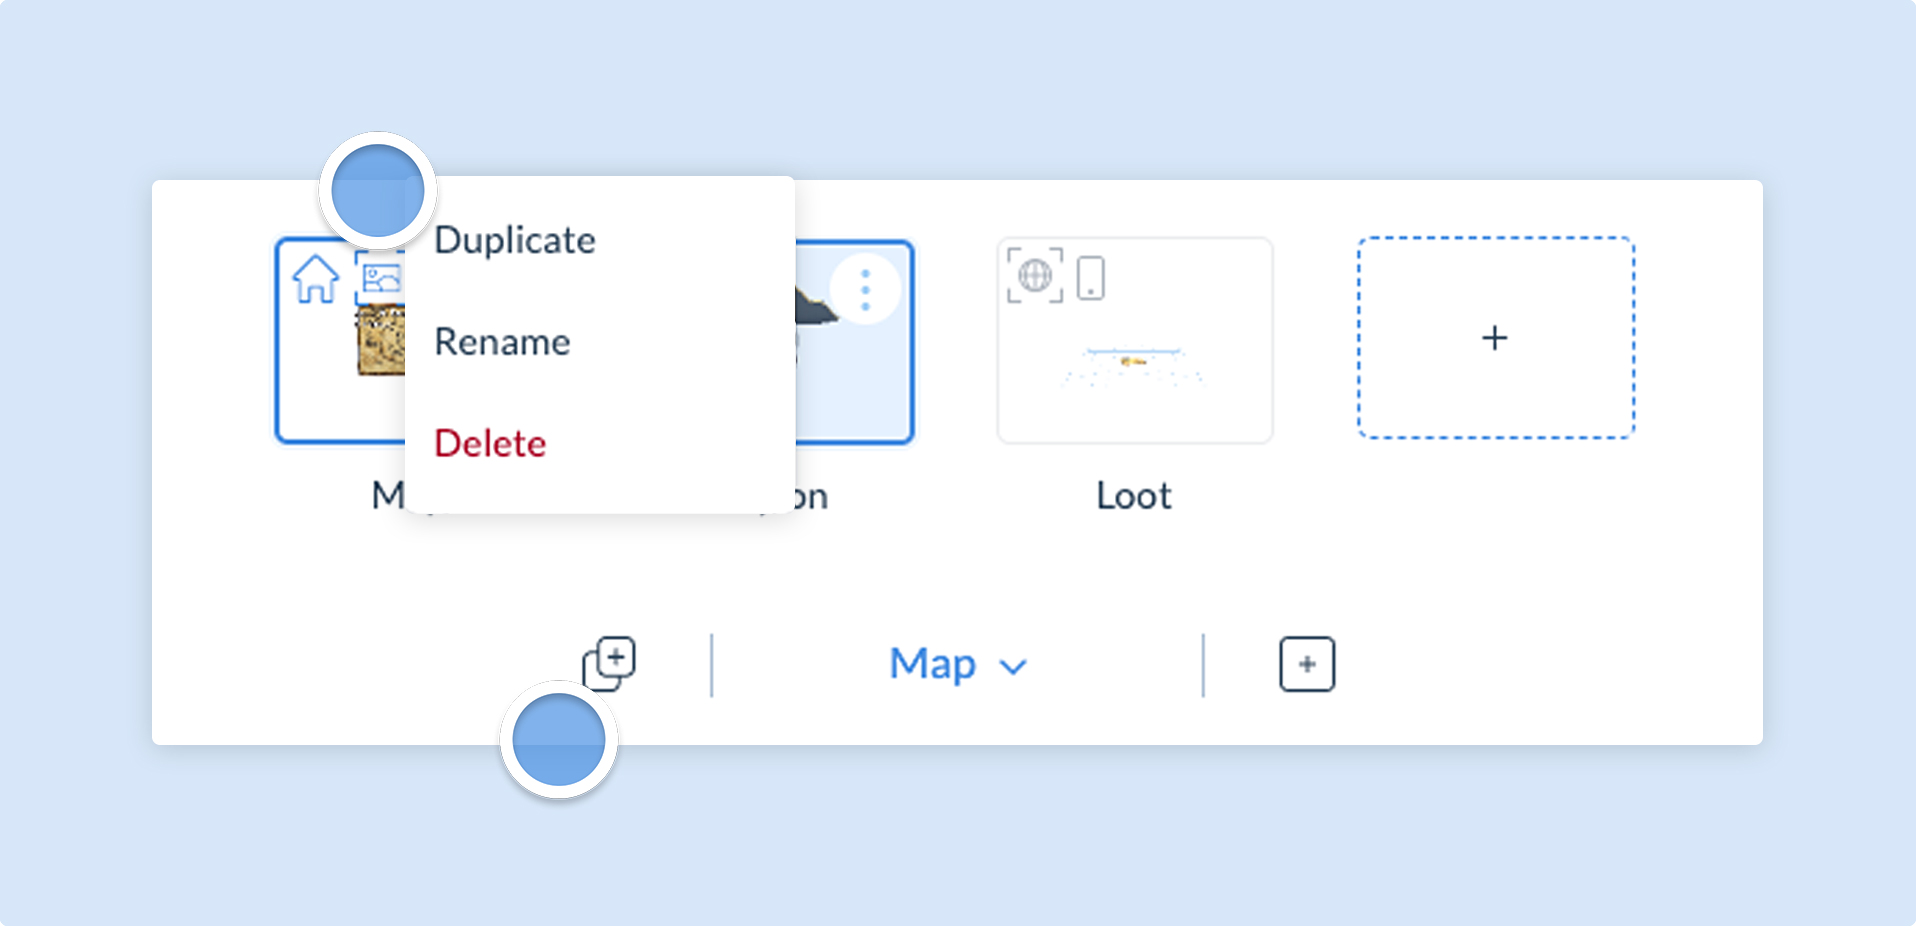
Deleting a scene
To delete an unwanted scene, hover over the scene you want to delete, click on the vertical ellipsis menu and select Delete.
Selecting your active scene
During development, you’ll want to view and edit the content in the different scenes. To select the active scene shown on the canvas, open the Scene Manager Panel and click on the desired scene.
You can also drag and drop scenes to change the order of them in the Scene Manager Panel. This won’t have any effect on how the experience performs, however, it’s helpful from a developer perspective to keep the scenes in personalized order.
Reordering scenes
To change which scene is launched on load, you can click and drag it to be the first in the list (the left). Other scenes will be launched through actions and their order doesn’t change this behaviour, although it might be helpful to reorder them for a better developer experience.
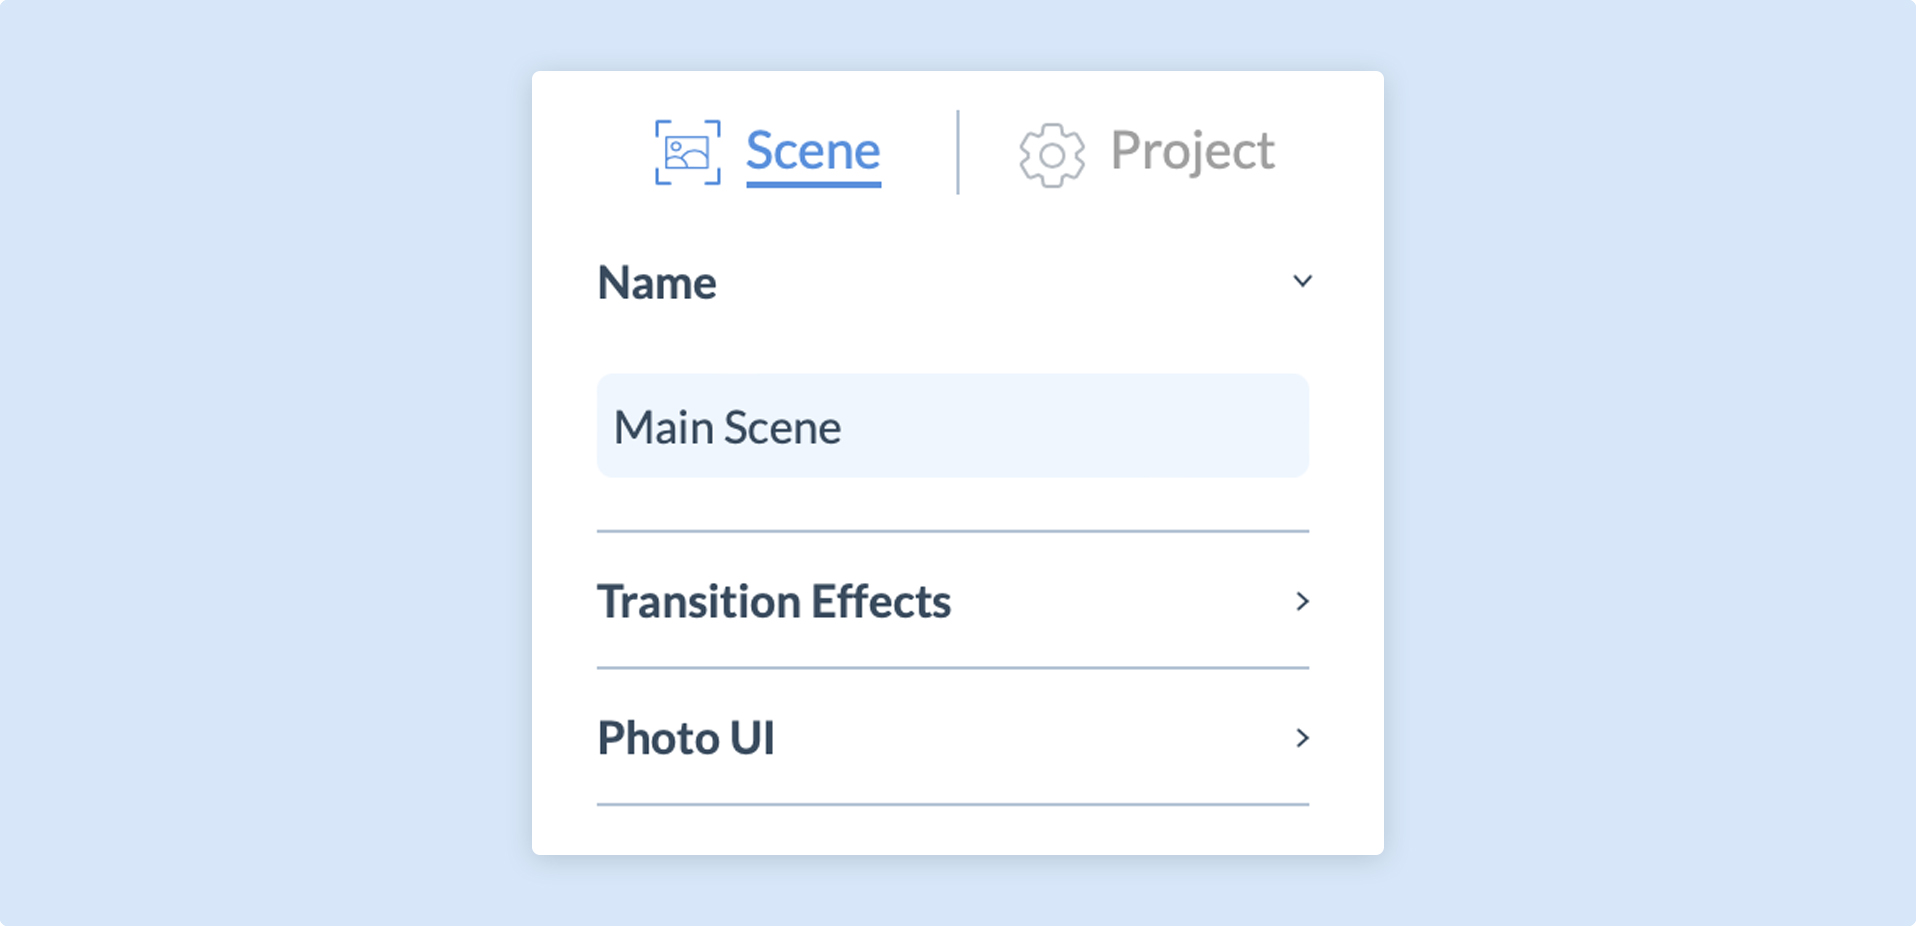
Scene Properties
Section titled “Scene Properties”Each scene has it’s own properties panel. In this properties panel, you can change the Scene Name, toggle the Photo UI and assign Transition Effects that will apply to everything in the scene.
You may also duplicate Screen UI components using the Scene Properties panel when in Screen UI mode.