Using 3D
Once you’ve imported your 3D model, you can add it into your current active scene by dragging it onto your canvas.
When you add a 3D model into a scene which is in 2D Mode, your project mode will shift to 3D Mode. You cannot switch back to a 2D scene until all 3D content has been removed.
Navigating your 3D Scene
Section titled “Navigating your 3D Scene”3D mode is navigated differently to 2D mode, as three-dimensional orbit controls are unlocked. You can navigate the 3D scene using either the navigation cube at the found bottom-right of the canvas, or by using keyboard and mouse shortcuts.
When using your mouse and keyboard, you can use the following shortcuts:
- Hold left-click to orbit around your project.
- Hold right-click (or left click and shift on the keyboard) to pan across the canvas.
- Use the scroll wheel to zoom in and out.
With the 3D navigation cube, you can orbit around your project by left-clicking the cube and moving your cursor around the screen. You can also snap to a direction by clicking that face on the cube.
Using 3D Models
Section titled “Using 3D Models”As with the other Designer components, you can edit the properties of your model through the Properties Panel.
You may use the Properties Panel to make the following adjustments to your 3D model:
| Property | Description |
|---|---|
| Content | Replace the 3D component with another 3D component you have uploaded to the Media Library. |
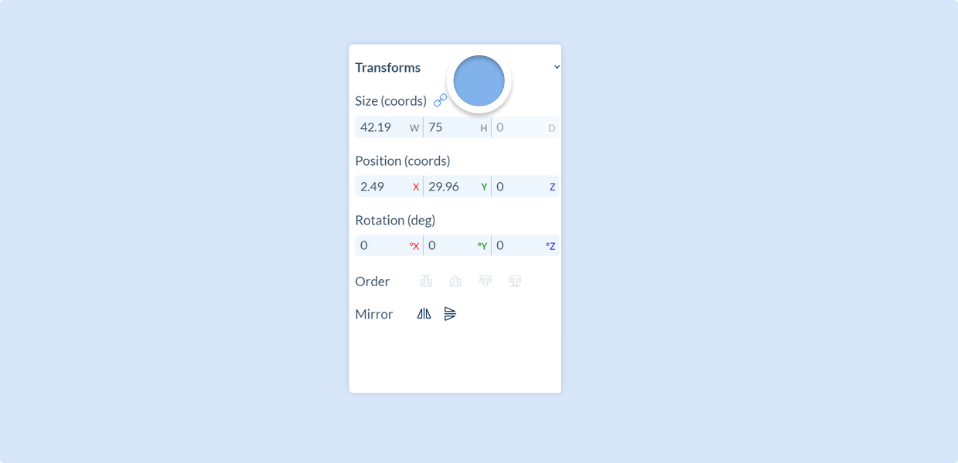
| Transforms | Edit the Size (Width, Height and Depth), Position (X/Y/Z coordinates), and Rotation (degrees on the X/Y/Z axes) of the 3D model. You can also Mirror the 3D component and change the 3D model’s layer Order (forwards or backwards) relative to other scene components. |
| Actions | Create interactivity by adding an on tap Action to the 3D component. |
| Transition Effects | Add an Enter or Exit transition effect to the 3D component. |
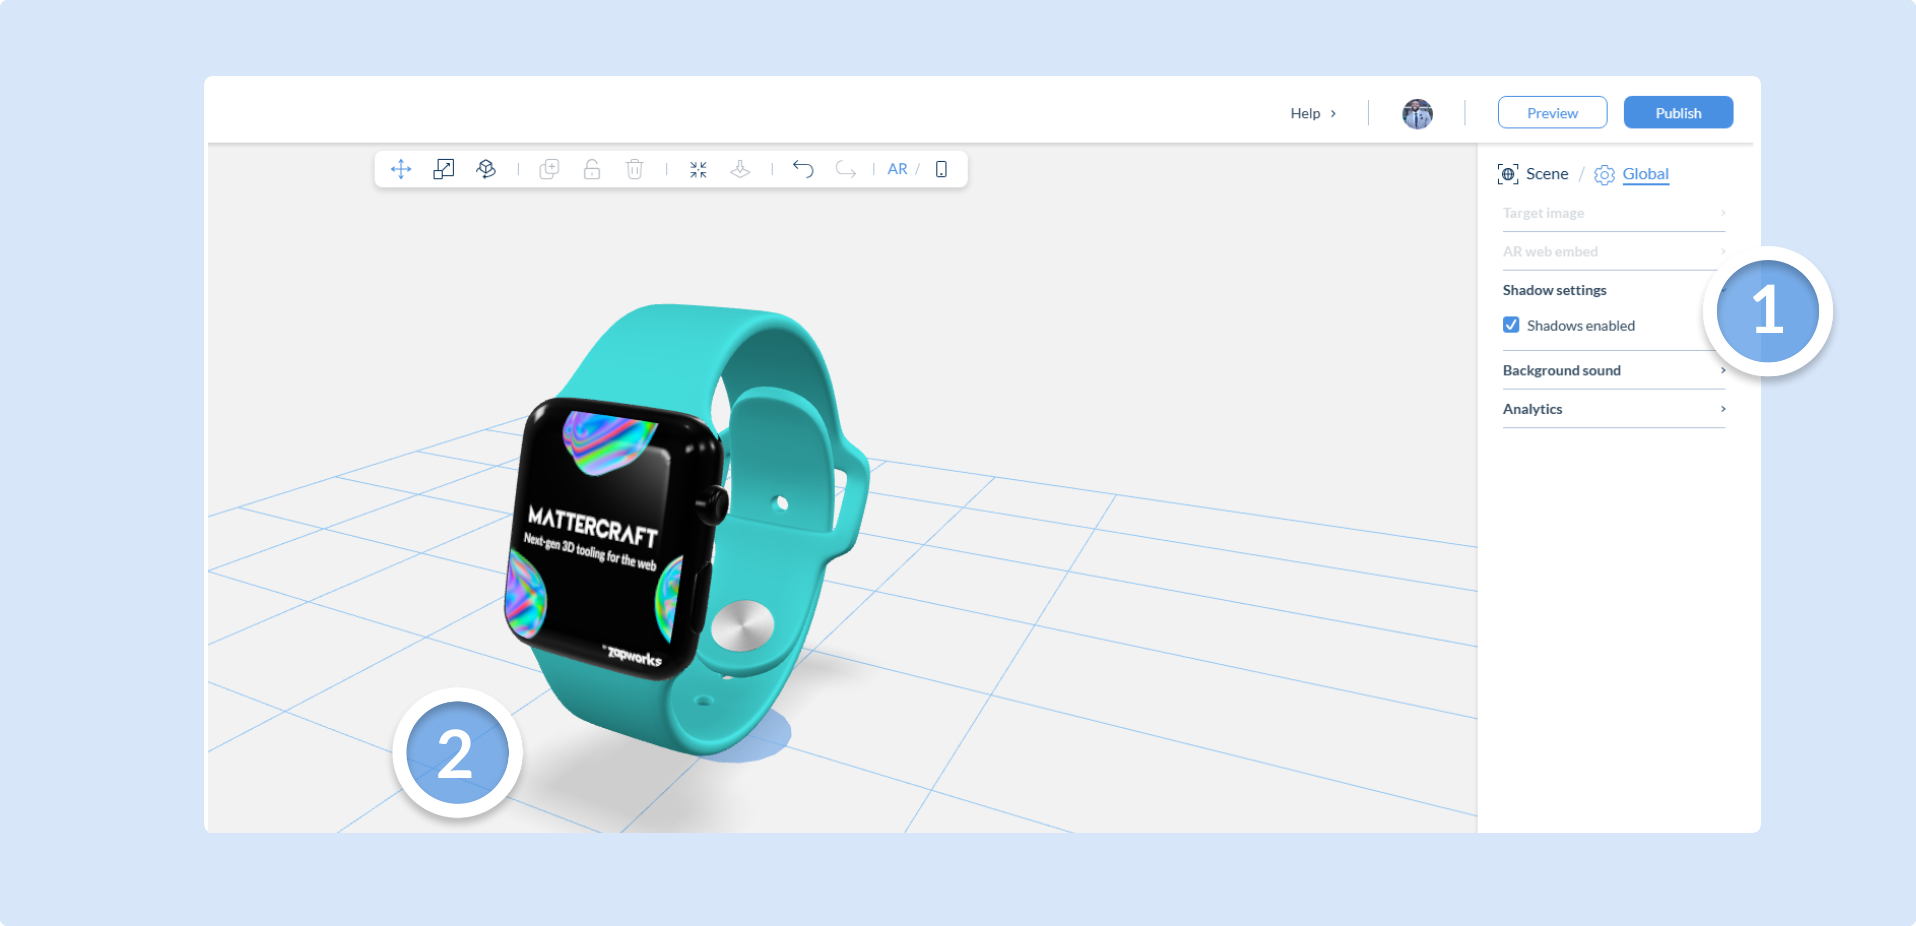
You can also use the Global Properties panel to enable shadows on all 3D components in your project.
By default, your model will scale in with a locked aspect ratio when adjusting scale. To edit each axis individually, select the unlock button in the ‘Transforms’ tab.
Transforming in 3D Space
Section titled “Transforming in 3D Space”You can update the transforms of a selected model using the Context Bar on your canvas (shown below).
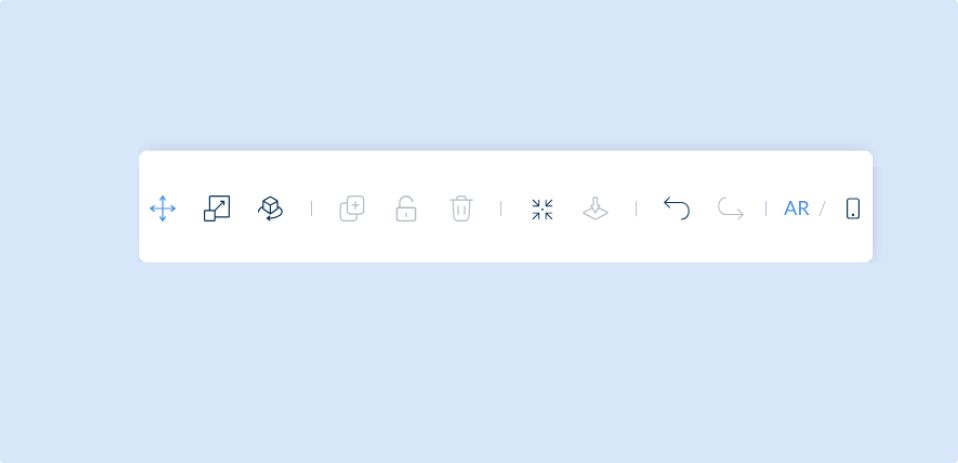
The Context Bar allows you to control the following:
| Section | Description |
|---|---|
| Move | Move the selected component in the X, Y, or Z axis. |
| Scale | Scale the selected component in the X, Y, or Z axis. |
| Rotate | Rotate the selected component in the X, Y, or Z axis. |
| Duplicate | Duplicate the selected component. |
| Lock/Unlock | Lock or unlock the selected component from transform functions. |
| Delete | Delete selected component. |
| Recenter | Recenter your view on the canvas to default. |
| Snap to surface | Recenter and snap your component to the surface of the tracking type. |
| Undo/Redo | Undo or redo any changes you have made to your component. |
Want to learn how to add interaction to 3D models in your scene? Click here.