Getting Started
Screen UI can be added to all experiences and is a useful feature for experiences using the AR Web Embed functionality.
The video below shows how you can access and use Screen UI mode in Zapworks Designer, regardless of the tracking type.
Navigating Screen UI mode
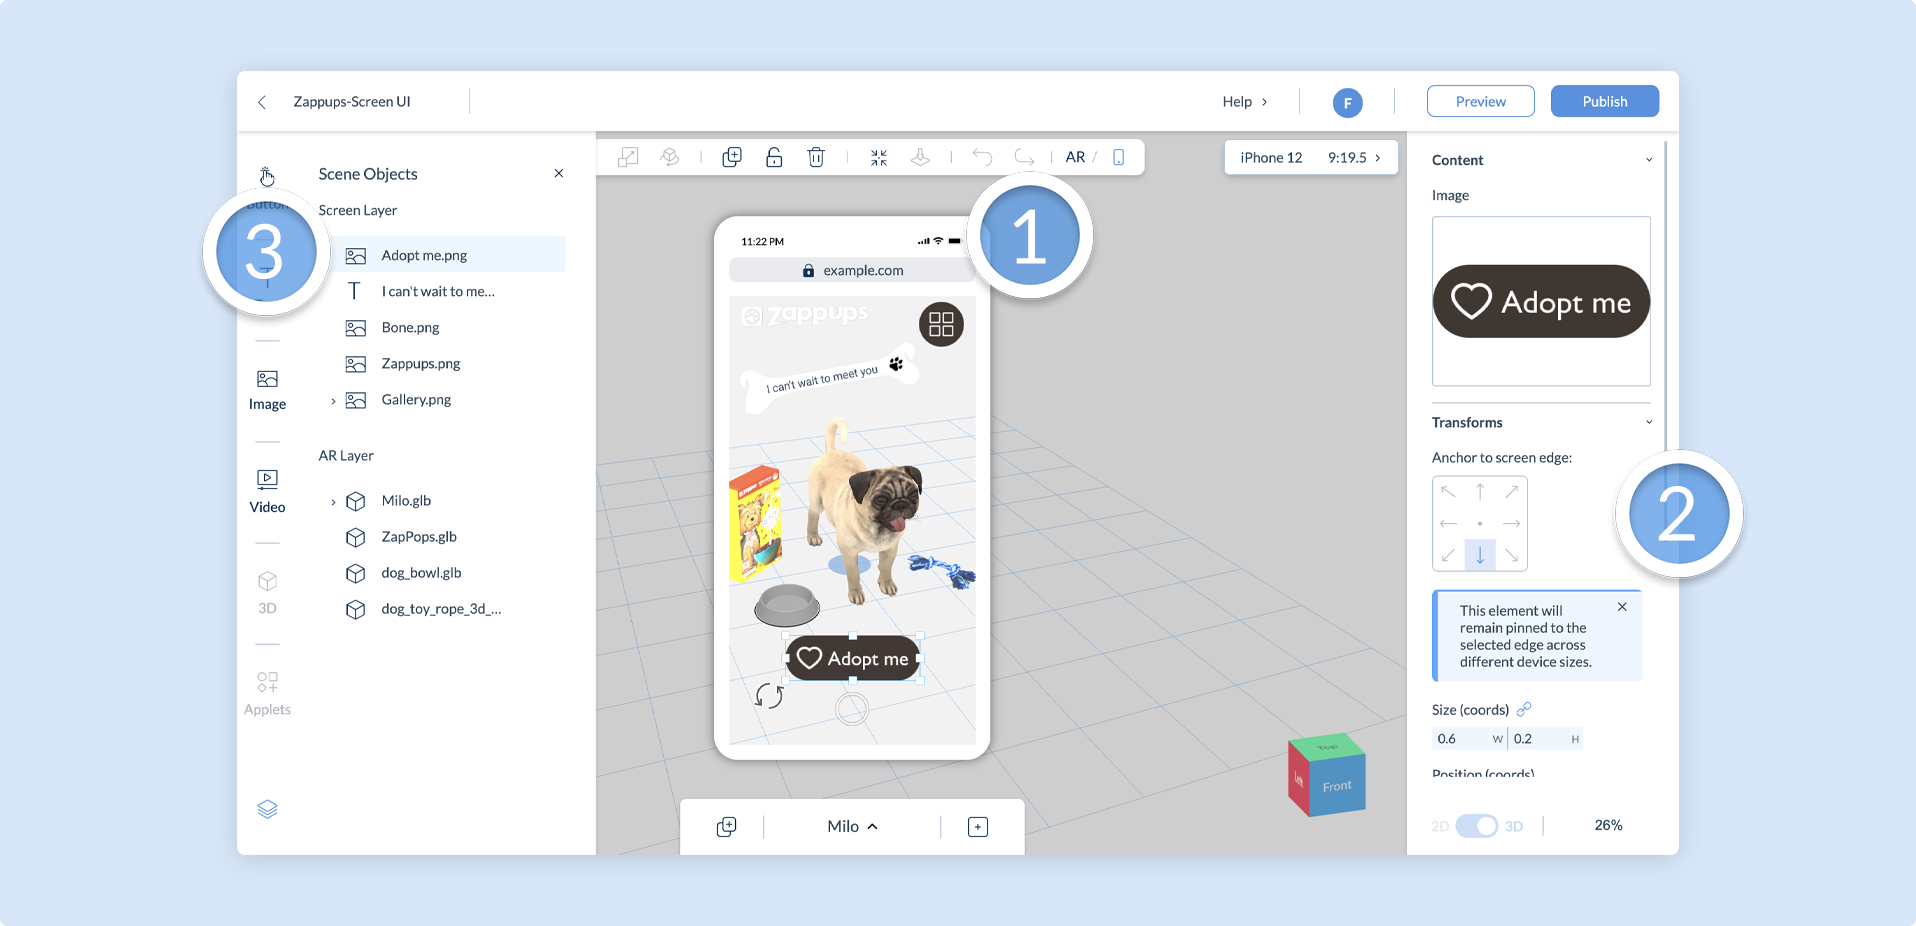
Section titled “Navigating Screen UI mode”The image and table below showcase the main Screen UI elements which become visible when you enter this mode.
| Scene UI Elements | Description |
|---|---|
| (1) Screen Layer Canvas | The overall area where you can add your 2D components. |
| (2) Anchor Pins | Allows you to pin your assets to a selected edge across different device sizes. |
| (3) Scene Objects: Screen Layer | Enables you to select your 2D components and re-arrange their order. |
3D components are disabled in Screen UI mode.
There are also some unique features on the canvas and in the Project Properties panel which are specific to Screen UI:
| Property | Description |
|---|---|
| Screen Settings | Allows you to duplicate your Screen UI elements to another scene or clear the current scene’s content. |
| Screen Layers Panel | Allows you to switch the screen layer canvas to other aspect ratios or a custom one. |
The aspect ratios selected for the Screen Layer canvas are just for reference, make sure to always preview your project on different devices to confirm your Screen UI looks correct.
Adding Components
Section titled “Adding Components”You can add any component to the Screen Layer canvas except for 3D. It is the same as in AR mode, simply drag components to the screen. You may then Position, Scale or Rotate the component with the controls that appear, and use the Project Properties panel to customize the component.
The transform tools in the context bar are disabled in Screen UI mode, simply click and drag your components to move them around.
Transition Effects are disabled for components while in Screen UI mode.
Managing Components
Section titled “Managing Components”To make the design process easier when trying to select a specific asset on the screen, make use of the Scene Objects Panel. Combined with the content preview property in the Project Properties panel, you can be sure you have selected the right component.
Components at the top of the Screen Layer in the Scene Objects panel will take priority. Therefore, any components at the top of this layer may prevent users from triggering the Actions of other components beneath.
Navigating the 3D scene in Screen UI mode
Section titled “Navigating the 3D scene in Screen UI mode”While in Screen UI mode, you are still able to manipulate the camera to Rotate, Pan, and Zoom in on your 3D scene. This will help you frame your Screen UI components to work well with your 3D scene.
Left-click and drag anywhere on the 3D scene outside of the Screen Layer canvas to Rotate the scene. You can also use the view tool in the bottom left corner to quickly change to specific views.
Right-click and drag anywhere on the 3D scene outside of the Screen Layer canvas to Pan the scene.
Use your mouse scroll wheel or trackpad gesture anywhere on the 3D scene outside of the Screen Layer canvas to Zoom in and out of the scene.
The camera view you set in Screen UI mode does not change the view or size of the actual AR experience, it is just for reference. Switch to AR mode to make such changes.
To learn about organizing your Screen UI assets, continue reading our documentation.