Getting Started
360 content scenes provide an immersive 360-degree viewing experience. This is great for building content that requires a 360-degree interactive panoramic view; such as tours, onboarding or training, and virtual reality games.
Supported formats
Section titled “Supported formats”Zapworks Designer supports 360-degree backgrounds in the following formats:
| Media type | File type |
|---|---|
| Image | .png, .jpg |
| Video | .mov, .avi, .mp4, .mpeg, .3gp, .mkv |
360-degree images must be under 10MB, and 360-degree videos must be under 200MB in order to be successfully uploaded into the system. Always optimize your media for web, as the smaller the file, the more performant your experience will be.
Equirectangular images and videos
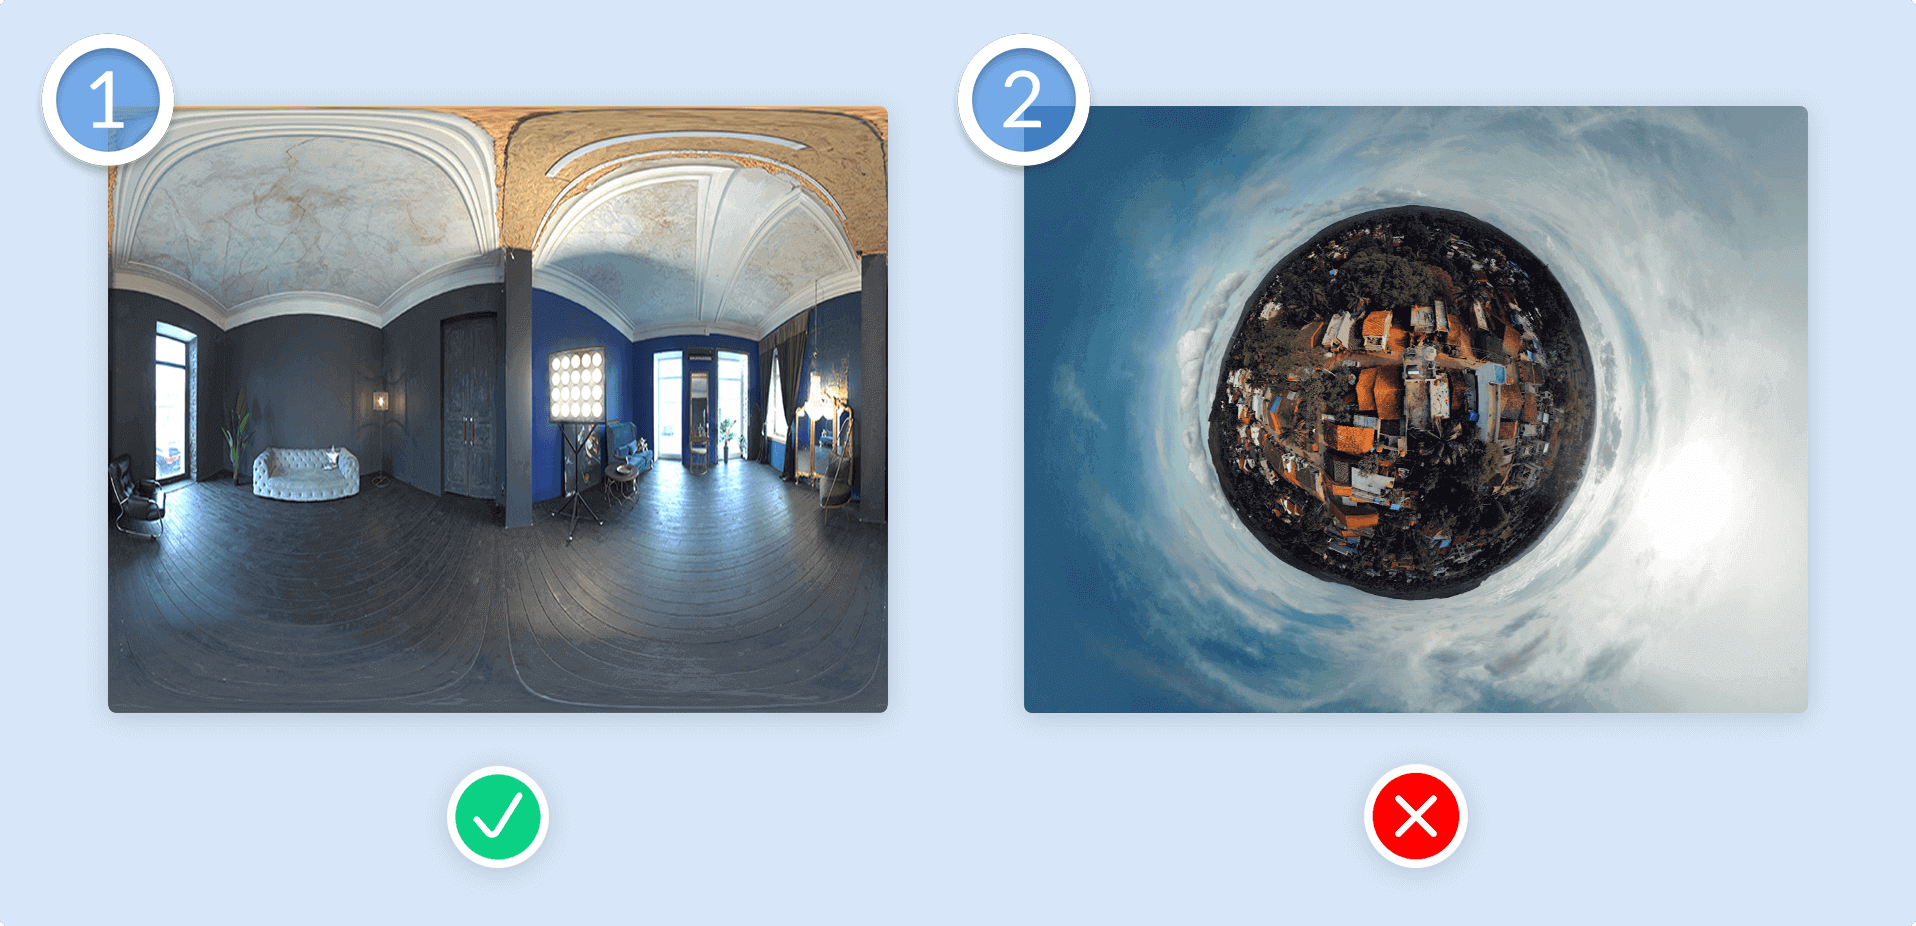
360-degree backgrounds should be an equirectangular image or video. ‘Equirectangular’ represents a spherical surface in a flat, rectangular format (for example, a 360-degree panoramic photo). The example below shows what is and is not considered to be the correct format for 360-degree backgrounds.
Using 360 content scenes
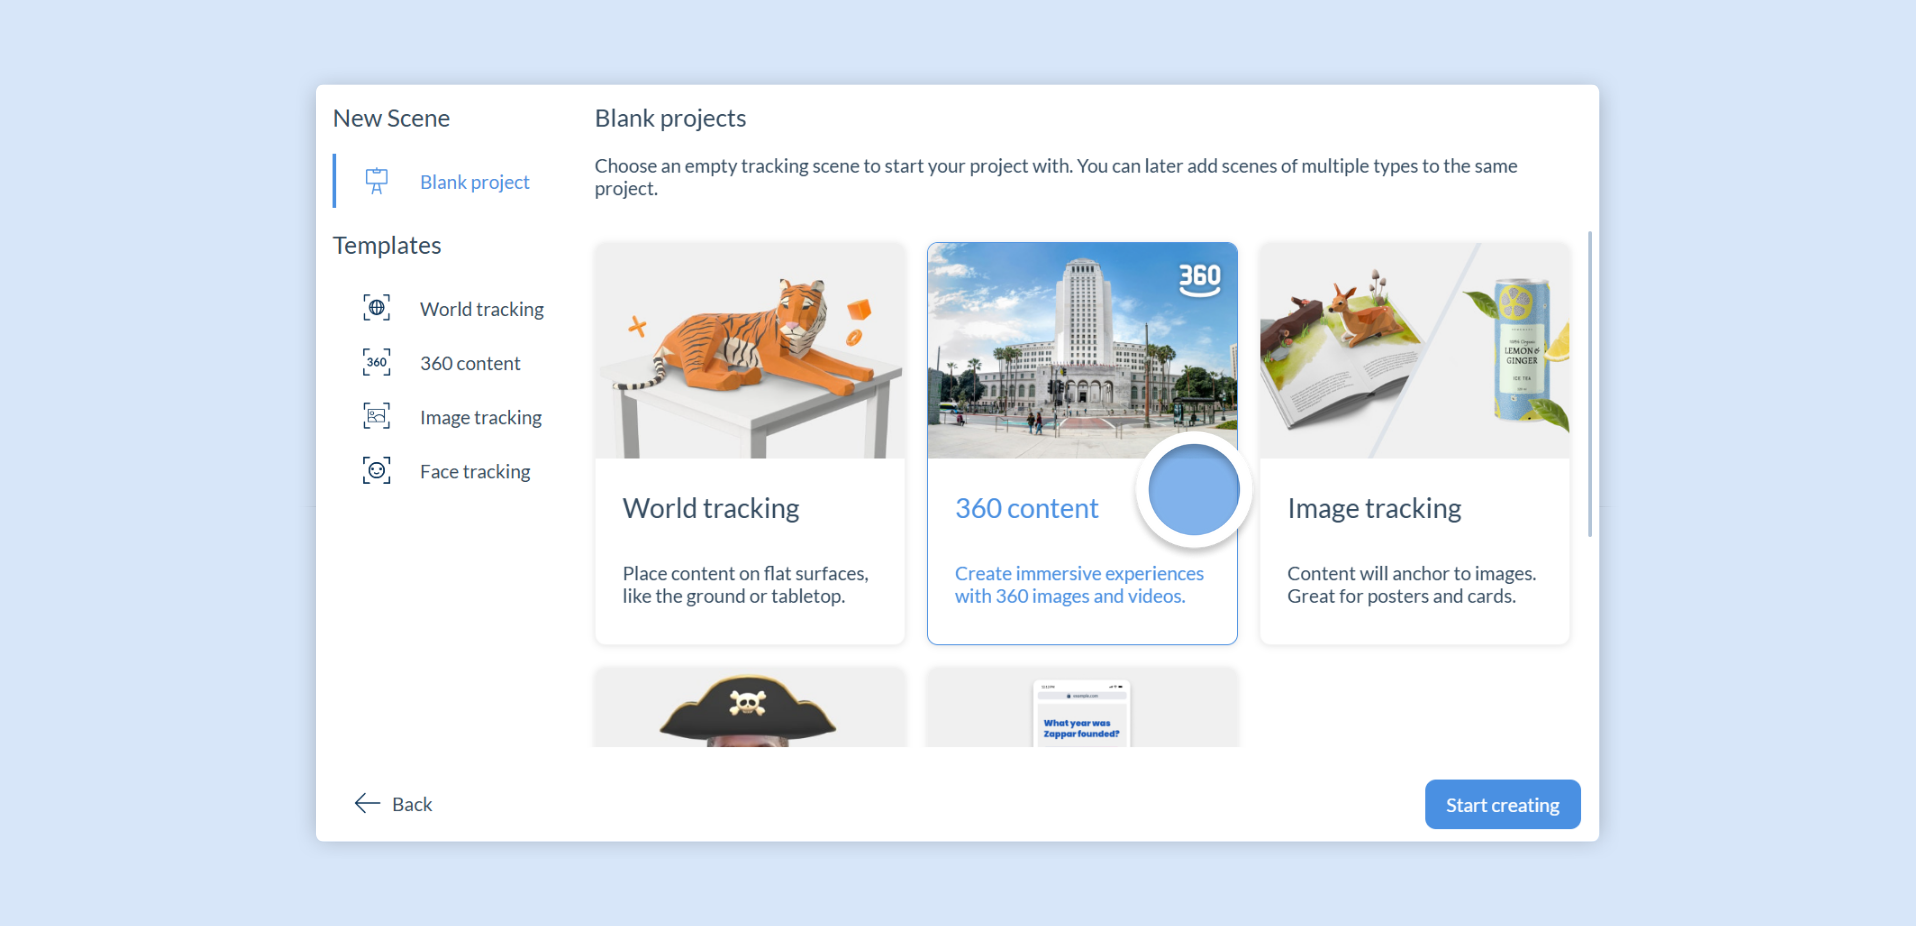
Section titled “Using 360 content scenes”When you create a new Zapworks Designer project, you will first be asked what type of device you want to build for, and then what type of scene you want to start adding content to.
360 content scenes are supported by both headset and handheld platforms.
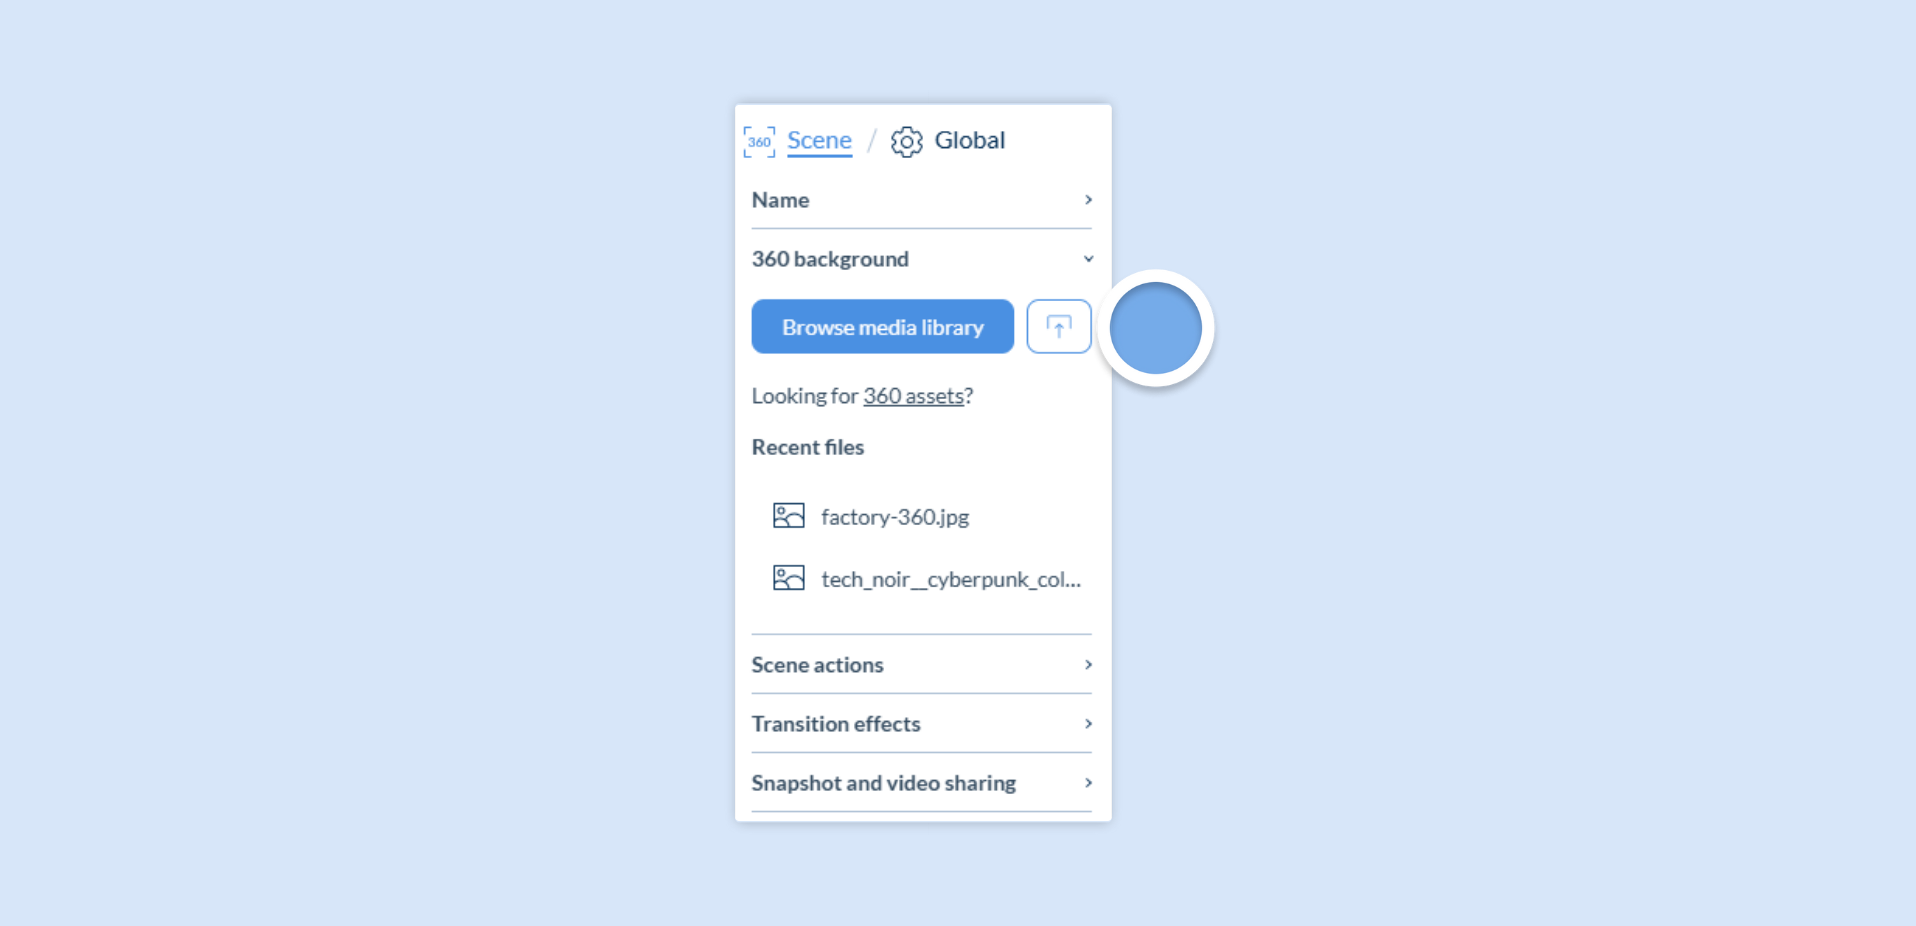
Upon selecting 360 content, you’ll be prompted to upload a 360-degree image or video in which your content will appear in. To do this, click on the Browse media library button or Upload icon in the Scene Properties panel to process a 360-degree image or video.
For best results, 360-degree backgrounds should be an equirectangular image or video. ‘Equirectangular’ represents a spherical surface in a flat, rectangular format (for example, a 360-degree panoramic photo).
Once uploaded, the 360-degree image or video will appear on your canvas.
Adjusting the start position
Section titled “Adjusting the start position”Once your 360-degree image or video background has been set, you can adjust the position that users will start the scene from by either:
- Finding the Initial camera position slider within the Scene Properties panel
- Panning around the canvas and then clicking Set initial camera view in the Scene Properties panel
Adding components to 360 content scenes
Section titled “Adding components to 360 content scenes”Drag and drop or double-click on components to add them to the canvas as usual. You can then use the existing transforms in the Properties panel on the right to customize components; such as their position, rotation or scale.
Due to the depth and curvature of 360-degree backgrounds, pay close attention to how your content fits so it doesn’t break the immersion. For example, you can utilize the Curve property to help make some components blend seamlessly with a 360-degree background.
360-specific Context Bar changes
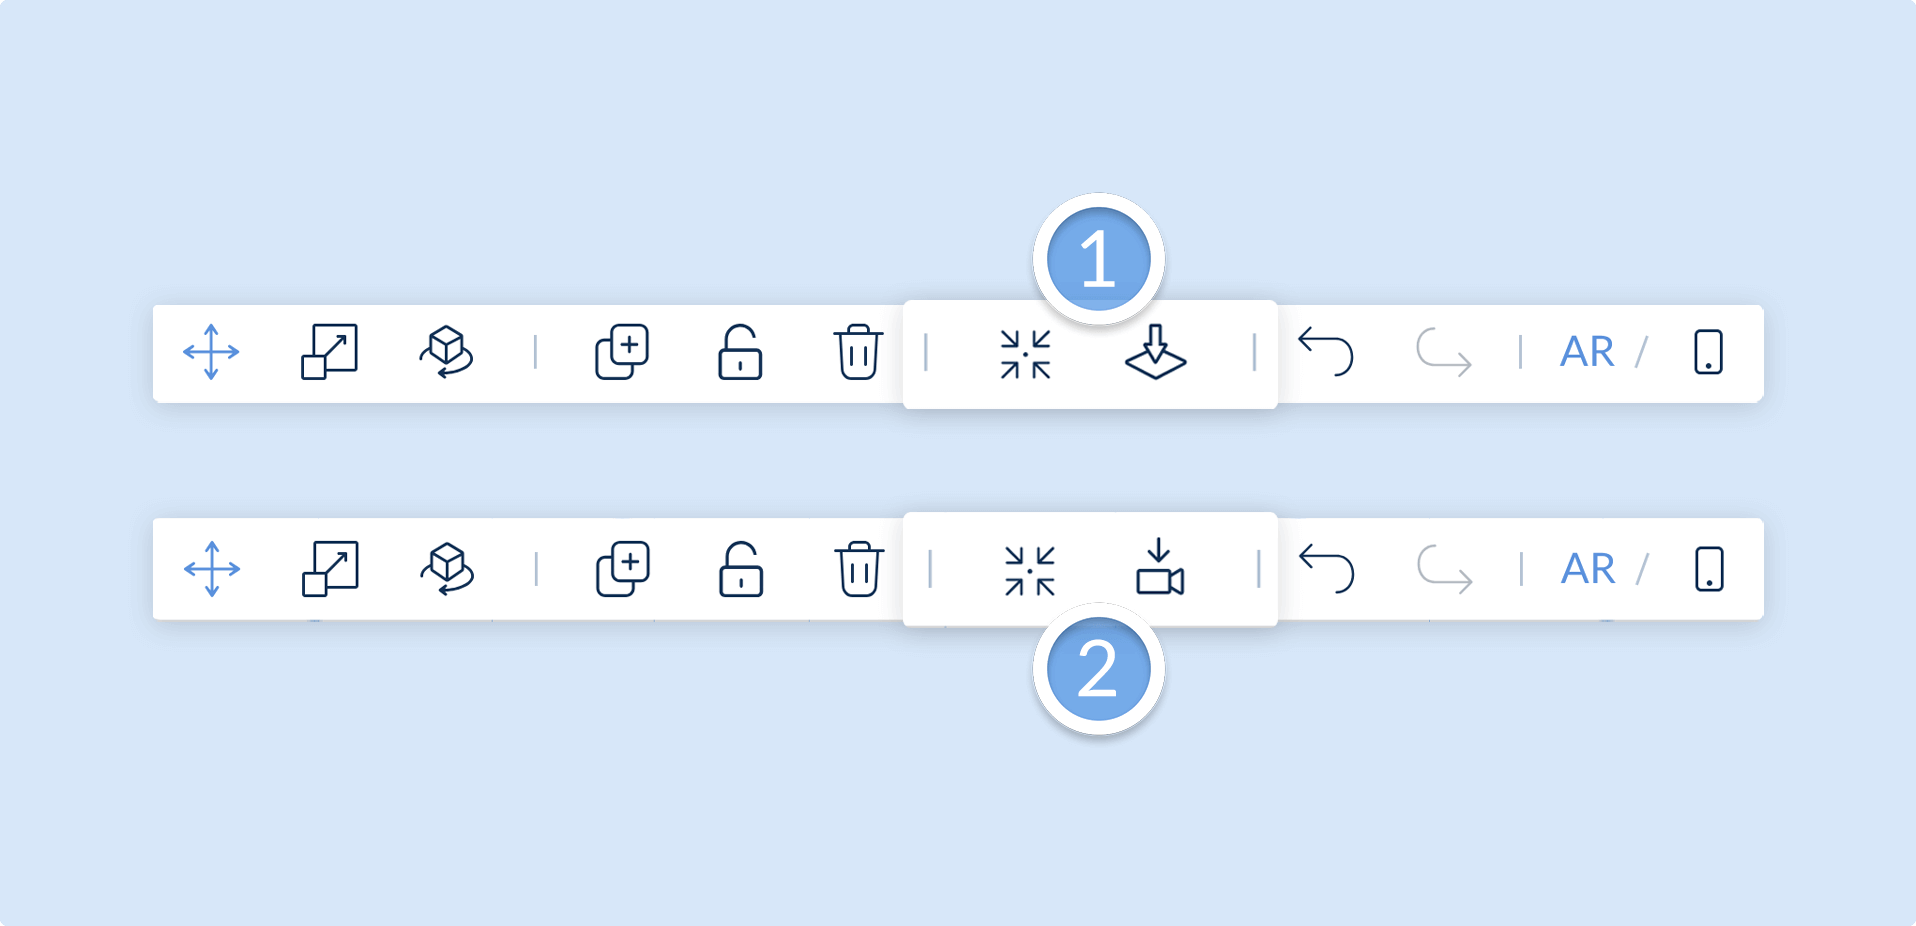
Section titled “360-specific Context Bar changes”360 content scenes cause specific changes to the Context Bar which make it easier to customize components within your experience.
| Default icon | 360 content scene icon | Default description | 360 content scene description |
|---|---|---|---|
| Snap to surface | Face camera | Snaps content to a surface (e.g. a ground plane or target image). | Makes a selected component transform to face the camera. |
| Recenter | Recenter | Returns the canvas to a default view. | Returns the canvas to the initial camera view position. |