Obstacles
The Obstacles tool lets you mark areas of your map that are physically inaccessible to users. Spaces will then exclude these areas from route calculations, ensuring users are never directed through spaces they cannot actually pass through.
This is particularly useful for features that may not be captured accurately during scanning - for example, glazed partitions or glass doors, which can be partially or fully transparent to scanning technology and may appear as open, walkable space in the map data.
Adding an obstacle
Section titled “Adding an obstacle”- In the Spaces editor, open the Structure section in the left-hand panel and select Obstacles.
- Click to place a red mesh on the map. Use the white indicators to reposition and resize it over the area you want to block.
- Check that the green walkable area no longer passes through the blocked region. The obstacle does not need to be pixel-perfect, as long as the green mesh avoids the inaccessible area, routing will work correctly.
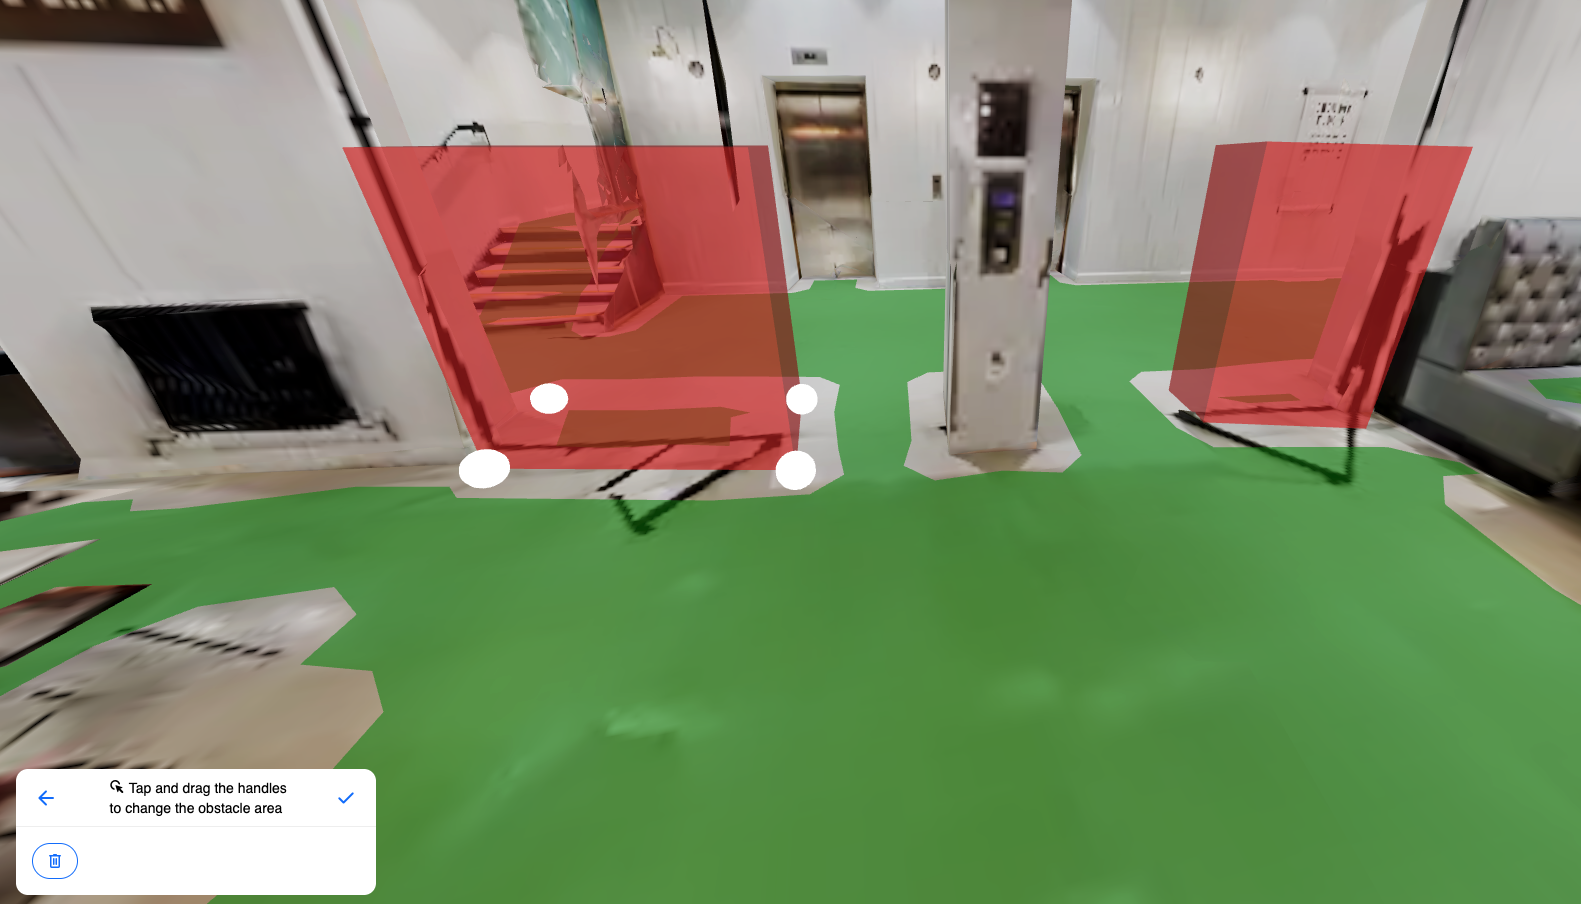
Once placed, the marked area will be excluded from navigation routing.
The nav mesh will update automatically. If your routing does not reflect the change, use Regenerate nav mesh in Advanced to force an update.
Common uses
Section titled “Common uses”- Glass walls or partitions not fully captured in the scan.
- Temporary blocked areas or restricted zones.
- Furniture, counters, or fixed equipment that occupies walkable floor space.
- Areas that are accessible to staff only and should not be included in visitor routes.