Face Tracking
Face Tracking can detect and track digital content to the user's face. This is great for building face-filter experiences which allow users to try on different virtual glasses or hats for example.
We recommend coupling face tracked experiences with Screen UI components to make the most out of your experiences.
Using Face Tracking
When you create your Designer experience, you will be asked whether you want your first scene to be World, Image, or Face tracked.
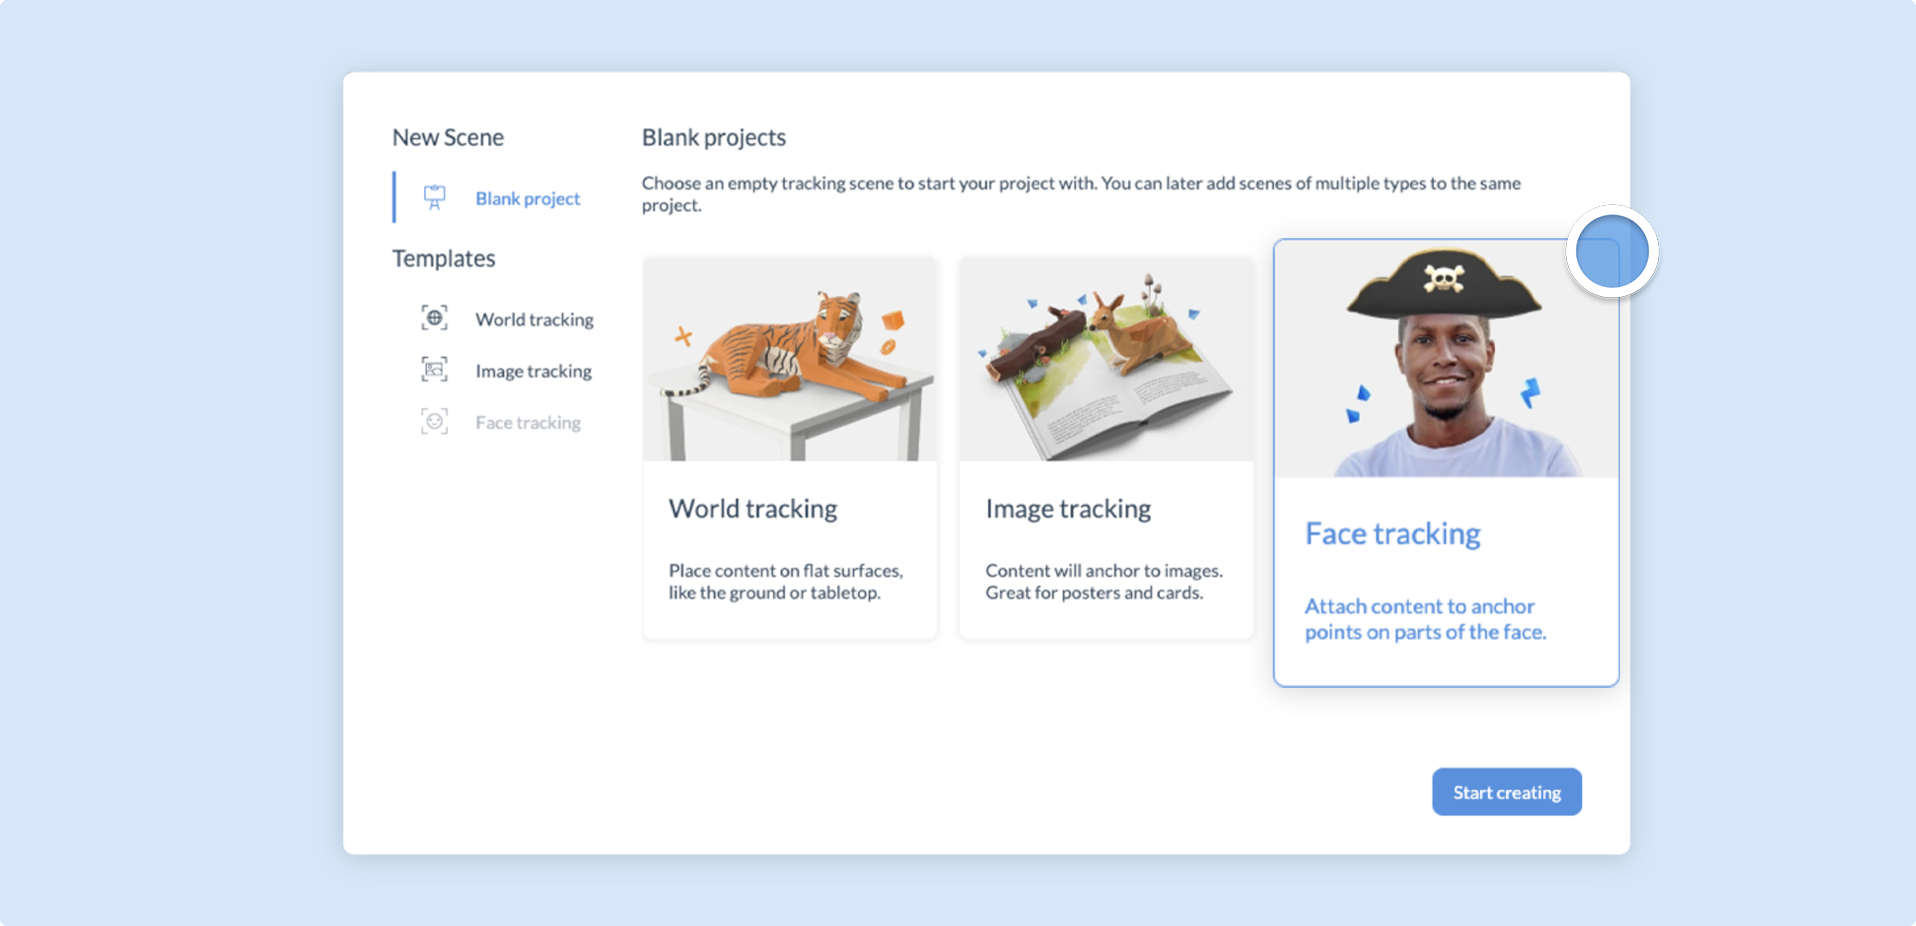
Upon selecting Face Tracking, your scene will automatically be switched to 3D mode, with a head mesh displayed on the canvas to indicate where to place your content.
The head mesh will automatically hide content inside the head.
Attachment points
In addition to tracking the center of the head (known as the origin), you can use Attachment points to track content from various places on the user's face. These attachment points will remain accurate, even as the user's expression changes.
To assign a component to an attachment point, simply click and drag over the highlighted attachment point.
The following attachment points are available:
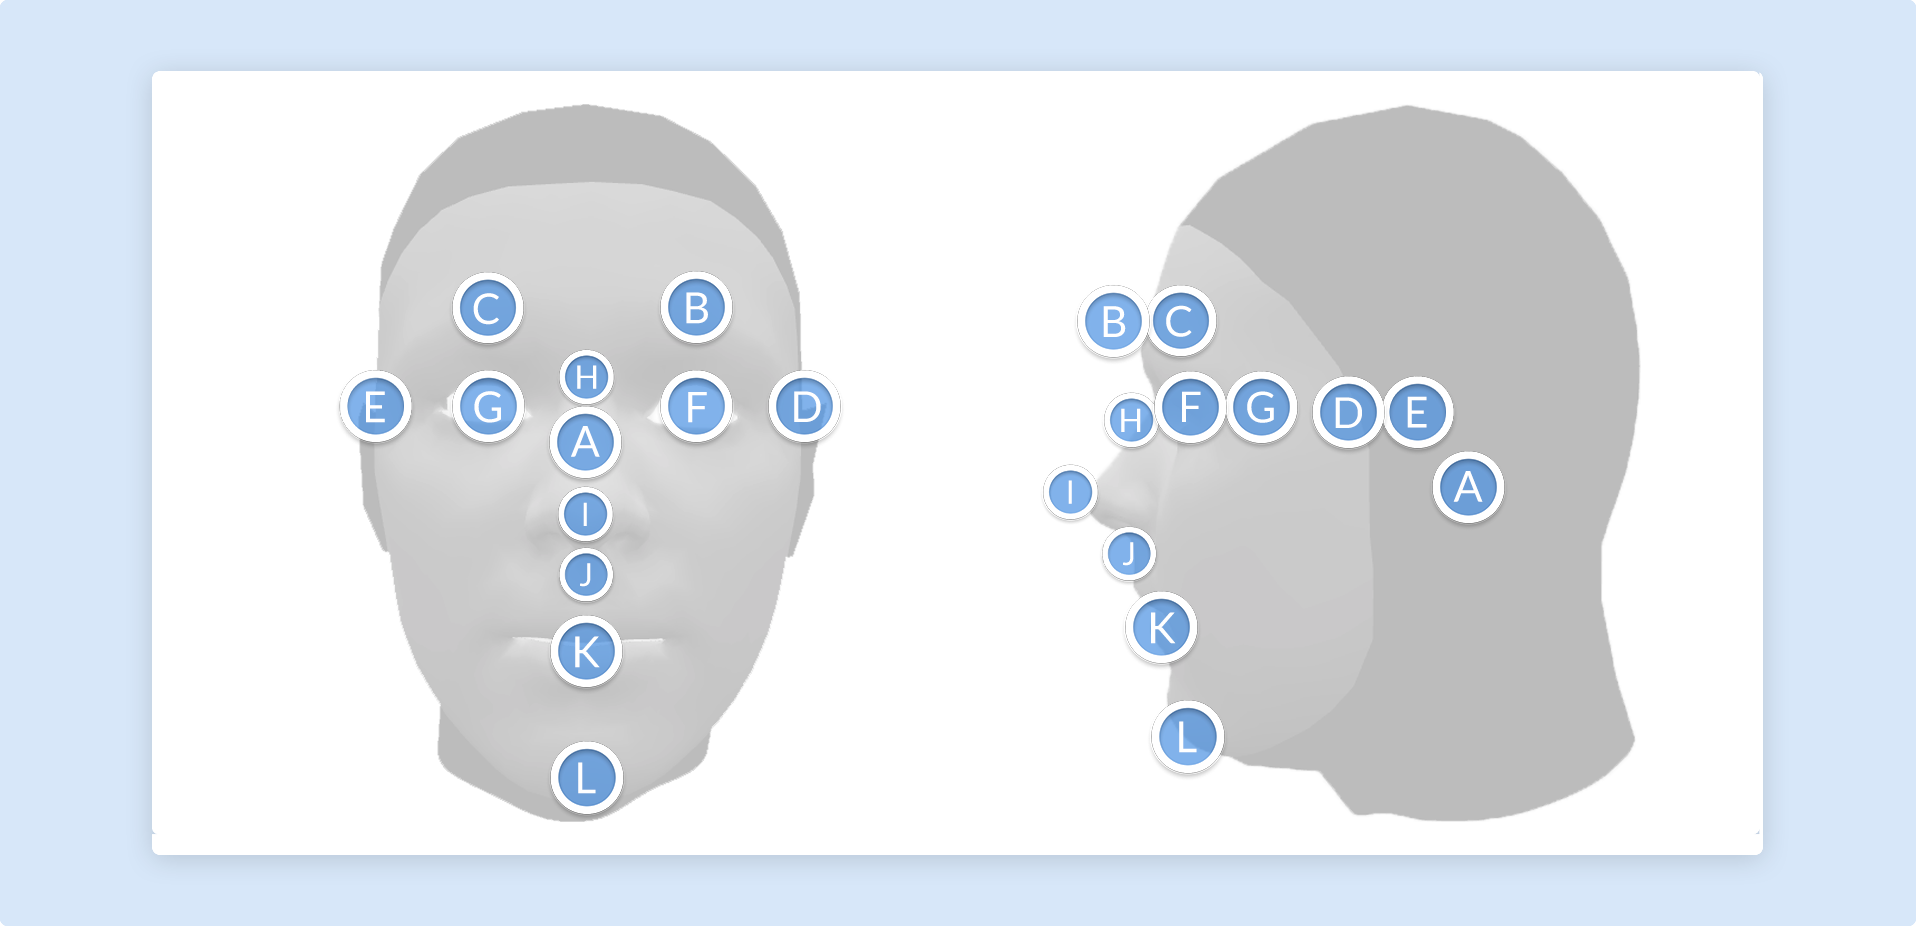
Note that 'left' and 'right' here are from the user's perspective in the experience.
| Attachment point | Diagram ID |
|---|---|
| Origin | A |
| Left eyebrow | B |
| Right eyebrow | C |
| Left ear | D |
| Right ear | E |
| Left eye | F |
| Right eye | G |
| Nose bridge | H |
| Nose tip | I |
| Nose base | J |
| Bottom lip | K |
| Chin | L |
You can change a component's attachment point at any time. To do so, click on your chosen component and then go to the Project Properties Panel. Find the Attachment points drop-down menu and then select a new attachment point.