Custom display URLs
Custom display URLs and Custom WebAR domains allow you to personalize the default URL that a user will see in their browser’s URL bar when launching your immersive experiences via their triggers.
By registering a domain that you own via your Workspace, Zapworks will handle the hosting and serving for you. This makes them different from Publishing Licences, which are used for independently self-hosting project bundles on your own web server.
Workspace support
Section titled “Workspace support”By default, new projects on all plans will use the zappar-us.io domain name, with projects hosted and served from the US. Certain plans are able to customize this, in some cases including the slug. Please see the table below for more information.
A URL ‘slug’ is part of a URL after the domain which uniquely identifies the page. For example, in the URL
https://www.zappar.com/ar-examples/, the slugar-exampleidentifies the purpose of this web page.
| Plan | Access to US hosting | Access to EU hosting | Customize display URL slug | Fully custom WebAR domain |
|---|---|---|---|---|
| 14 day trial | ✓ | X | X | X |
| Developer | ✓ | X | X | X |
| Pro | ✓ | X | ✓ | X |
| Enterprise | ✓ | ✓ | ✓ | ✓ |
Setting your default Display URL
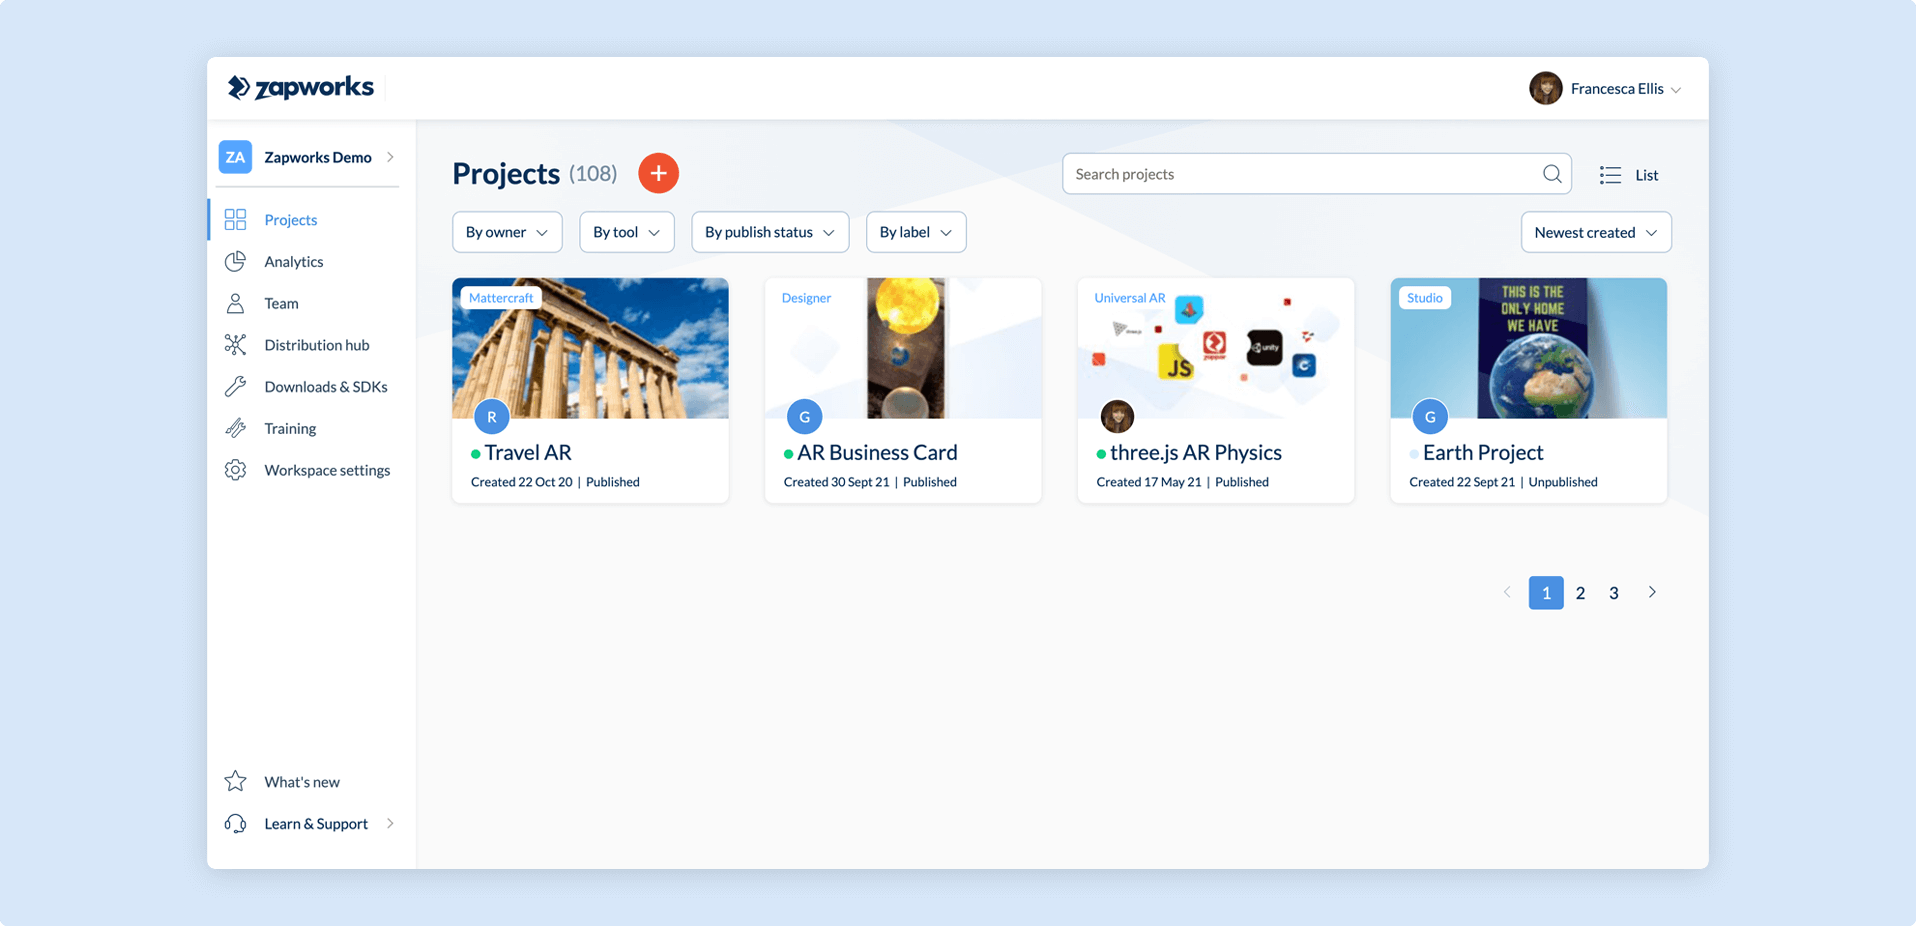
Section titled “Setting your default Display URL”To set a new project default display URL, first click on your project from your Workspace Dashboard to enter the Project Page.
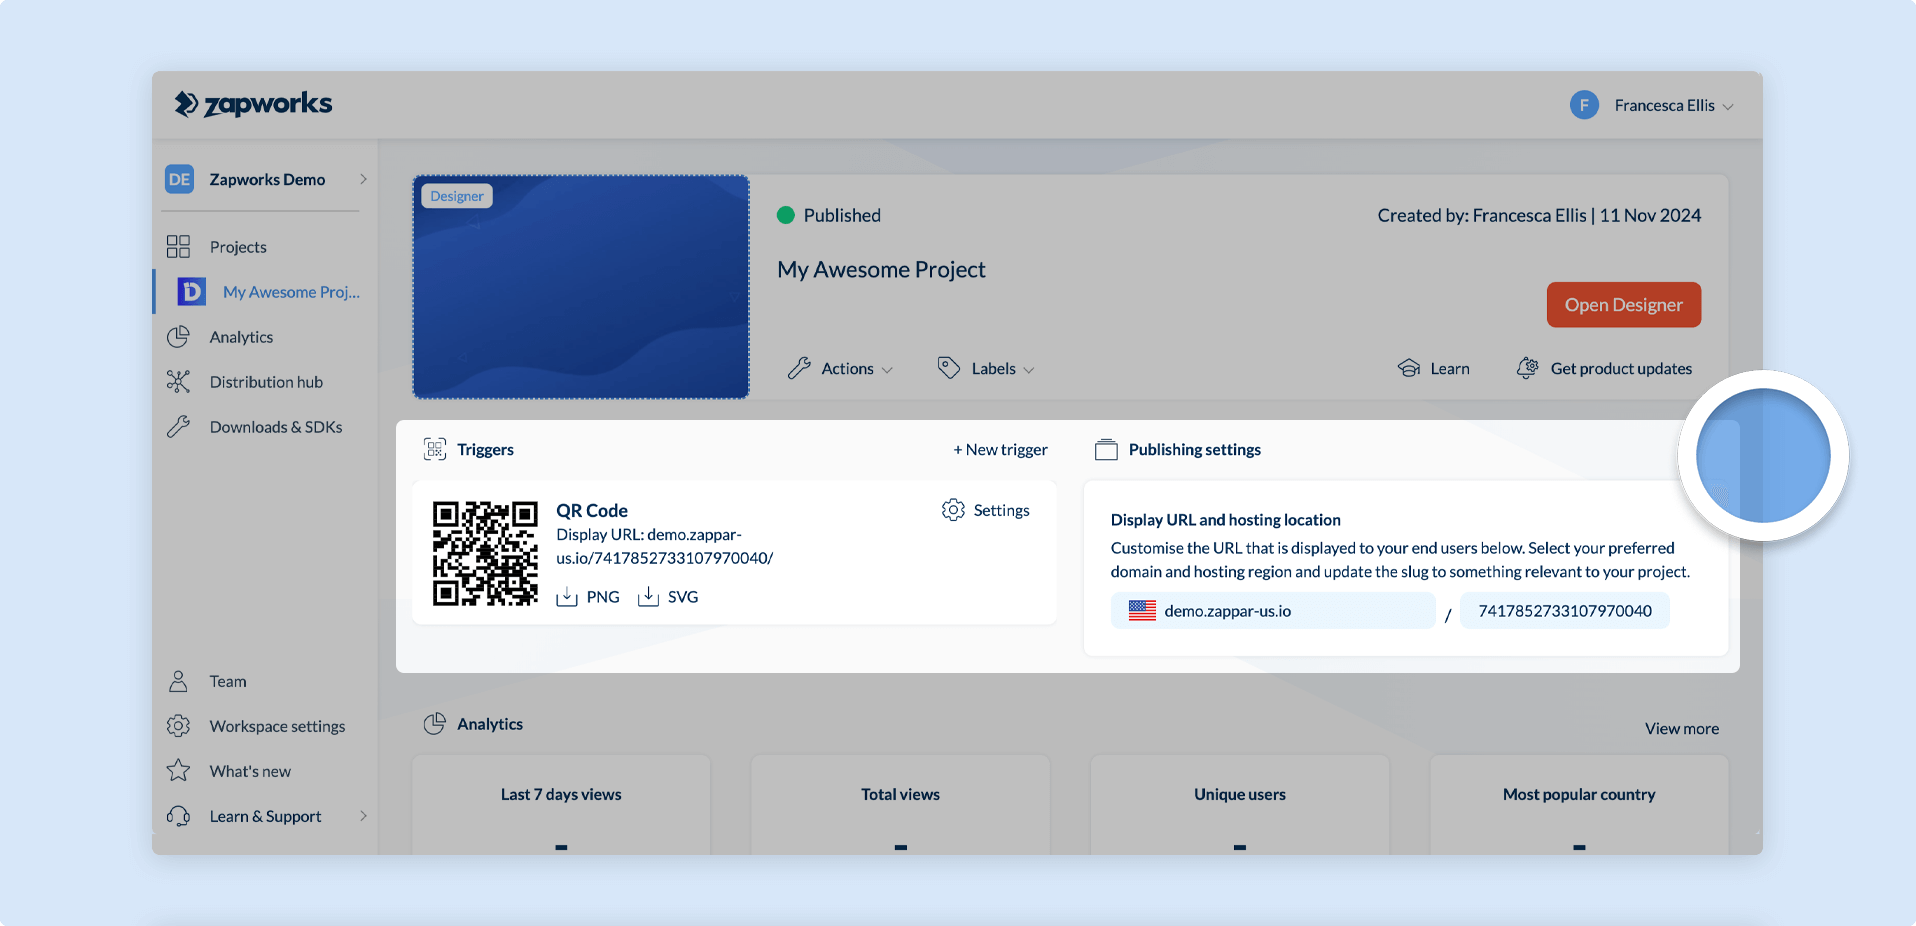
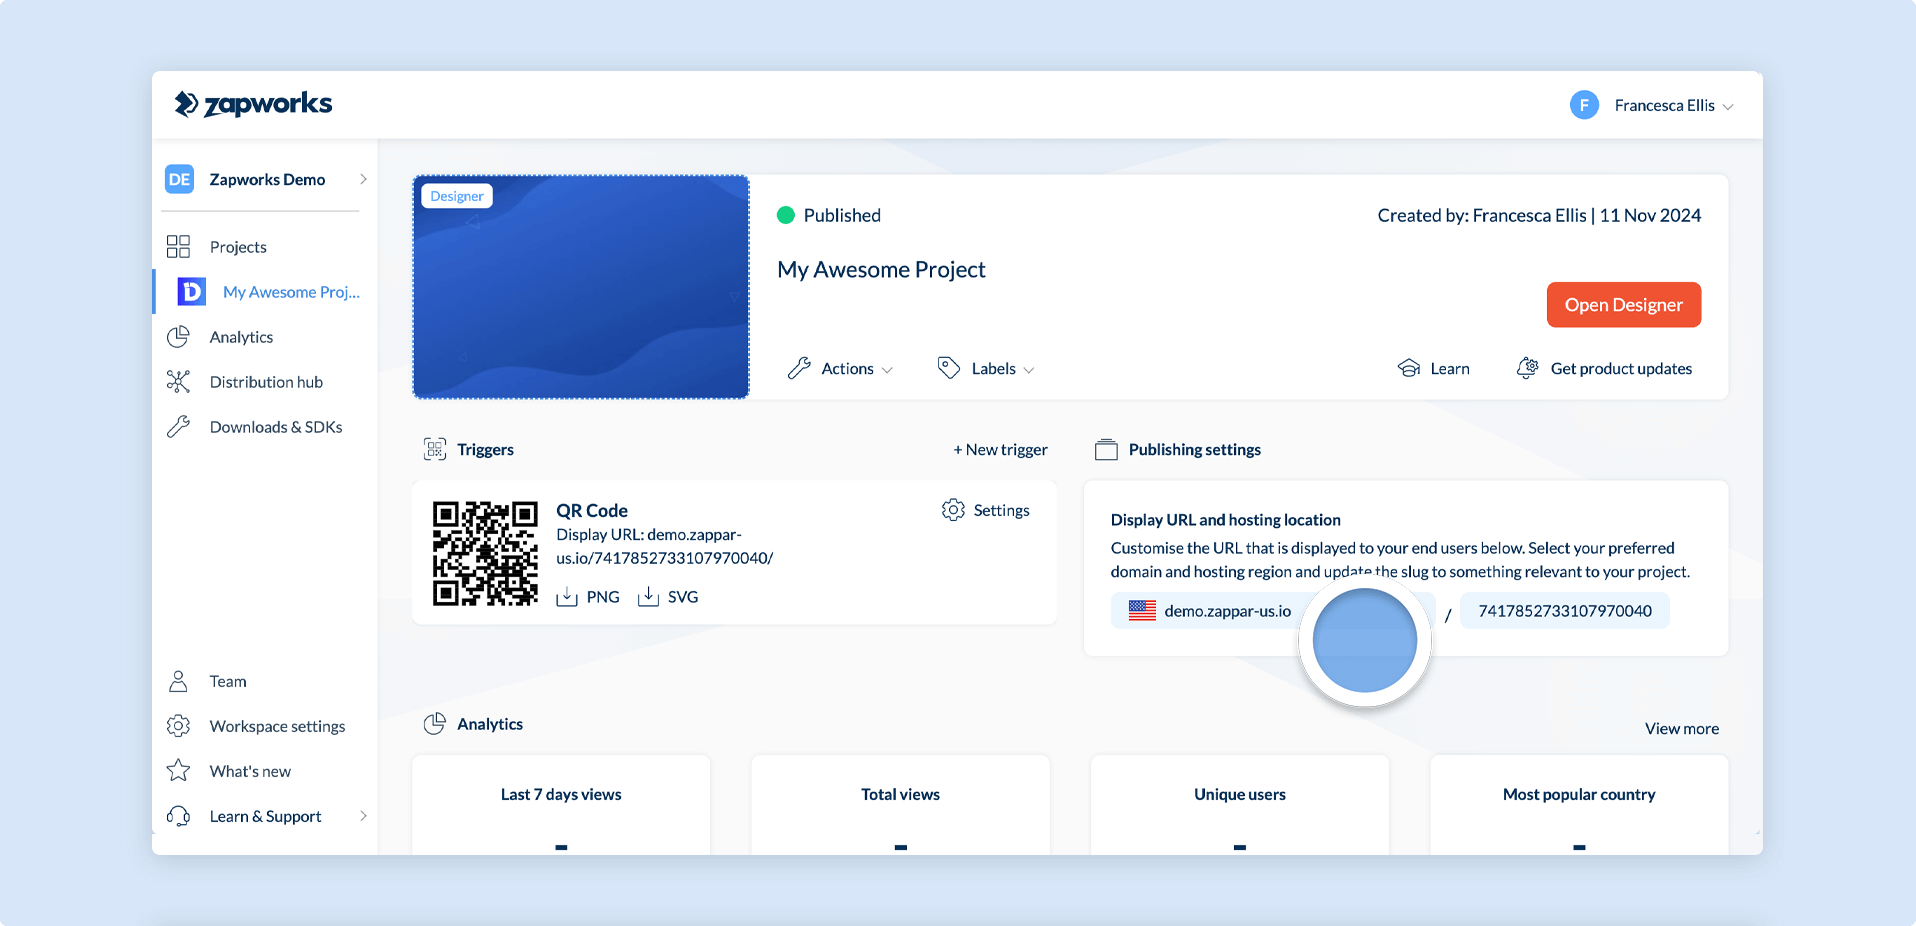
From here, you can go to the Publishing settings panel to the right of the screen and click on the project’s current display URL.
You will then see the Modify display URL and hosting location modal which will allow you to update the current display URL.
Some domains such as ‘http://zappar-us.io/’ will allow you to customize the project’s slug in the URL, while others such as
http://zappar.io/will use the project ID and the version name to compose the display URL.
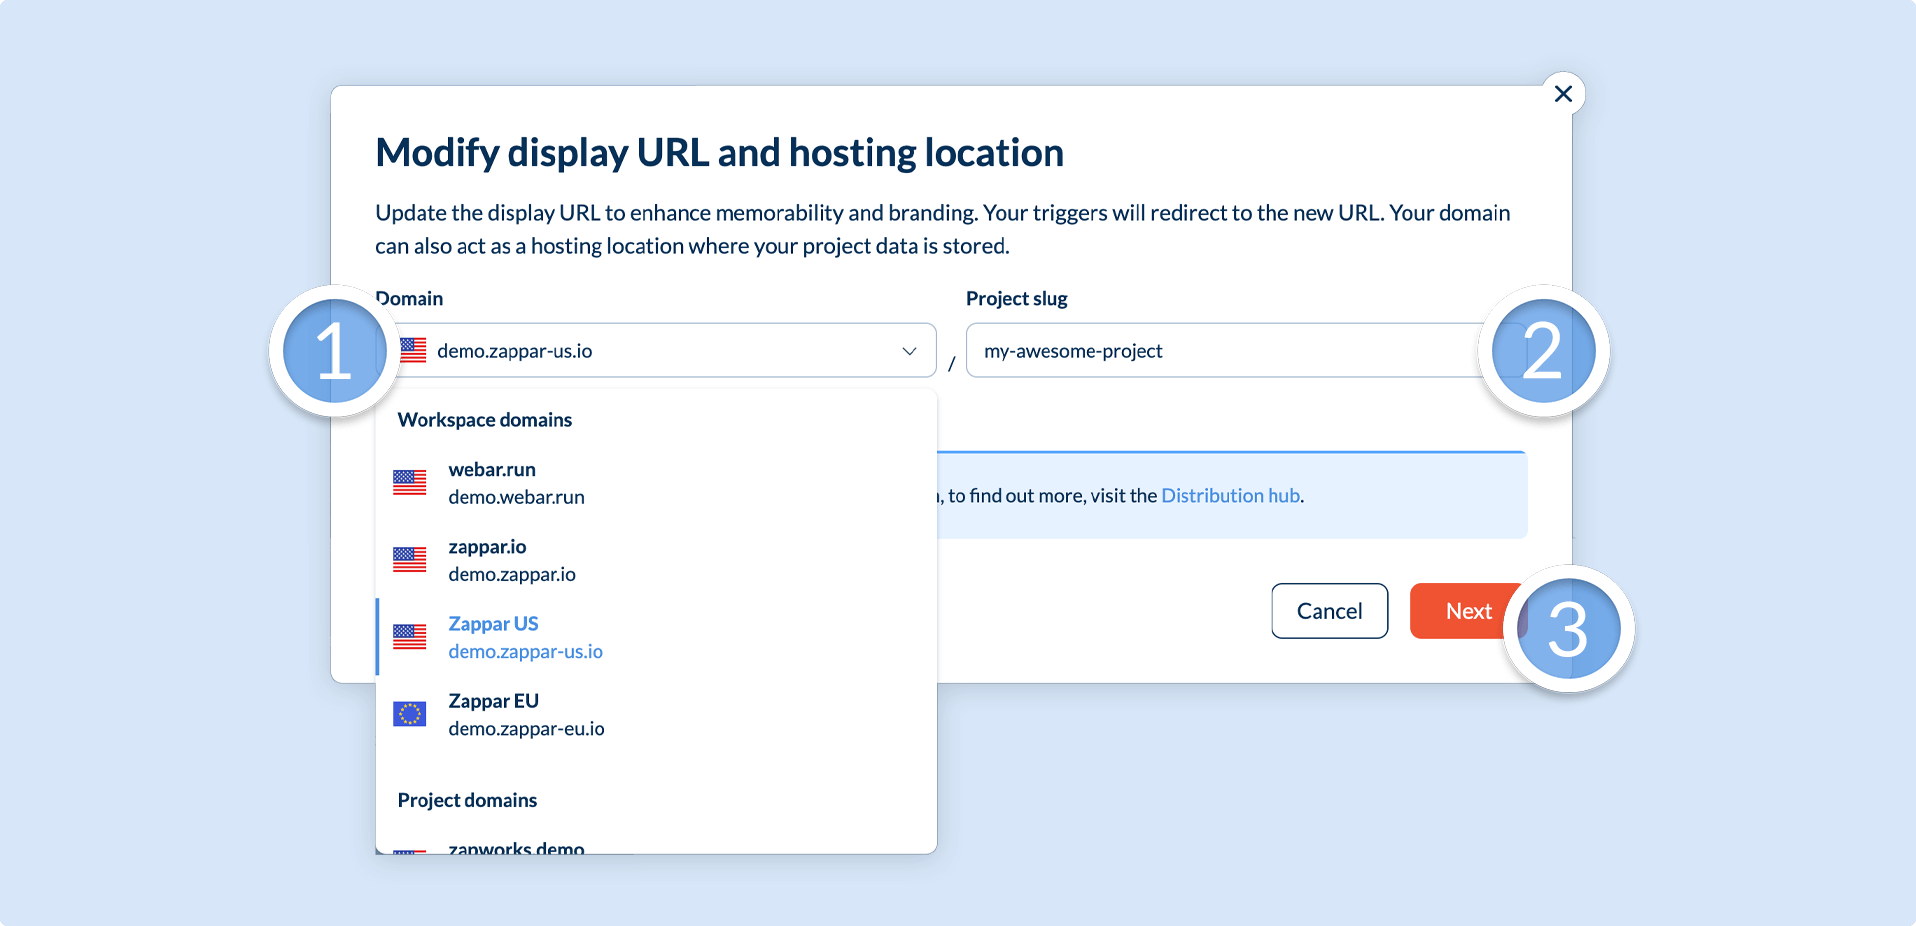
When you have selected the new default display URL that you would like to show to your users, click on the Next button in the modal to confirm whether you would like this change to affect both new and existing triggers, or, new triggers only.
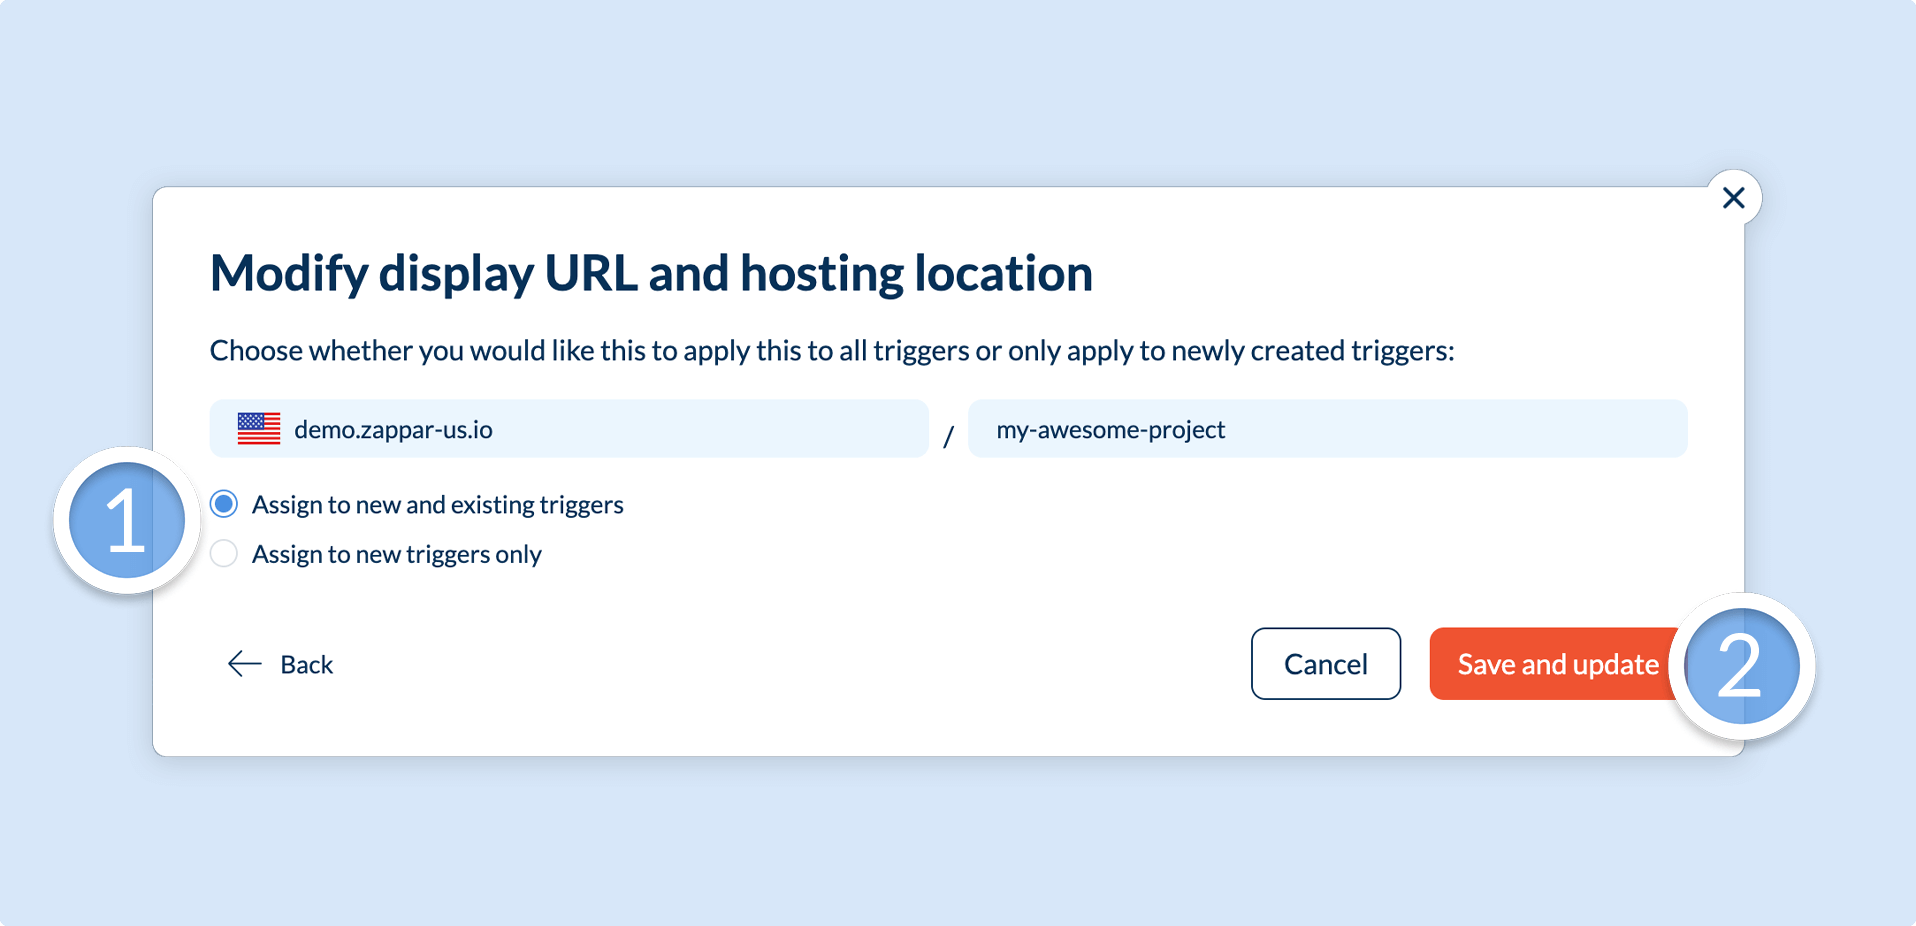
When you click on Save and update, your triggers will begin to redirect to the new default display URL after a few seconds.
You can also set the default domain for your projects by heading to the Distribution Hub.
Setting an individual trigger’s display URL
Section titled “Setting an individual trigger’s display URL”From time to time you may wish for individual triggers to be redirected to different display URLs; for example, to host your experience on servers which are in multiple target countries, or for legal and compliance reasons.
To set an individual trigger’s display URL, first click on the project you wish to customize from your Workspace Dashboard to enter the Project Page.
From here, you can go to the Triggers panel to the left of the page and find the trigger you wish to update the display URL for. Then, click on that trigger’s Settings, where you will be redirected to the Trigger Settings page.
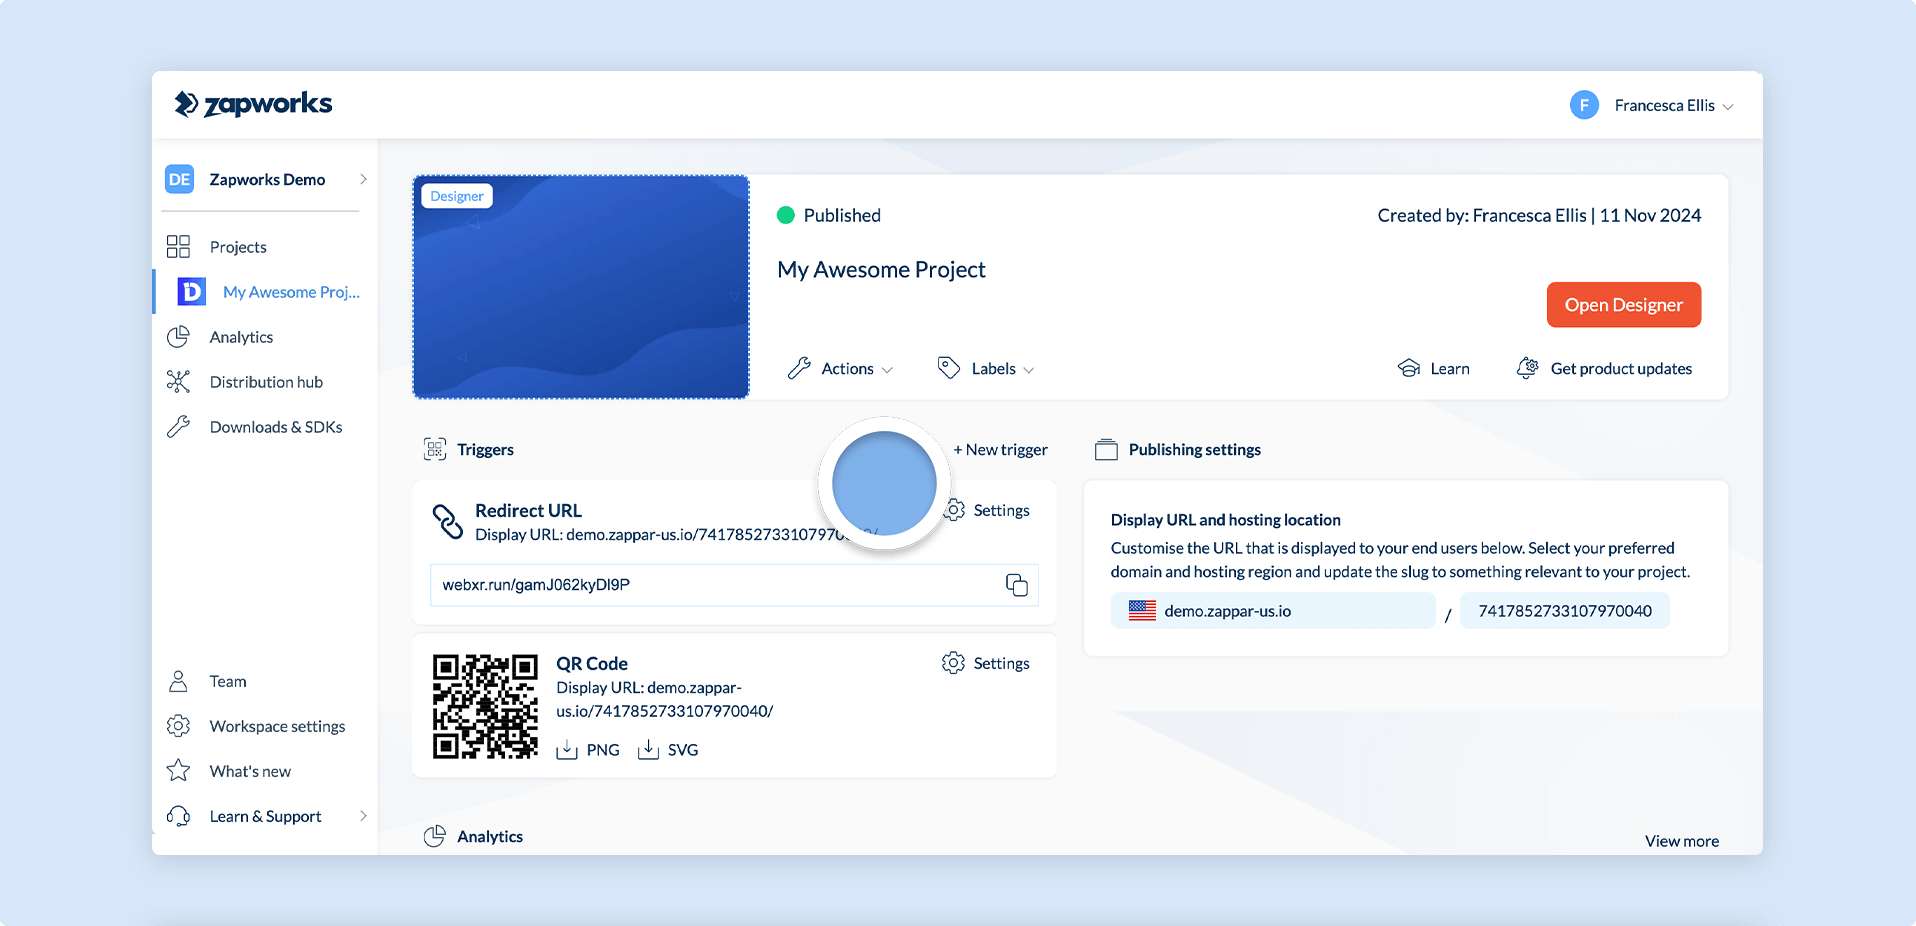
Making sure that you are selected on the Destination tab, click on the display URL which you would like this trigger to redirect to.
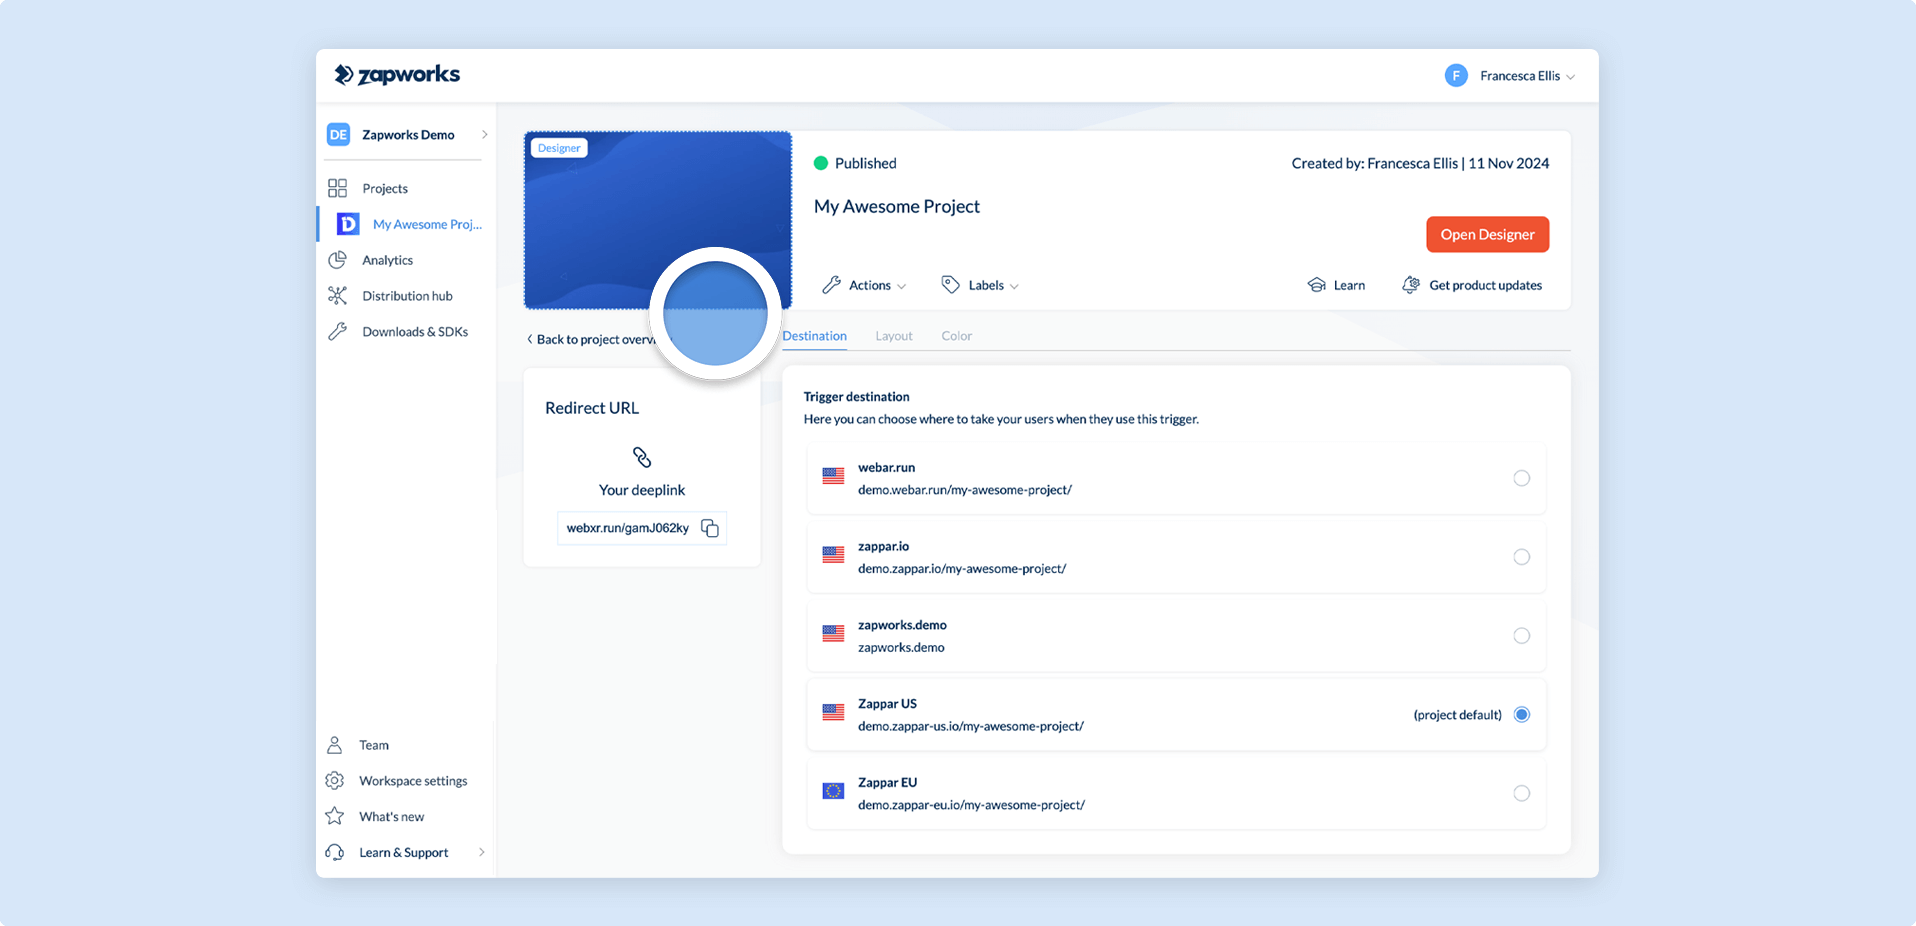
When you click on a Trigger destination, your trigger will begin to redirect to the new default display URL after a few seconds.
Creating a new Custom WebAR Domain
Section titled “Creating a new Custom WebAR Domain”There may be instances where a project needs specific branding and customization in its display URL. In this case, a Zappar hosted Custom WebAR Domain may be required.
This feature is only available on our Enterprise plan. Please use the instructions below and if you need help to upgrade, our team will be in touch to assist.
To create a new Zappar hosted custom WebAR domain, first click on your project from your Workspace Dashboard to enter the Project Page.
From here, you can go to the Publishing settings panel to the right of the screen and click on the project’s current display URL.

You will then see the Modify display URL and hosting location modal which will allow you to update the current display URL and request a new domain.
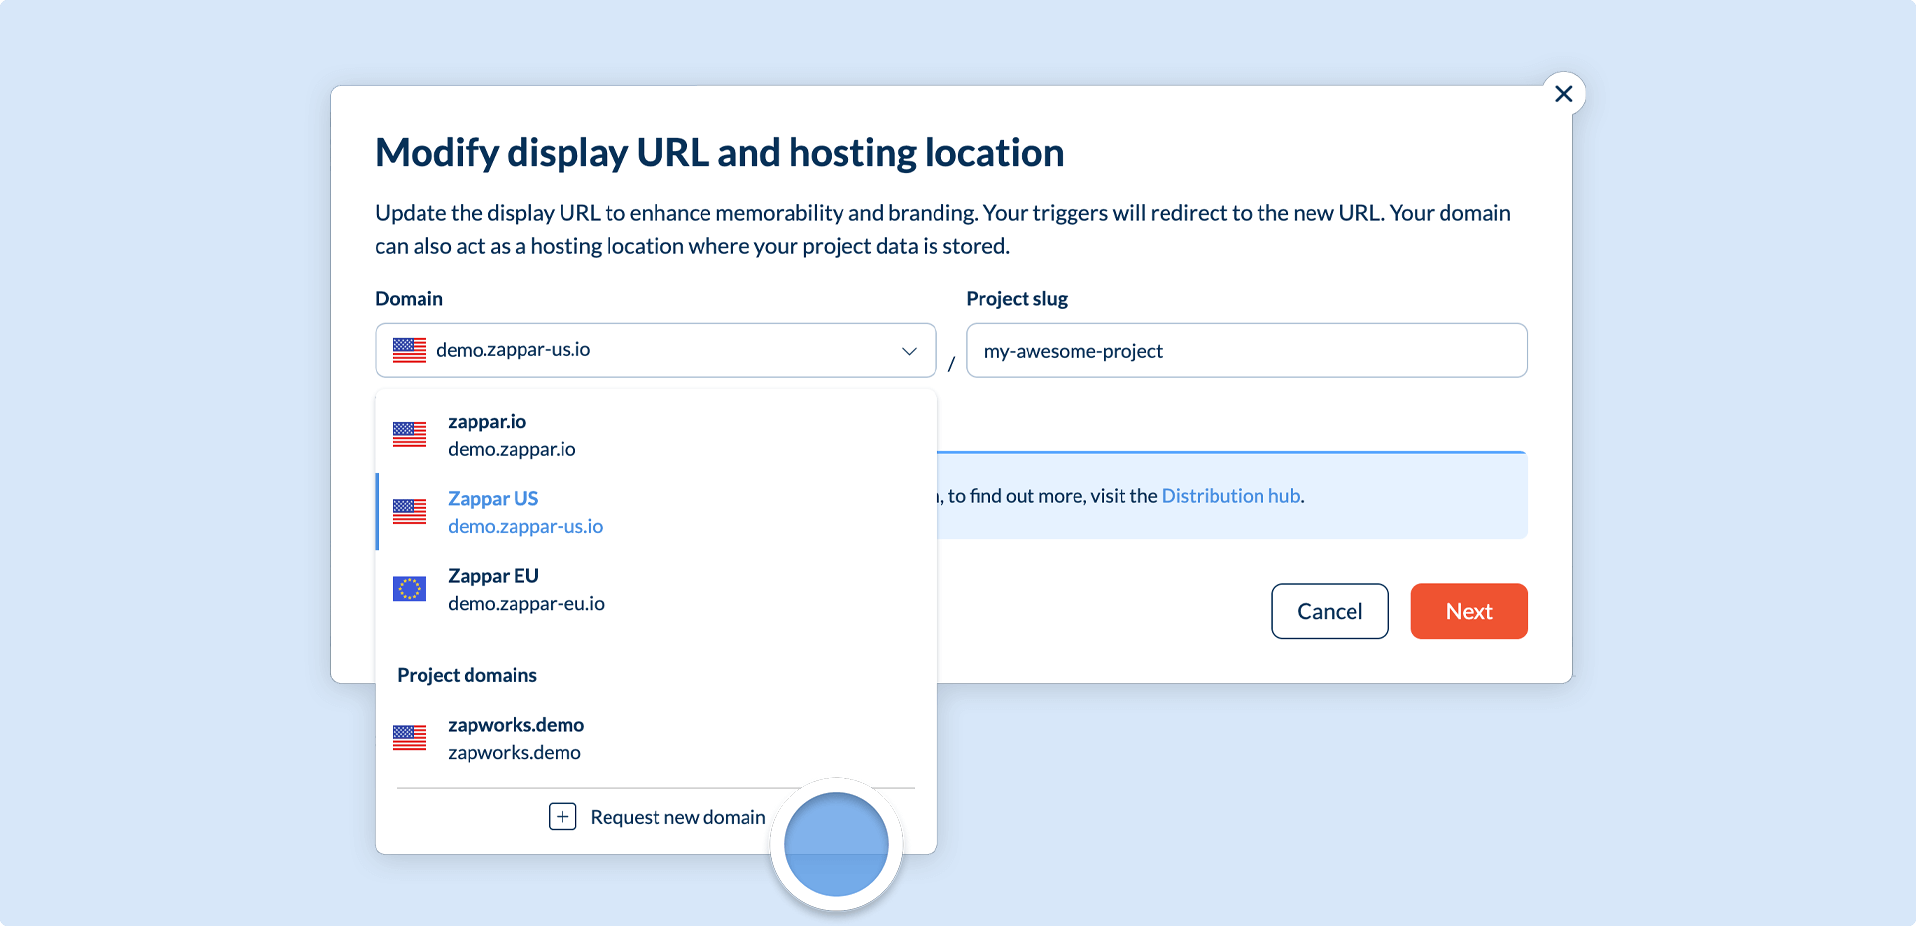
To request a new Zappar hosted custom WebAR domain, click on the Request a new domain option in the dropdown to open the domain request modal and follow the instructions to request a host name and hosting region.
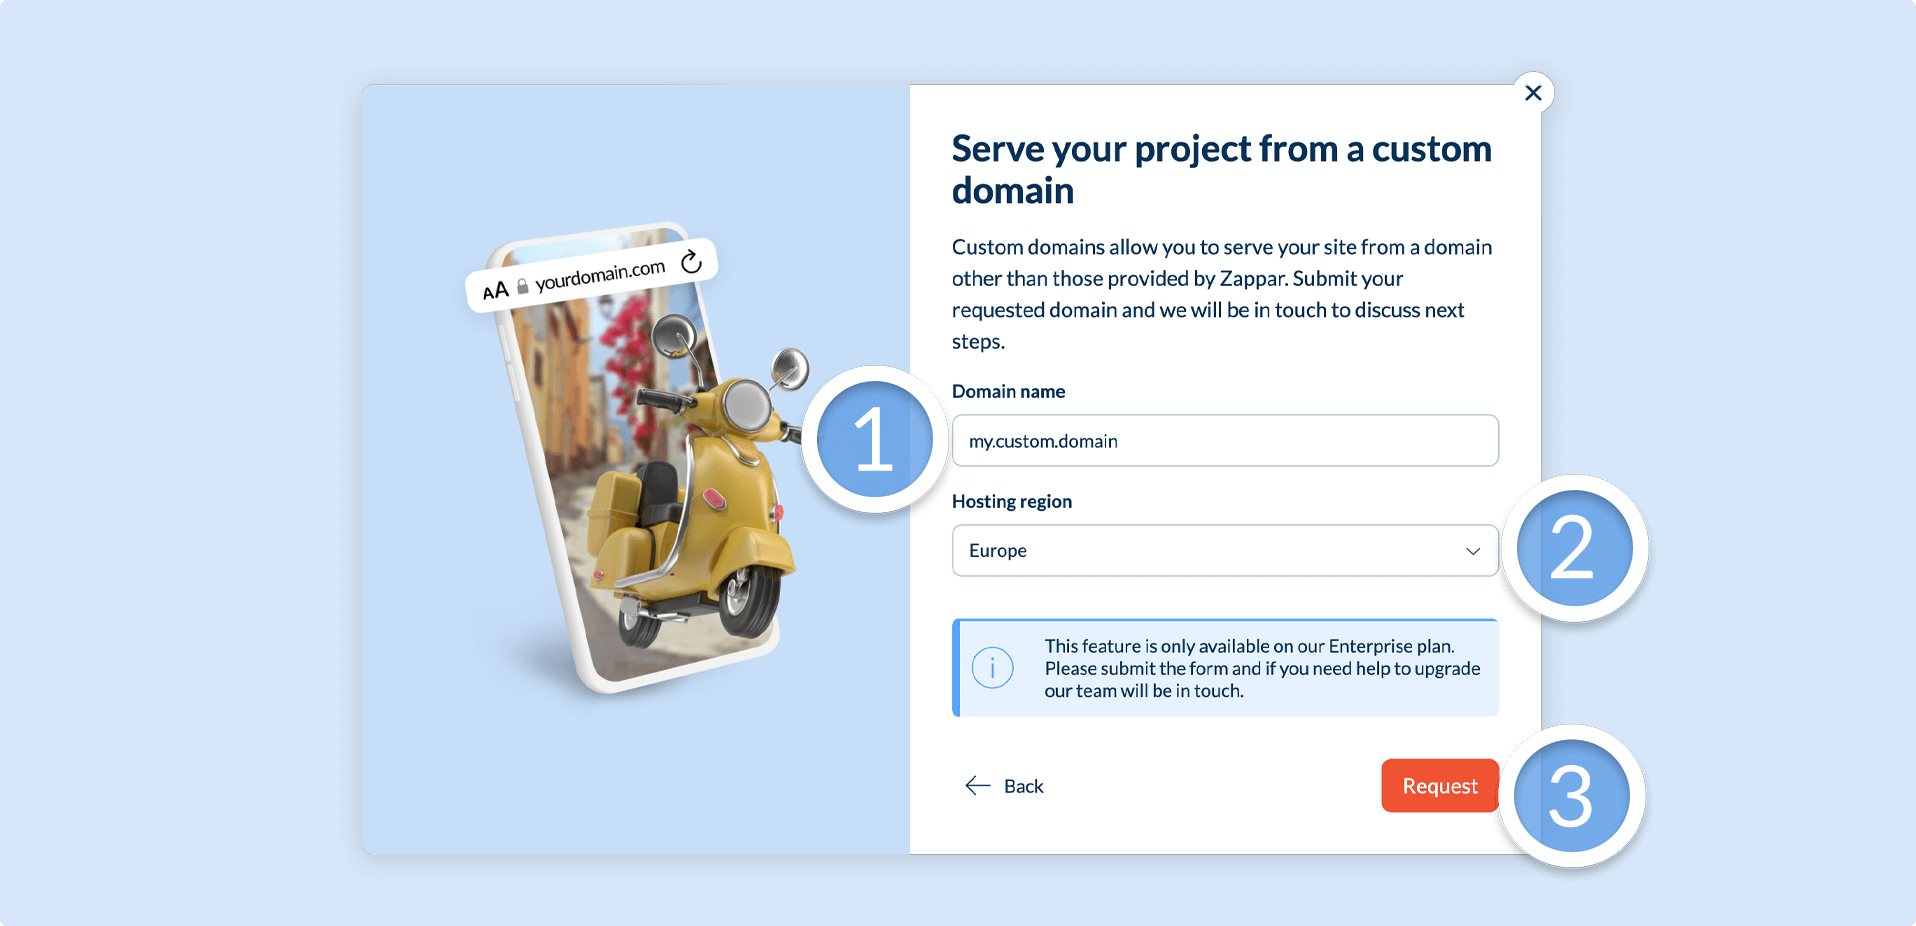
When you have completed the form, click on the Request button to submit your requested domain and the Zappar team will be in touch to discuss the next steps with you.
You can also register Zappar hosted custom WebAR domains via your Workspace Distribution Hub, where all of your Zappar hosted custom WebAR domains will be shown in a list under the Custom WebAR Domains accordion tab.
Setting a new Custom WebAR Domain
Section titled “Setting a new Custom WebAR Domain”To set your new custom Zappar hosted WebAR domain, follow one of the above guides to set your custom WebAR domain as the default display URL for all existing triggers, new triggers, or both; or a specific display URL for an individual trigger.
You can also set the default domain for your projects by heading to the Distribution Hub.