Integrating with your Flutter App
Creating a Flutter Build
Section titled “Creating a Flutter Build”From your ZapWorks page, open the settings dropdown and select App Embed. On the next page, select New app, give it a name, and click Next.
The App Embed option is only displayed if you’ve been given access to our SDK. Please contact support@zappar.com if you’d like to request access.
Select Flutter as the build type and in the Build field, enter a name for the type of build you are creating eg. production, testing, etc.
If the Flutter build option is not displayed, please contact support@zappar.com
The above steps will create a new entry in the App Embed section. Selecting an app’s build from this page will allow you to download your build and find any API keys associated with it.
If you’ve used up your account’s API key allocation, please contact support@zappar.com
Flutter Project
Section titled “Flutter Project”Add the dart file provided in the app embed package to your lib folder and create a reference to the Zappar library in the main.dart file with the following line: import 'package:<project directory name>/zappar.dart';.
Example:
import 'package:zappar_flutter/zappar.dart';import 'package:flutter/services.dart';        child: new Column(          mainAxisAlignment: MainAxisAlignment.center,          children: <Widget>[            new RaisedButton(              child: new Text('Move to Native World!'),              onPressed: _showNativeView,            ),          ],        ),      ),
 void _showNativeView() async {  var zappar = new Zappar();  await zappar.showNativeView("");  }
Android
Section titled “Android”- In your Android project, start an intent with the Zappar embed. Add the following code to your MainActivity file. The path will likely be
<root>/android/app/src/main/java/MainActivity.kt
import com.zappar.ZapparEmbed
class MainActivity : FlutterActivity() {
    companion object {        const val CHANNEL = "com.example.zapparflutter"        const val KEY_NATIVE = "showNativeView"    }
    override fun onCreate(savedInstanceState: Bundle?) {        super.onCreate(savedInstanceState)        MethodChannel(flutterView, CHANNEL).setMethodCallHandler { call, result ->            if (call.method == KEY_NATIVE) {                val intent = Intent(this,    ZapparEmbed.getZapcodeClassForIntent())                intent.setFlags(Intent.FLAG_ACTIVITY_NEW_TASK)                startActivity(intent)                result.success(true)            }        }    }}
The
CHANNELvariable must match the package ID and should be identical to the one used in the main.dart file. Doing so will allow channel communication to be established and the embed to be started.
- Add the AAR library to the project.
- In the build.gradle file, add the following:
compile project(':zappar-release')implementation 'com.google.ar:core:1.8.0'implementation 'com.android.support:localbroadcastmanager:28.0.0'- In the manifest, add the following above the
<activitytag:
<meta-data android:name="com.zappar.embed.API_KEY" android:value="APIKEY"/>Your API key can be found from your app’s page on your ZapWorks page. If you’ve used up your account’s API key allocation, please contact support@zappar.com.
- Add the following entries to your Info.plist file:
| Permission | Description |
|---|---|
| Privacy - Camera Usage | A string of your choice e.g. Allow camera access for augmented reality amazingness. |
| Privacy - Calendar Usage | A string of your choice e.g. Allow calendar entries to be saved. |
| Privacy - Contacts Usage | A string of your choice e.g. Allow contact entries to be saved. |
| Privacy - Microphone Usage | A string of your choice e.g. Allow sound to be recorded when using the video record feature. |
| Privacy - Photo Library Usage | A string of your choice e.g. Allow snapshots to be saved to your camera roll. |
| Privacy - Photo Library Additions | A string of your choice e.g. Allow snapshots to be saved to your camera roll. |
The above entries are essential to ensure the correct behavior of the embed component at runtime; if they are not set the app may crash due to missing permissions.
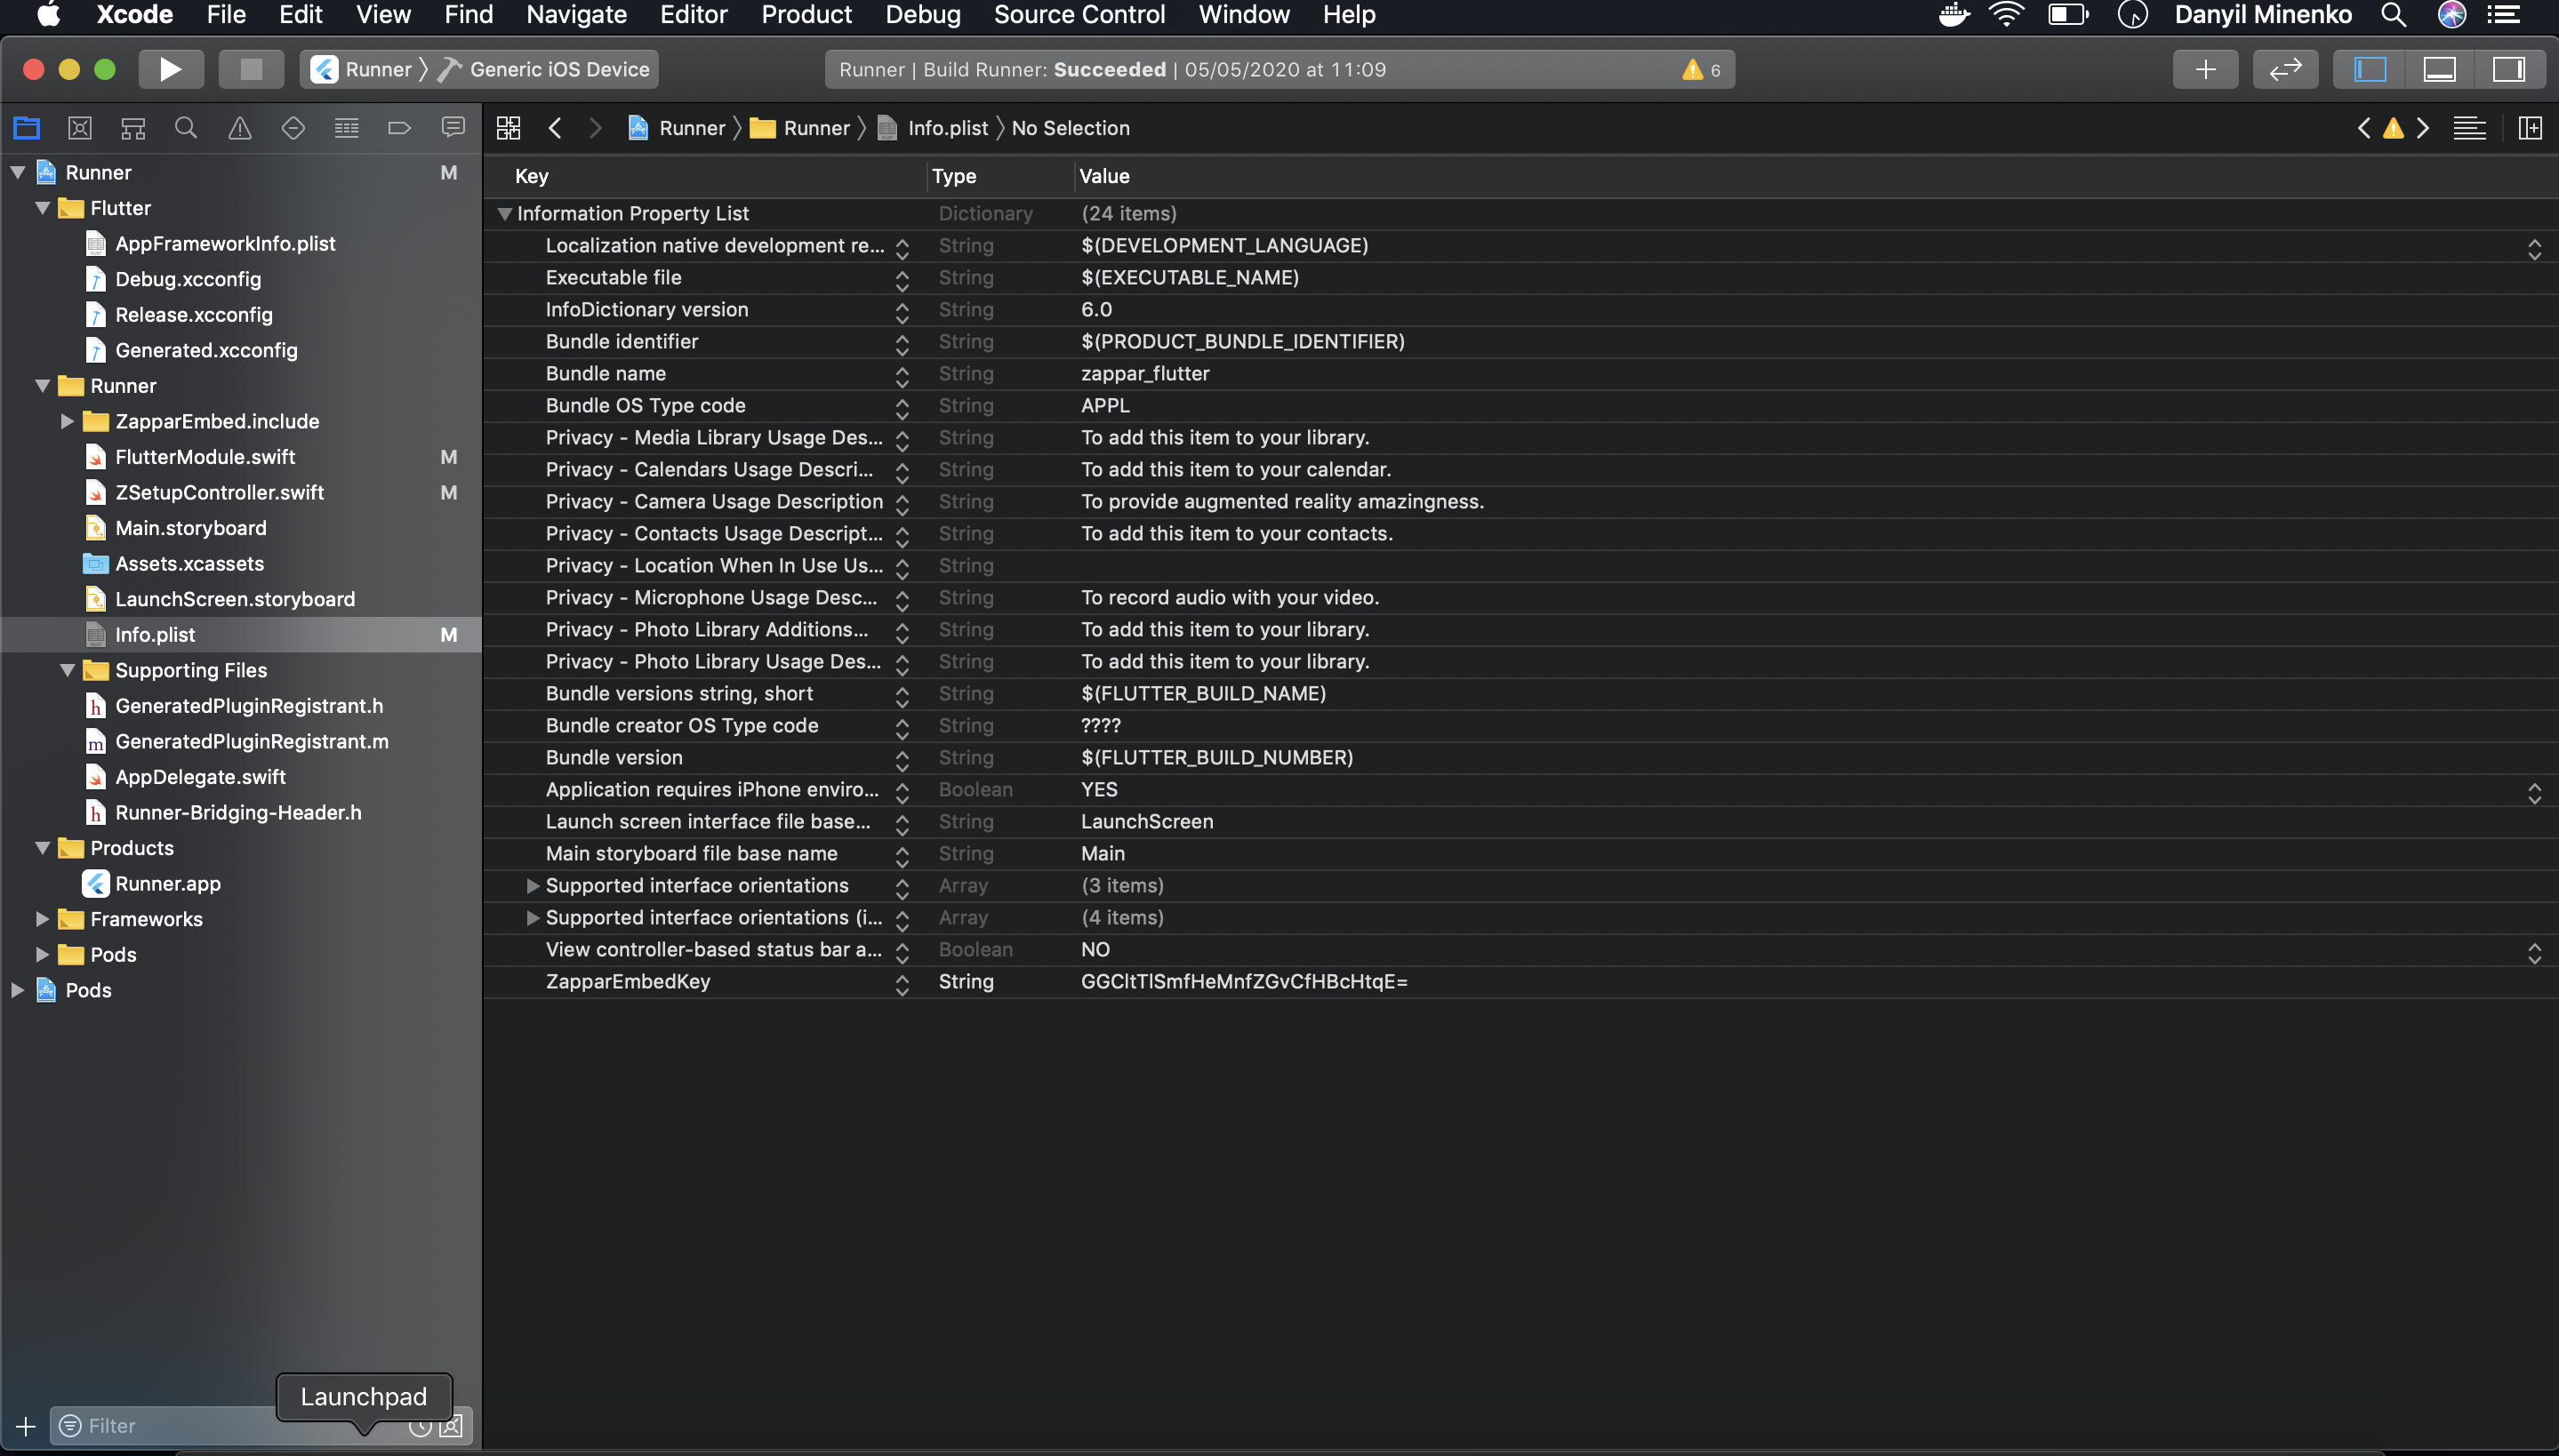
Please note, this does not remove the ability for the user to decline these permissions once prompted.
- Add dependent frameworks to the project. Select the Target, then navigate to Build Phases > Link Binary With Libraries and add the following:
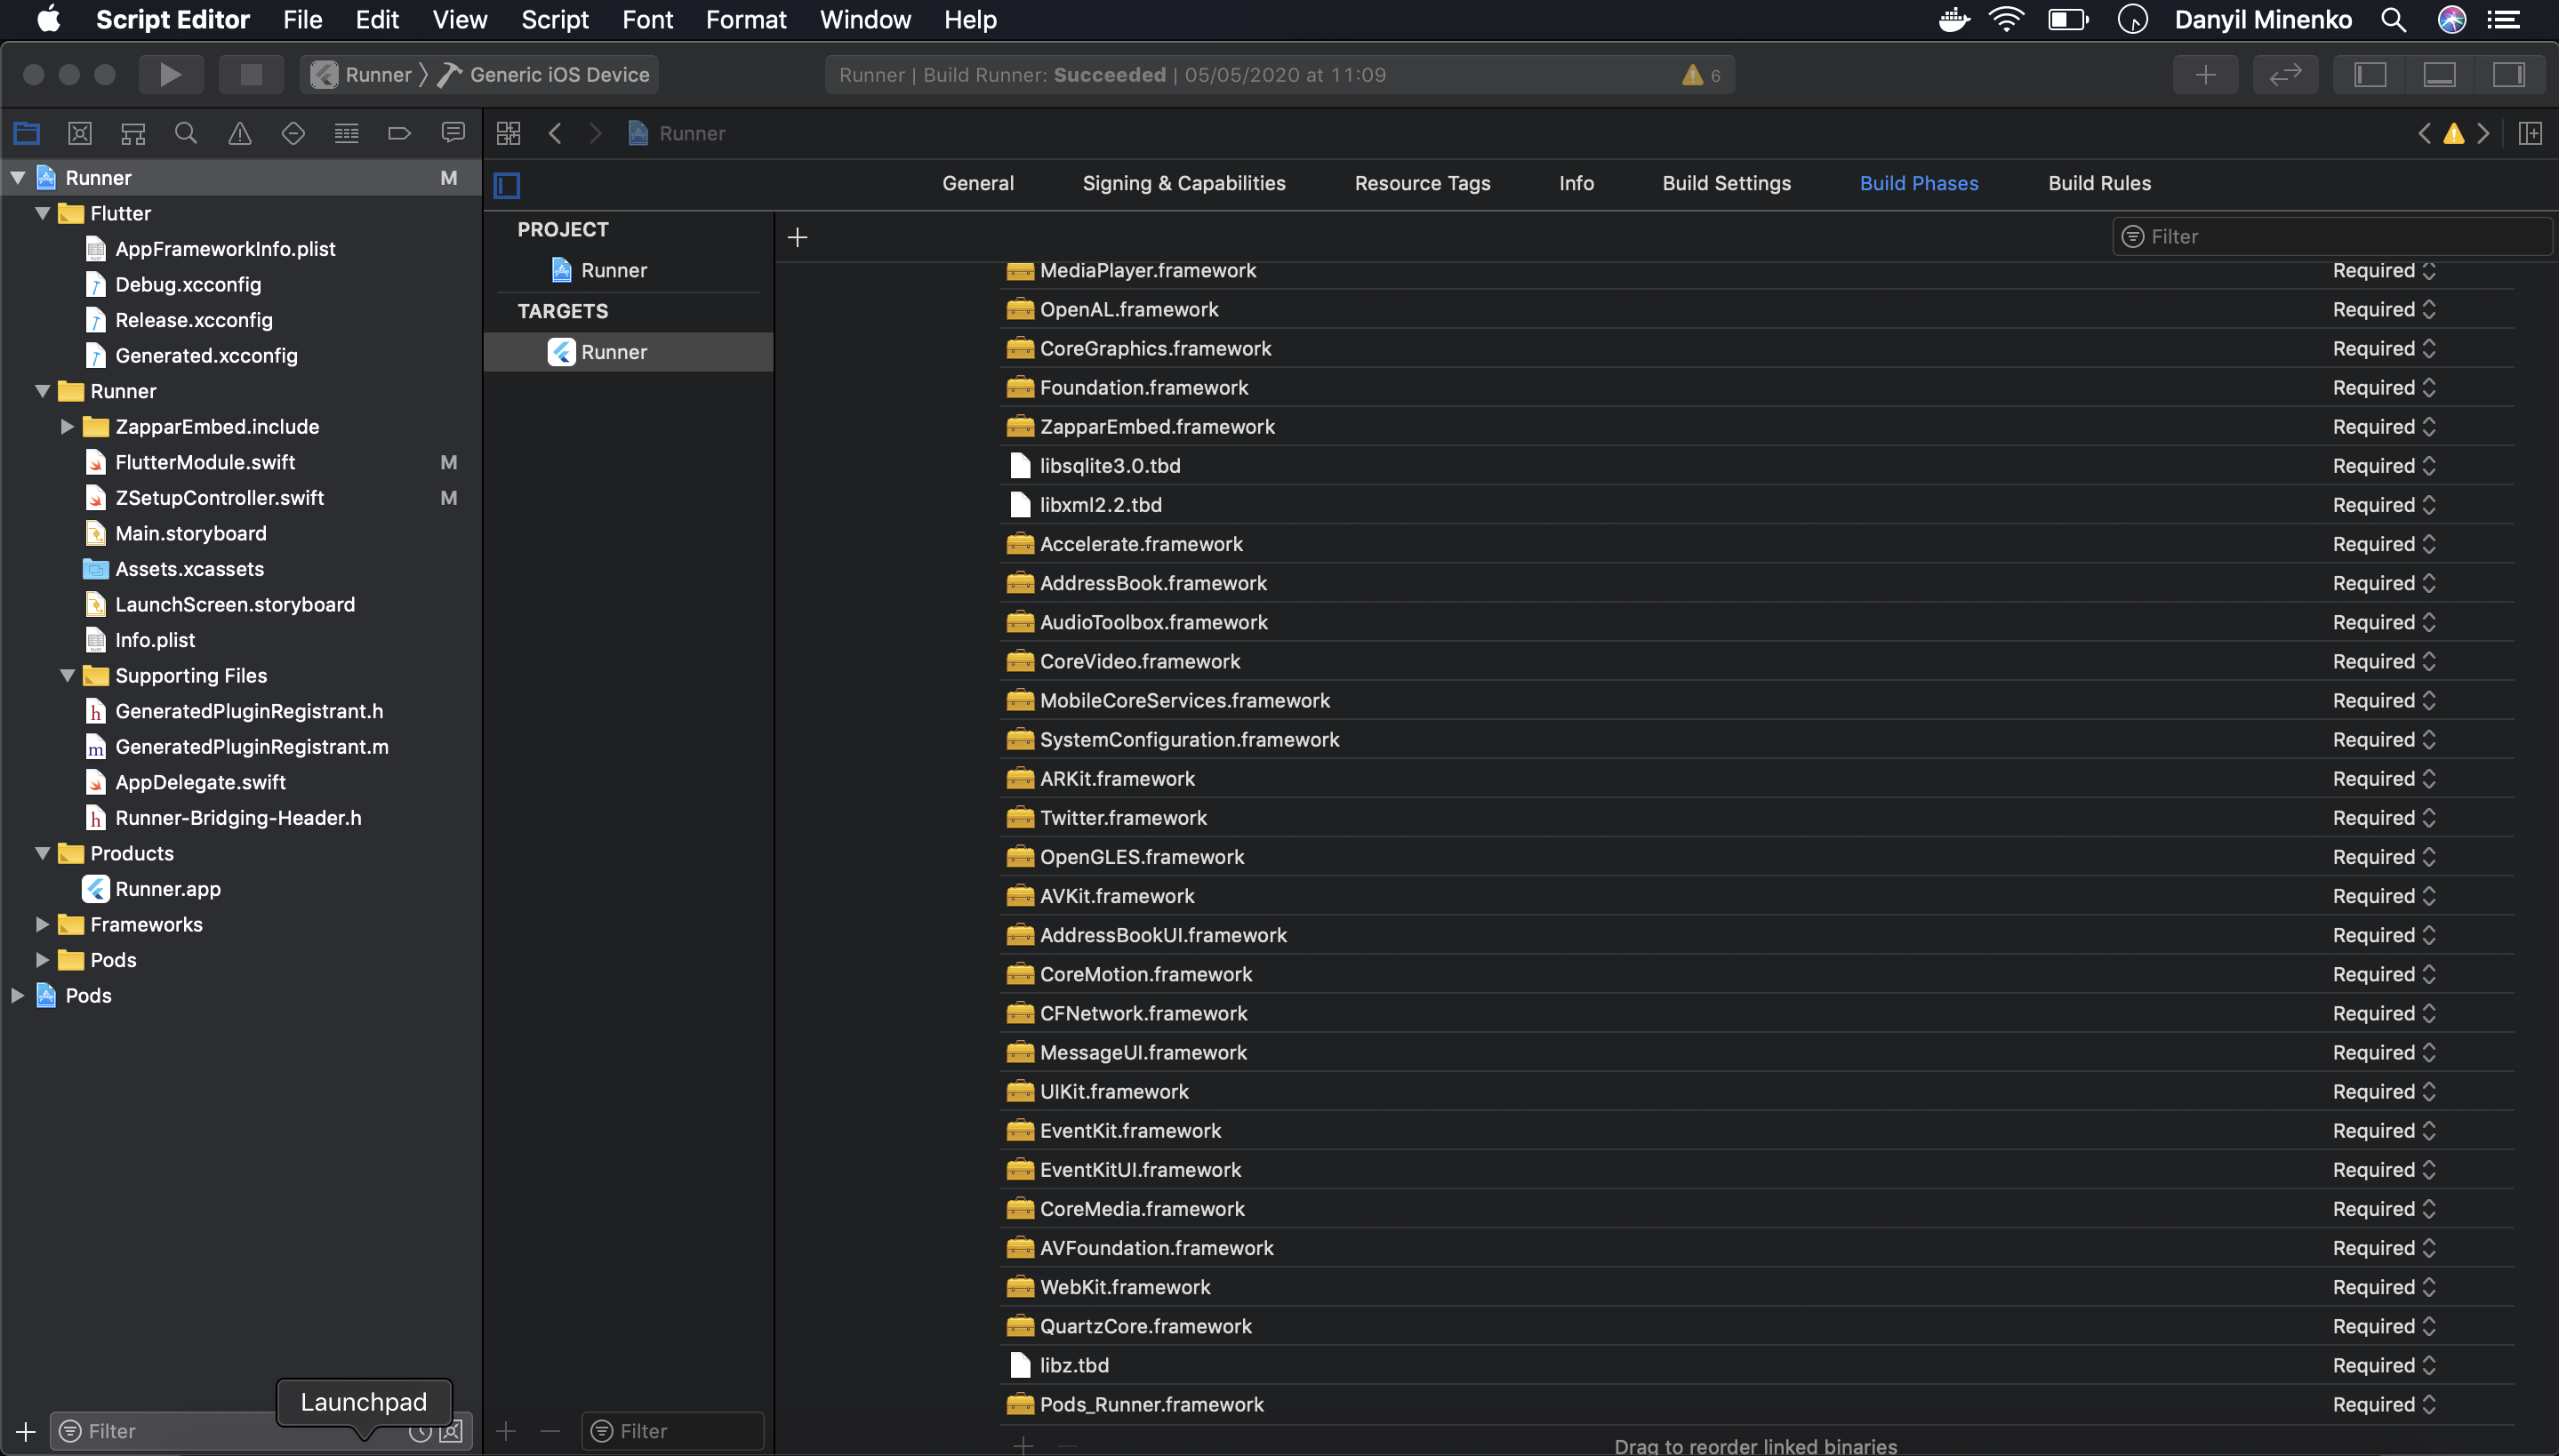
If the project build fails to automatically link to Zappar’s required standard system frameworks please refer to the Troubleshooting Guide.
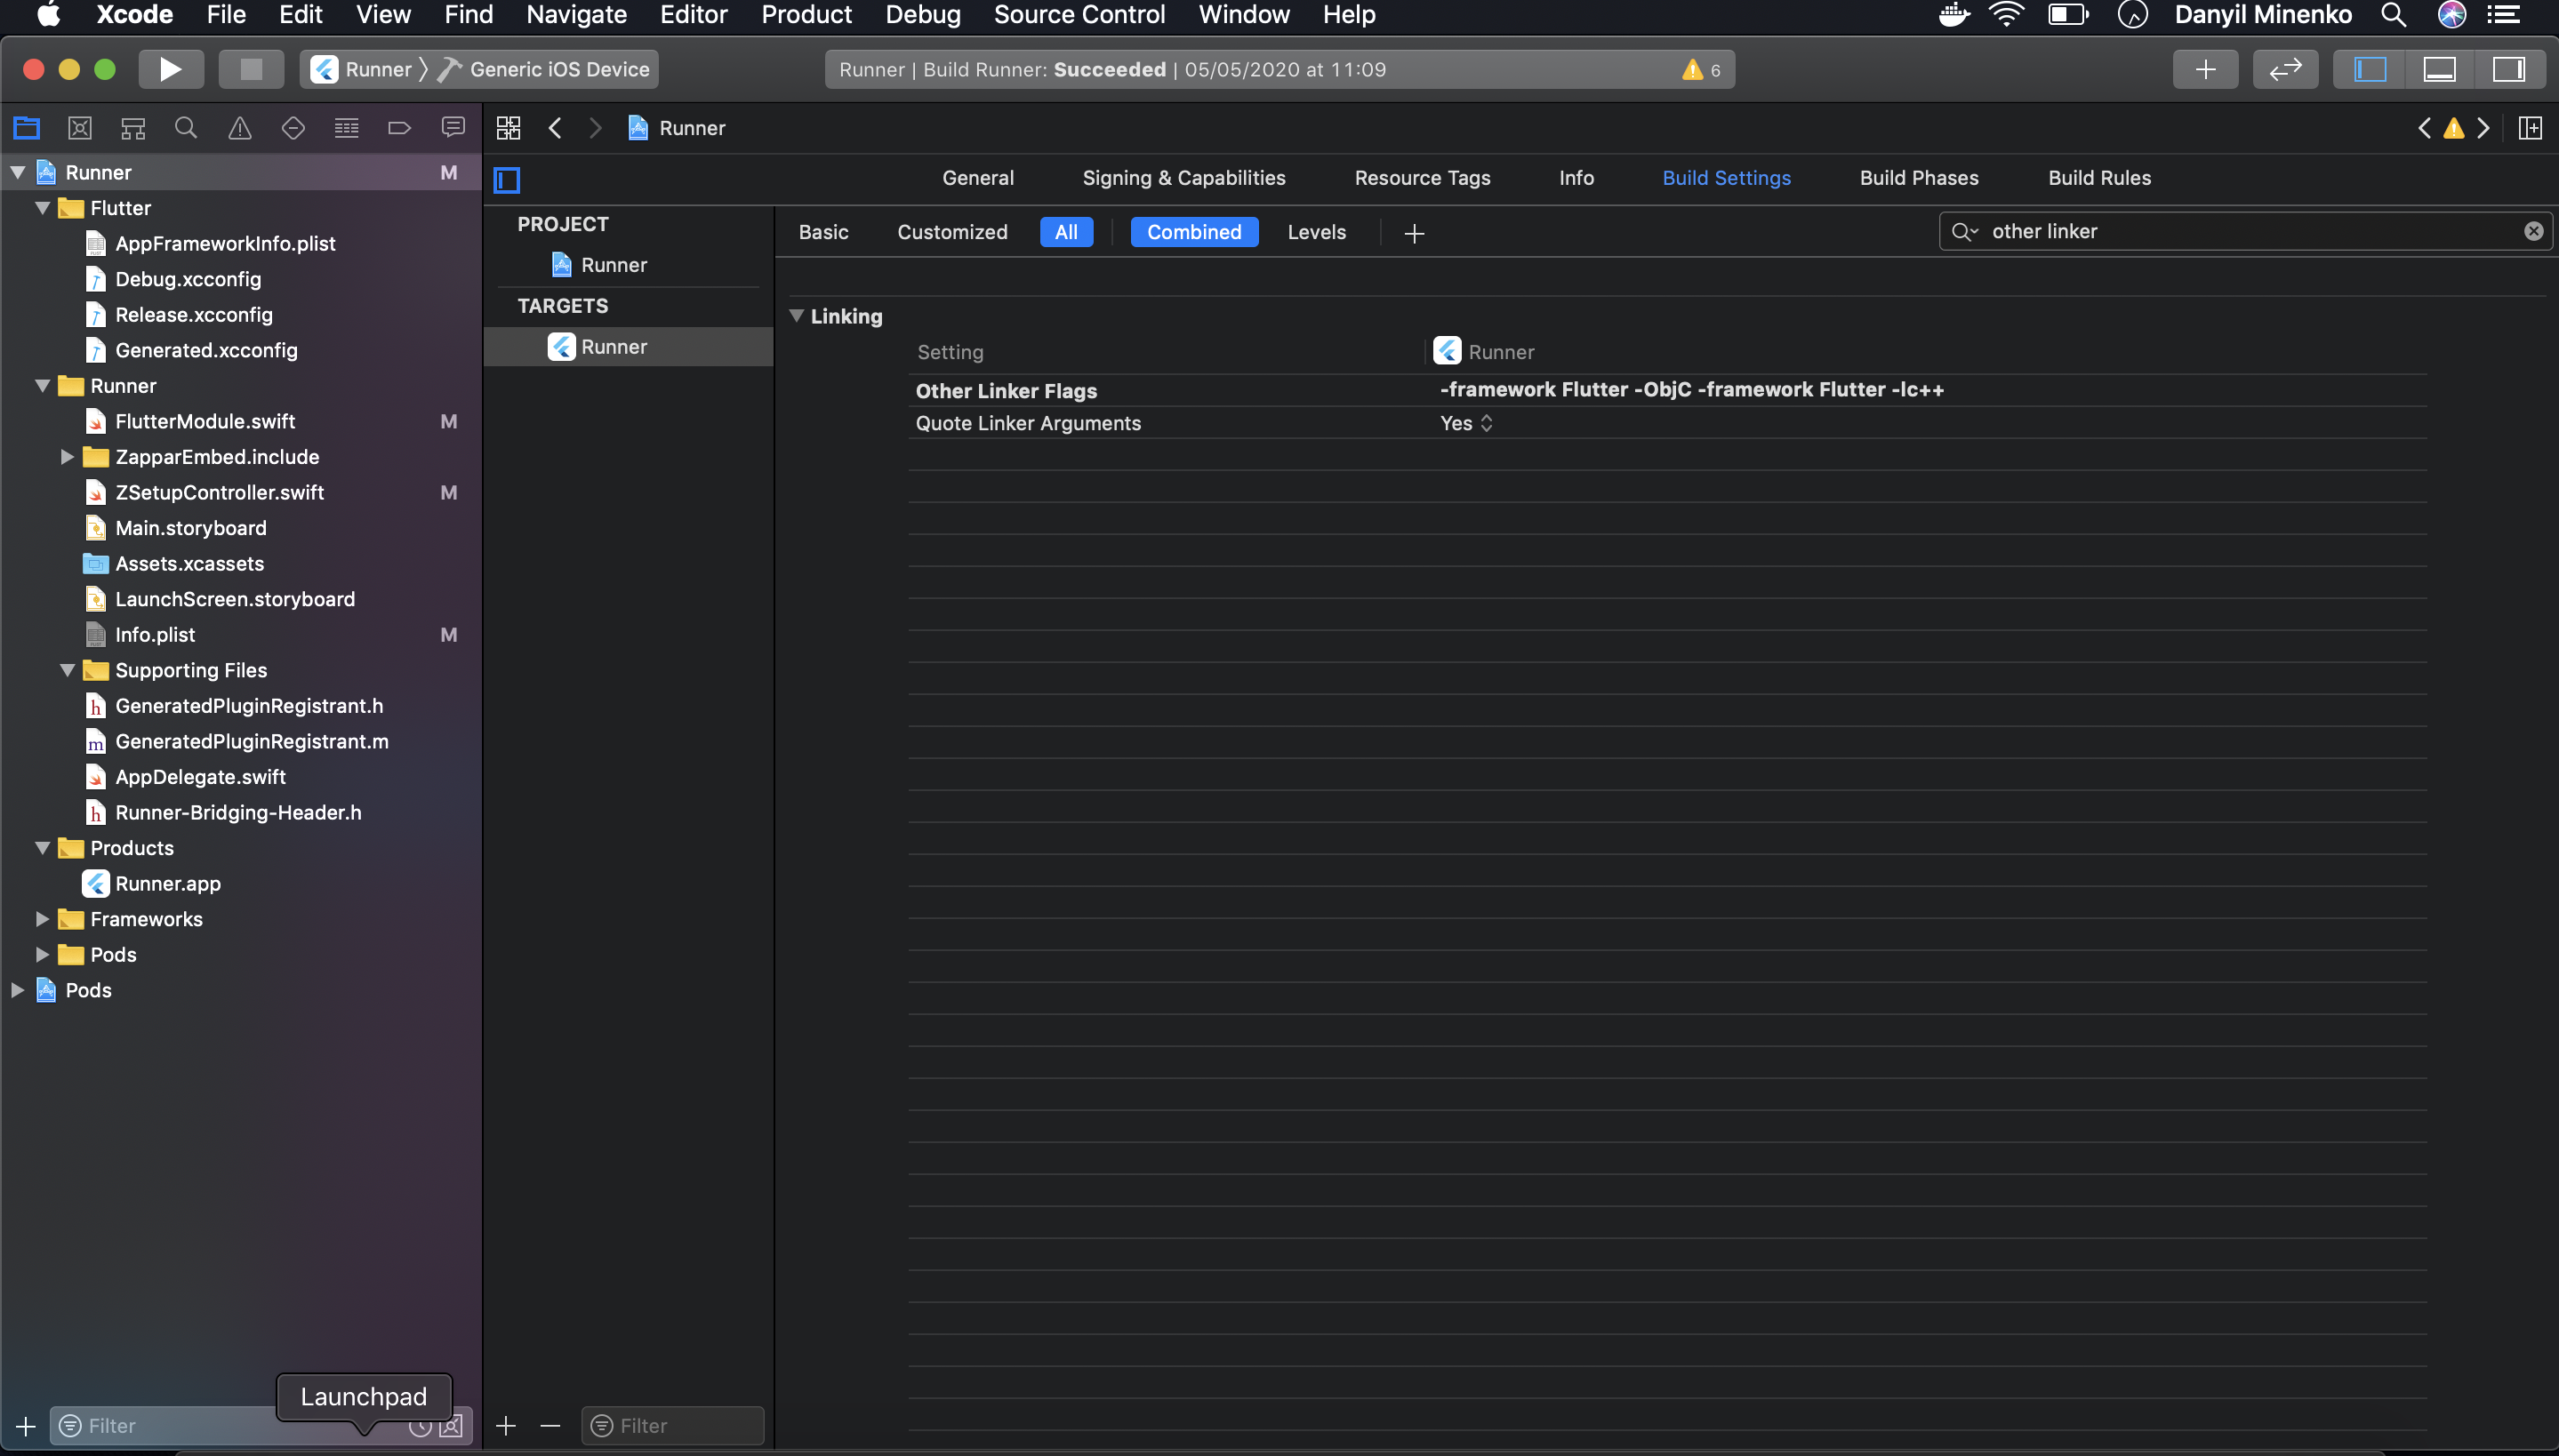
- Set the ObjC flag. Within the Other Linker Flags settings, add -ObjC to ensure the app accesses the framework library functions safely, and add -lc++ below the flag.
- Within your iOS directory, likely found at
<root>/ios/Runner/AppDelegate.swift>, add the following two lines of code within thedidFinishLaunchingWithOptionsmethod:
let zappar = FlutterModule()zappar.initZappar(window: window)- Add the Zappar include file to the project.
The Zappar embed component can be customized with the options covered in this article.