Managing Business Accounts
When you register with ZapWorks you’ll be asked to create an account, the following article discusses the management of Business accounts.
Creating Additional Accounts
Section titled “Creating Additional Accounts”Additional accounts can be created from the ZapWorks homepage by selecting ‘Add Account’ from the top menu and choosing the account type.

Users can create one Personal account and as many Business accounts as they please.
Business accounts require at least one Seat to be purchased in order to be used. Seats from existing accounts do not carry over as they are tied to the account.
Adding and Removing Users
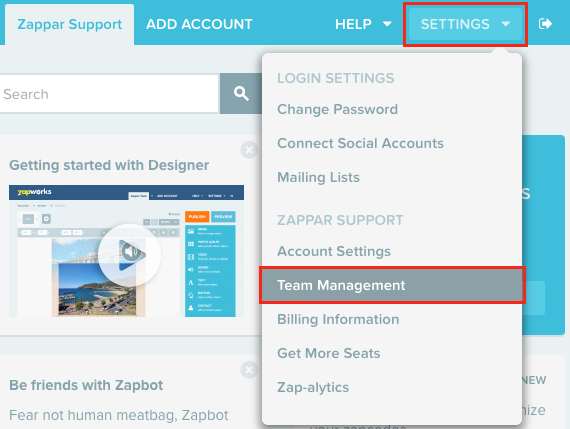
Section titled “Adding and Removing Users”Users can be added and removed from Business accounts from the Team Management page, accessible from the Settings menu.
To add a user select ‘Invite User’, enter the email address of the user you wish to invite and then click the ‘Invite User’ button. You can also set the user as an Admin, for more information see our article on Account Admins.

An email will then be sent to the user alerting them they’ve been invited to the account, which they can then access by signing in to ZapWorks. If they are not already registered then they will be prompted to do so before accepting the invitation.
If an account has more than 10 Seats then the ‘Invite User’ window will allow multiple email addresses to be entered at once, separated by a new line.
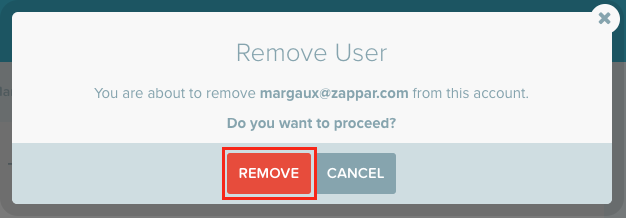
Users can be removed by clicking the ‘Remove’ button next to their email address.

Changing an Admin’s Email Address
Section titled “Changing an Admin’s Email Address”To change the email address of a Business account’s administrator:
- Log in to ZapWorks using the current administrator’s email address. (Note: This email address will be referred to as “initial email address” in the following steps.)
- Click ‘Settings’ in the upper right and select ‘Team Management’.
- In the Team Management page, click ‘Invite User’ and type in the email address that you would like to replace the initial one, and tick the ‘Admin’ box. (Note: This email address will be referred to as “new email address” in the following steps.)

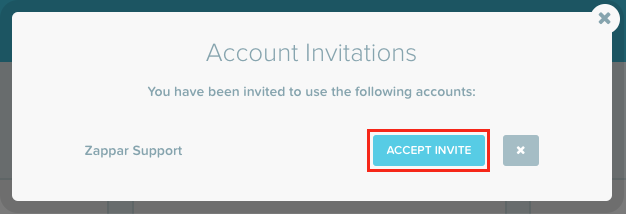
- Log in to ZapWorks with the new email address. When the Account Invitations window appears, click ‘Accept Invite’.
If the new email address has not been registered as a ZapWorks user yet, register and verify the email address before logging in to ZapWorks and accepting the invite.
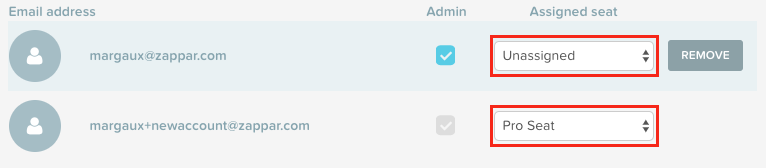
- Go to ‘Team Management’ under ‘Settings’ and, using the drop-down menu to the right of each email address, change the ‘Assigned Seat’ column to ‘Unassigned’ for the initial email address and to the chosen type of seat for the new one.
The new email address can now be used to log in to ZapWorks as a Business account’s administrator.
Additionally, the user with the initial email address can be removed from the account if they no longer need to access it:
- In ‘Team Management’ under ‘Settings’, click ‘Remove’ next to the initial email address.
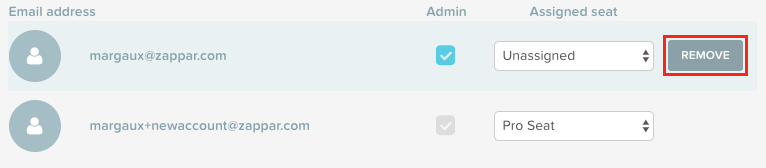
- When the Remove User window shows up, click ‘Remove’.
Switching Accounts
Section titled “Switching Accounts”You can switch between accounts using the account switcher at the top of each page.


The name of the account at the top of the drop-down menu or the tab highlighted in gray represents the current active account.
Deleting Accounts
Section titled “Deleting Accounts”An account can be deleted from the Account Settings page, accessible from the Settings menu.
Clicking the ‘Delete Account’ button at the bottom of the page and confirming by selecting ‘Delete’ will:
- Remove all Seats from the account.
- Set the account to read-only.
- Un-publish all zapcodes.