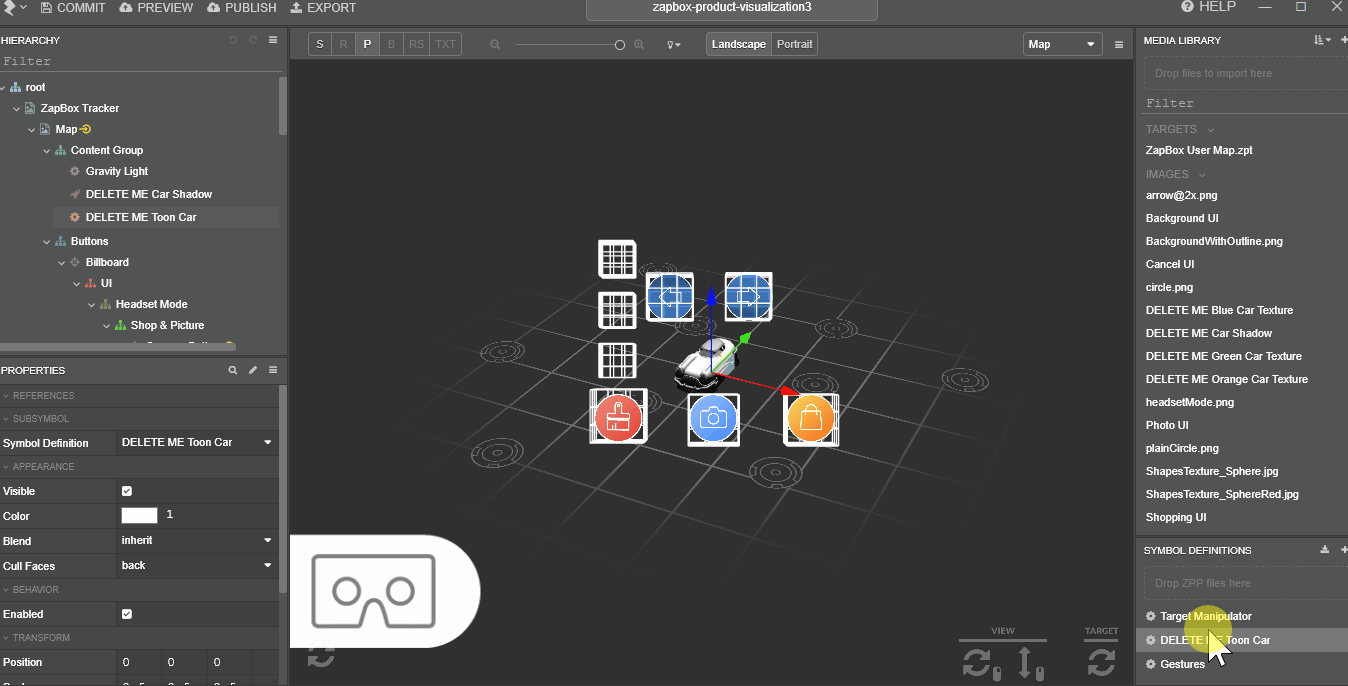
ZapBox Product Visualisation
This example project displays a interactive 3D Model, with three interchangable textures and intuitive UI tracked to a ZapBox Map.
You can find this example project within the New Project modal in ZapWorks Studio.
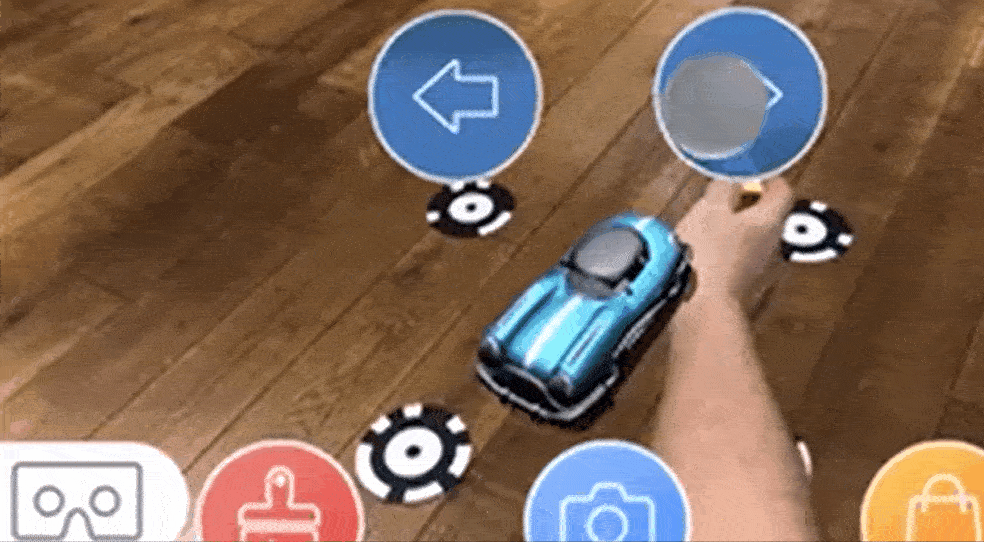
Set up your ZapBox following the steps in the app and scan the zapcode below to preview the experience.
Editing the project
Follow the steps below to customize the template:
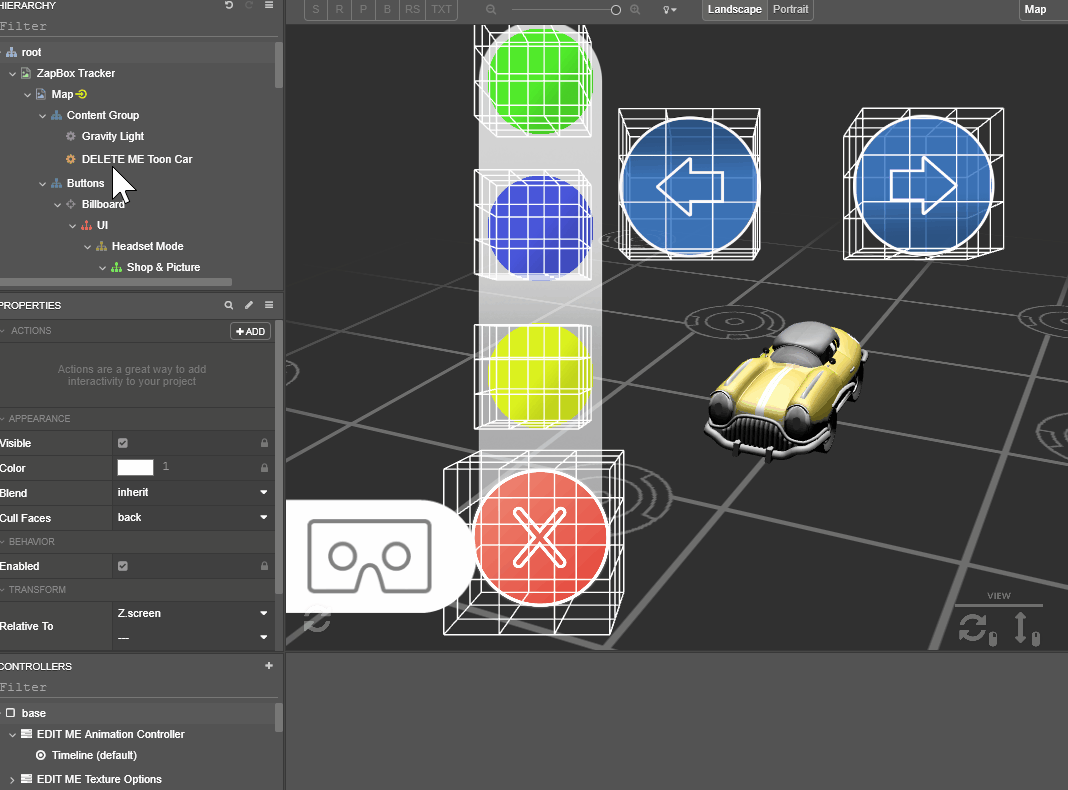
- Delete the Car Shadow and Toon Car nodes from the Hierarchy.
- Delete the Toon Car subsymbol from the Symbol Definitions.
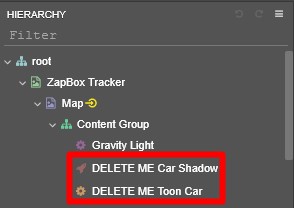
Delete the Car Shadow and Toon Car node from Hierarchy
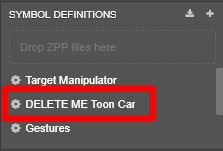
Delete the Toon Car node from Symbol Definitions
- Import your 3D model to ZapWorks Studio.
- Drag the resulting subsymbol into the Content Group in the Hierarchy.
- Double click the newly imported 3D Model and head into the subsymbol.
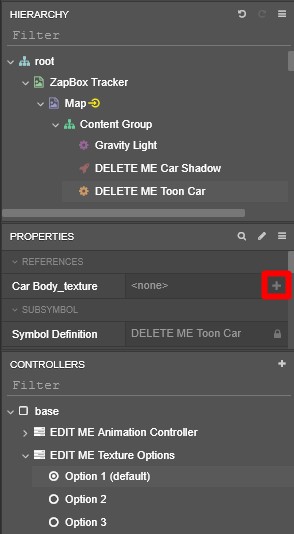
- Find the material node in the Hierarchy that contains the texture you’d like to switch out from the parent symbol.
- Right-click on the node’s Diffuse Map property and select Reference. You’ll now be able to change this property from the parent symbol.
Reference Diffuse Map.
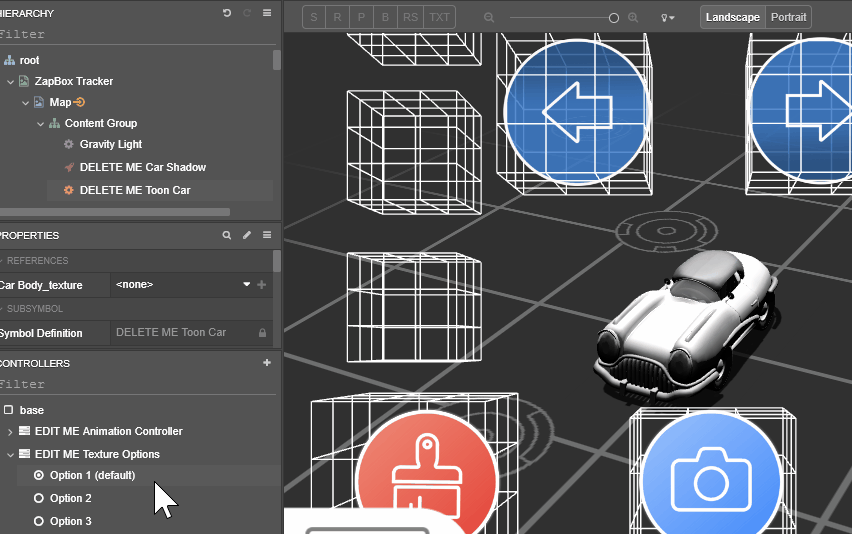
- In the parent symbol, import the three textures you’d like the model to switch between to the Media Library.
- While your 3D model in the Content Group is selected, also select the Texture Options controller in the Controllers panel.
- Add the Diffuse Map property you referenced during set up to the controller by clicking the + icon next to it.
Add reference property to the Texture Options controller.
- For each state, assign a different texture to the model’s referenced property.
Assign different material colors.
- Edit the Color property of the Option Button nodes (UI) in the UI > Texture Selector > Textures group to suit your texture options.
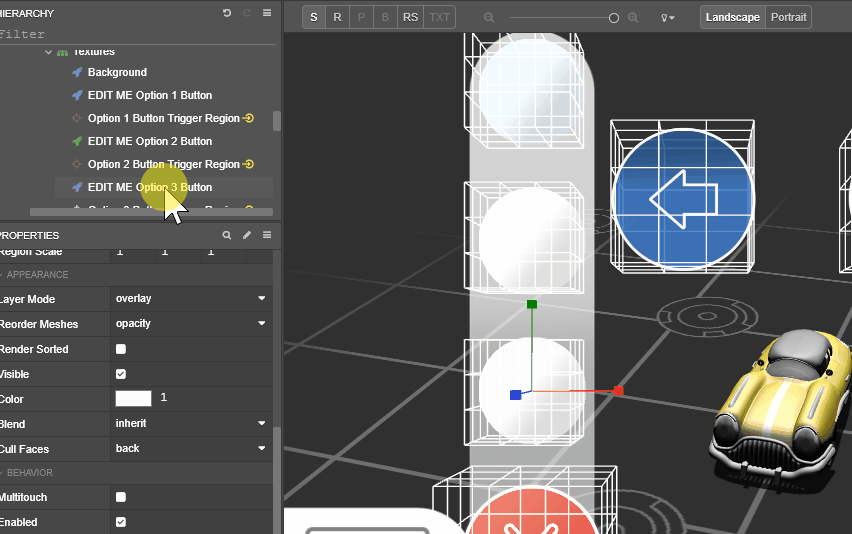
Edit the UI color.
- Change the URL field in the On Trigger Enter Action for each of the Trigger Region objects in the Shop Button Group.
- Select on your 3D Model in the hierarchy and add it's rotation property to the Timeline under the Animation Controller.
- Create a keyframe at the end of the timeline and change the model's Y axis value to 359. A more detailed step-by-step can be found here: Setting up a timeline in the parent symbol.
Edit the timeline.
- Set up your ZapBox app and preview the experience to see your 3D model tracked to point codes, rotate and texture changed when UI is touched with ZapBox controller.